- Fix Error Repairing Disk Errors on Windows 10 (Solved)
- How to Fix Repairing Disk Errors
- 1. Using Startup Repair
- 2. Fix Disk Errors using Check Disk Command
- 3. Using PowerShell
- 4. Perform System Restore
- Устранение ошибки «Startup Repair Offline» при загрузке Windows 7
- Исправляем ошибку «Startup Repair Offline»
- Способ 1: Сброс настроек BIOS
- Способ 2: Подключение шлейфов
- Способ 3: Восстановление запуска
- Способ 4: «Командная строка»
- Заключение
Fix Error Repairing Disk Errors on Windows 10 (Solved)
August 11, 2018 By Ansh R
Windows 10 comes with a lot of new features. Sure, it is very different from the older Windows OS versions. But, Windows 10 is also very much like its predecessors. Just like Windows XP, Windows 7 and Windows 8/8.1, Windows 10 also comes with a number of errors and bugs.
The latest Windows 10 error which is leaving users scratching their heads is “Repairing disk errors. This might take over an hour to complete”. This is a very annoying error and it shows up on the boot screen. Sometimes the computer will start working after an hour, but the error will most probably show up again. And most of the times it doesn’t even let the Windows to take you to sign in screen.
The error says it is repairing the disk errors and even after waiting for hours, nothing happens. If you are also one of the Windows 10 users who are stuck with this error, you are on the right page. We will help you fix this problem using our methods.
How to Fix Repairing Disk Errors
This error causes the computer to get stuck at booting screen. As we mentioned, sometimes it will let you use your computer. So, some of the methods require you to be logged in on your computer, while others can be performed without signing in. All the details are given below to perform the methods. Simply follow the steps to perform the methods.
1. Using Startup Repair
In this method, we will try to fix this error using Startup Repair. To perform this method, you will need a Windows Installation Media. If you don’t have it, you can create a bootable Windows Installation Media.
If you are unable to sign in, create the Windows Installation Media using some other Windows 10 computer. Make sure to enter the correct version of Windows 10 installed on your computer (the one with disk error) while creating it. When you are ready with the disk/USB drive, follow the steps.
Step 1. Plug in the Windows Installation Media USB flash drive to your computer.
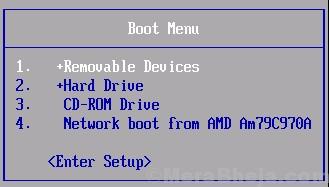
Step 2. Turn on your computer by pressing the power button and start pressing F12 (boot menu option) key.
Step 3. When you see the Boot Menu, use arrow keys to select Bootable USB Drive Name or Removable devices (whichever’s present on screen) or CD-ROM drive and press Enter.
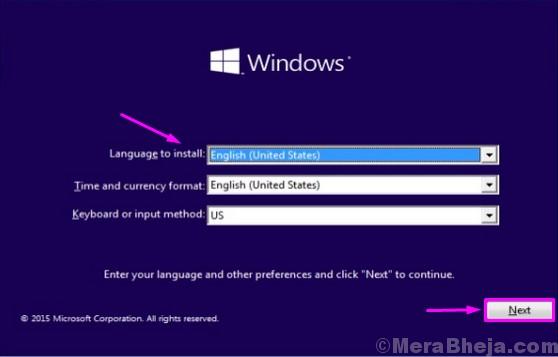
Step 4. Next, you will see the Windows Setup screen. Here, seelct the language and click on Next.
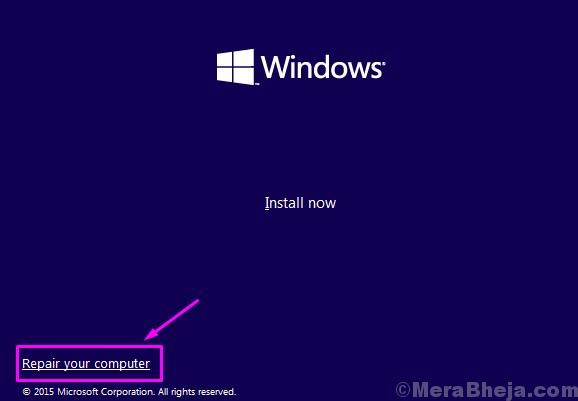
Step 5. Go to Repair your computer.
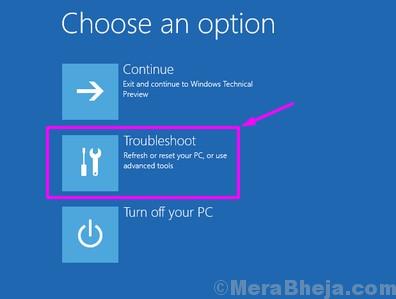
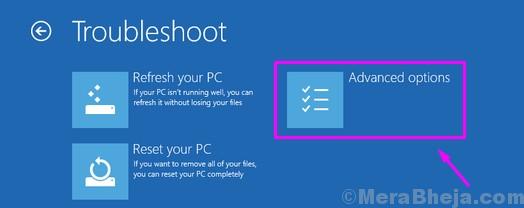
Step 6. Select Troubleshoot in Choose an option screen.
Step 7. Go to Advanced options in Troubleshoot screen.
Step 8. Click on Startup Repair on Advanced options screen.
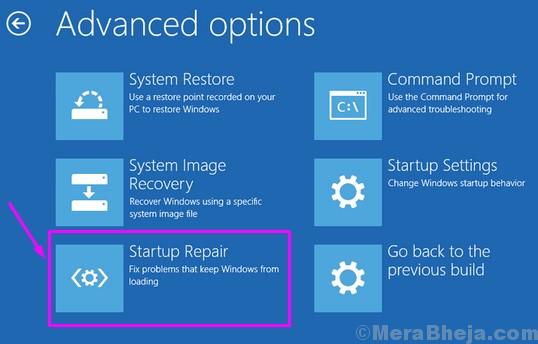
Now, wait for the repairing process to complete. When the process is done, restart your computer. You will no longer see the error. If it is still bothering you, follow the next method.
2. Fix Disk Errors using Check Disk Command
In this method, we will try to solve the problem using the chkdsk command. This command repairs the bad sectors and logical file system, which could be causing the disk error.
Note: To perform this method, you have to be signed in on your computer. So, if you are unable to sign in on your computer, you will have to boot into Safe Mode. To boot into Safe Mode you can use Method 6 from How to Boot Windows 10 into Safe Mode.
When you are signed in on your computer, follow the steps.
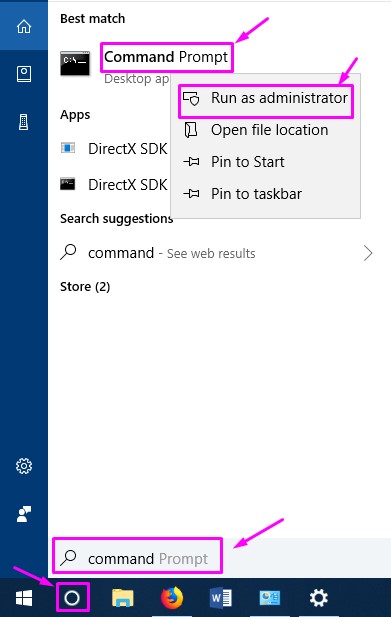
Step 1. Go to Cortana and type Command Prompt. Right-click on Command Prompt from results and select Run as administrator.
Step 2. Now, in the Command Prompt window, you have to enter the following command and press Enter.
Note: here “C” in the command is the drive partition where Windows 10 is installed. If it is installed on some other drive on your computer, then use the alphabet assigned to that drive.
Step 3. When asked if you wish to run the command before next boot, type Y and press Enter.
Step 4. Restart your computer.
When your computer reboots, it will scan and fix the disk errors. Now you will be able to sign in without any errors. If this method didn’t work, follow the next one.
3. Using PowerShell
In this method, we will try to fix the error using Repair-volume command on PowerShell.
Note: To perform this method, you have to be signed in on your computer. So, if you are unable to sign in on your computer, you will have to boot into Safe Mode. To boot into Safe Mode you can use Method 6 from How to Boot Windows 10 into Safe Mode
Follow the steps to perform this method.
Step 1. Go to Cortana and type powershell. Right-click on Windows PowerShell from results and select Run as administrator.

Step 2. Now, enter the following command in PowerShell and press Enter. This command will scan the C drive for errors. If you have Windows installed on another drive, use the respective alphabet in place of C.
Step 3. Now, type the following command and press enter. This command will run a scan and will fix the errors on the drive. Again, if you have Windows installed on another drive, use its letter in place of C.
Step 4. Wait for the process to finish scanning and fixing the disk errors. When it’s done, restart your computer.
The error must be gone by now. If you are still facing the same problem, follow the next method.
4. Perform System Restore
If none of the methods has done the job for you, it’s time to perform a System Restore to the point when your computer was working well. To perform this method, you will need a Windows Installation Media. If you don’t have it, you can create a bootable Windows Installation Media.
Step 1. Plug in the Windows Installation Media USB flash drive to your computer.
Step 2. Turn on your computer by pressing the power button and start pressing F12 (boot menu option) key to acess boot menu.
Step 3. When you see the Boot Menu, use arrow keys to select Bootable USB Drive Name or Removable devices (whichever’s present on screen) or CD-ROM drive and press Enter.
Step 4. Next, you will see the Windows Setup screen. Here, select language and click on Next.
Step 5. Go to Repair your computer on the next screen.
Step 6. Select Troubleshoot on Choose an option screen.
Step 7. Go to Advanced options on Troubleshoot screen.
Step 8. Select System Restore on Advanced options screen.
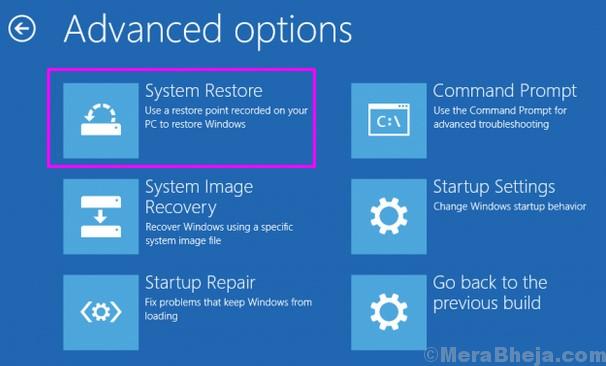
Now, wait for the process to complete and restore your computer to the earlier working state.
This will fix the error.
In case, even the last method hasn’t worked for you, then your hard drive has malfunctioned. You will need to replace the hard drive. Take your computer to an authorized service centre and ask them to replace the hard drive.
We hope we were able to help you fix this error. If you solved this problem using some other method, or if you have any questions regarding this issue, mention them below in comments.
Устранение ошибки «Startup Repair Offline» при загрузке Windows 7
Исправляем ошибку «Startup Repair Offline»
Буквально данная неисправность означает – «восстановление запуска не в сети». После перезапуска компьютера, система предприняла попытку по восстановлению работы (не подключаясь к сети), но попытка оказалась неудачной.
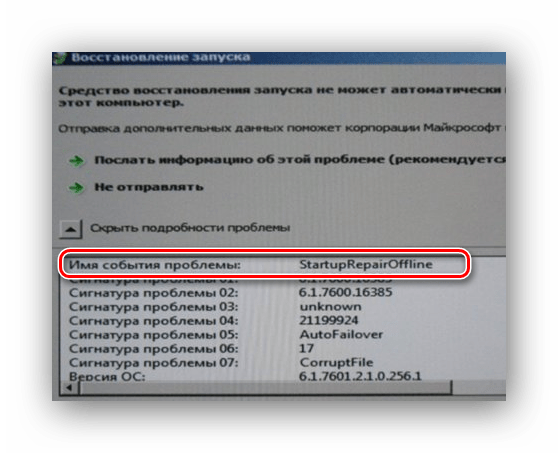
Неисправность «Startup Repair Offline» зачастую появляется из-за проблем с жестким диском, а именно из-за повреждения сектора, на котором находятся системные данные, отвечающие за правильный запуск Windows 7. Также возможны проблемы с поврежденными разделами реестра системы. Перейдем к способам исправления этой неполадки.
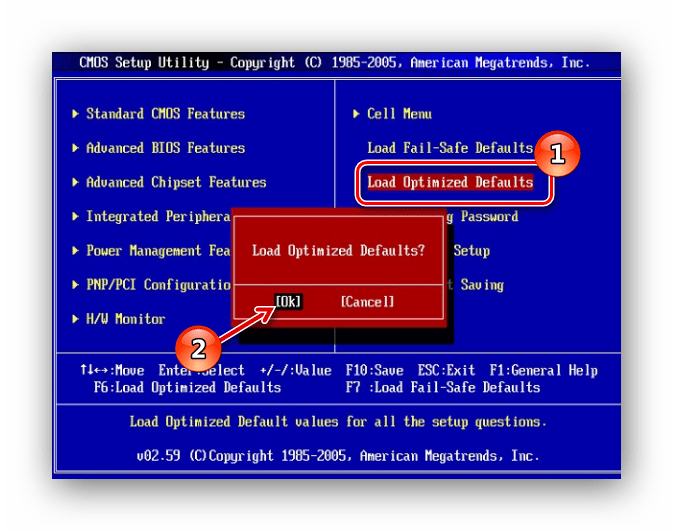
Способ 1: Сброс настроек BIOS
Переходим в БИОС (при помощи клавиш F2 или Del при загрузке компьютера). Производим загрузку настроек по умолчанию (пункт «Load optimized defaults»). Сохраняем сделанные изменения (нажав клавишу F10) и перезапускаем Виндовс.
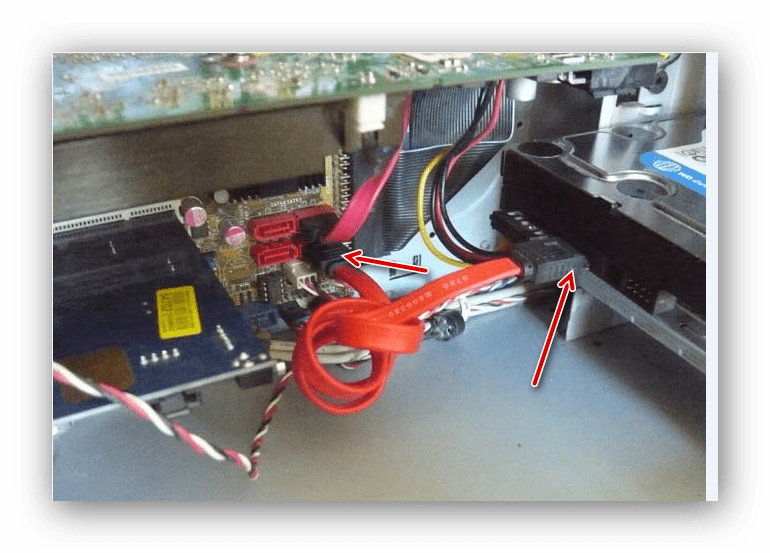
Способ 2: Подключение шлейфов
Необходимо произвести проверку целостности разъемов и плотность подключения шлейфов жесткого диска и материнской платы. Убедитесь, что все контакты подключены качественно и плотно. После проверки перезапускаем систему и проверяем на наличие неисправности.
Способ 3: Восстановление запуска
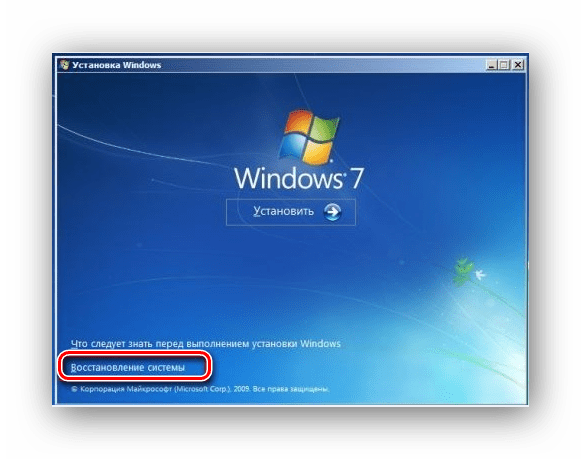
Так как обычный запуск операционной системы невозможен, рекомендуем воспользоваться загрузочным диском или флешкой с системой, которая является идентичной установленной.
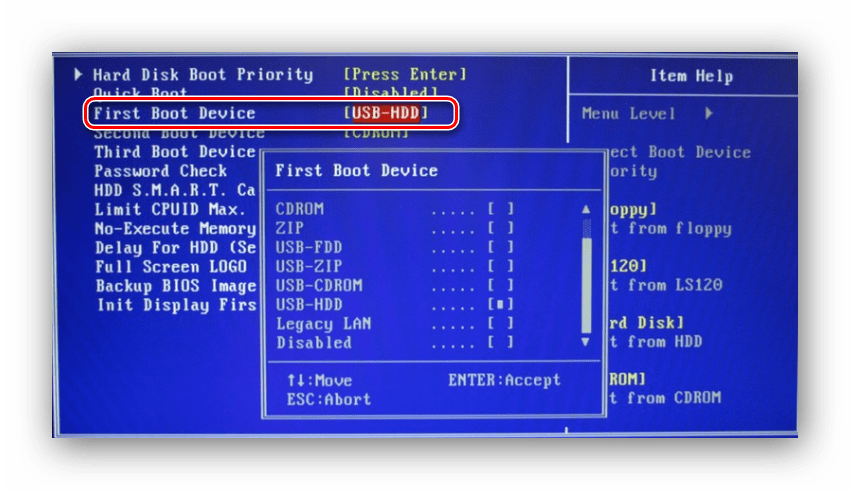
- Выполняем запуск с загрузочной флешки или диска. В БИОСе устанавливаем опцию запуска с диска или флеш-накопителя (устанавливаем в пункте «First Boot Device USB-HDD» параметр «USB-HDD«). Как это сделать на различных версиях BIOS, подробно описано в уроке, который представлен ниже.
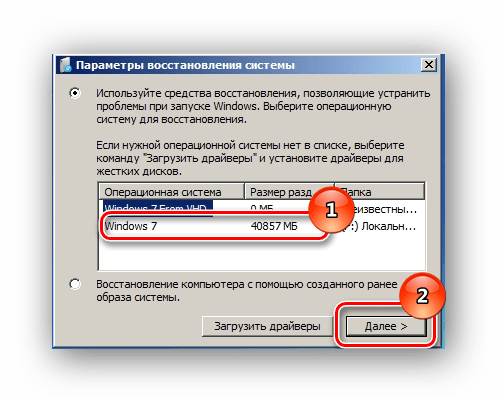
Системой будет произведён поиск неполадок в автоматическом режиме. Жмём на кнопочку «Далее» в открывшемся окне, выбрав необходимую ОС.
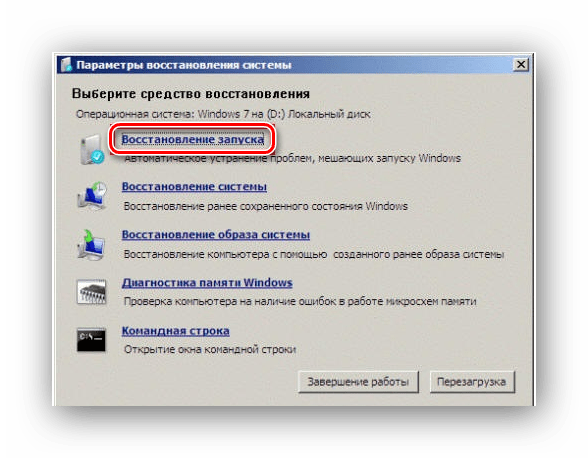
В окошке «Параметры восстановления системы» щелкаем по пункту «Восстановление запуска» и дожидаемся завершения проверочных действий и корректного запуска компьютера. После окончания проверки перезагружаем ПК.
Способ 4: «Командная строка»
Если приведенные выше способы не помогли устранить неполадку, тогда вновь запускаем систему с флешки или установочного диска.
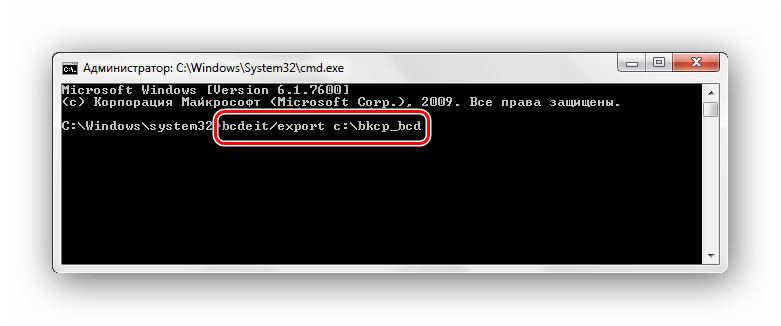
Нажимаем клавиши Shift+F10 в самом начале установочного процесса. Попадаем в меню «Командной строки», где необходимо набрать поочередно определенные команды (после ввода каждой из них нажимаем Enter).
bcdedit /export c:\bckp_bcd
attrib c:\boot\bcd -h -r –s

ren c:\boot\bcd bcd.old

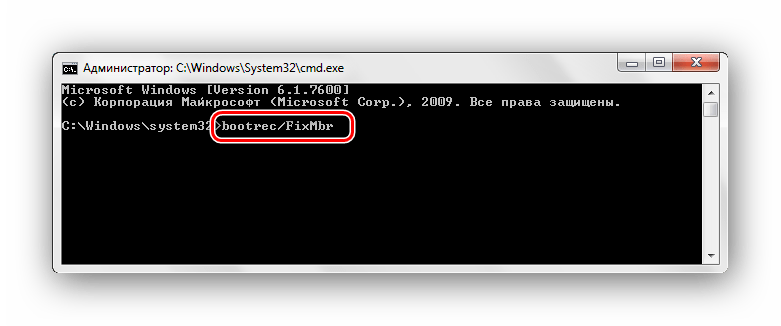

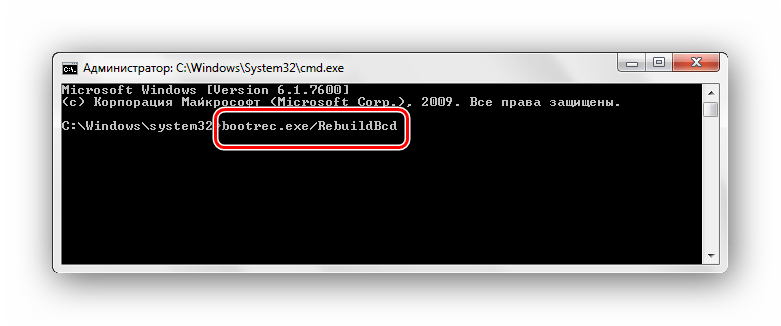
После того, как ввели все команды, перезапускаем ПК. Если Виндовс 7 не запустилась в работоспособном режиме, тогда в данных о неисправности может быть имя проблемного файла (например, библиотеки расширения .dll). Если было указано название файла, то необходимо попробовать совершить поиска данного файла в интернете и поместить его на ваш винчестер в необходимую директорию (в большинстве случаев, это папка windowds\system 32 ).
Заключение
Итак, что же делать с неполадкой «Startup Repair Offline»? Самый простой и эффективный способ – это использование восстановления запуска ОС, применяя загрузочный диск или флеш-накопитель. Если способ с восстановлением системы не исправил проблему, то воспользуйтесь командной строкой. Также проверьте целостность всех соединений компьютера и настройки BIOS. Применение этих методов позволит устранить ошибку запуска Windows 7.


