- Как восстановить загрузчик Windows в главной загрузочной записи (MBR) из Ubuntu
- Требования
- Загрузка в Ubuntu live USB
- Способ первый: утилита Boot Repair
- Метод второй: Syslinux
- Метод третий: LILO
- Заключение
- FIX: Windows 10 Bootloader from Linux [Quick Guide]
- How to repair Windows 10 bootloader errors from Linux
- 1. Use the Boot Repair utility on Ubuntu
- 2. Fix Windows 10 bootloader within the Terminal
- 3. Try fixing it with LILO
- Fix Windows MBR using Ubuntu Live CD and ms-sys tool
- 3 Answers 3
- Восстановление убитых MBR и таблицы разделов
- 0. Intro.
- 1. Восстановление таблицы разделов
- 3. Восстановление MBR
Как восстановить загрузчик Windows в главной загрузочной записи (MBR) из Ubuntu
Оригинал: How to Fix Windows MBR from Ubuntu
Автор: Matthew Muller
Дата публикации: 21 августа 2018 года
Перевод: А. Кривошей
Дата перевода: март 2019 г.
Если вы пытались настроить двойную загрузку Windows с Linux, то вы, вероятно, столкнулись с некоторыми изменениями, которые могут вами не приветствоваться. При установке Linux в такой среде загрузчик GRUB перезаписывает загрузчик Windows в основной загрузочной записи (MBR).
Это также верно в обратном направлении: если вы сначала установили Linux, а затем решили установить Windows, загрузчик Windows перезапишет GRUB, и вы обнаружите, что невозможно загрузить вашу систему Linux. Или, возможно, вы решили, что Linux не для вас, и хотите полностью удалить его, оставив только Windows.
Любой из этих сценариев может быть проблематичным для нового пользователя, но, к счастью есть способы восстановить загрузчик и MBR.
Примечание. В качестве дополнительной информации, который затронет многих пользователей, похоже, что Windows 10 Anniversary Update перезаписывает загрузчик как само собой разумеющееся.
Требования
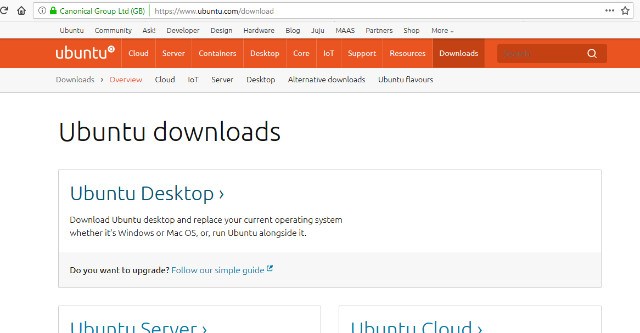
Первым шагом будет скачивание и создание вашего Linux live CD или USB. Ubuntu — безусловно, самый простой и доступный дистрибутив, хотя для наших целей могут использоваться большинство дистрибутивов Linux. Используя другой компьютер, перейдите на веб-сайт Ubuntu и загрузите версию, подходящую для вашей архитектуры. Если вы сомневаетесь, возьмите 32-битную версию, так как она будет загружаться на любой машине.
Следуйте этому руководству , чтобы создать Linux live USB в Windows.
Загрузка в Ubuntu live USB
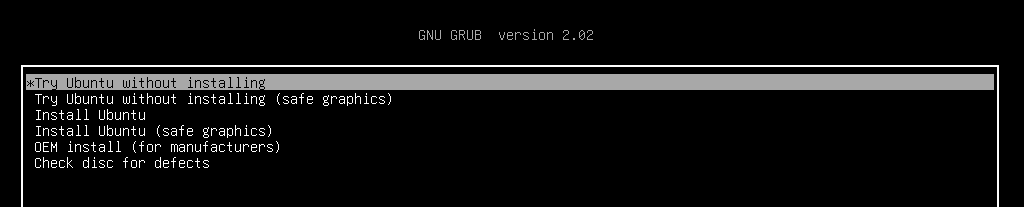
Создав свой live-носитель, необходимо загрузить компьютер с вашего носителя с Ubuntu и выбрать в загрузочном меню пункт «Try Ubuntu without installing». Если это не удается, убедитесь, что в BIOS отключена secure boot, иначе ваша система никогда не загрузится с диска Linux.
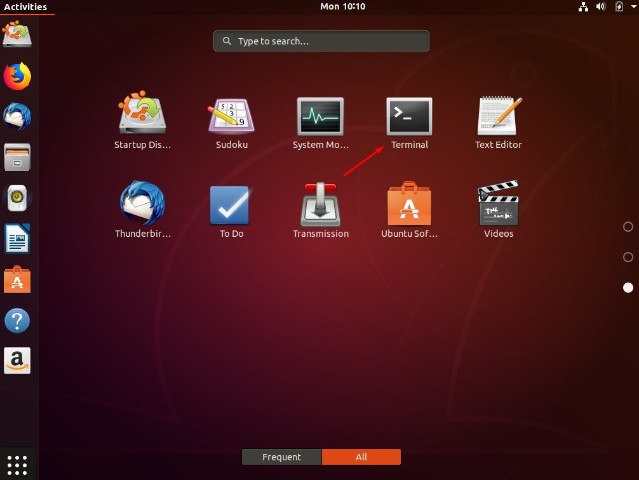
После запуска рабочего стола вам нужно будет открыть терминал, который можно найти в меню «Приложения».
Примечание: на этом этапе имейте в виду, что вы имеете дело напрямую с жестким диском, и полностью прочитайте руководство, прежде чем вносить какие-либо изменения, в противном случае вся ваша система может стать нестабильной или неработоспособной.
Безусловно, самый простой способ восстановить MBR — использовать небольшую утилиту под названием «boot-repair», а не работать непосредственно в терминале.
Способ первый: утилита Boot Repair
Во-первых, вам нужно добавить репозиторий. Введите:
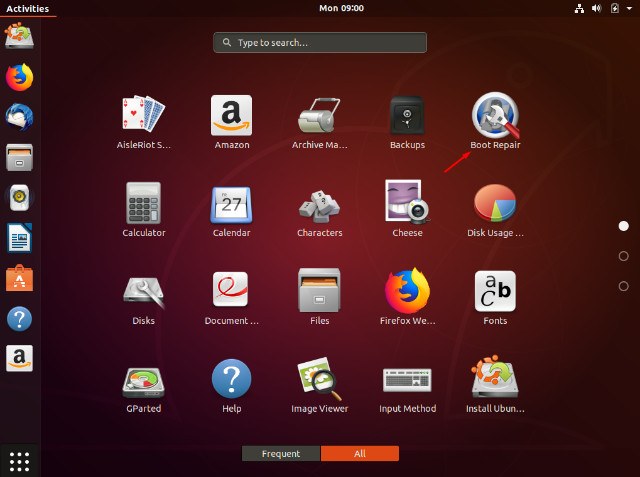
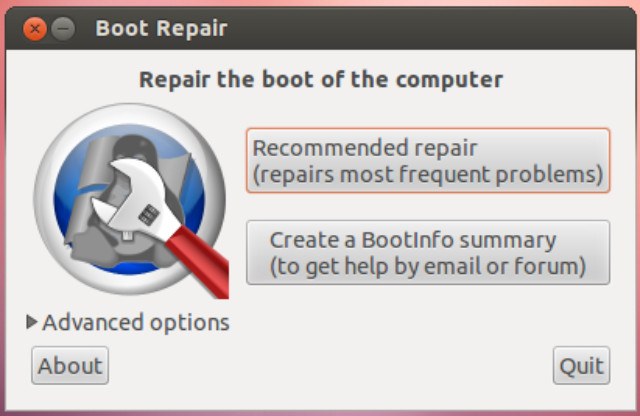
После установки найдите приложение в меню «Приложения» и кликните, чтобы запустить.
После запуска утилиты выберите тип восстановления. Для большинства случаев это будет рекомендуемое восстановление.
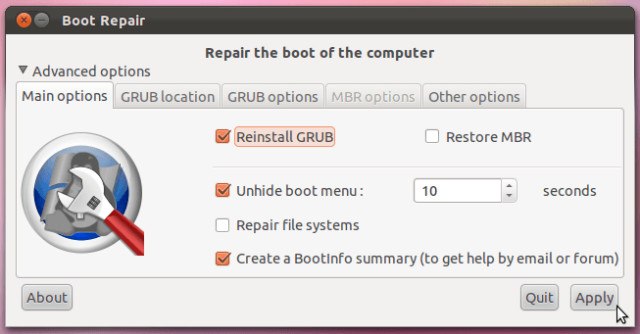
Когда утилита завершит работу, вы сможете загрузить свою систему и выбрать либо Windows, либо Linux из меню GRUB. Запуск утилиты также позволит вам изменить или изучить некоторые другие опции, если вам требуется более сложное восстановление загрузки. Кликнув «Restore MBR», вы сможете использовать вкладку MBR.
Если вы застряли, у Ubuntu есть руководство на их сайте.
Метод второй: Syslinux
Это немного сложнее и требует от вас работы с терминалом. Если вы не уверены, то, пожалуйста, придерживайтесь первого метода.
Откройте терминал, как и раньше, и введите:
По завершении установки введите следующую команду, не забывая изменить имя диска «sda» на свое:
Кроме того, вы можете восстановить MBR, введя:
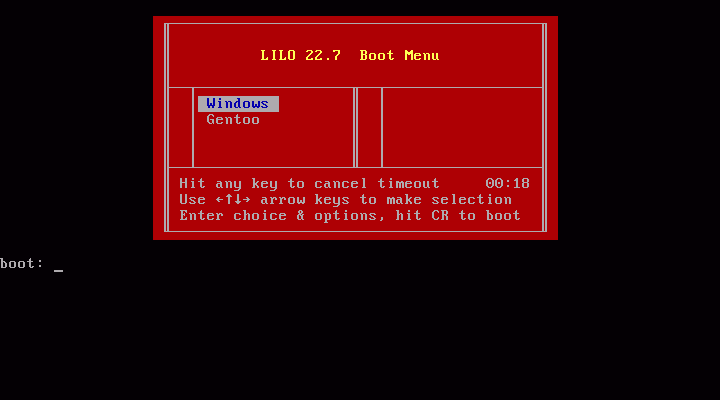
Метод третий: LILO
Загрузитесь с live CD или USB, и в терминале введите:
где «/dev/sda» — это имя вашего диска. Это должно исправить вашу MBR.
Заключение
Если вы используете двойную загрузку Windows и Linux, очень легко перезаписать MBR. Описанные выше действия должны помочь вам восстановить MBR.
FIX: Windows 10 Bootloader from Linux [Quick Guide]

- You can quickly fix the Windows bootloader from Linux if it doesn’t work due to Windows updates.
- Use the boot repair utility which comes with Ubuntu to repair Windows boot from Linux.
- If you’re looking for a fast U buntu boot repair on Windows 10, you can do it within the terminal.
- The Linux loader is also a great way to fix the Windows boot from Linux in no time.
- Download Restoro PC Repair Tool that comes with Patented Technologies (patent available here).
- Click Start Scan to find Windows issues that could be causing PC problems.
- Click Repair All to fix issues affecting your computer’s security and performance
- Restoro has been downloaded by 0 readers this month.
Due to the aggressive and territorial nature of Windows 10, problems like this will emerge quite often. That’s why it’s advised to install Windows 10 first before installing Linux in a dual-boot mode.
Linux is much less intrusive and won’t damage Windows 10 bootloader. Despite that, things still can go wrong after major updates. If that happens, you can fix it with Linux (Ubuntu) and we offered 3 methods below.
How to repair Windows 10 bootloader errors from Linux
- Use the Boot Repair utility on Ubuntu
- Fix Windows 10 bootloader within the Terminal
- Try with LILO
1. Use the Boot Repair utility on Ubuntu
- Download Ubuntu live distro version.
- Mount it to your USB.
- You can do it with the Universal USB Installer (preferably) tool. It’s important to use this application or the drive won’t be bootable.
- Plug-in the drive and boot from it.
- Go for the Try Ubuntu without installing option.

- In case this fails, open BIOS/UEFI settings, disable Secure Boot option, and try again.
- Once Ubuntu boots, press Ctrl+Alt+T to open the Terminal.
- In the command line, run the following string and press Enter after each:
- sudo add-apt-repository ppa:yannubuntu/boot-repair
- sudo apt update
- sudo apt install boot-loader
- This should install Boot Repair application and you can now find it among the Application menu.
- Open it and choose Recommended repair and wait until it’s done.
Let’s start with the simplest method. Probably knowingly, Ubuntu comes with the small utility called Boot Repair which fixes Windows 10 bootloader corruption upon running.
What you’ll need to have is the latest version of bootable Ubuntu mounted on your USB drive. After that, you’ll need to install the utility and, without the meddling in the Terminal, repair the Windows 10 bootloader.
2. Fix Windows 10 bootloader within the Terminal
- Boot again with the bootable USB drive.
- Open Terminal.
- In the command line, type the following string and press Enter after each:
- sudo apt-get install syslinux
- sudo dd if=/usr/lib/syslinux/mbr.bin of=/dev/sda
- sudo apt-get install mbr
- sudo install-mbr -i n -p D -t 0 /dev/sda
- Don’t forget to replace sda with the Windows 10 system drive.
- Reboot after that and Windows 10 should boot without any issues.
The second method relies on the Syslinux run through the Terminal. There’s a batch of commands you’ll need to run in order to install and utilize Syslinux to fix the Windows 10 bootloader.
If you’re not familiar with the way these work, we advise you to stick to the first method. Otherwise, the steps are rather easy and you just need to replace the sda input to your Windows 10 system drive letter.
3. Try fixing it with LILO
- Boot again with the bootable USB drive.
- Open Terminal.
- In the command line, type the following string and press Enter after each:
- sudo apt-get install lilo
- sudo lilo — M/dev/sda mbr
- Reboot and you’re good to go. The Windows 10 bootloader is fixed.
The final method utilizes LILO (Linux Loader) which is a small program responsible for managing dual boot. The procedure is similar to the previous one, at least for the unaccustomed eye.
Either way, if the previous two steps weren’t working for you (the first one should resolve bootloader issues), LILO is certainly a handy alternative.
If you’re still having trouble after going through all of the solutions above, we recommend using a third-party tool that can repair your PC and keep it healthy.
With that said, we can conclude this article. Hopefully, you managed to resolve the issue with the Windows 10 bootloader. We encourage you to tell us in the comment section below.
Fix Windows MBR using Ubuntu Live CD and ms-sys tool
I’m trying to fix the MBR using Ubuntu live CD. I already have the ms-sys installed but from the threads that I saw, I’m not completely sure in which /dev I should execute the command:
(is it mbr7 the correct option when using Windows 7?)
Why is /dev/sda1 empty?
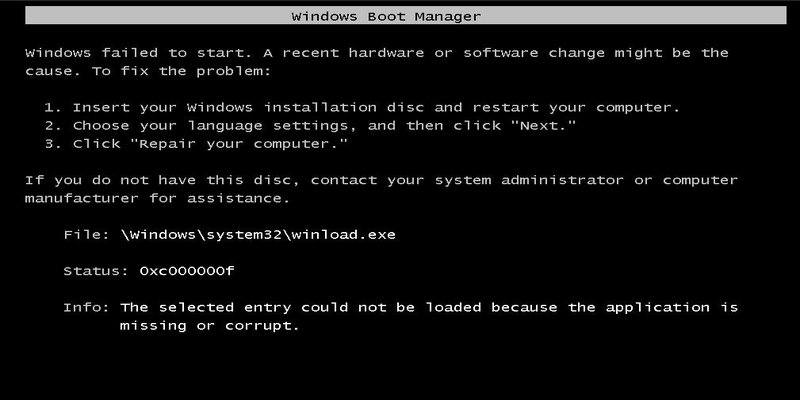
I’m trying to fix the MBR because I’m getting a black screen when trying to load the operating system.

3 Answers 3
To restore the MBR, the accepted method is to use a Windows CD. We didn’t have that luxury. Fortunately we had a Ubuntu Live USB in hand.
The method to fix the MBR is:
- Boot the machine using the Live USB/CD.
- Install lilo sudo apt-get install lilo
- Fix the MBR using lilo using the command: sudo lilo -M /dev/sda mbr
Works like a charm!

First, your partition table appears to have two active partitions, which may prevent your computer from booting even if you fix the problem of the MBR.
Windows’s MBR boot is kind of funky because it uses a «default» MBR to load the MBR of the active partition. Before you change the boot records, try unmarking one of the partitions and booting.
If that doesn’t work, the package mbr may be worth looking into. It is able to install the «default» MBR to your disk, which just loads the boot code from the active partition.
As per your question, read/follow these bullet points at your own risk. This stuff has the ability to mess up your partition table. Back it up using dd if=/dev/sda of=table.bin bs=512 count=1 first. I would also recommend backing up all your files. If I understand the docs correctly, doing these commands without -w may prevent them from writing anything without additional user intervention.
- ms-sys /dev/sda will inspect the hard dist partitions
- Please read the documentation here. From what I gather, ms-sys can be quite dangerous and is designed to obliterate your entire MBR along with the partition table in several situations. It would seem you are using the wrong utility for the job.
- ms-sys —ntfs /dev/sdaX where sdaX is your partition with Windows 7 on it. This might do what you are expecting, but probably not.
I think you have the wrong utility for the job here. This does not «fix» MBR’s, it destroys and creates them. You may get lucky and have the new partition table line up with the new one, but I wouldn’t count on it. Try booting a grub CD and typing chainloader (hd0, )+1 at the prompt and seeing if it boots. This will help diagnose where your problem is. If else fails, use your windows installation dist to fix the MBR.
Восстановление убитых MBR и таблицы разделов
0. Intro.
Ситуация следующая. Есть винт на 160Гб. На нем 2 раздела — 40Гб и 120Гб. С целью установки убунты как второй системы была произведена разбивка 120Гб -> 100+10+2+8.
Далее, с целью отката изменений, были объединены диски (10, 2 и 8) обратно в один 20Гб и отформатирован в NTFS. В нагрузку к этому, были проведены операции с MBR, результатом которой явилась ее смерть.
Итоги
1. При загрузке системы выводится сообщение MBR helper not found;
2. fdisk показывает один большой 160Гб диск.
Дураку понятно, что это начало веселой ночи.
Далее, под катом, решения вопроса.
1. Восстановление таблицы разделов
1.1. Parted magic
Данный LiveCD\USB дистрибутив, размером в 100Мб несет в себе огромную кучу софта, для работы с дисками. От разбивки, до восстановления.
Из них всех, нам нужны будут gpart, testdisk, fdisk и ms-sys.
1.2. Gpart
gpart — это утилита, сканирующая по-секторно диск на наличие разделов, которые присутствуют на носителе, но отсутствуют в таблице. В своей работе, она игнорирует уже существующую таблицу (если присутствует). Программа разаботана немецким программистом Michail Brzitwa и больше им не поддерживается. Вялотекущая разработка ведется командами Fedora и Debian. Текущая версия — 0.1h.
Утилита позволяет наиболее быстро и легко восстановить таблицу разделов, но она несет в себе несколько недостатков. Во-первых, разработка была давно заброшена, во-вторых, она иногда не совсем корректно определяет разделы.
gpart может работать в 2-х режимах. Это быстрый анализ и подробное сканирование. В некоторых случаях, первого режима достаточно. Мы же будем смотреть на второй.
gpart -if /dev/sda
-i — интерактивный режим. На каждую найденную партицию будет задан вопрос, сохранять ее, либо пропустить.
-f — полный скан диска.
После, довольно продолжительного времени, будет создан отчет с возможными разделами. Его-то и нужно обязательно максимально внимательно просмотреть перед записью.
Пример отчета (не мой):
Begin scan.
Possible partition(DOS FAT), size(1907mb), offset(0mb)
Possible partition(SGI XFS filesystem), size(5730mb), offset(1907mb)
End scan.
Checking partitions.
Partition(DOS or Windows 95 with 32 bit FAT, LBA): primary
Partition(Linux ext2 filesystem): primary
Ok.
Guessed primary partition table:
Primary partition(1)
type: 012(0x0C)(DOS or Windows 95 with 32 bit FAT, LBA)
size: 1907mb #s(3906544) s(16-3906559)
chs: (0/1/1)-(1023/19/16)d (0/1/1)-(12207/19/16)r
Primary partition(2)
type: 131(0x83)(Linux ext2 filesystem)
size: 5730mb #s(11736000) s(3906560-15642559)
chs: (1023/19/16)-(1023/19/16)d (12208/0/1)-(48882/19/16)r
Primary partition(3)
type: 000(0x00)(unused)
size: 0mb #s(0) s(0-0)
chs: (0/0/0)-(0/0/0)d (0/0/0)-(0/0/0)r
Primary partition(4)
type: 000(0x00)(unused)
size: 0mb #s(0) s(0-0)
chs: (0/0/0)-(0/0/0)d (0/0/0)-(0/0/0)r
Если все ОК, то соглашаемся на запись в таблицу разделов, скрещиваем пальцы и перезагружаемся.
В моем случае, программа определила разделы, которые были до разбивки (40 и 120), что не подходило и заставило искать альтернативные способы восстановления.
1.3. testdisk
Note: подробнее эта утилита описана в этом посте, здесь не буду повторяться.
Эта утилита аналогична предыдущей, но имеет ряд плюсов:
1. более свежая и активно поддерживается;
2. субъективно, работает намного быстрее;
3. функциональнее;
4. есть простой консольный интерфейс на базе ncurses.
Поехали!
1. в первом окне выбираем Create a new log file;
2. выбираем нужный диск (/dev/sda) -> Proceed;
3. отмечаем тип разделов как Intel;
4. выбираем Analyse current partition structure and search for lost partitions;
5. если найденные разделы верны, жмем Backup и переходим к пункту 6, есть возможность быстро пересканировать диск, если где-то ошибка (Quick search);
6. здесь уже виден зеленый список с разделами. Если ок, то записываем, иначе запускаем Deep search.;
В моем случае, результат был аналогичен результату gpart, что есть некорректен.
Запустив Deep search, выждав около 40 минут я получил ответ, от которого на душе так нехило отлегло.
Было найдено несколько партиций, которые накладывались одна на другую (это были изначальная (до манипуляций) 120Гб и новая, на 100Гб). Отметив ненужную, как удаленную, я записал таблицу на диск и перезагрузился. К счастью, все обошлось и компьютер вернулся к состоянию, который был изначально, а я мог с чистой совестью лечь спать.
3. Восстановление MBR
Для этой задачи, у нас в арсенале есть тулза ms-sys.
Сперва узнаем, что с нашей MBR.
ms-sys /dev/sda
/dev/sda has an x86 boot sector
it is unknown boot sector
Теперь видно, что на данном диске нет загрузочного сектора.
Утилита может работать с MBR различных операционных систем. Список можно получить, запустив программу без агрументов. В моем случае, необходим был от Windows 7.
Записываем MBR на диск:
ms-sys -7 /dev/sda
Windows 7 master boot record successfully written to /dev/sda
Проверяем:
ms-sys /dev/sda
it is Microsof 7 master boot record, like the one this
program creates with the switch -7 on a hard disk device.
Вот и все, нужная MBR установлена и можно перезагружаться.


