Use the System File Checker tool to repair missing or corrupted system files
If some Windows functions aren’t working or Windows crashes, use the System File Checker to scan Windows and restore your files.
Though the steps below might look complicated at first glance, just follow them in order, step-by-step, and we’ll try to get you back on track.
Run the System File Checker tool (SFC.exe)
To do this, follow these steps:
Open an elevated command prompt. To do this, do the following as your appropriate:
If you are running Windows 10, Windows 8.1 or Windows 8, first run the inbox Deployment Image Servicing and Management (DISM) tool prior to running the System File Checker. (If you are running Windows 7 or Windows Vista, skip to Step 3.)
Type the following command, and then press Enter. It may take several minutes for the command operation to be completed.
DISM.exe /Online /Cleanup-image /Restorehealth
Important: When you run this command, DISM uses Windows Update to provide the files that are required to fix corruptions. However, if your Windows Update client is already broken, use a running Windows installation as the repair source, or use a Windows side-by-side folder from a network share or from a removable media, such as the Windows DVD, as the source of the files. To do this, run the following command instead:
DISM.exe /Online /Cleanup-Image /RestoreHealth /Source: C:\RepairSource\Windows /LimitAccess
Note: Replace the C:\RepairSource\Windows placeholder with the location of your repair source. For more information about using the DISM tool to repair Windows, reference Repair a Windows Image.
At the command prompt, type the following command, and then press ENTER:
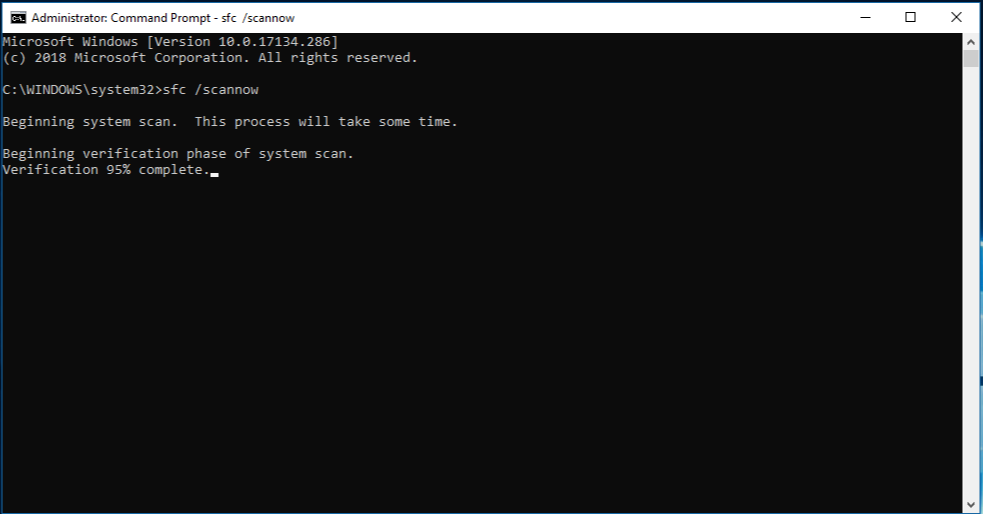
The sfc /scannow command will scan all protected system files, and replace corrupted files with a cached copy that is located in a compressed folder at %WinDir%\System32\dllcache.
The %WinDir% placeholder represents the Windows operating system folder. For example, C:\Windows.
Note Do not close this Command Prompt window until the verification is 100% complete. The scan results will be shown after this process is finished.
After the process is finished, you may receive one of the following messages:
Windows Resource Protection did not find any integrity violations.
This means that you do not have any missing or corrupted system files.
Windows Resource Protection could not perform the requested operation.
To resolve this problem, perform the System File Checker scan in safe mode, and make sure that the PendingDeletes and PendingRenames folders exist under %WinDir%\WinSxS\Temp.
Windows Resource Protection found corrupt files and successfully repaired them. Details are included in the CBS.Log %WinDir%\Logs\CBS\CBS.log.
To view the detail information about the system file scan and restoration, go to How to view details of the System File Checker process.
Windows Resource Protection found corrupt files but was unable to fix some of them. Details are included in the CBS.Log %WinDir%\Logs\CBS\CBS.log.
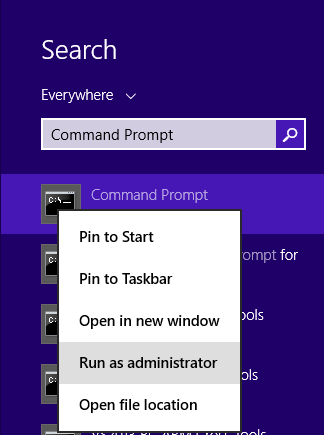
Swipe in from the right edge of the screen, and then tap Search. Or, if you are using a mouse, point to the lower-right corner of the screen, and then click Search. Type Command Prompt in the Search box, right-click Command Prompt, and then click Run as administrator. If you are prompted for an administrator password or for a confirmation, type the password, or click Allow.
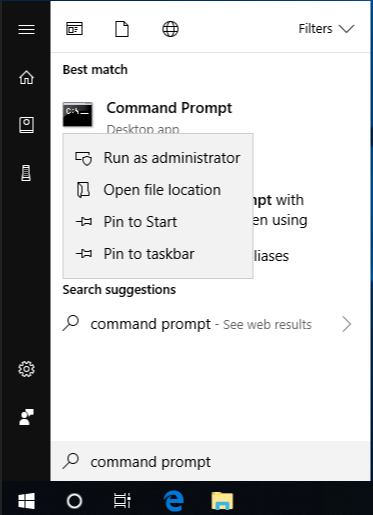
To do this, click Start, type Command Prompt or cmd in the Search box, right-click Command Prompt, and then click Run as administrator. If you are prompted for an administrator password or for a confirmation, type the password, or click Allow.
More Information
To view the details that included in the CBS.Log file, you can copy the information to the Sfcdetails.txt file by using the Findstr command, and then view the details in the Sfcdetails.txt. To do this, follow these steps:
Open an elevated command prompt as described in the previous step 1.
At the command prompt, type the following command, and then press ENTER:
Note The Sfcdetails.txt file contains details from every time that the System File Checker tool has been run on the computer. The file includes information about files that were not repaired by the System File Checker tool. Verify the date and time entries to determine the problem files that were found the last time that you ran the System File Checker tool.
Open the Sfcdetails.txt file from your desktop.
The Sfcdetails.txt file uses the following format:
Date/Time SFC detail The following sample log file contains an entry for a file that could not be repaired: 2007-01-12 12:10:42, Info CSI 00000008 [SR] Cannot repair member file [l:34<17>]»Accessibility.dll» of Accessibility, Version = 6.0.6000.16386, pA = PROCESSOR_ARCHITECTURE_MSIL (8), Culture neutral, VersionScope neutral, PublicKeyToken =
How to manually replace a corrupted system file with a known good copy of the file
After you determine which system file was corrupted and could not be repaired through the detail information in the Sfcdetails.txt file, find where the corrupted file located, and then manually replace the corrupted file with a known good copy of the file. To do this, follow these steps:
Note You may be able to get a known good copy of the system file from another computer that is running the same version of Windows with your computer. You may perform a System File Checker process on that computer to make sure the system file that you intend to copy is a good copy.
Take administrative ownership of the corrupted system file. To do this, at an elevated command prompt, copy and then paste (or type) the following command, and then press ENTER:
takeown /f Path_And_File_Name Note The Path_And_File_Name placeholder represents the path and the file name of the corrupted file. For example, type takeown /f C:\windows\system32\jscript.dll. 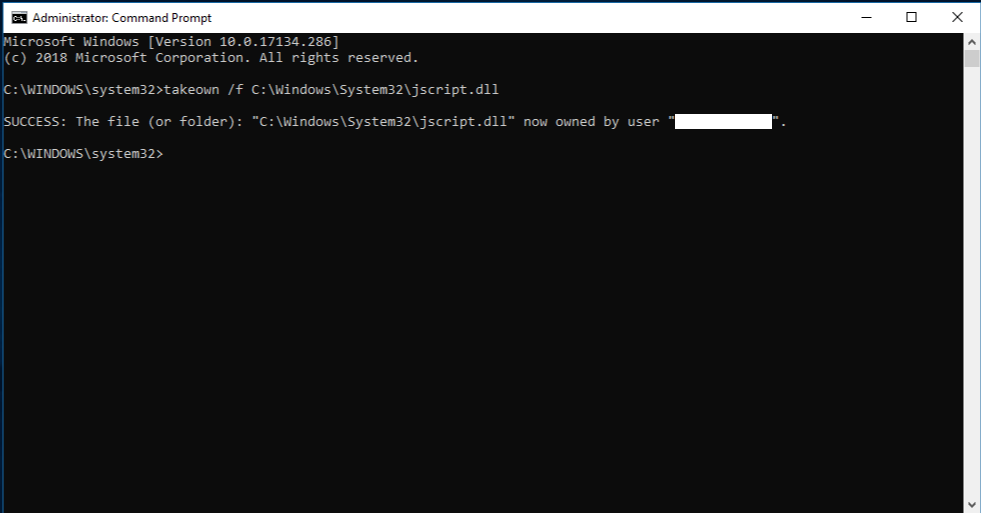
Grant administrators full access to the corrupted system file. To do this, copy and paste (or type) the following command, and then press ENTER:
icacls Path_And_File_Name /GRANT ADMINISTRATORS:F Note The Path_And_File_Name placeholder represents the path and the file name of the corrupted file. For example, type icacls C:\windows\system32\jscript.dll /grant administrators:F.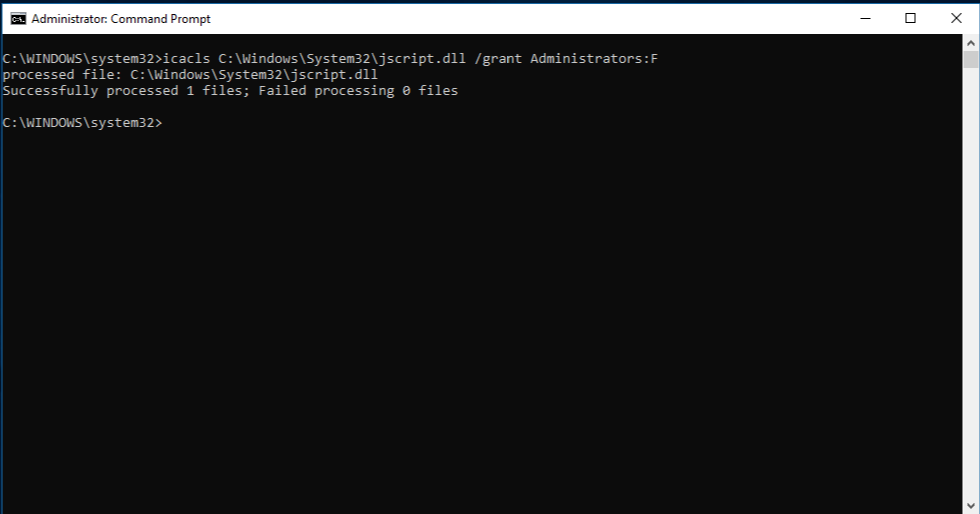
Replace the corrupted system file with a known good copy of the file. To do this, copy and paste (or type) the following command, and then press ENTER:
Copy Source_File Destination Note The Source_File placeholder represents the path and file name of the known good copy of the file on your computer, and the Destination placeholder represents the path and file name of the corrupted file. For example, type copy E:\temp\jscript.dll C:\windows\system32\jscript.dll.
If the steps above don’t work, you may need to reinstall Windows. For more info, see Windows 10 recovery options.
How to Fix Missing or Corrupted Files on Windows 10

Windows 10, or any operating system for that matter, can end up giving bugs or crashes over the time and usage due to missing or corrupt files. If you are wondering how to fix this missing files issue, Windows 10 contains several failsafe commands to ensure that you can always sort out such dilemmas on your own without losing any data.
Let us get you well-acquainted with some of the best methods to fix the missing files issue on Windows 10 in your PC:
Use System File Checker (SFC):
The System File Checker feature or SFC is a program that can scan and resolve the issue of the missing or corrupted files on Windows 10 via replacing the files from the cache which stores the backup files for safekeeping within the OS.
- Open the Start menu by clicking on it or press the Windows key and type cmd in the search bar. Right-click on the Command Prompt app and Run as Administrator.

- In the Command Prompt, type the command sfc /scannow and press Enter.
- The system will commence the verification phase to identify the corrupt/missing files and resolve the issue for you.
- Now there are multiple scenarios, if no corrupt files are detected then the results would return as “Windows Resource Protection did not find any integrity violations”. But if the SFC scan repairs and resolves the issue then the result would indicate, “Windows Resource Protection found corrupt files and successfully repaired them”. If errors are found then it is recommended to repeat the SFC scan thrice or more.


Use DISM command:
Deployment Image Servicing and Management or DISM is the tool which holds the potential to bypass the System File Checker as the SFC solely relies on the replacement file held up in the cache. But, if they are also corrupted then the SFC protocol would not work. This is where the DISM steps in to service the Windows image file by downloading the required files from the Windows Update servers.
There are three commands, CheckHealth, ScanHealth, RestoreHealth respectively, which need to be executed in the order mentioned above as CheckHealth is a basic scan but does not resolve the issue whereas ScanHealth is an advanced scan to detect the deeply rooted problems. The RestoreHealth command would fire up the process to resolve the issues which were revealed during the earlier scans.
Step 1 — CheckHealth Command:
- Open Start menu and type cmd in the search bar. Right-click on the Command Prompt app and select Run as Administrator.
- Type the command DISM /Online /Cleanup-Image /CheckHealth and press Enter.
- The results would provide you with an insight as to whether or not the corrupted files were detected. Here it states, “No component store corruption detected” which is a thumbs up that the Windows image is functioning fine. But if the corrupted/missing files are located then proceed to the next step.


Step 2 — ScanHealth Command:
- Open Start menu and type cmd in the search bar. Right-click on the Command Prompt app and select Run as Administrator.
- Type the command DISM /Online /Cleanup-Image /ScanHealth and press Enter.
- Since it is an extensive scan, it could take some time to complete.
- Now you can see the results of the scan as it would indicate the damaged files which were detected during the scan. If it indicates, “No component store corruption detected. The operation completed successfully” then the Windows image is functioning normally.


Step 3 — RestoreHealth Command:
- Open Start menu and type cmd in the search bar. Right-click on the Command Prompt app and select Run as Administrator.
- Type the command DISM /Online /Cleanup-Image /RestoreHealth and press Enter.
- The system will inform you once the restore operation has been completed successfully.


Restore the System:
This is an effective bug fix for damaged files in Windows 10 as your PC reverts back to a previous log on session. You must be thinking how will this help? In easier words, your entire operating system would take a step back to a certain point where the issue initially started or even before that. Here’s how you can restore your system on Windows 10:
- Open the Start menu and type system restore in the search bar. Click on the Create a restore point to proceed.
- Simply click on System Restore in the System Properties menu.
- Click on Next in the Restore system files and settings wizard.
- Check the Show more restore points box to reveal more restore points for you to choose from.
- Select the restore point that you wish to revert back to according to the date, time, and type of the state. If you wish to learn more about the programs that will be affected by this restore attempt then click on Scan for affected programs.
- This would reveal the list of affected programs which will be restored and deleted. Click on Close to proceed after you’ve checked the information out.
- Click on Next to proceed with the restore session.
- Once you are done reviewing the necessary information, click on Finish to initiate the System Restore and your PC would restart. This is known to resolve any kind of missing or corrupted file issues with the Windows image.


By following the above-mentioned methods, you can save your system from a messy situation via some collateral damage that is the data loss because of the restore. Rest assured the other methods would not result in any data loss as the system utilizes the cached backup replacement files from within the system to repair your PC.


