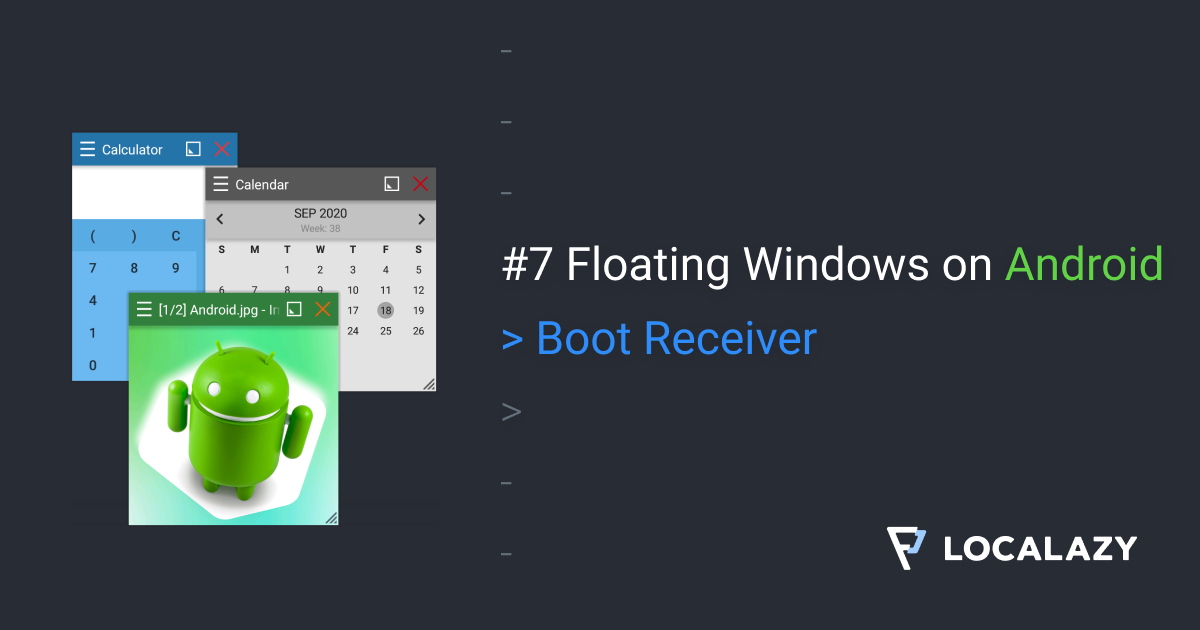
- #7 Floating Windows on Android: Boot Receiver
- Learn how to use floating windows in your Android apps. The seventh lesson teaches you how to reliably start the service when the device boots up.
- Always Ready
- The Permission
- The Receiver
- Receiver Registration
- Settings
- Results
- Source Code
- Stay Tuned
- The Series
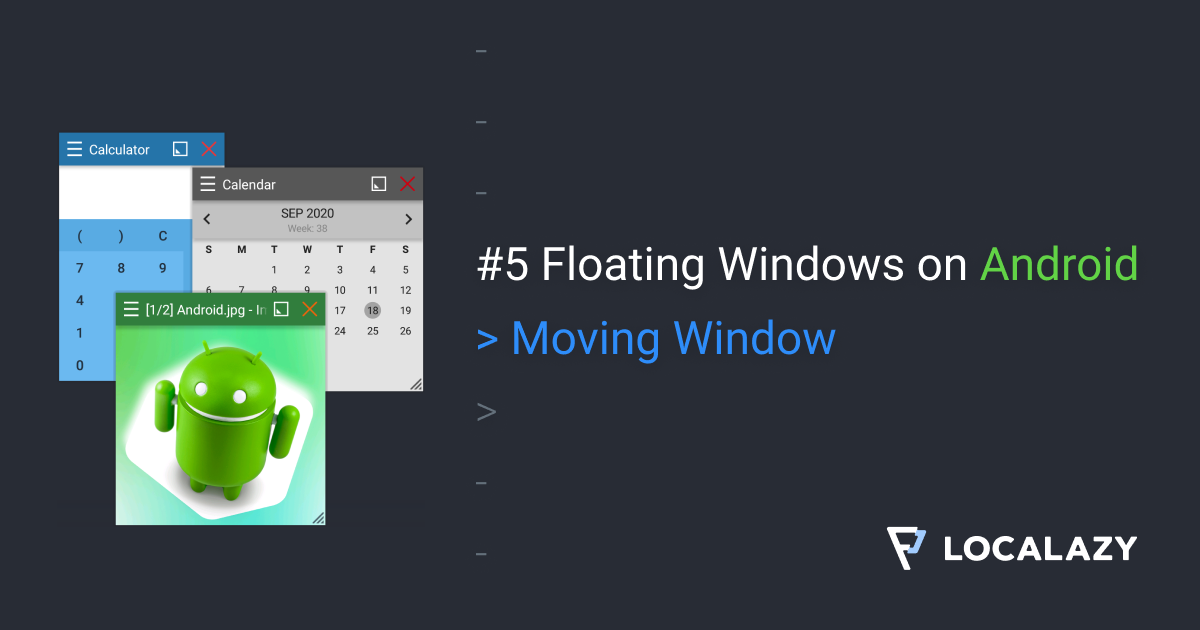
- #5 Floating Windows on Android: Moving Window
- Learn how to use floating windows in your Android apps. The fifth lesson teaches you how to make your windows movable.
- Updating Layout
- Custom OnTouchListener
- Let’s Get The Window Movin’
- Boundaries
- Results
- Source Code
- Stay Tuned
- The Series
- How To Add Floating Windows Feature In Android (3 Methods)
- Steps To Add Floating Windows Feature In Android
- Install Floating Windows Using Expose Installer:
- Using Leena Desktop UI
- Using Floating Apps Free
- #9 Floating Windows on Android: Shortcomings
- Learn how to use floating windows in your Android apps. The ninth lesson teaches you how to overcome some key shortcomings in floating technology.
- Mixed Support
- Dialogs
- Popup Menus
- Copy & Paste
- Permissions
- System Interactions
- Z-Order
- Browser Limitations
- — Open With
- — Copy/Paste
- — Long-Click On Links & Images
- The Final Note
- Stay Tuned
- The Series
#7 Floating Windows on Android: Boot Receiver
Learn how to use floating windows in your Android apps. The seventh lesson teaches you how to reliably start the service when the device boots up.

Have you ever wondered how to make those floating windows used by Facebook Heads and other apps? Have you ever wanted to use the same technology in your app? It’s easy, and I will guide you through the whole process.
I’m the author of Floating Apps; the first app of its kind on Google Play and the most popular one with over 8 million downloads. After 6 years of the development of the app, I know a bit about it. It’s sometimes tricky, and I spent months reading documentation and Android source code and experimenting. I received feedback from tens of thousands of users and see various issues on different phones with different Android versions.
Here’s what I learned along the way.
Before reading this article, it’s recommended to go through Floating Windows on Android 6: Keyboard Input.
In this article, I will teach you how to start our service reliably when the device boots up.
Always Ready
Our floating service is launched from the main app. When the user turns off the device and later turns it on, she cannot make notes with our app until she manually starts it. That’s not comfortable.
However, we can quickly solve this by launching our service when the device boots up.
The Permission
We need to add permission to AndroidManifest.xml to listen for boot events:
The Receiver
When the broadcast is received, just start the service. Nothing else is necessary to do.
Receiver Registration
The last thing to do is to register our receiver in AndroidManifest.xml , so it receives required broadcast events.
You can notice that we listen to more events:
- BOOT_COMPLETED — This is broadcast once after the device has finished booting.
- USER_PRESENT — Sent when the user is present after the device wakes up (e.g. when the keyguard is gone).
- QUICKBOOT_POWERON — This is broadcast that you don’t find in the official Android documentation. It’s sent on some devices and emulators when the device is restarted only.
With these three events, our service should be reliably launched when the device boots up.
Note: Please remember that when the app was force killed or stopped, it may not be started automatically on boot before the user launches it manually at least once again.
Settings
It’s out of the scope of this article, but for the app’s production version, it would be useful to implement an option to disable the notification and disable starting the service when the device boots up.
Results
- Install the app and start the main app. The note notification appears.
- Real device: Turn the device off and on, or restart it.
- Emulator: Close the emulator and start it again from Android Virtual Device Manager. Don’t start it by running the app!
- The notification should appear a while after the device boots up.
Source Code
The whole source code for this article is available on Github.
Stay Tuned
Eager to learn more about Android development? Follow me (@vaclavhodek) and Localazy (@localazy) on Twitter, or like Localazy on Facebook.
The Series
This article is part of the Floating Windows on Android series.
#5 Floating Windows on Android: Moving Window
Learn how to use floating windows in your Android apps. The fifth lesson teaches you how to make your windows movable.
Have you ever wondered how to make those floating windows used by Facebook Heads and other apps? Have you ever wanted to use the same technology in your app? It’s easy, and I will guide you through the whole process.
I’m the author of Floating Apps; the first app of its kind on Google Play and the most popular one with over 8 million downloads. After 6 years of the development of the app, I know a bit about it. It’s sometimes tricky, and I spent months reading documentation and Android source code and experimenting. I received feedback from tens of thousands of users and see various issues on different phones with different Android versions.
Here’s what I learned along the way.
Before reading this article, it’s recommended to go through Floating Windows on Android 4: Floating Window.
In this article, I will teach you how to make the window movable by dragging its header.
Updating Layout
In the previous article, we introduced how to add views to WindowManager along with their LayoutParams . However, from the moment the window is added, changes made to LayoutParams are not reflected.
To apply changes, it’s necessary to call method updateViewLayout of WindowManager . Therefore, we need to implement two additional methods for our Window class for changing the window position.
Of course, the very same principle can be used to change the window’s size, opacity, etc.
Custom OnTouchListener
For moving the window, let’s implement a custom OnTouchListener that allows us to track the initial point’s movement. Also, let’s keep the basic functionality — clicks & long-clicks — to work in the expected system-like way.
Our implementation doesn’t support multitouch, but it’s good enough to demonstrate how to move the window.
The source code of our new DraggableTouchListener is here:
We can add a bit of Kotlin magic — extension functions — to make it even easier to use:
Theoretically, you can move anything with code above — the view serves here as a trigger only.
Let’s Get The Window Movin’
Everything we need to do is to attach our newly created DraggableTouchListener to the view we want to be used as a handle for moving the window.
For desktop operating systems, the window’s title bar typically serves this purpose, so let’s follow the same trend:
Boundaries
It would be necessary for the productional use to implement some boundaries, so the window can’t be moved out of the screen too much.
In Floating Apps, I allow the user to move 50% of the window outside the screen area.
Results
Tap the window’s title bar and move it anywhere you want!
Source Code
The whole source code for this article is available on Github.
Stay Tuned
Eager to learn more about Android development? Follow me (@vaclavhodek) and Localazy (@localazy) on Twitter, or like Localazy on Facebook.
The Series
This article is part of the Floating Windows on Android series.
How To Add Floating Windows Feature In Android (3 Methods)
We are going to share a trick that will help you to add floating windows in any of your androids. These features are now only available in selective models but don’t worry this feature can now be implemented in any of your android.
Today we are here with the cool android trick that is How To Add Floating Windows In Any Android. Till now we had discussed lots of android tips and tricks and there is the android tweak that will let you add a floating window by altering your system settings. So have a look at the complete guide discussed below to proceed.
Steps To Add Floating Windows Feature In Android
The method is easy but a little bit time-consuming as in this you need a rooted android. As the tool that we are going to discuss right here only works in rooted android. You just need to have to follow some simple steps discussed below to proceed.
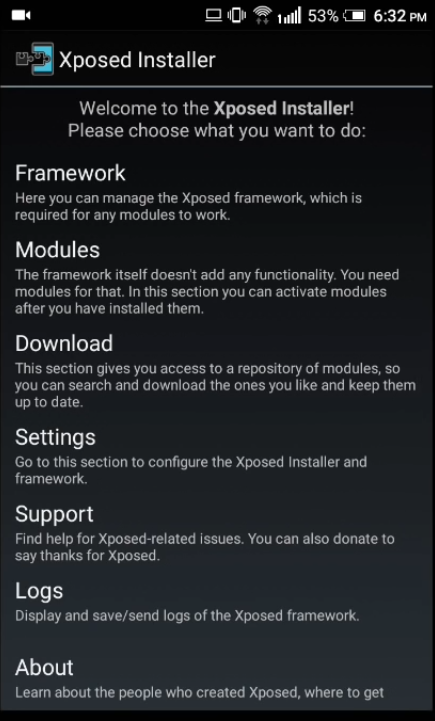
Install Floating Windows Using Expose Installer:
Step 1. First of all, you need to root an android and for that follow the Rooting Guide.

Step 2. Now you need to install Xposed Installer. You can go through our full post How To Install Xposed Framework In Android (2 Methods) to know how to install Xposed installer on your Android.

Step 3. Now from there click on “Download”
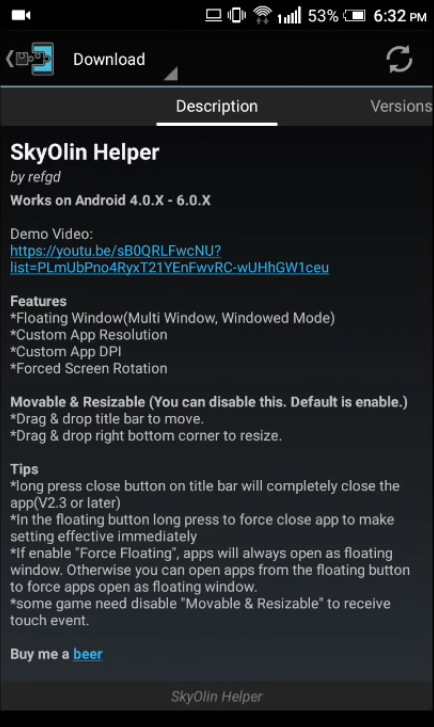
Step 4. Now search for SkyOlin Helper and download the latest version.
Step 5. Now you need to head over modules and then enable SkyOlin Helper.

Step 6. Now reboot your device and open the app SkyOlin Helper. From app settings you need to tap on “Apps”
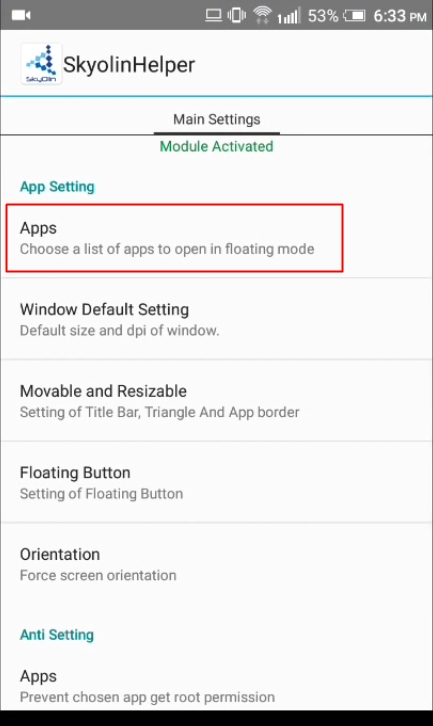
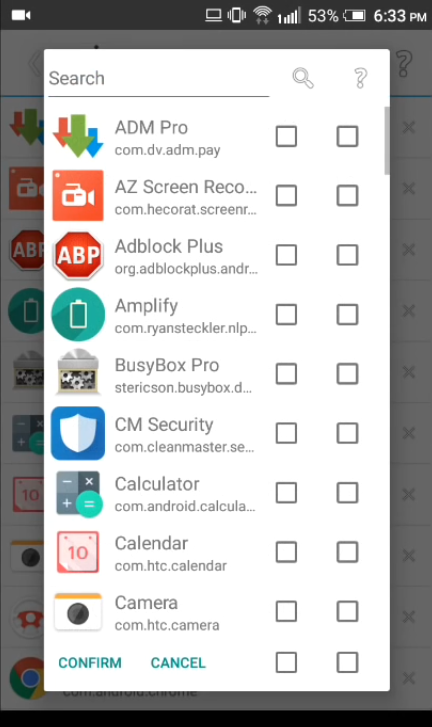
Step 7. There you need to select the apps that you want to open up in floating windows.
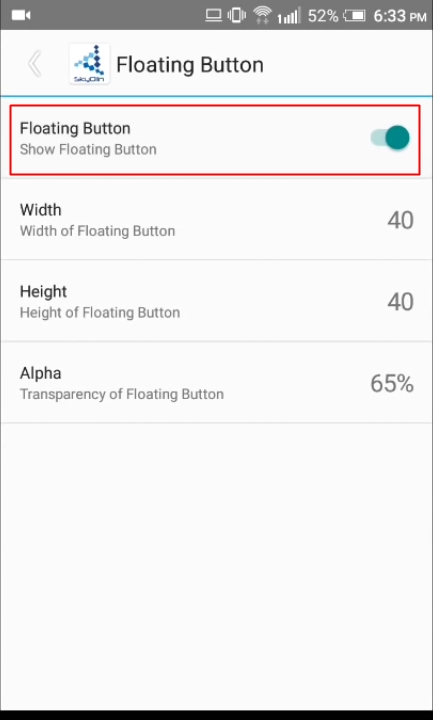
Step 8. Now move to the app home screen and there tap on the “Floating button” and enable the option. you can also set the width, height, etc.
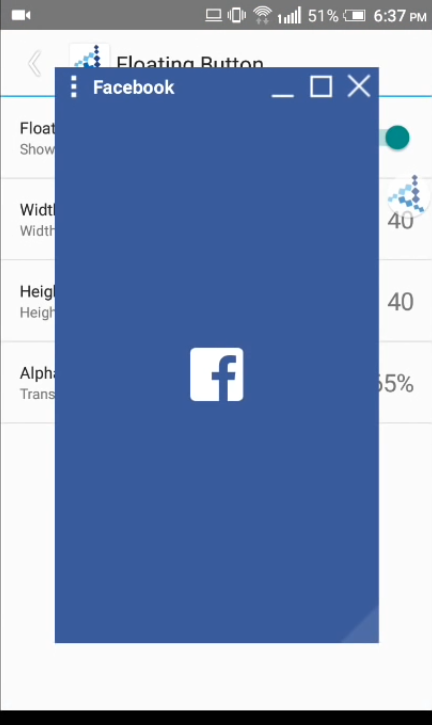
That’s it! You are done, by this way you can open any app within a floating window.
Note:- Above apps are not the official one and also rooting android voids your warranty and also device may get bricked during the process, so do this at your own risk as we are not responsible for anything misshapen.
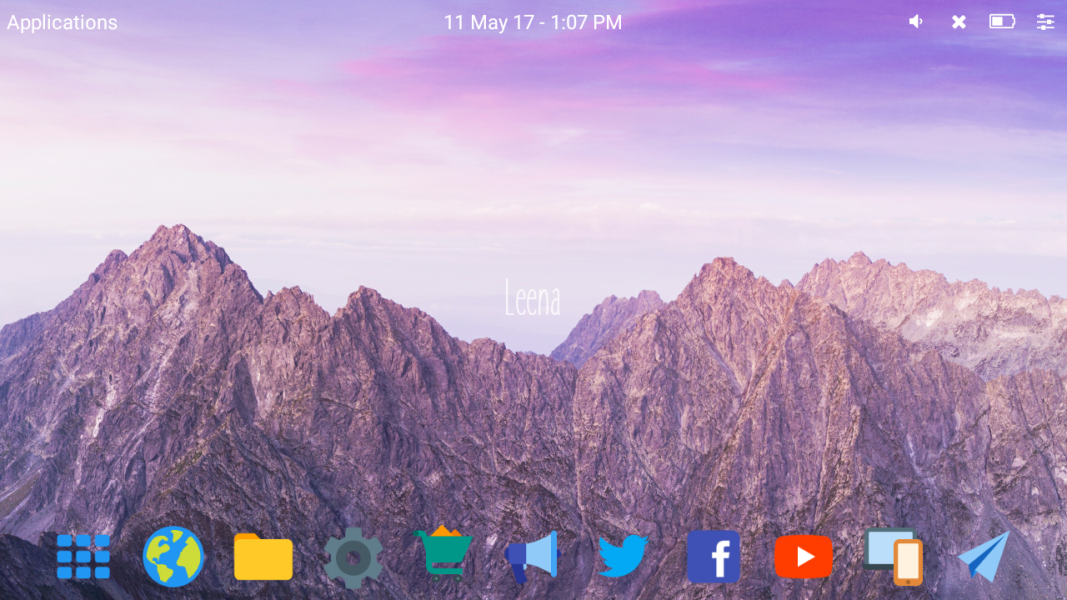
Using Leena Desktop UI
Well, if you don’t have a rooted device, then you can use Leena Desktop UI to add the floating window feature on Android. It’s a full-fledged launcher app that brings the desktop look to your computer. Here’s how you can use Leena Desktop UI to add a floating window feature on Android.
Step 1. You need to download and install Leena Desktop UI on your Android smartphone.
Step 2. After installing the app, open the app and you will see the screen like below. Here you need to grant permission to access photos, media, and files on your device.

Step 3. Now you will see the screen like below. You will get to see the complete desktop experience on your Android smartphone. It was actually an android app that seamlessly integrates into the Android ecosystem and allows to use of Android as a full-blown desktop operating system.
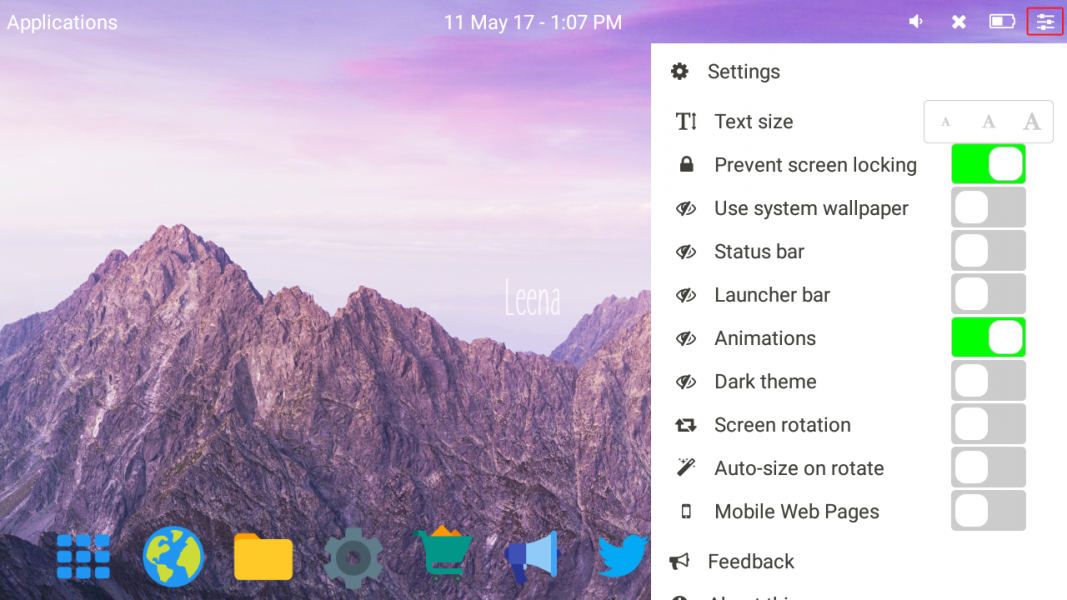
Step 4. Now in the next step, you need to tap on Settings which is located on the top right corner of your screen. Here you can set everything as per your wish.
Step 5. Once done, you can open the app or files. Everything will open up in a multi-window mode.
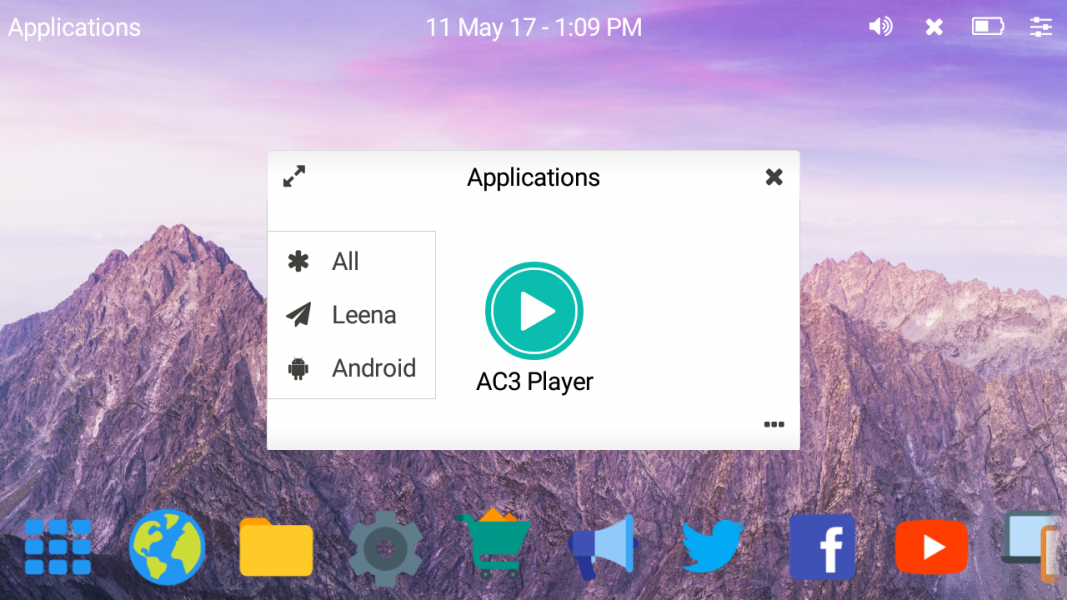
That’s it! you are done. Leena Launcher is “just” an android app that seamlessly integrates into the Android ecosystem and allows us to use Android as a full-blown desktop operating system.
Using Floating Apps Free
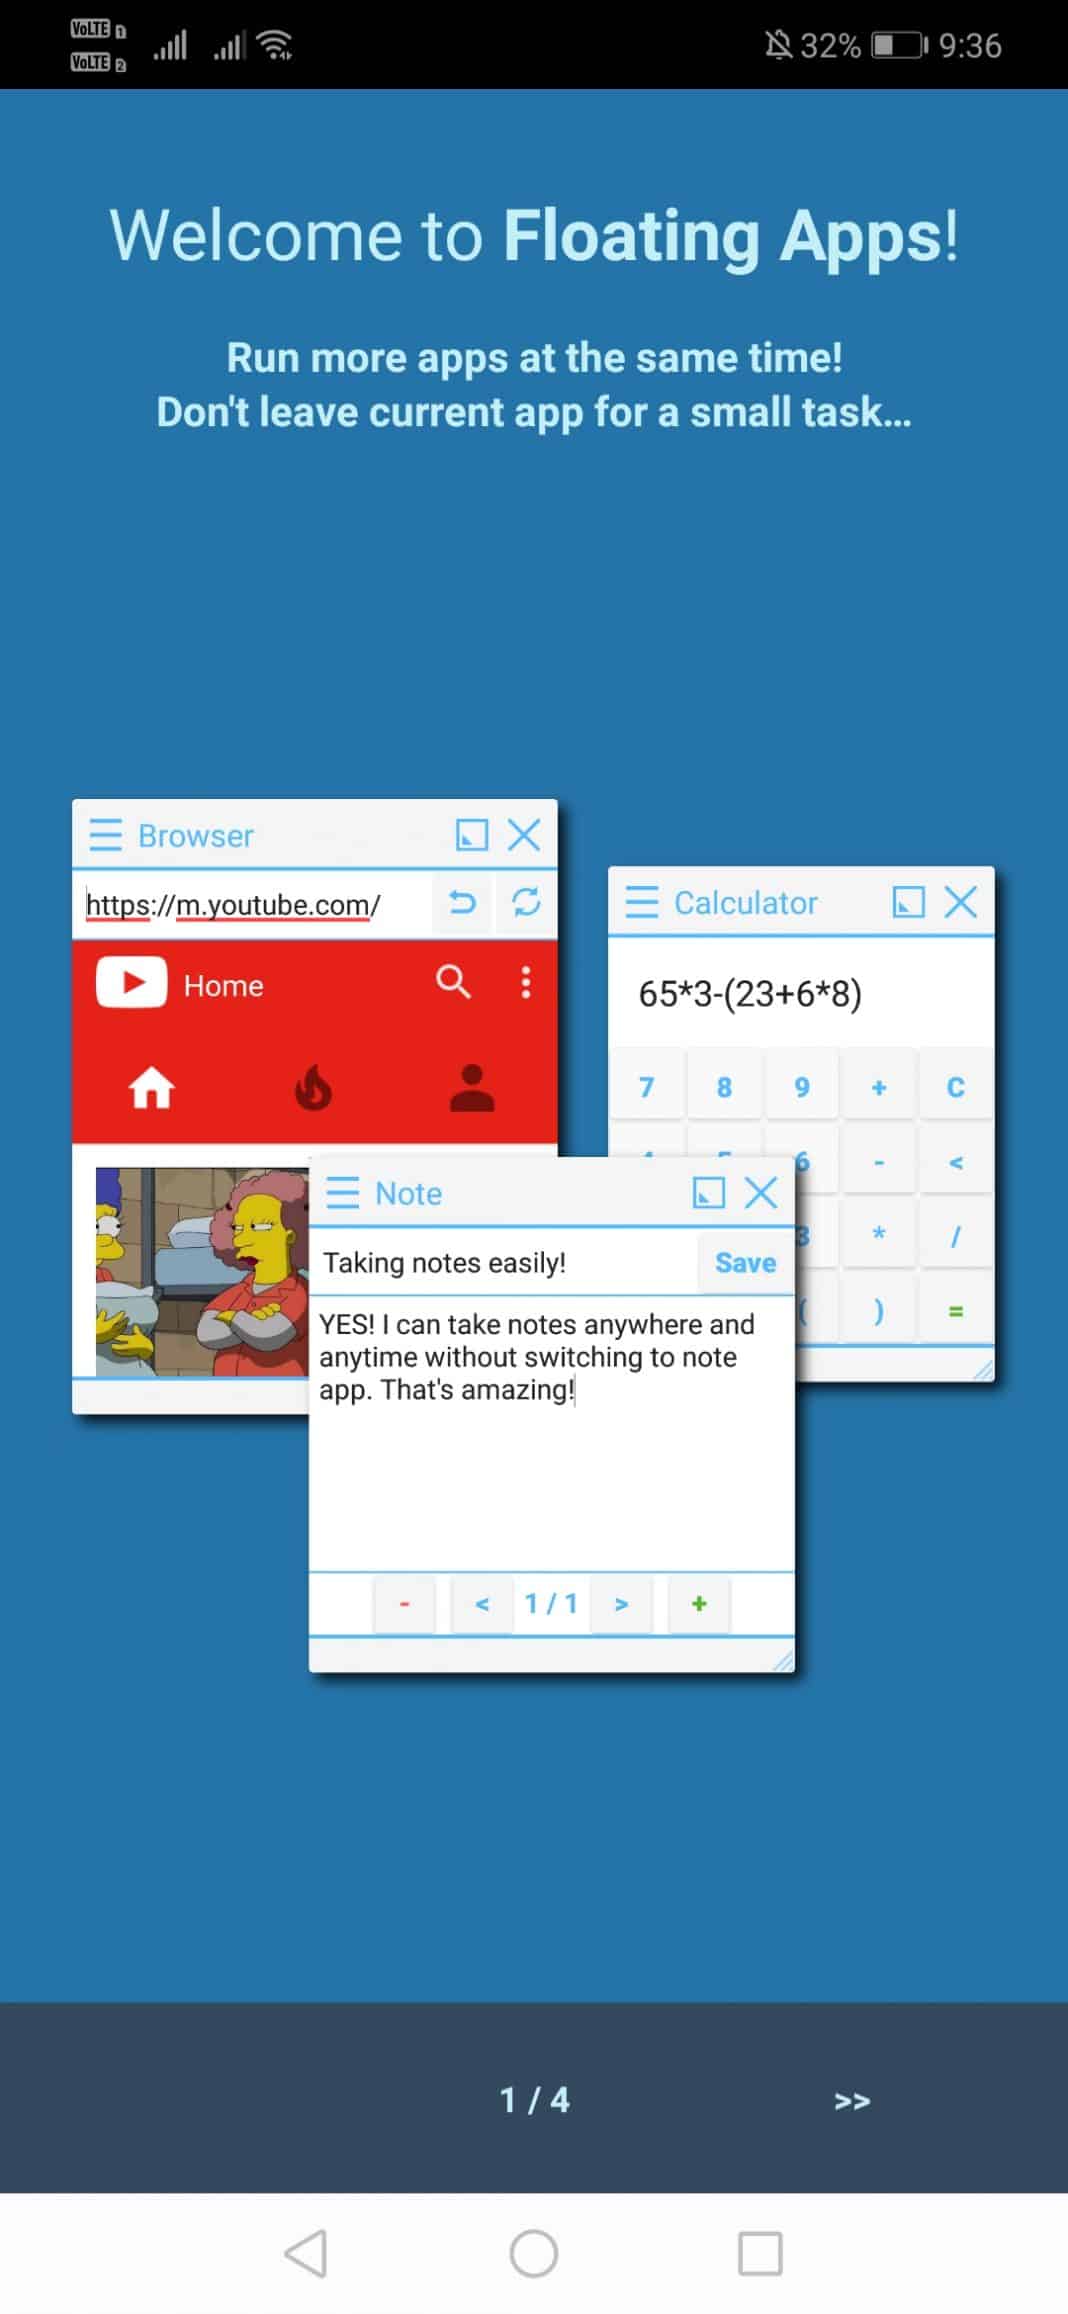
Well, Floating apps is another best Android app that can help you with multitasking. The great thing about Floating Apps Free is that it can create a floating window for browser, notes, document viewer, YouTube, Facebook, Contacts, File Manager, Music Player, and lots of other things. So, in this method, we are going to use Floating Apps Free to add the floating window feature in Android.
Step 1. First of all, download & install Floating Apps Free on your Android smartphone.
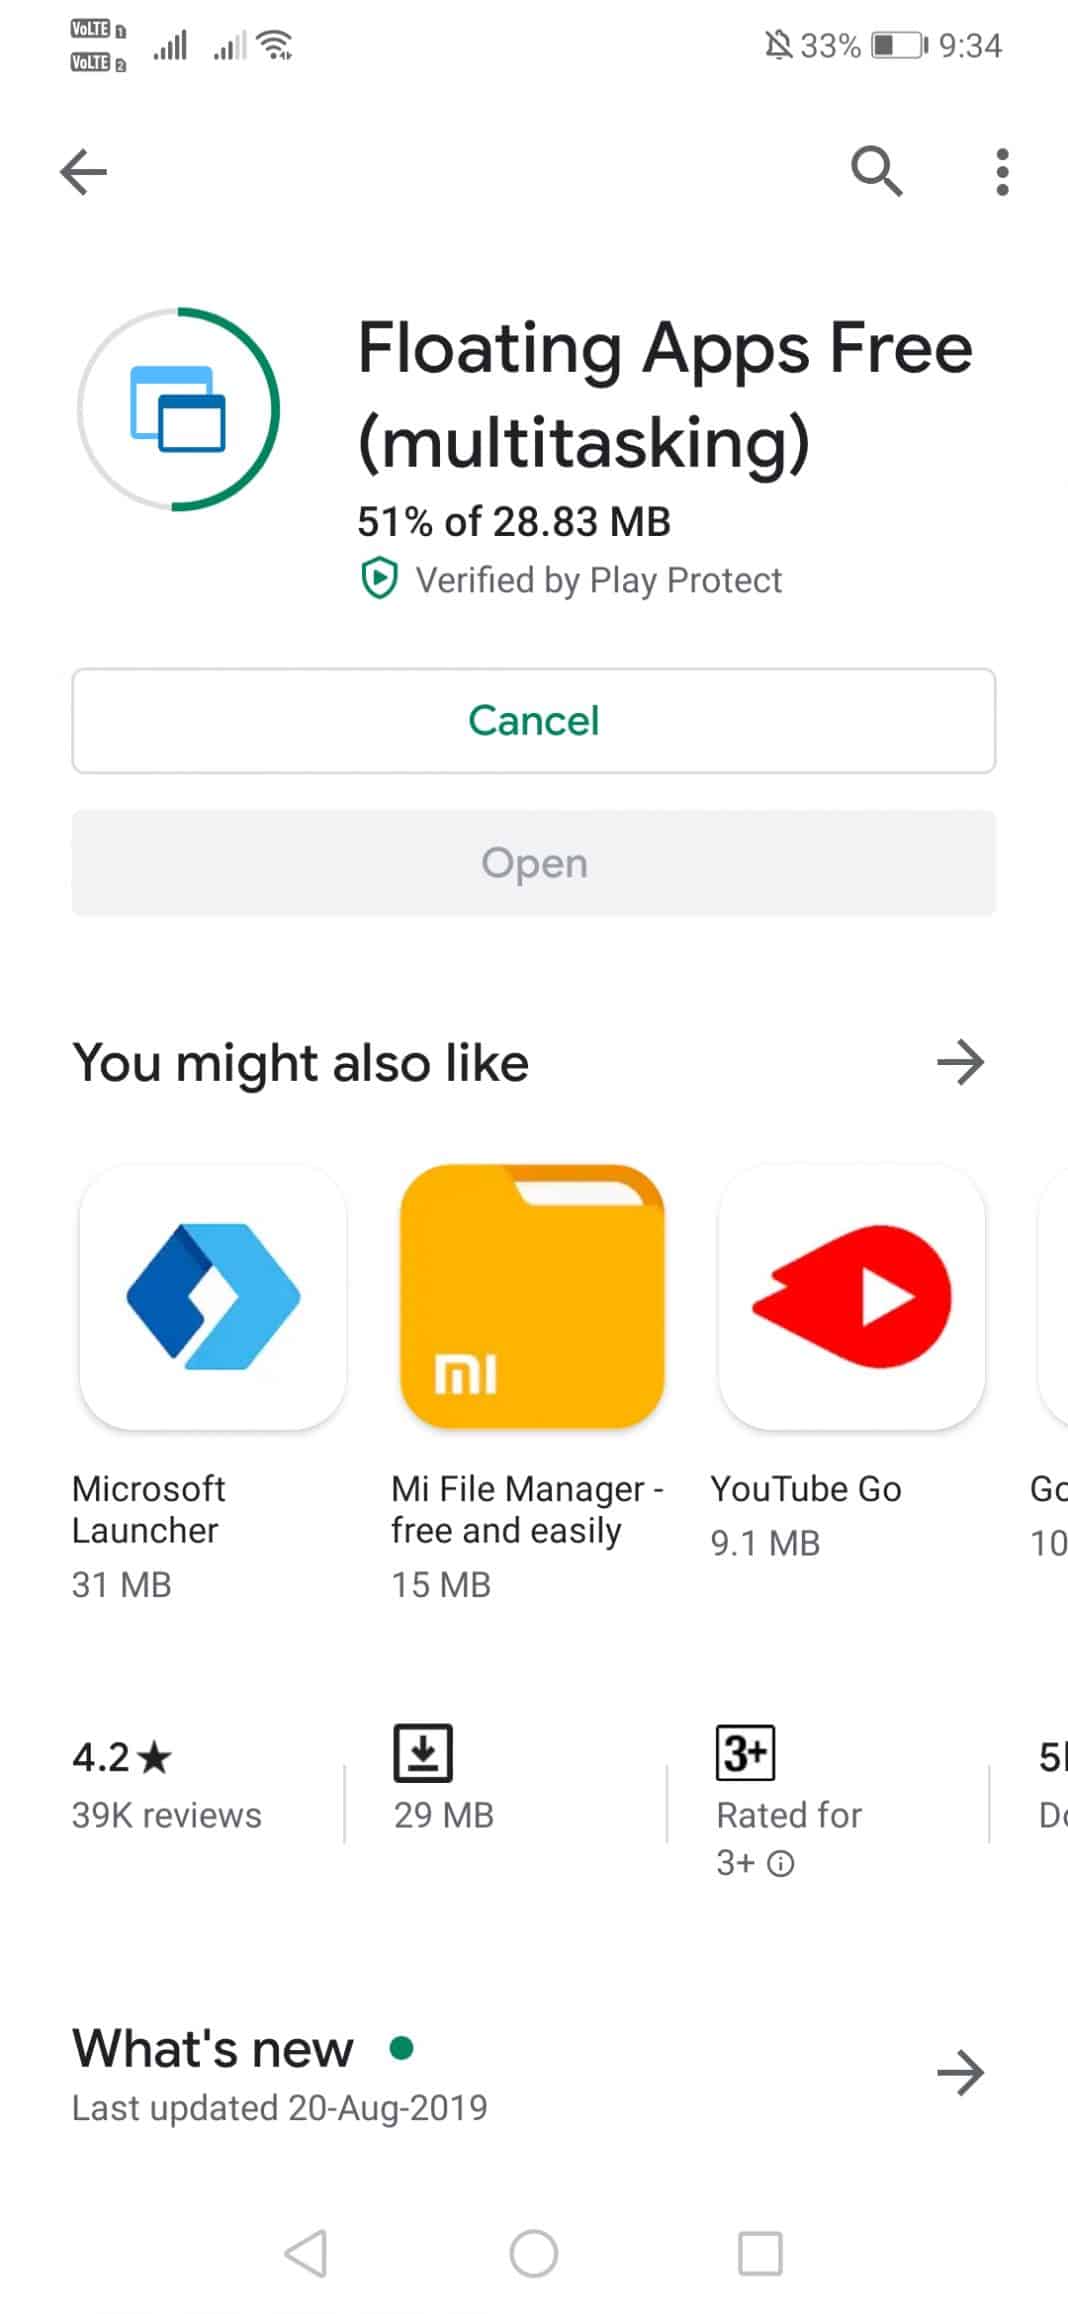
Step 2. Once done, open the app and you will see an interface like below. You need to skip this page.
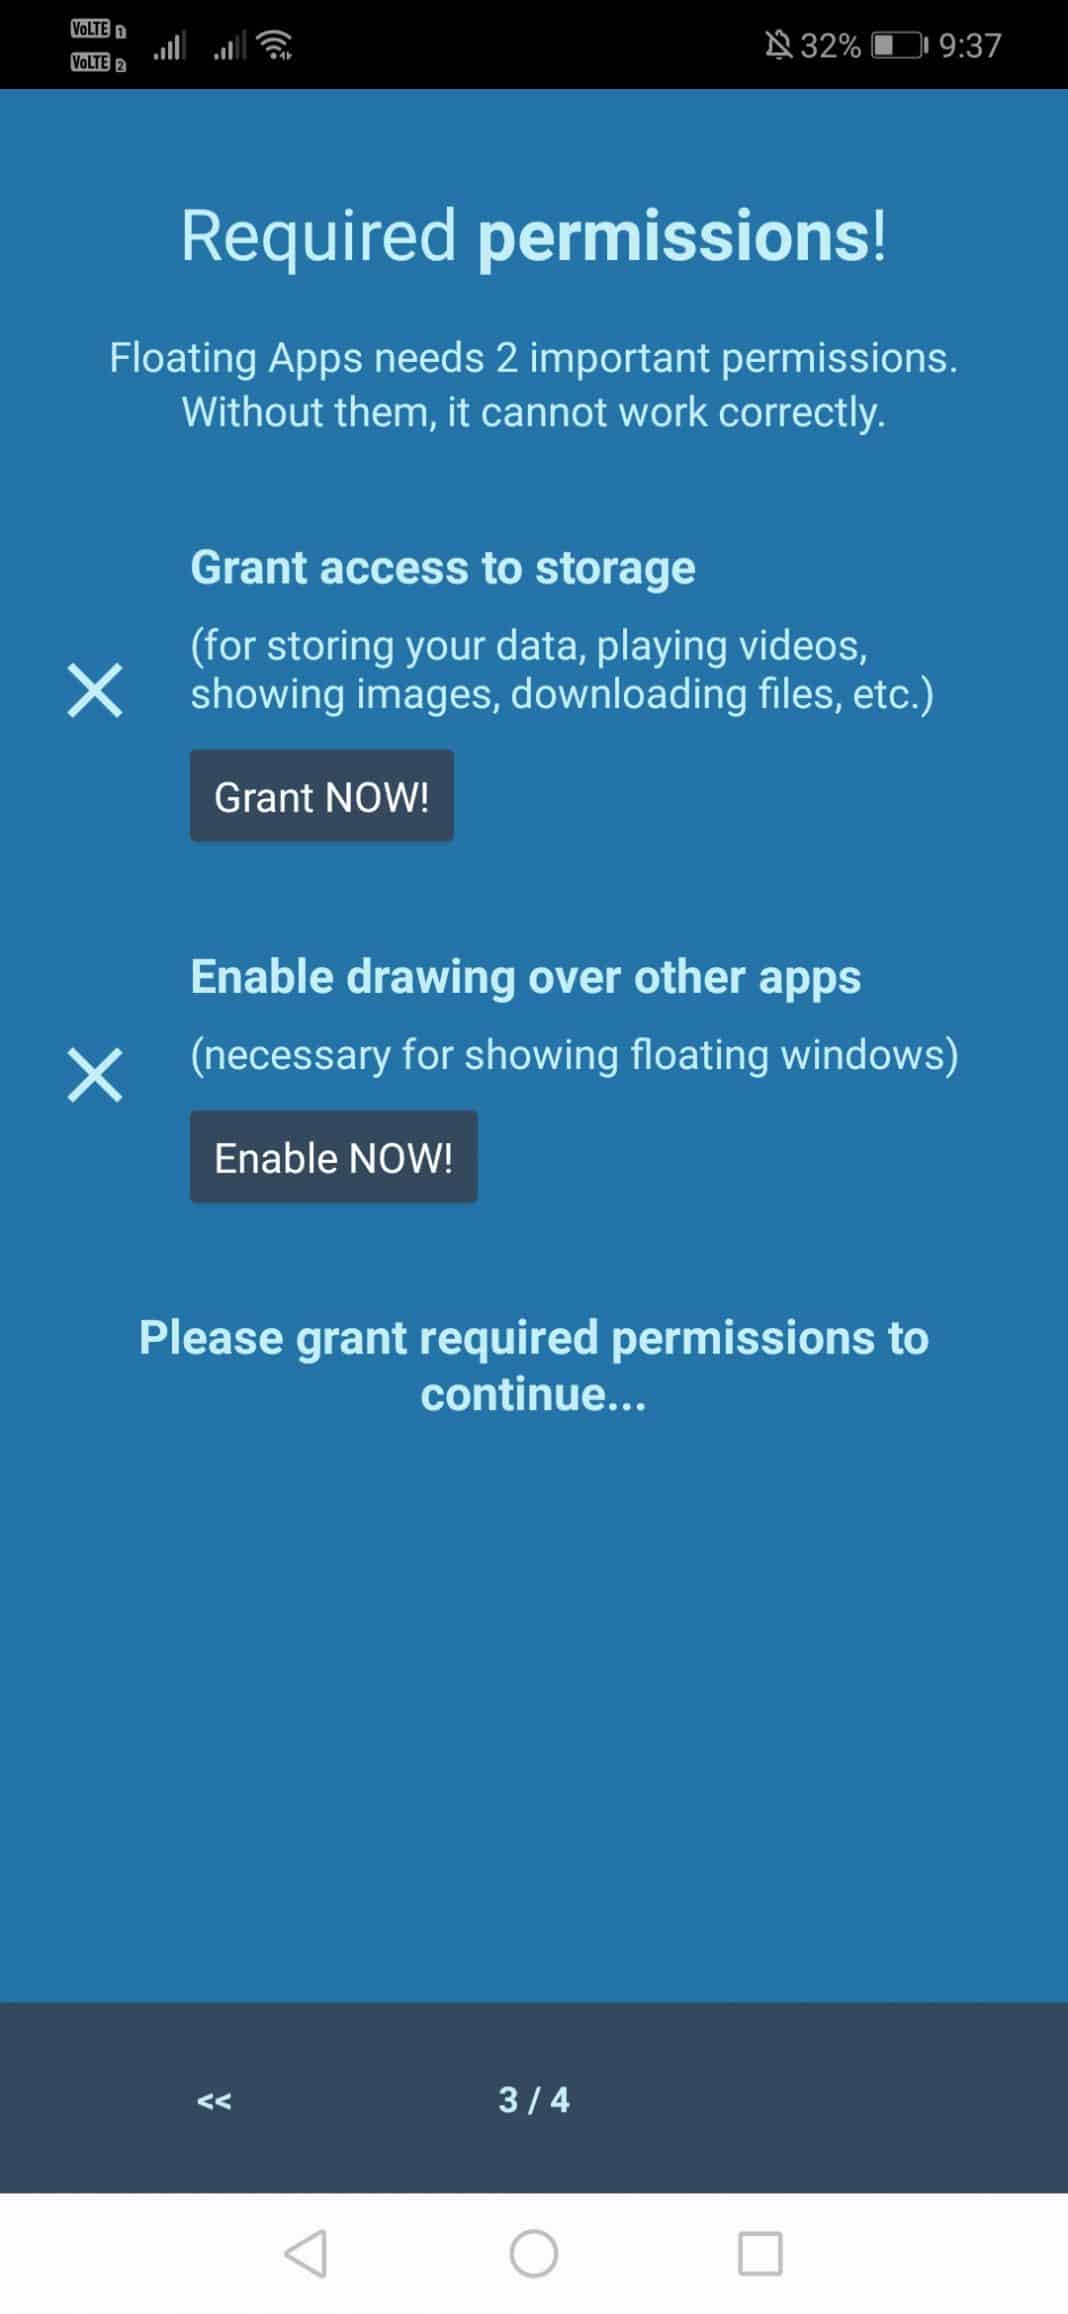
Step 3. Now you will be asked to grant two permissions – Storage and drawing over the apps. Grant the permissions.
Step 4. Now you will see the main interface of the Android app.
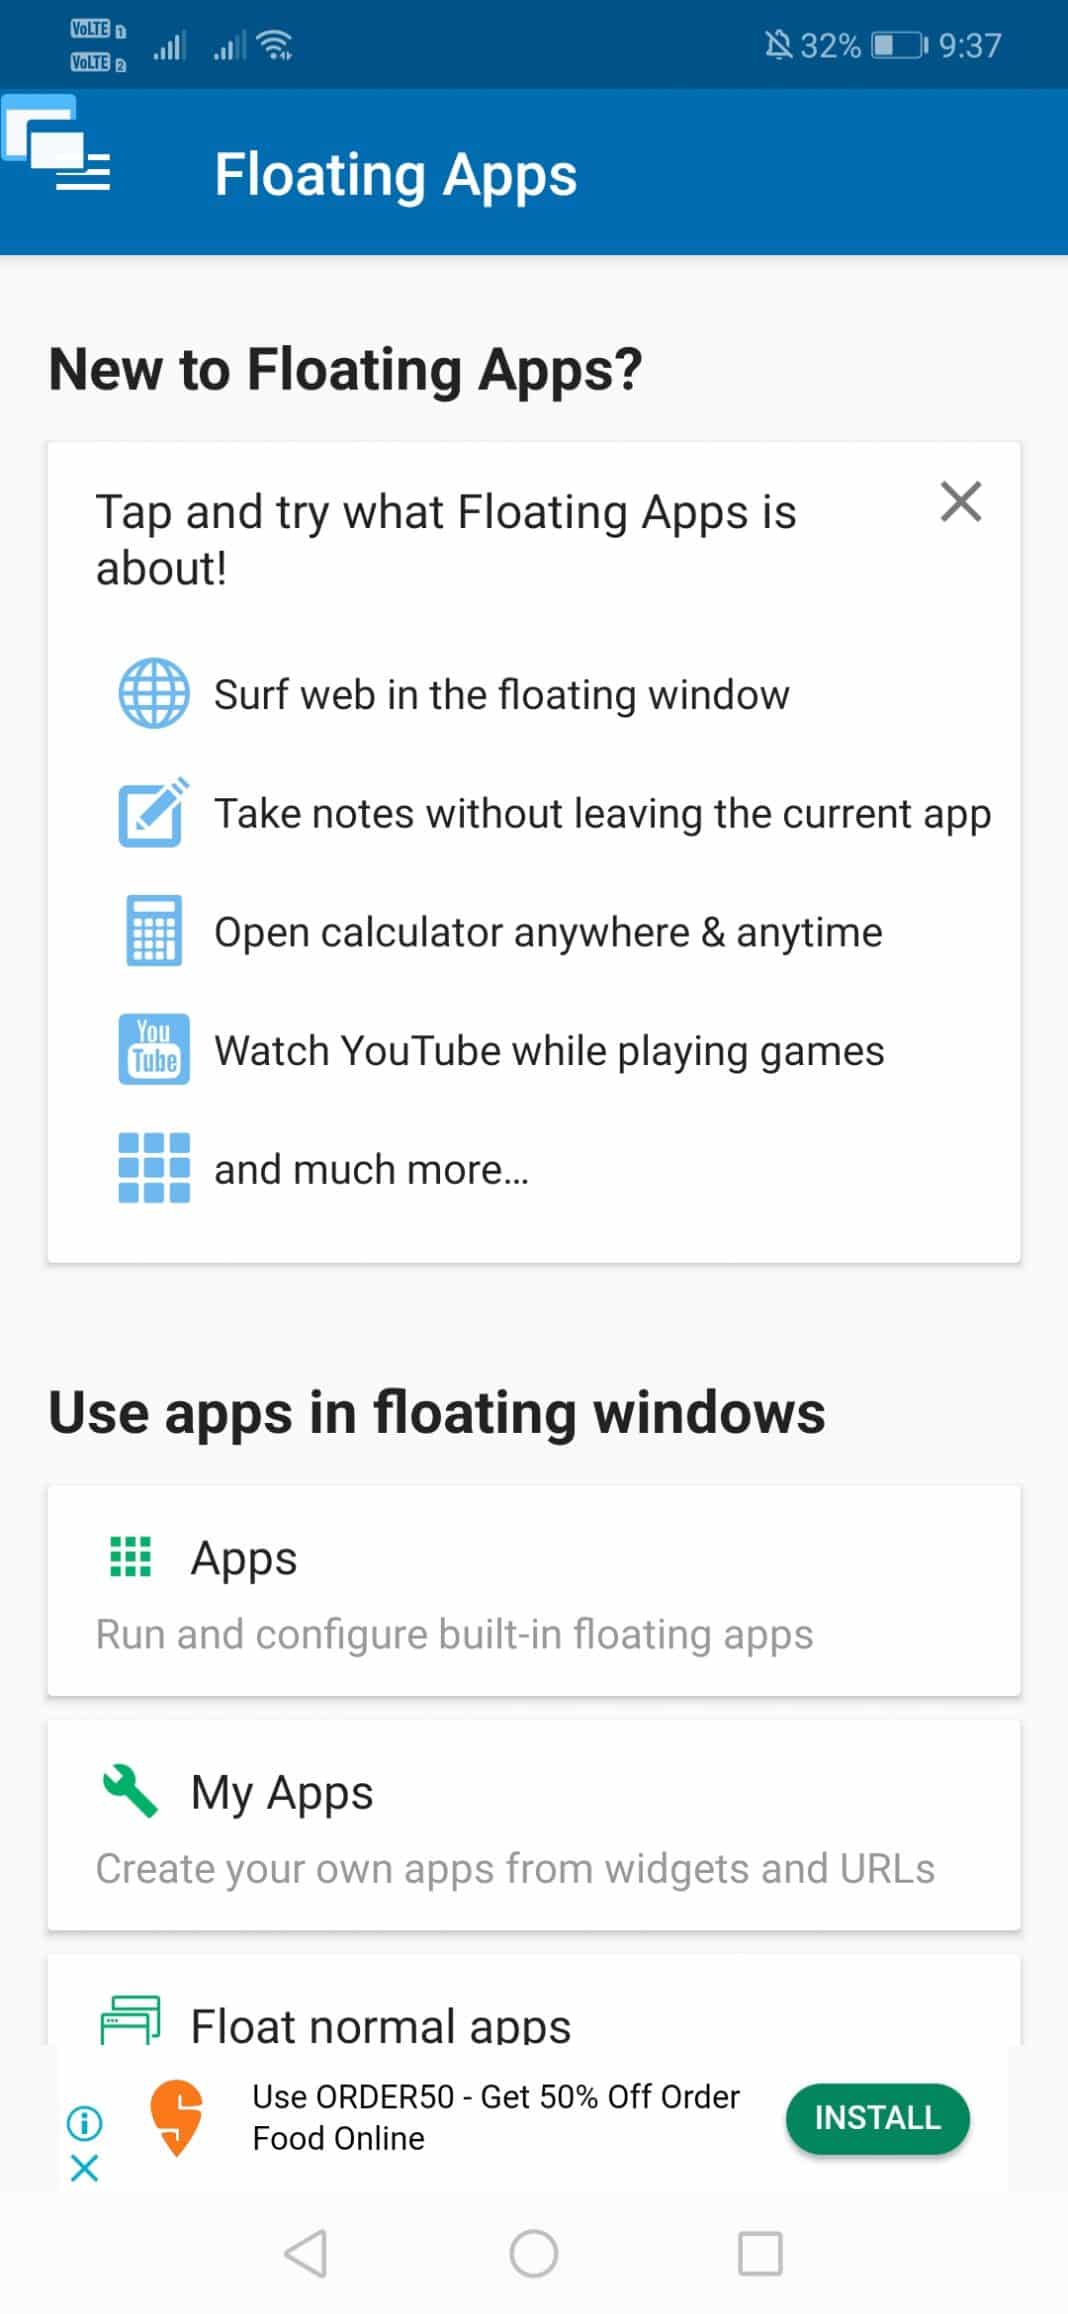
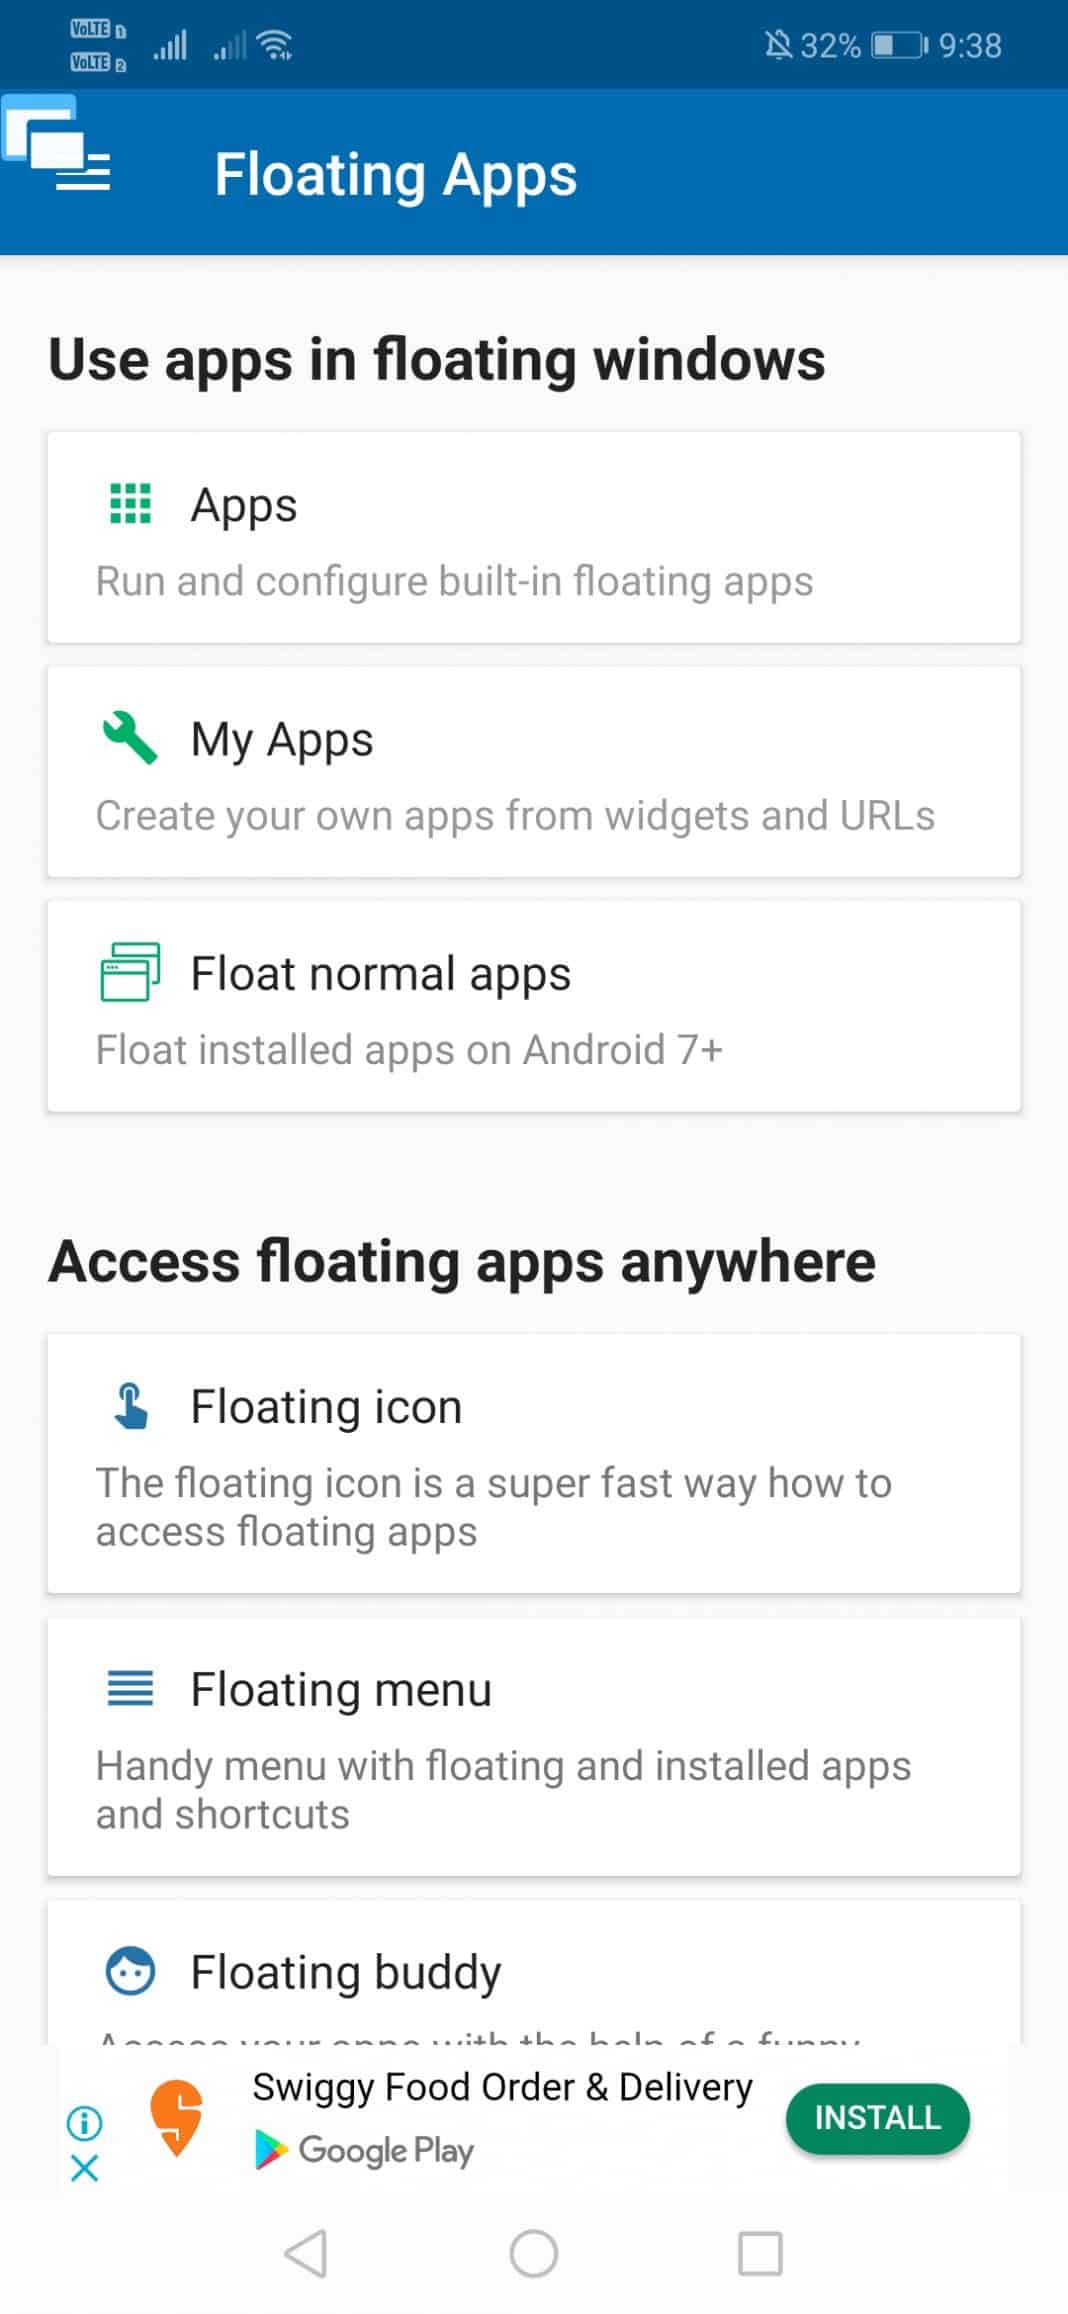
Step 5. Now you need to tap on the ‘Apps’.
Step 6. Now tap on the application and select the app for which you want to create a floating window.

Step 7. I have selected ‘Calendar’ here. Similarly, you can select anything as per your requirement.
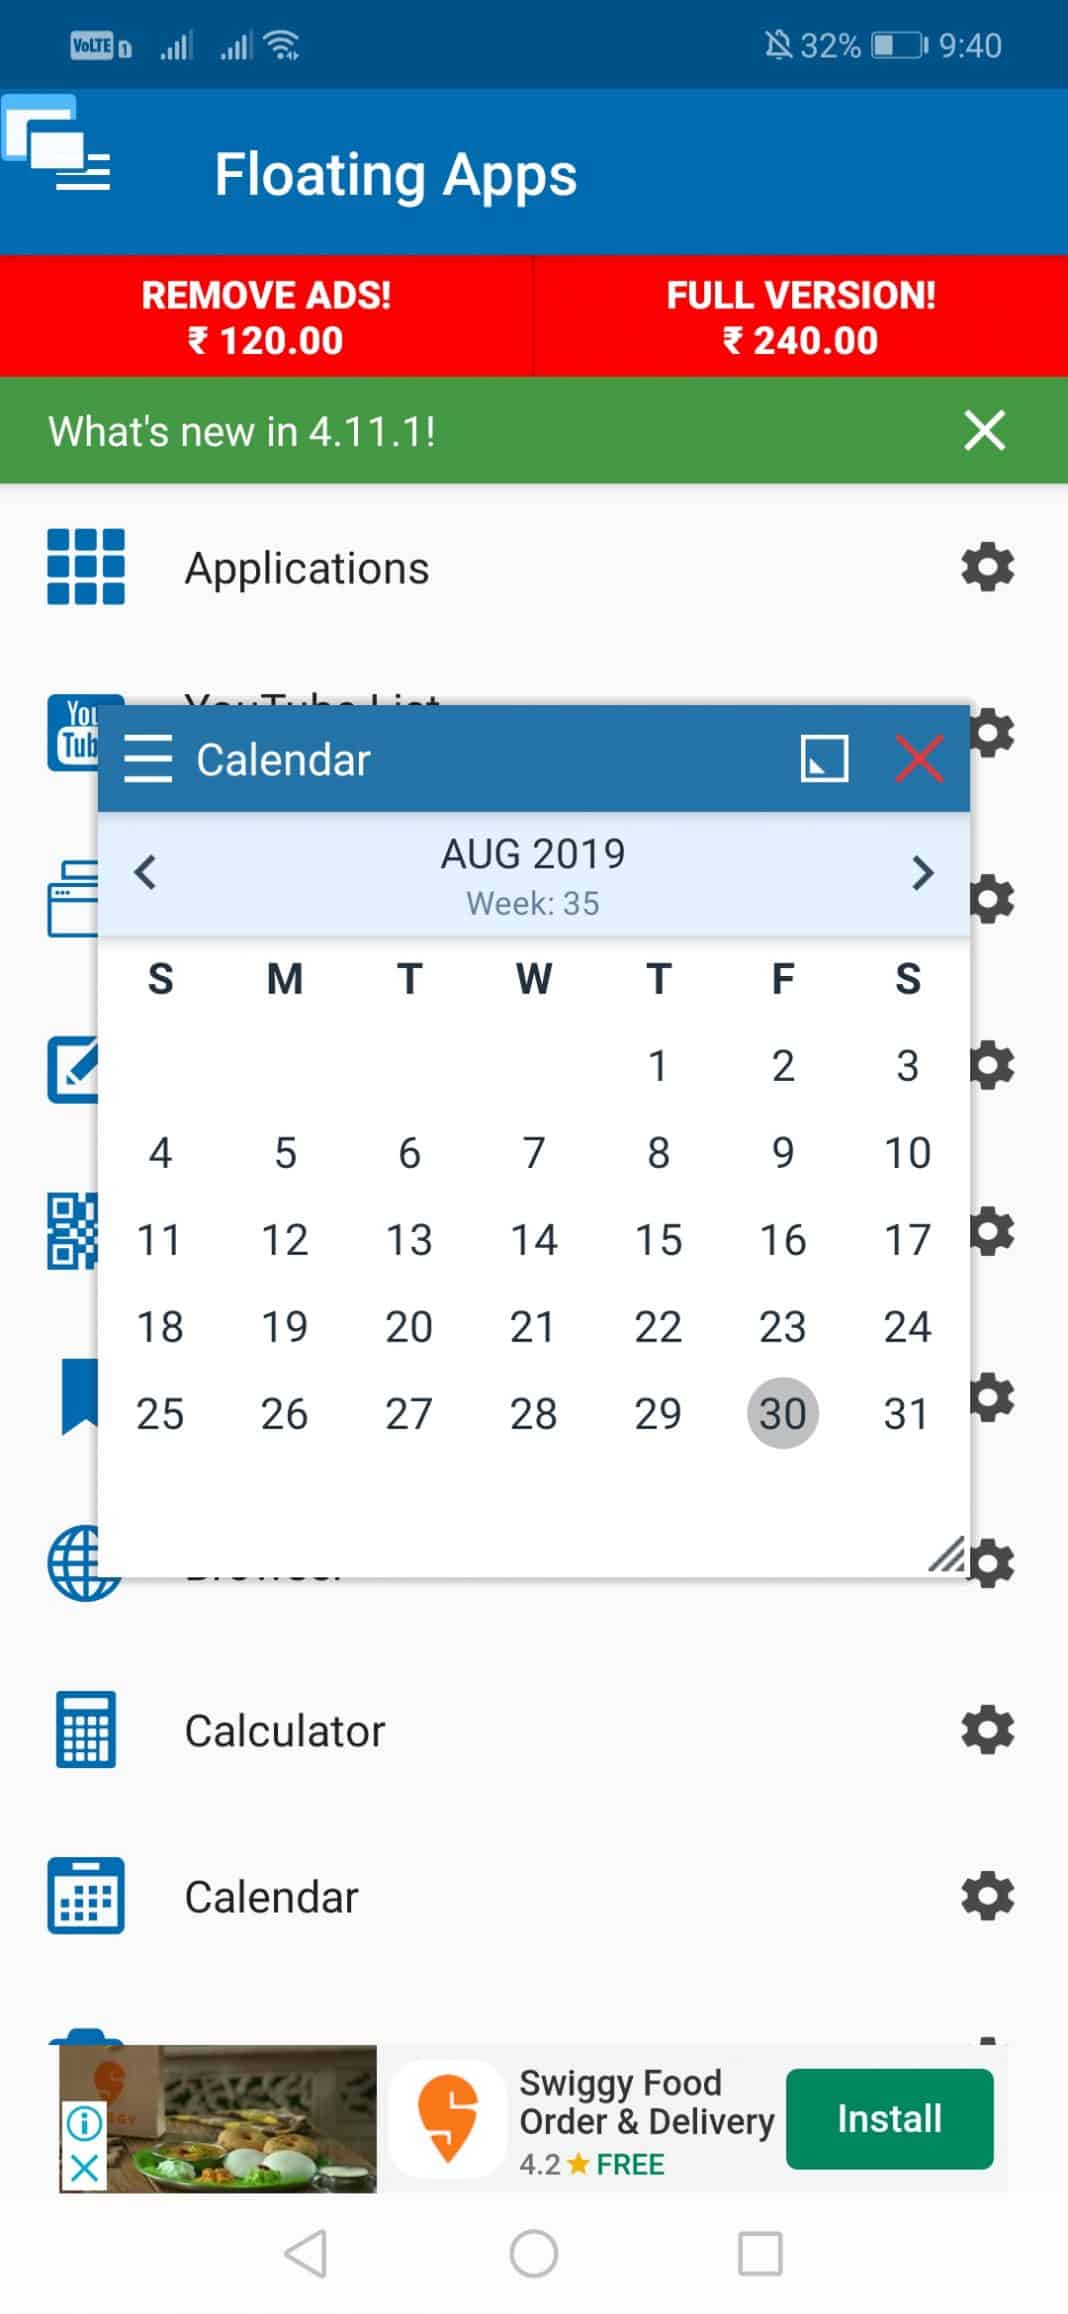
That’s it, you are done! The floating window will be there while using other apps as well.
With the above method, you can easily get floating windows installed on your android very easily. With this, you will have a better multitasking experience in your android. So, install this and change the boring looks of your android into the cool one. Hope you like this, do share with others too. Leave a comment below if you have any related queries with this.
#9 Floating Windows on Android: Shortcomings
Learn how to use floating windows in your Android apps. The ninth lesson teaches you how to overcome some key shortcomings in floating technology.

Have you ever wondered how to make those floating windows used by Facebook Heads and other apps? Have you ever wanted to use the same technology in your app? It’s easy, and I will guide you through the whole process.
I’m the author of Floating Apps; the first app of its kind on Google Play and the most popular one with over 8 million downloads. After 6 years of the development of the app, I know a bit about it. It’s sometimes tricky, and I spent months reading documentation and Android source code and experimenting. I received feedback from tens of thousands of users and see various issues on different phones with different Android versions.
Here’s what I learned along the way.
Before reading this article, it’s recommended to go through Floating Windows on Android 8: The Final App.
In this article, I teach you how to overcome some key shortcomings of floating technology.
Mixed Support
Below, I write about the most significant shortcomings of floating technology. On some devices, some of the described problems may not appear at all. On other devices, some issues exist, some not.
However, if you want your app to be available to all users, you can’t rely on mixed support. Your app would crash frequently, or it wouldn’t be usable for a large group of users.
Believe me, I had the privilege to see my app running on thousands of different devices, and I came across weird and illogical bugs and non-standard behavior.
Dialogs
The standard Android’s AlertDialog needs an underlying activity, and so it’s not possible to use it in floating windows — it would cause the app to crash.
The best solution is to implement custom dialogs based on floating technology.
In Floating Apps, I implemented many different dialog types:
- yes/no
- ok/cancel
- ok only
- select file
- show list
- list of checkboxes
- rich-text
- custom view
- etc.
I also implemented modality. When the dialog is shown, the related window is blocked, and the dialog is brought to the front instead of the window.
A simple confirmation dialog.

Popup Menus
With popup menus, there is a similar problem as for AlertDialog . It’s not supported in floating windows.
As for AlertDialog , I would recommend implementing custom popup menus based on floating technology.
I did for Floating Apps. It relies on popups heavily.
A simple popup menu shown over its parent window.

Copy & Paste
The copy/paste feature is a real problem. It works well only on a few phones. As a rule of thumb, it’s better to consider it unsupported.
Usually, it’s possible to highlight/select text. To be more precise, it’s possible to select words with a long tap. However, handles used for working with the selection are missing, and therefore, there is no way to select anything else than single words.
And there’s another issue. The standard popup with actions (copy, paste, select all, translate, etc.) is somehow connected to the underlying activity on most devices and won’t appear at all.
For short texts, it’s acceptable to implement OnLongClickListener and use custom popup. However, as it’s not possible to select the text this way, it’s necessary to introduce Copy all/ Cut all functionality. The Facebook Heads uses this solution everywhere. In Floating Apps, I use it too for edit fields.
In Floating Apps, there are mini-apps for notes taking and text editing, and being able to use Copy all only, it wouldn’t be a suitable solution. For this reason, these apps use WebView in which a full-size contenteditable div is shown with custom logic for text selection, copying and pasting. It’s not perfect, but better than nothing.
A custom copy/paste popup menu.

Permissions
Obtaining permissions from Android M and above requires a dialog to be shown and the method for issuing the request is available in Activity as well as the mechanism for catching the result.
In fact, there are two possible solutions to this problem.
- You can ask the user to grant all the necessary permissions in the main app before you allow her to access floating windows. Honestly, this solution may scare your users, and as Floating Apps has around 8 required permissions, I believe that almost nobody would grant them all before any real experience with the app.
- Ask the user for the required permission when you need it. This is the correct way how to do it. In this case, the best you can do is to show an invisible activity and raise the permission request dialog from it. It may interrupt the current task, but as this is an only one-time action, it’s not a big deal, and there is no better way to do.
In Floating Apps, every single mini-app defines a set of required permissions, and before the app is launched, the service checks whether all permissions are granted. If not, an invisible activity is shown and ask the user to grant missing ones.
System Interactions
Some things, such as social logins, requesting SD card access, opening with, sharing, etc., can only be invoked from running activity.
I tend to move “configuration” level things to the main app, which is a normal Android app, and once configured, it’s usually possible to use them from inside the service.
For Open With / Share With functionality, a hidden activity is a solution both for showing the dialog to open/share with and for receiving data from other apps.
However, you may need to sacrifice functionality that is not supported in the service. For example, I once wanted to implement floating navigation with MapBox, but their SDK expects an instance of Activity to be available. No luck.
Z-Order
The most recently added View is rendered on top of all others. There is no mechanism for switching the z-order of View s in WindowManager .
In Floating Apps, the switching of floating windows is a complex process.
- The whole window is rendered to an image, and a new ImageView is injected to WindowManager with the image of the original window on exactly the same position. In fact, it looks exactly the same as the original window.
- The original window is removed from the WindowManager but kept alive.
- The original window is added back to the WindowManager , which means that it’s effectively brought to the top.
- The ImageView with the rendered image of the window is removed from the WindowManager .
Using the approach above, switching windows seems like a seamless process without blinking and other undesired effects.
Of course, in Floating Apps, this is automated, and there is a complex logic around this that also controls the current z-order of all windows and intelligently decides when the switching is necessary and when not.
However, removing and re-adding the window may cause a problem with components rendering content directly to the video memory such as SurfaceView , VideoView , etc. For this reason, Floating Apps automatically disable this process for windows of a certain type.
Browser Limitations
WebView works well in floating windows, and it’s mostly possible to reimplement its interactions such as uploading and downloading files, invalid certificate notifications, requests for location permission, etc. to use floating windows/dialogs described above.
However, there are a few actions that may lead to crashes or are unsupported. I hope I listed all the key issues.
— Open With
Android tries to offer available apps, aka Open With feature, when opening links with an unknown protocol. As there is no activity, it may cause crashes. However, this behavior can be easily overridden.
— Copy/Paste
The problem with copy/paste described above also exists for WebView , and it’s even worse.
It’s possible to use WebView to implement a workaround for unsupported text selection because we have full control over the code. However, for other websites, the situation is much complicated.
However, it’s possible to get the selected text in the WebView using something like:
And paste the text to WebView using simulating key strokes with dispatchKeyEvent .
— Long-Click On Links & Images
Long-clicks may lead to crashes depending on the implementation, and certainly, it’s not possible to invoke standard actions like Open In New Window , Download Image , etc.
The solution is to set custom OnLongClickListener for the WebView and get use webView.getHitTestResult() to get information about the clicked element.
Don’t forget to return false when webView.getHitTestResult() returns null to let the WebView process the long click correctly, e.g. for selecting texts.
HTML element shows a dialog with available options and cause your app to crash. It’s a big deal, and the only solution is to hook the element, override its action, and show custom UI based on floating technology.
It’s not a simple task and needs a lot of testing. Don’t forget that options in may be nested and disabled.
The Final Note
You learned how to implement floating windows for your app. It’s a powerful technology, but it comes with its price.
Use it wisely where it makes sense and try to avoid situations in which you get to shortcomings mentioned in this article and some others I forgot. It’s not a simple task to correctly implement all the workarounds to be reliable across different phones and Android versions.
Enjoy it and feel free to share your apps with me.
Also, I will be glad if you decide to localize your apps with Localazy. I put the very same love into it as I did with Floating Apps.
Continue to the last article with tips & tricks I learned the hard way.
Stay Tuned
Eager to learn more about Android development? Follow me (@vaclavhodek) and Localazy (@localazy) on Twitter, or like Localazy on Facebook.
The Series
This article is part of the Floating Windows on Android series.


