- How to Flush and Reset the DNS Cache in Windows 10
- Option 1 – Windows Command
- Option 2 – Windows PowerShell
- Как очистить кэш DNS
- Microsoft Windows
- Windows 10
- Windows 8 / Windows 8.1
- Windows Vista / Windows 7
- Windows 98/NT/2000/XP
- Apple OS X
- macOS Sierra
- Mac OS X El Capitan
- Mac OS X Yosemite
- Mac OS X Mavericks
- Mac OS X Mountain Lion
- Mac OS X Lion
- Mac OS X Snow Leopard
- Mac OS X Leopard and below
- Other Operating Systems
- Linux
- Как очистить кэш DNS в Windows
- Перезапуск ДНС-клиента Windows
- Удаление кэша через командную строку
- Очистка кэша в браузерах на движке Хромиум
- 3 Easy Ways To Flush DNS Cache In Windows 10/ 8.1 and 7
- Share this post
- A couple of words on DNS
- What is the DNS Cache?
- How flushing the DNS Cache can help you
- How to see your current DNS Cache
- Flush DNS Cache, Option 1 – Windows Command
- Flush DNS Cache, Option 2 – Windows PowerShell
- Flush DNS Cache, Option 3 – Command prompt
- Conclusion
How to Flush and Reset the DNS Cache in Windows 10
By Mitch Bartlett 15 Comments
Flushing the DNS resolver cache can help resolve DNS related problems in Microsoft Windows 10. Issues would include web site not found errors or not being able to view certain web pages that have changed.
Option 1 – Windows Command
To reset the DNS resolver cache, perform the following steps:
- Select the “Start” button, then type “cmd“.
- Right-click “Command Prompt“, then choose “Run as Administrator“.
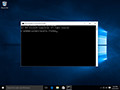
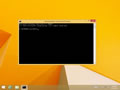
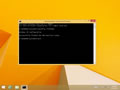
- Type ipconfig /flushdns then press “Enter“. (be sure there is a space before the slash)

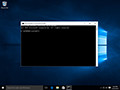
A command box will flash on the screen for a split second and the DNS Resolver cache is cleared.
Option 2 – Windows PowerShell
- Select the “Start” button, then type “powershell“.
- Select “Windows PowerShell“.
- Type the following command, then press “Enter“:
- Clear-DnsClientCache
This article applies to Windows 10, 8, 7, XP, 2000, 2003 and 2008.
What is the DNS Resolver Cache?
Whenever you visit a website using it’s domain name (i.e. microsoft.com), your browser is directed to a DNS server where it learns the IP address of that website. You are then directed to that website. A record of the IP address that domain name points to is created within Windows so that if you visit that same website again, the information is accessed quicker. These records that get created make up the DNS Resolver Cache.
Why would flushing the DNS Resolver Cache fix anything?
Sometimes an IP address to a site may change. If the DNS Resolver Cache has the old IP address record, it may result in your computer not being able to reach the site. Cached data can also become corrupt. Therefore, clearing it is a step you can take whenever you cannot connect to a site.
Can I view the data in the DNS Resolver Cache?
Yes. From a command prompt, you can use the “ipconfig /displaydns” command or the “Get”>-DnsClientCache” PowerShell command to view the data.
Как очистить кэш DNS

Большинство операционных систем и клиентов DNS автоматически кэшируют IP-адреса и другие результаты DNS, это делается для того, чтобы ускорить последующие запросы к тому же имени хоста. Иногда плохие результаты будут кэшироваться и поэтому должны быть удалены из кэша, чтобы вы могли правильно общаться с хостом. Все основные операционные системы позволяют форсировать этот процесс. Ниже приведены общие шаги, которые необходимо выполнить, чтобы очистить кэш DNS.
Microsoft Windows
Windows 10
Очистка кеша DNS в Windows 10 — очень простой процесс. Из-за разрешений безопасности системы вы должны убедиться, что вы запускаете командную строку от имени администратора.
- Убедитесь, что вы на рабочем столе Windows 10.
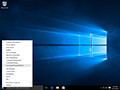
- Щелкните правой кнопкой мыши меню «Пуск» и выберите в меню Command Prompt (Admin)
- Введите команду ipconfig /flushdns

Windows 8 / Windows 8.1
Очистка кеша DNS в Windows 8 и Windows 8.1 — очень простой процесс. Из-за разрешений безопасности системы вы должны убедиться, что вы запускаете командную строку от имени администратора.
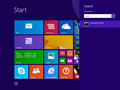
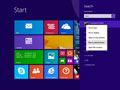
- Убедитесь, что вы находитесь на начальном экране Windows 8.
- Просто введите cmd , и справа появится панель поиска Windows с результатами поиска.
- Щелкните правой кнопкой мыши Command Prompt и выберите Запуск от имени администратора
- введите команду ipconfig /flushdns


Windows Vista / Windows 7
Очистка DNS в более новых версиях Windows почти так же проста, как и в более ранних версиях, но из-за дополнений безопасности Microsoft вы должны запустить командную строку с правами администратора.
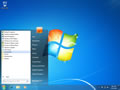
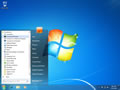
- Нажмите кнопку «Пуск» и перейдите к командной строке (Пуск> Все программы> Стандартные> Командная строка)
- Убедитесь, что вы щелкнули правой кнопкой мыши по приложению командной строки и выбрали «Запуск от имени администратора».
- Введите команду ipconfig /flushdns
Примечание. Также можно ввести cmd в поле поиска в меню «Пуск» Windows Vista / Windows 7, а затем щелкнуть правой кнопкой мыши результат cmd.exe вместо необходимости переходить по различным подпунктам, меню.
Windows 98/NT/2000/XP
Очистка DNS в Windows — это простой процесс, ниже описаны шаги, которые необходимо выполнить, если вы хотите очистить кэш DNS.
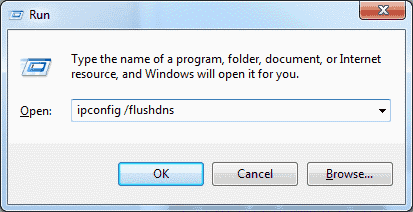
- Откройте командную строку (Пуск> Выполнить> cmd.exe > ОК).
- Введите команду ipconfig /flushdns
Apple OS X
Очистка DNS в Mac OS X — это простой процесс, но предпринятые шаги будут зависеть от того, какую версию OS X вы используете.
macOS Sierra
Если вы используете Mac OS X 10.11, вам нужно выполнить следующие шаги:
- Откройте терминал.
- Запустите команду sudo killall -HUP mDNSResponder
Mac OS X El Capitan
Если вы используете Mac OS X 10.11, вам нужно выполнить следующие шаги:
- Откройте терминал.
- Запустите команду sudo killall -HUP mDNSResponder
Mac OS X Yosemite
Если вы работаете в Mac OS X 10.10, вам необходимо выполнить следующие шаги:
- Откройте терминал.
- Запустите команду sudo discoveryutil udnsflushcaches
Mac OS X Mavericks
Если вы работаете в Mac OS X 10.9, вам необходимо выполнить следующие шаги:
- Откройте терминал.
- Запустите команду sudo killall -HUP mDNSResponder
Mac OS X Mountain Lion
Если вы используете Mac OS X 10.8, вам необходимо выполнить следующие шаги:
- Откройте терминал.
- Запустите команду sudo killall -HUP mDNSResponder
Mac OS X Lion
Если вы работаете в Mac OS X 10.7, вам необходимо выполнить следующие шаги:
- Откройте терминал.
- Запустите команду sudo killall -HUP mDNSResponder
Mac OS X Snow Leopard
Если вы работаете в Mac OS X 10.6, вам необходимо выполнить следующие шаги:
- Откройте терминал.
- Запустите команду sudo dscacheutil -flushcache
Mac OS X Leopard and below
Если вы используете Mac OS X 10.5.1 или ниже, вам необходимо выполнить следующие шаги:
- Откройте терминал.
- Запустите команду sudo lookupd -flushcache
Other Operating Systems
Linux
Если вы используете демон кэширования службы имен nscd и хотите очистить кэш DNS, вам потребуется выполнить следующее:
Как очистить кэш DNS в Windows
Каждый адрес в сети имеет свой числовой эквивалент — IP. Чтобы упростить работу в интернете, используется механизм DNS, который помогает устанавливать соответствие между неудобными для использования IP-адресами и привычными нам их текстовыми эквивалентами. Кэширование DNS происходит на каждом компьютере — это нужно для ускорения работы, чтобы устройство каждый раз не обращалось к серверу.
По мере работы, в кэше могут накапливаться ошибки, что может вызвать сбои в работе. Иными словами, страницы попросту не будут отображаться в браузере даже при исправном соединении. Чтобы избежать ошибок, нужно регулярно сбрасывать кэш DNS, вне зависимости от версии операционной системы, будь это Windows 7,8 или даже 10.
Перезапуск ДНС-клиента Windows
Одновременно нажмите клавиши Win и R. Откроется командная строка, куда нужно ввести «services.msc». Запустится панель управления службами. Выберите службу «DNS-клиент» и нажмите «перезапустить». Это вызовет сброс кэша ДНС.
Удаление кэша через командную строку
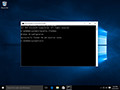
Откройте командную строку. Если вы не знаете, где она находится, то просто напишите в поиске «командная строка».
Она выглядит одинаково во всех версиях Windows. Скопируйте команду «ipconfig /flushdns» и нажмите клавишу enter. После этого кэш будет очищен. Если всё пройдёт успешно, то текст будет как на картинке.
Очистка кэша в браузерах на движке Хромиум
Свой кэш ДНС есть и в браузерах. Разумеется, его тоже можно удалить. К браузерам на базе «Хромиум» относятся: Яндекс.Браузер, Opera, Амиго, Chrome и тд. Очистить кэш можно командой «название браузера на английском://net-internals/#dns», которая вводится прямо в адресную строку. Далее просто кликните по «Clear host cache». Кэш будет полностью удалён.
3 Easy Ways To Flush DNS Cache In Windows 10/ 8.1 and 7

Share this post
A couple of words on DNS
DNS stands for Domain Name System. It translates website names into IP addresses which computers can understand. This happens for every website you want to visit. Every time a user visits a website by its hostname, the web browser initiates a request out to the internet, but this request cannot be completed until the site’s name is “converted” into an IP address.
Windows comes with an option which stores the specified DNS server address to speed up browsing experience. It makes the TCP/IP stack use that IP address and refers to this user-specified DNS service or gateway-specified service to resolve the domain name of a website to its IP address and load it in your web browser.
In most cases, your Internet Service Provider (ISP) provides their own DNS server. This server is usually specified in your router or automatically fetched from the ISP. The internet relies on the DNS to maintain an index of all public websites and their corresponding IP addresses.
In some cases, you may want to switch to an external DNS server. Some reasons include:
- it may update its cache faster,
- a third-party DNS service can have a built-in ad blocker,
- other DNS services can provide extra security
What is the DNS Cache?
Even though there are tons of public DNS servers your network can use to try to speed up the conversion process, it’s still quicker to have a local copy, which is where DNS comes in.
Whenever you visit a website using it’s domain name, your browser is directed to a DNS server where it learns the IP address of that website. Then, you are directed to that website.
The primary function is storing the location of web servers that contain web pages which you have recently accessed. If the location of any web server changes before the entry in your DNS Cache updates, then you can no longer access that site.
A record of the IP address is created within Windows so if you visit that same website again, the information is accessed quicker. These records make up the DNS Cache (sometimes called a DNS resolver cache).
How flushing the DNS Cache can help you
If you can’t access a web page in spite of the page existing on the internet it indicates DNS Cache on the local server may be corrupted or broken.
Sometimes bad results are cached, maybe due to DNS Cache Poisoning and Spoofing. Therefore they need to be cleared from the cache in order to allow your PC to communicate with the host correctly.
Or sometimes an IP address to a site may change. If the DNS Cache has the old IP address record, it may result in your computer not being able to reach the site. Therefore, clearing it is a step you can take whenever you cannot connect to a site.
How to see your current DNS Cache
To see your current Windows DNS Cache, open a new elevated command prompt instance and type the following command:

The command will produce a very long output.

For your convenience, you can redirect it to a file. Use the following command:
Then you can open the dns.txt file created on your Desktop and inspect its entries.

Flush DNS Cache, Option 1 – Windows Command
- Hold down the Windows key and press “ R ” to bring up the Run dialog box.
- Type ipconfig /flushdns then press “Enter “.

A command box will flash on the screen and the DNS Resolver cache is cleared.
Flush DNS Cache, Option 2 – Windows PowerShell
- Select the “ Start ” button, then type “ powershell “.
- Select “ Windows PowerShell “.
- Type Clear-DnsClientCache , then press “ Enter “.

Flush DNS Cache, Option 3 – Command prompt
- Click on start menu search and type ‘command’.
- From search results right click on Command Prompt (make sure you’re running it as administrator).
- Type ipconfig /flushdns and hit enter.

Conclusion
When you flush DNS Cache, it removes all the entries and deletes any invalid records. Thus forcing your computer to repopulate those addresses the next time you try accessing those websites. These new addresses are taken from the DNS server your network is set up to use.
A router can have a DNS cache as well. Which is why rebooting a router is often a troubleshooting step. For the same reason you might flush DNS cache on your computer, you can reboot your router to clear the DNS entries stored in its temporary memory.
Check out this article to find out the current best DNS Servers which you can use for free!


