- Windows install
- System requirements
- Get the Flutter SDK
- Update your path
- Run flutter doctor
- Android setup
- Install Android Studio
- Set up your Android device
- Set up the Android emulator
- Web setup
- Flutter — Installation
- Installation in Windows
- Installation in MacOS
- Set up an editor
- Install Android Studio
- Install the Flutter and Dart plugins
- Linux or Windows
- Install VS Code
- Install the Flutter and Dart plugins
- Validate your setup with the Flutter Doctor
- Install Emacs
- Install the lsp-dart package
- Flutter часть 1. Установка и настройка
- Содержание
- Особености Flutter
- Всё есть виджет
- Иерархия слоёв
- Установка Flutter
- Установка плагинов в Android studio (Flutter и Dart)
- Создание нового проекта
Windows install
System requirements
To install and run Flutter, your development environment must meet these minimum requirements:
- Operating Systems: Windows 7 SP1 or later (64-bit), x86-64 based
- Disk Space: 1.64 GB (does not include disk space for IDE/tools).
- Tools: Flutter depends on these tools being available in your environment.
- Windows PowerShell 5.0 or newer (this is pre-installed with Windows 10)
Git for Windows 2.x, with the Use Git from the Windows Command Prompt option.
If Git for Windows is already installed, make sure you can run git commands from the command prompt or PowerShell.
Get the Flutter SDK
Download the following installation bundle to get the latest stable release of the Flutter SDK:
For other release channels, and older builds, see the SDK releases page.
Extract the zip file and place the contained flutter in the desired installation location for the Flutter SDK (for example, C:\src\flutter ).
Warning: Do not install Flutter in a directory like C:\Program Files\ that requires elevated privileges.
If you don’t want to install a fixed version of the installation bundle, you can skip steps 1 and 2. Instead, get the source code from the Flutter repo on GitHub, and change branches or tags as needed. For example:
You are now ready to run Flutter commands in the Flutter Console.
Update your path
If you wish to run Flutter commands in the regular Windows console, take these steps to add Flutter to the PATH environment variable:
- From the Start search bar, enter ‘env’ and select Edit environment variables for your account.
- Under User variables check if there is an entry called Path:
- If the entry exists, append the full path to flutter\bin using ; as a separator from existing values.
- If the entry doesn’t exist, create a new user variable named Path with the full path to flutter\bin as its value.
You have to close and reopen any existing console windows for these changes to take effect.
Note: As of Flutter’s 1.19.0 dev release, the Flutter SDK contains the dart command alongside the flutter command so that you can more easily run Dart command-line programs. Downloading the Flutter SDK also downloads the compatible version of Dart, but if you’ve downloaded the Dart SDK separately, make sure that the Flutter version of dart is first in your path, as the two versions might not be compatible. The following command tells you whether the flutter and dart commands originate from the same bin directory and are therefore compatible.
As shown above, the command dart from the Flutter SDK doesn’t come first. Update your path to use commands from C:\path-to-flutter-sdk\bin\ before commands from C:\path-to-dart-sdk\bin\ (in this case). After restarting your shell for the change to take effect, running the where command again should show that the flutter and dart commands from the same directory now come first.
However, if you are using PowerShell , in it where is an alias of Where-Object command, so you need to use where.exe instead.
To learn more about the dart command, run dart -h from the command line, or see the dart tool page.
Run flutter doctor
From a console window that has the Flutter directory in the path (see above), run the following command to see if there are any platform dependencies you need to complete the setup:
This command checks your environment and displays a report of the status of your Flutter installation. Check the output carefully for other software you might need to install or further tasks to perform (shown in bold text).
The following sections describe how to perform these tasks and finish the setup process. Once you have installed any missing dependencies, you can run the flutter doctor command again to verify that you’ve set everything up correctly.
Note: If flutter doctor returns that either the Flutter plugin or Dart plugin of Android Studio are not installed, move on to Set up an editor to resolve this issue.
Warning: The flutter tool uses Google Analytics to anonymously report feature usage statistics and basic crash reports. This data is used to help improve Flutter tools over time.
Flutter tool analytics are not sent on the very first run. To disable reporting, type flutter config —no-analytics . To display the current setting, type flutter config . If you opt out of analytics, an opt-out event is sent, and then no further information is sent by the Flutter tool.
By downloading the Flutter SDK, you agree to the Google Terms of Service. Note: The Google Privacy Policy describes how data is handled in this service.
Moreover, Flutter includes the Dart SDK, which may send usage metrics and crash reports to Google.
Android setup
Note: Flutter relies on a full installation of Android Studio to supply its Android platform dependencies. However, you can write your Flutter apps in a number of editors; a later step discusses that.
Install Android Studio
- Download and install Android Studio.
- Start Android Studio, and go through the ‘Android Studio Setup Wizard’. This installs the latest Android SDK, Android SDK Command-line Tools, and Android SDK Build-Tools, which are required by Flutter when developing for Android.
Set up your Android device
To prepare to run and test your Flutter app on an Android device, you need an Android device running Android 4.1 (API level 16) or higher.
- Enable Developer options and USB debugging on your device. Detailed instructions are available in the Android documentation.
- Windows-only: Install the Google USB Driver.
- Using a USB cable, plug your phone into your computer. If prompted on your device, authorize your computer to access your device.
- In the terminal, run the flutter devices command to verify that Flutter recognizes your connected Android device. By default, Flutter uses the version of the Android SDK where your adb tool is based. If you want Flutter to use a different installation of the Android SDK, you must set the ANDROID_SDK_ROOT environment variable to that installation directory.
Set up the Android emulator
To prepare to run and test your Flutter app on the Android emulator, follow these steps:
- Enable VM acceleration on your machine.
- Launch Android Studio, click the AVD Manager icon, and select Create Virtual Device…
- In older versions of Android Studio, you should instead launch Android Studio > Tools > Android > AVD Manager and select Create Virtual Device…. (The Android submenu is only present when inside an Android project.)
- If you do not have a project open, you can choose Configure > AVD Manager and select Create Virtual Device…
- Choose a device definition and select Next.
- Select one or more system images for the Android versions you want to emulate, and select Next. An x86 or x86_64 image is recommended.
- Under Emulated Performance, select Hardware — GLES 2.0 to enable hardware acceleration.
Verify the AVD configuration is correct, and select Finish.
For details on the above steps, see Managing AVDs.
- In Android Virtual Device Manager, click Run in the toolbar. The emulator starts up and displays the default canvas for your selected OS version and device.
- Start Android Studio.
- Open plugin preferences (Configure > Plugins as of v3.6.3.0 or later).
- Select the Flutter plugin and click Install.
- Click Yes when prompted to install the Dart plugin.
- Click Restart when prompted.
- Open plugin preferences (File > Settings > Plugins).
- Select Marketplace, select the Flutter plugin and click Install.
- Start VS Code.
- Invoke View > Command Palette….
- Type “install”, and select Extensions: Install Extensions.
- Type “flutter” in the extensions search field, select Flutter in the list, and click Install. This also installs the required Dart plugin.
- Invoke View > Command Palette….
- Type “doctor”, and select the Flutter: Run Flutter Doctor.
- Review the output in the OUTPUT pane for any issues. Make sure to select Flutter from the dropdown in the different Output Options.
- Flutter engine.
- Foundation library.
- Design-specific widgets.
- Material Design widgets — графические компоненты реализующие спецификацию material design.
- Cupertino widgets — набор реализующий Apple iOS дизайн.
- структурные элементы, например кнопки или меню
- стилистические элементы, например шрифты или цветовую схему
- разметку макета, например отступы.
Web setup
Flutter has support for building web applications in the stable channel. Any app created in Flutter 2 automatically builds for the web. To add web support to an existing app, follow the instructions on Building a web application with Flutter when you’ve completed the setup above.
Flutter — Installation
This chapter will guide you through the installation of Flutter on your local computer in detail.
Installation in Windows
In this section, let us see how to install Flutter SDK and its requirement in a windows system.
Step 1 − Go to URL, https://flutter.dev/docs/get-started/install/windows and download the latest Flutter SDK. As of April 2019, the version is 1.2.1 and the file is flutter_windows_v1.2.1-stable.zip.
Step 2 − Unzip the zip archive in a folder, say C:\flutter\
Step 3 − Update the system path to include flutter bin directory.
Step 4 − Flutter provides a tool, flutter doctor to check that all the requirement of flutter development is met.
Step 5 − Running the above command will analyze the system and show its report as shown below −
The report says that all development tools are available but the device is not connected. We can fix this by connecting an android device through USB or starting an android emulator.
Step 6 − Install the latest Android SDK, if reported by flutter doctor
Step 7 − Install the latest Android Studio, if reported by flutter doctor
Step 8 − Start an android emulator or connect a real android device to the system.
Step 9 − Install Flutter and Dart plugin for Android Studio. It provides startup template to create new Flutter application, an option to run and debug Flutter application in the Android studio itself, etc.,
Open Android Studio.
Click File → Settings → Plugins.
Select the Flutter plugin and click Install.
Click Yes when prompted to install the Dart plugin.
Restart Android studio.
Installation in MacOS
To install Flutter on MacOS, you will have to follow the following steps −
Step 1 − Go to URL, https://flutter.dev/docs/get-started/install/macos and download latest Flutter SDK. As of April 2019, the version is 1.2.1 and the file is flutter_macos_v1.2.1- stable.zip.
Step 2 − Unzip the zip archive in a folder, say /path/to/flutter
Step 3 − Update the system path to include flutter bin directory (in
Step 4 − Enable the updated path in the current session using below command and then verify it as well.
Flutter provides a tool, flutter doctor to check that all the requirement of flutter development is met. It is similar to the Windows counterpart.
Step 5 − Install latest XCode, if reported by flutter doctor
Step 6 − Install latest Android SDK, if reported by flutter doctor
Step 7 − Install latest Android Studio, if reported by flutter doctor
Step 8 − Start an android emulator or connect a real android device to the system to develop android application.
Step 9 − Open iOS simulator or connect a real iPhone device to the system to develop iOS application.
Step 10 − Install Flutter and Dart plugin for Android Studio. It provides the startup template to create a new Flutter application, option to run and debug Flutter application in the Android studio itself, etc.,
Open Android Studio
Click Preferences → Plugins
Select the Flutter plugin and click Install
Click Yes when prompted to install the Dart plugin.
Set up an editor
You can build apps with Flutter using any text editor combined with our command-line tools. However, we recommend using one of our editor plugins for an even better experience. These plugins provide you with code completion, syntax highlighting, widget editing assists, run & debug support, and more.
Follow the steps below to add an editor plugin for Android Studio, IntelliJ, VS Code, or Emacs. If you want to use a different editor, that’s OK, skip ahead to the next step: Test drive.
Install Android Studio
Android Studio offers a complete, integrated IDE experience for Flutter.
Alternatively, you can also use IntelliJ:
Install the Flutter and Dart plugins
The installation instructions vary by platform.
Use the following instructions for macos:
Linux or Windows
Use the following instructions for Linux or WIndows:
Install VS Code
VS Code is a lightweight editor with Flutter app execution and debug support.
Install the Flutter and Dart plugins
Validate your setup with the Flutter Doctor
Install Emacs
Emacs is a lightweight editor with support for Flutter and Dart.
Install the lsp-dart package
For information on how to install and use the package, see the lsp-dart documentation.
![]()
Except as otherwise noted, this work is licensed under a Creative Commons Attribution 4.0 International License, and code samples are licensed under the BSD License.
Flutter часть 1. Установка и настройка
Содержание
Недавно google анонсировал beta версию Flutter. Flutter — это новый кроссплатформенный UI framework, который включает в себе набор инструментов: движок для 2D рендеринга, готовый набор UI компонентов и набор инструментов для разработки. Он позволяет писать кроссплатформенные приложения с общей кодовой базой.
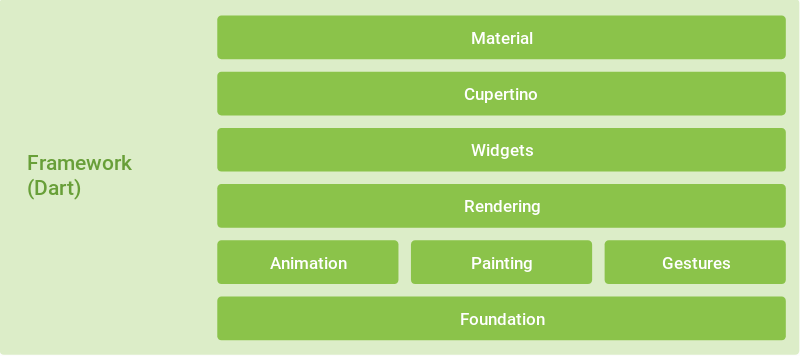
Flutter состоит из трёх компонентов:
Flutter engine — написан на C++, предоставляет низкоуровневую поддержку рендеринга, использует для этого графическую библиотеку Skia. Skia — это 2D графическая библиотека, с открытым исходным кодом, которая предоставляет кроссплатформенное API. Она служит графическим движком для Google Chrome, Chrome OS, Android, Mozilla Firefox, Firefox OS и т.д. На официальном сайте есть примеры, которые запускаются сразу из браузера.
Foundation library — включает в себя базовые классы и функции, которые используются для создания приложения с использованием Flutter. Данная библиотека написана уже на языке Dart.
Design-specific widgets — это набор уже готовых базовых графических компонентов для построения пользовательского интерфейса. Данный набор состоит из двух крупных наборов компонентов:
Особености Flutter
Всё есть виджет
Виджет представляет собой строительный блок для построения пользовательского интерфейса, который по сути является согласованной унифицированной моделью.
С помощью виджета можно определить:
Виджеты выстраиваются в иерархию с помощью композиции. Каждый виджет находиться внутри другого виджета и наследует его свойства. Характерной особенностью является то что корневой виджет выполняет роль application.
Так же виджет позволяет получать и обрабатывать события и заменять виджеты в иерархии динамически.
Иерархия слоёв

Установка Flutter
Что бы попробовать Flutter в деле необходимо клонировать репозиторий с GitHub из ветки beta с помощью команды:
Далее нужно добавить переменные окружения PATH. Для этого в конец файла
/.bashrc нужно добавить следующие строки:
Где в первой строке необходимо указать путь к каталогу с исполняемым файлом flutter, который находиться в каталоге /bin. Во второй строке нужно добавить путь к Android SDK.
Следующая команда проверит и при необходимости закачает все зависимости, которые нужны для Flutter:
После того как все необходимое будут закачено, в терминале будет выведена следующая информация:
C помощью команды flutter devices можно увидеть список подключённых устройств. В моём случае это эмулятор:
Установка плагинов в Android studio (Flutter и Dart)
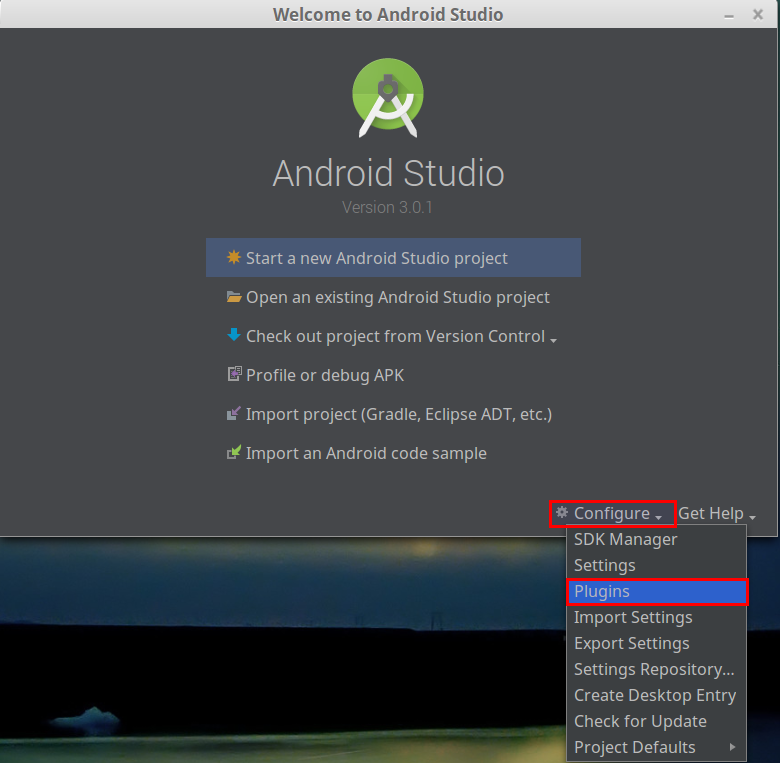
Для поддержки Flutter в Android Studio необходимо установить плагин Flutter из репозитория. Для этого на экране приветствия нужно выбрать пункт меню Configure | Plugins.
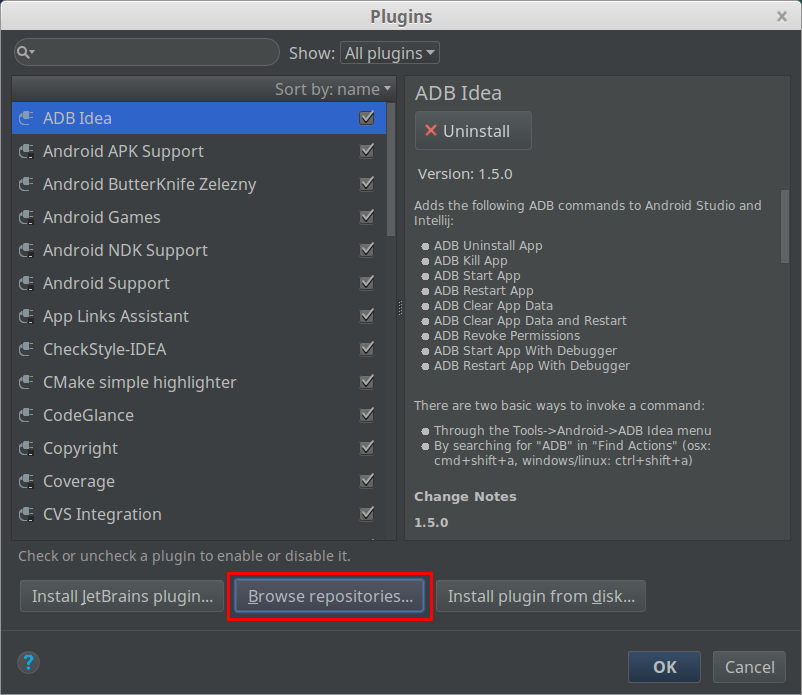
В окне Plugins нужно выбрать кнопку Browse repositories.
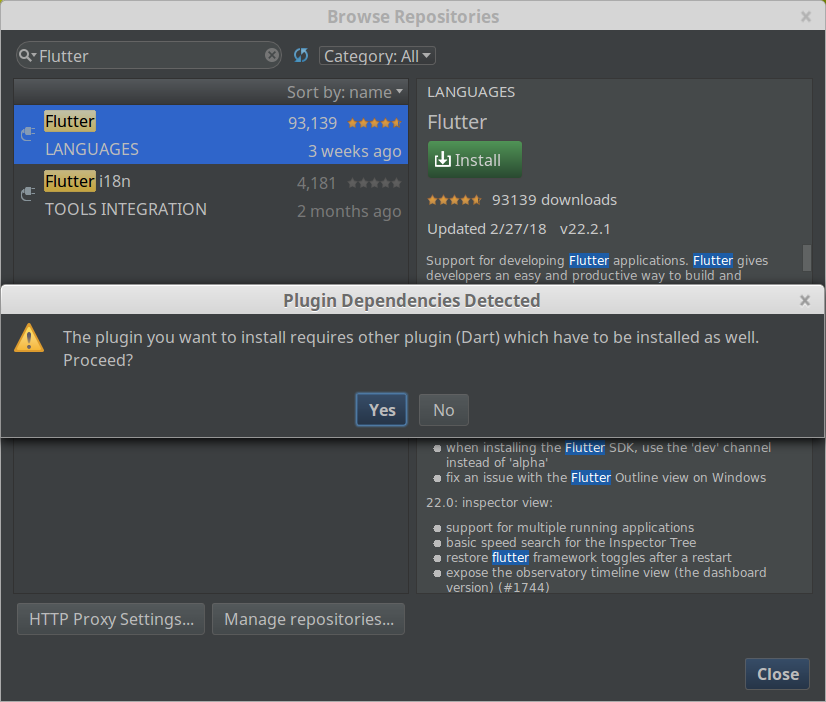
В строке поиска вбиваем название плагина Flutter и выбираем кнопку Install.
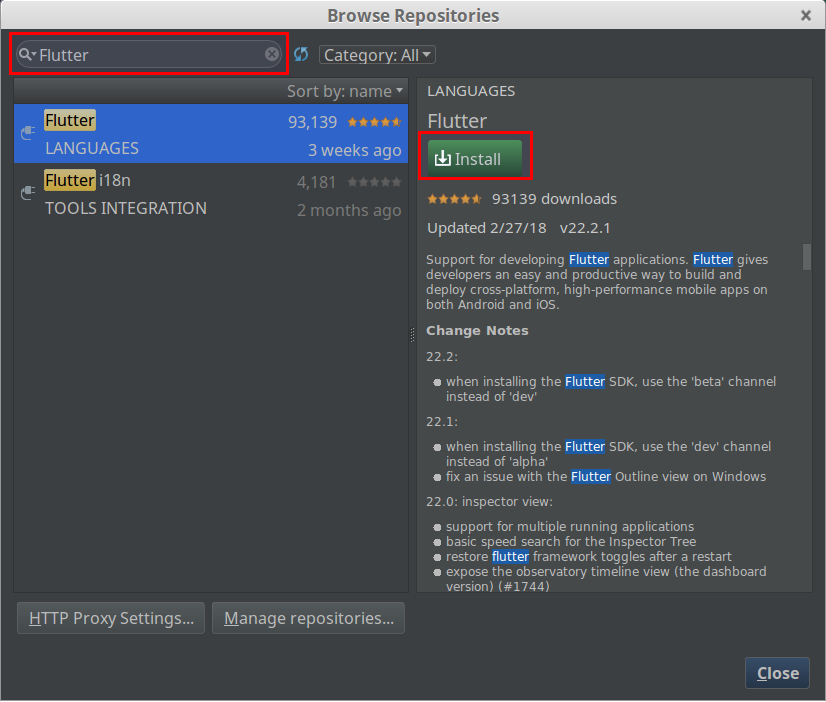
Если ранее не был установлен плагин Dart, то появиться диалоговое окно, где предложат это сделать. Соглашаемся с установкой.
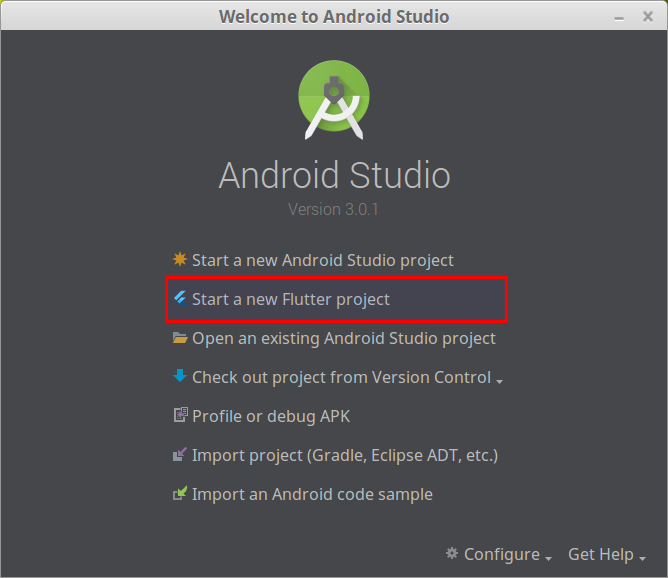
После установки плагина необходимо перезапустить Android Studio. После этого в основном меню появиться новый пункт Start a new Flutter project.
Создание нового проекта
После установки плагинов в основном меню Android Studio выбираем пункт Start a new Flutter project. После выбора пункта запуститься мастер создания проекта:
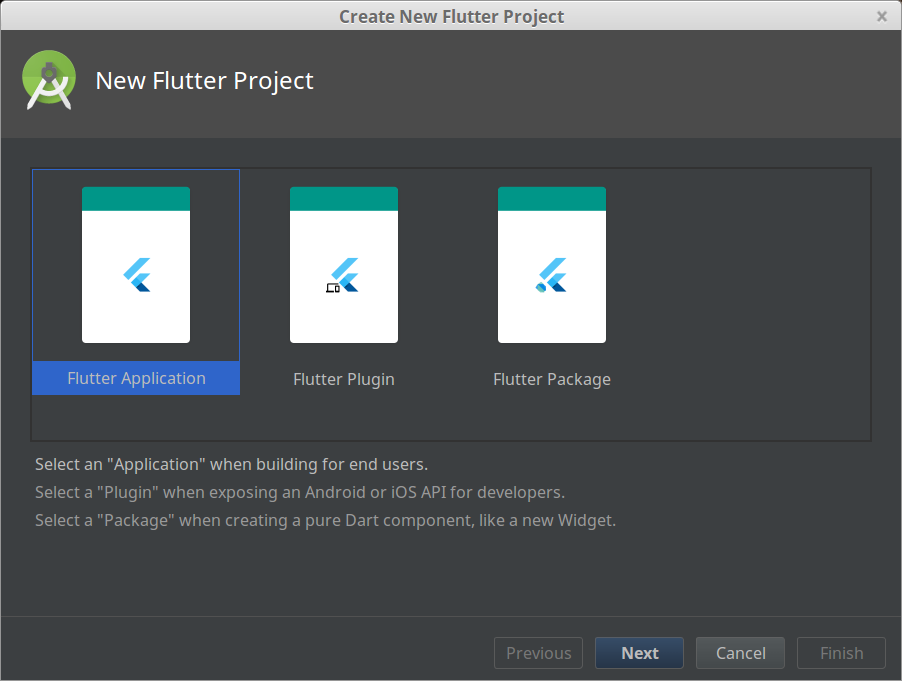
Выбираем пункт Flutter Application. Далее нажимаем на кнопку Next и переходим к следующему шагу:

Здесь необходимо указать путь к Flutter SDK, который был закачен ранее. Нажимаем на кнопку Next. На следующем завершающем шаге нажимаем кнопку Finish. После этого сгенерируется Flutter проект.
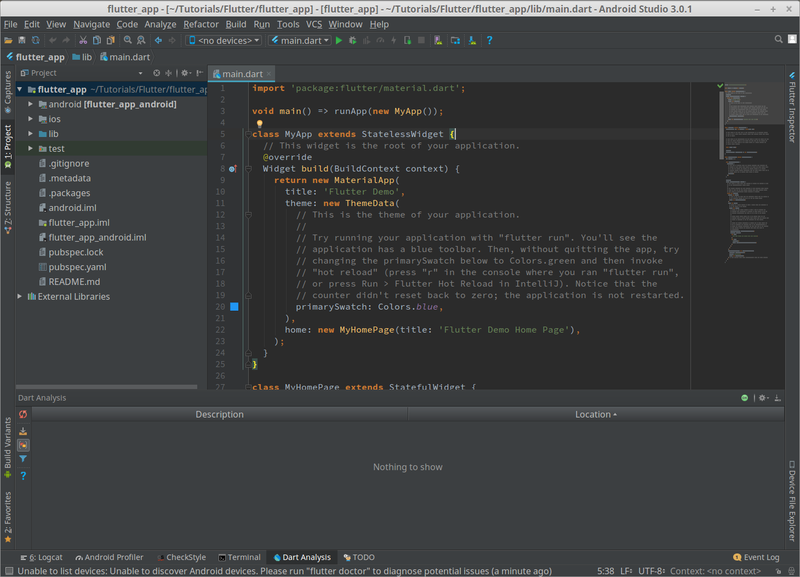
Запустим эмулятор, и произведём запуск приложения. Нужно перейти в корневой каталог проекта и выполнить команду:
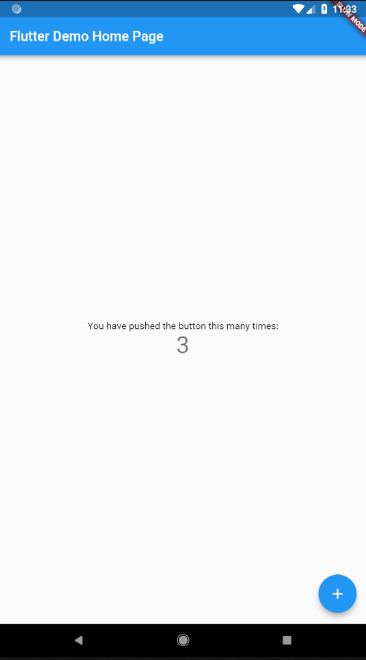
После компиляции приложение запуститься на устройстве:
В следующей статье создадим свой собственный экран из готовых компонентов Flutter.


