- Форматирование диска в Linux
- Как форматировать диск в Linux
- Выводы
- Partitioning, Formatting, and Mounting a Hard Drive in Linux Ubuntu 18.04 (2020)
- A. Partitioning (for >2GB Harddisk) (New) (Updated on 18 Jan 2020)
- 10 fdisk Commands to Manage Linux Disk Partitions
- 1. View all Disk Partitions in Linux
- 2. View Specific Disk Partition in Linux
- 3. Check all Available fdisk Commands
- 4. Print all Partition Table in Linux
- 5. How to Delete a Partition in Linux
- 6. How to Create a New Partition in Linux
- 7. How to Format a Partition in Linux
- 8. How to Check Size of a Partition in Linux
- 9. How to Fix Partition Table Order
- 10. How to Disable Boot Flag (*) of a Partition
- If You Appreciate What We Do Here On TecMint, You Should Consider:
Форматирование диска в Linux
Одна из самых первых задач, которую надо сделать после установки нового жесткого диска или SSD накопителя в компьютер, это отформатировать его и создать на нём разделы, на которых будут размещены данные. Форматировать диск можно разными способами. Для этого существует несколько консольных утилит с разным уровнем сложности работы, такие как fdisk, cfdisk и parted, а также графические утилиты, например GParted и Gnome Диски.
Про каждую из консольных утилит на этом сайте уже есть отдельная статья. Поэтому в этой статье мы поговорим как выполняется форматирование диска в Linux с помощью графических инструментов.
Как форматировать диск в Linux
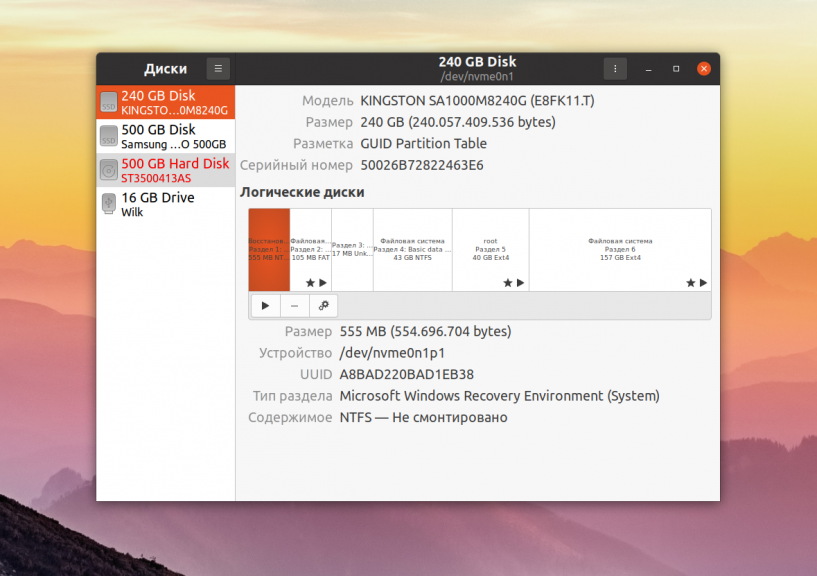
Допустим, вы купили новый или бывший в употреблении жесткий диск и вам надо его отформатировать. Запустите утилиту Диски из главного меню системы. Затем выберите в колонке слева нужный жесткий диск. В данном случае это HDD на 500 Гб:
Далее кликните по кнопке вызова меню в правом верхнем углу окна и выберите Форматировать диск:

На следующем этапе программа предложит вам выбрать способ форматирования, быстрое, при котором будет просто создана новая таблица разделов, или медленное, при котором все данные будут перезаписаны нулями. Также в этом окне надо выбрать таблицу разделов. Если вы собираетесь использовать диск вместе с современной системой лучше оставить GPT:

Далее программа спросит действительно ли вы хотите форматировать диск. Если вы выбрали быстрый способ, то сообщит, что если вы хотите выбросить диск или продать, надо использовать медленный способ, чтобы данные уже нельзя было восстановить:

При быстром варианте форматирование будет выполнено мгновенно, и вы получите пустой жесткий диск. Теперь на нём необходимо создать новые разделы, на которых будут хранится данные. Для этого кликните по кнопке со значком плюса:

Затем выберите размер будущего раздела. В данном примере я создам раздел из всего свободного пространства:

На следующем шаге программа предложит выбрать файловую систему для раздела. Если вы хотите использовать этот диск только с Linux, то можно оставить Ext4, для использования его в Windows надо выбрать NTFS. Файловую систему FAT лучше не использовать, потому что максимальный размер файла в ней может быть только четыре гигабайта:

После этого шага раздел станет доступным для использования:

Теперь его можно монтировать и использовать для ваших задач. Если вы собрались продать диск или отправить его в утилизацию разделы создавать не обязательно, достаточно только форматировать его, для того чтобы никто не смог получить доступ к вашим данным.
Выводы
В этой статье мы рассмотрели как форматировать диск в Linux. Как видите, для этого существует огромное количество способов, но этот самый простой и вам даже не понадобится устанавливать в систему дополнительные программы. Если вы используете KDE, а не Gnome, то вам лучше воспользоваться Gparted. На сайте есть отдельная статья об этой утилите. Таким способом можно форматировать не только HDD и SSD диски, но и обычные флешки.
Источник
Partitioning, Formatting, and Mounting a Hard Drive in Linux Ubuntu 18.04 (2020)

Jul 4, 2018 · 4 min read

I have a brand new 4-TB harddisk to add to my computer recently. So I need to mount it in Linux. (Sik-Ho Tsang @ Medium)
To do this, I need to do the following:
- A. Partitioning Using Parted (for > 2GB Harddisk) (New) (Updated on 18 Jan 2020)
- B. Formatting
- C. Mounting (including auto mount after reboot)
- D. Checking whether the hard drive is mounted
- E. Unmounting (Updated on 05 May 2020)
- F. Partitioning Using fdisk (for Harddisk larger than 2GB, GPT is needed, A > B > C > D.
To partition a Harddisk smaller than 2GB, fdisk already can help, E > B > C > D.
A. Partitioning (for >2GB Harddisk) (New) (Updated on 18 Jan 2020)
- First, after connecting the harddisk to the computer by SATA and power cables, we can check the new 4-TB harddisk by:

Note: You may have a different name other than sdb. The name sdb needs to be changed in the following steps.
2. But we cannot mount it right now, if we mount it now, errors will come out. We need to partition it first, we use parted to partition:

3. Within the parted, type the following to have gpt partition, gpt can allow partition larger than 2GB:

4. Set the size for partition, I here partition from 0GB to 4GB:
Источник
10 fdisk Commands to Manage Linux Disk Partitions
fdisk stands (for “fixed disk or format disk“) is an most commonly used command-line based disk manipulation utility for a Linux/Unix systems. With the help of fdisk command you can view, create, resize, delete, change, copy and move partitions on a hard drive using its own user friendly text based menu driven interface.
This tool is very useful in terms of creating space for new partitions, organising space for new drives, re-organising an old drives and copying or moving data to new disks. It allows you to create a maximum of four new primary partition and number of logical (extended) partitions, based on size of the hard disk you have in your system.
![]() fdisk command to manage disk partition
fdisk command to manage disk partition
This article explains 10 basic fdisk commands to manage a partition table in Linux based systems. You must be root user to run fdisk command, otherwise you will get a “command not found” error.
1. View all Disk Partitions in Linux
The following basic command list all existing disk partition on your system. The ‘-l‘ argument stand for (listing all partitions) is used with fdisk command to view all available partitions on Linux. The partitions are displayed by their device’s names. For example: /dev/sda, /dev/sdb or /dev/sdc.
2. View Specific Disk Partition in Linux
To view all partitions of specific hard disk use the option ‘-l‘ with device name. For example, the following command will display all disk partitions of device /dev/sda. If you’ve different device names, simple write device name as /dev/sdb or /dev/sdc.
3. Check all Available fdisk Commands
If you would like to view all commands which are available for fdisk. Simply use the following command by mentioning the hard disk name such as /dev/sda as shown below. The following command will give you output similar to below.
Type ‘m‘ to see the list of all available commands of fdisk which can be operated on /dev/sda hard disk. After, I enter ‘m‘ on the screen, you will see the all available options for fdisk that you can be used on the /dev/sda device.
4. Print all Partition Table in Linux
To print all partition table of hard disk, you must be on command mode of specific hard disk say /dev/sda.
From the command mode, enter ‘p‘ instead of ‘m‘ as we did earlier. As I enter ‘p‘, it will print the specific /dev/sda partition table.
5. How to Delete a Partition in Linux
If you would like to delete a specific partition (i.e /dev/sda9) from the specific hard disk such as /dev/sda. You must be in fdisk command mode to do this.
Next, enter ‘d‘ to delete any given partition name from the system. As I enter ‘d‘, it will prompt me to enter partition number that I want to delete from /dev/sda hard disk. Suppose I enter number ‘4‘ here, then it will delete partition number ‘4‘ (i.e. /dev/sda4) disk and shows free space in partition table. Enter ‘w‘ to write table to disk and exit after making new alterations to partition table. The new changes would only take place after next reboot of system. This can be easily understood from the below output.
Warning : Be careful, while performing this step, because using option ‘d‘ will completely delete partition from system and may lost all data in partition.
6. How to Create a New Partition in Linux
If you’ve free space left on one of your device say /dev/sda and would like to create a new partition under it. Then you must be in fdisk command mode of /dev/sda. Type the following command to enter into command mode of specific hard disk.
After entering in command mode, now press “n” command to create a new partition under /dev/sda with specific size. This can be demonstrated with the help of following given output.
While creating a new partition, it will ask you two options ‘extended‘ or ‘primary‘ partition creation. Press ‘e‘ for extended partition and ‘p‘ for primary partition. Then it will ask you to enter following two inputs.
- First cylinder number of the partition to be create.
- Last cylinder number of the partition to be created (Last cylinder, +cylinders or +size).
You can enter the size of cylinder by adding “+5000M” in last cylinder. Here, ‘+‘ means addition and 5000M means size of new partition (i.e 5000MB). Please keep in mind that after creating a new partition, you should run ‘w‘ command to alter and save new changes to partition table and finally reboot your system to verify newly created partition.
7. How to Format a Partition in Linux
After the new partition is created, don’t skip to format the newly created partition using ‘mkfs‘ command. Type the following command in the terminal to format a partition. Here /dev/sda4 is my newly created partition.
8. How to Check Size of a Partition in Linux
After formatting new partition, check the size of that partition using flag ‘s‘ (displays size in blocks) with fdisk command. This way you can check size of any specific device.
9. How to Fix Partition Table Order
If you’ve deleted a logical partition and again recreated it, you might notice ‘partition out of order‘ problem or error message like ‘Partition table entries are not in disk order‘.
For example, when three logical partitions such as (sda4, sda5 and sda6) are deleted, and new partition created, you might expect the new partition name would be sda4. But, the system would create it as sda5. This happens because of, after the partition are deleted, sda7 partition had been moved as sda4 and free space shift to the end.
To fix such partition order problems, and assign sda4 to the newly created partition, issue the ‘x‘ to enter an extra functionality section and then enter ‘f‘ expert command to fix the order of partition table as shown below.
After, running ‘f‘ command, don’t forget to run ‘w‘ command to save and exit from fdisk command mode. Once it fixed partition table order, you will no longer get error messages.
10. How to Disable Boot Flag (*) of a Partition
By default, fdisk command shows the boot flag (i.e. ‘*‘) symbol on each partition. If you want to enable or disable boot flag on a specific partition, do the following steps.
Press ‘p‘ command to view the current partition table, you see there is a boot flag (asterisk (*) symbol in orange color) on /dev/sda1 disk as shown below.
Next enter command ‘a‘ to disable boot flag, then enter partition number ‘1‘ as (i.e. /dev/sda1) in my case. This will disable boot flag on the partition /dev/sda1. This will remove the asterisk (*) flag.
I’ve tried my best to include almost all basic commands of fdisk commands, but still fdisk contains a variety of other expert commands you can use them by entering ‘x‘. For more detailed information, check out ‘man fdisk‘ command from the terminal. If I’ve missed any important command, please do share with me via comment section.
Read Also :
If You Appreciate What We Do Here On TecMint, You Should Consider:
TecMint is the fastest growing and most trusted community site for any kind of Linux Articles, Guides and Books on the web. Millions of people visit TecMint! to search or browse the thousands of published articles available FREELY to all.
If you like what you are reading, please consider buying us a coffee ( or 2 ) as a token of appreciation.

We are thankful for your never ending support.
Источник


