- Use Linux Graphical Softwares on Windows via X11 Forwarding
- Pre-Requisites:
- Installing X11 Server on Windows:
- InstallingPuTTY:
- PuTTY is a SSH client for Windows. PuTTY can also be used for X11 forwarding over SSH.
- Using PuTTY for X11 Forwarding Linux GUI Apps:
- Навигация
- Настройка сервера
- Настройка клиента
- Запуск
- Настройка клиента Windows
- Установка Xming
- Настройка PuTTy
- Обсуждение
- Setting up X11 forwarding over SSH on Windows 10 Subsystem for Linux?
- 3 Answers 3
- Raspberry Pi (Host) Configuration
- Windows (Client) Setup
- Note on XDMCP, FreeNX
- Windows and X11 forwarding with Xming
- Using Xming for X11 forwarding on Windows
- X11 forwarding as other user
- One thought on “Windows and X11 forwarding with Xming”
Use Linux Graphical Softwares on Windows via X11 Forwarding
Pre-Requisites:
In order to use Linux graphical softwares on Windows using X11 forwarding, the remote Linux machine you’re connecting to must have SSH server software installed and X11 Forwarding enabled.
I have written an article to show you how to configure X11 forwarding on Linux. If you’re having trouble, be sure to check the article Configure SSH X11 Forwarding on Debian 10 on LinuxHint.
Installing X11 Server on Windows:
In this article, I am going to use VcXsrv on Windows to set up a X11 display server on Windows. VcXsrv is completely free. You can download it from SourceForge and install it on Windows very easily.
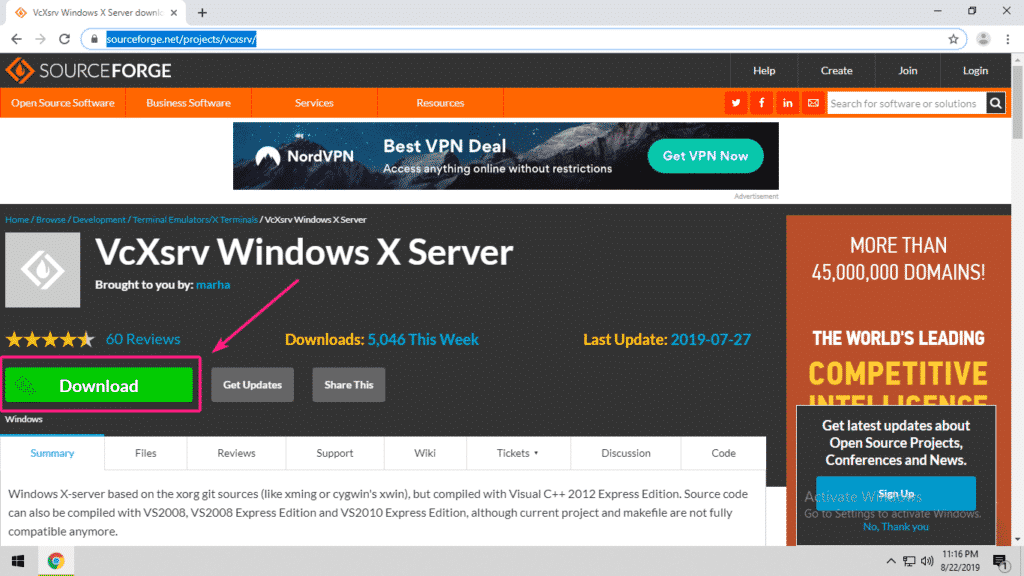
First, visit the official sourceforge page of VcXsrv. When the page loads, click on Download as marked in the screenshot below.
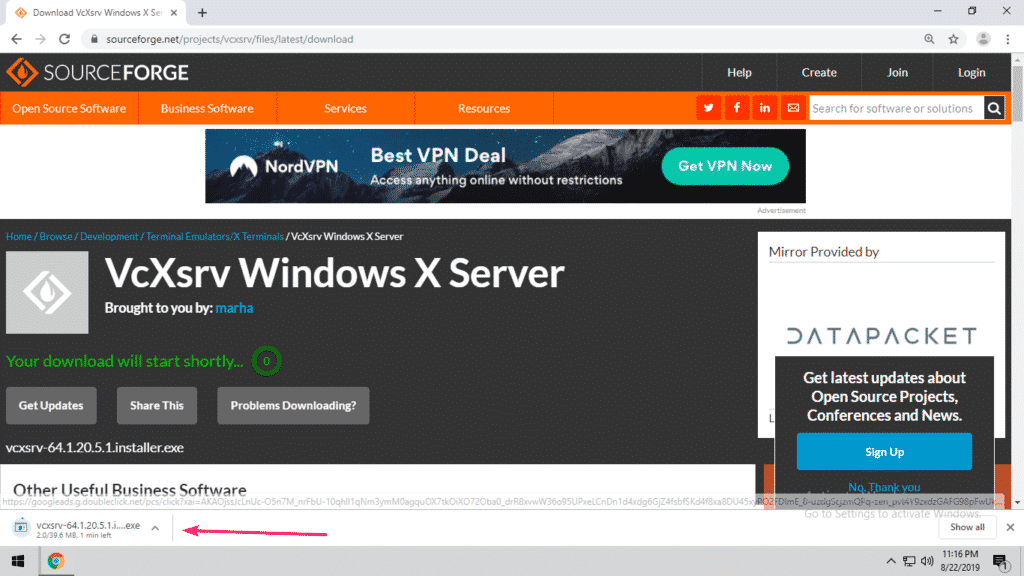
VcXsrv is being downloaded.
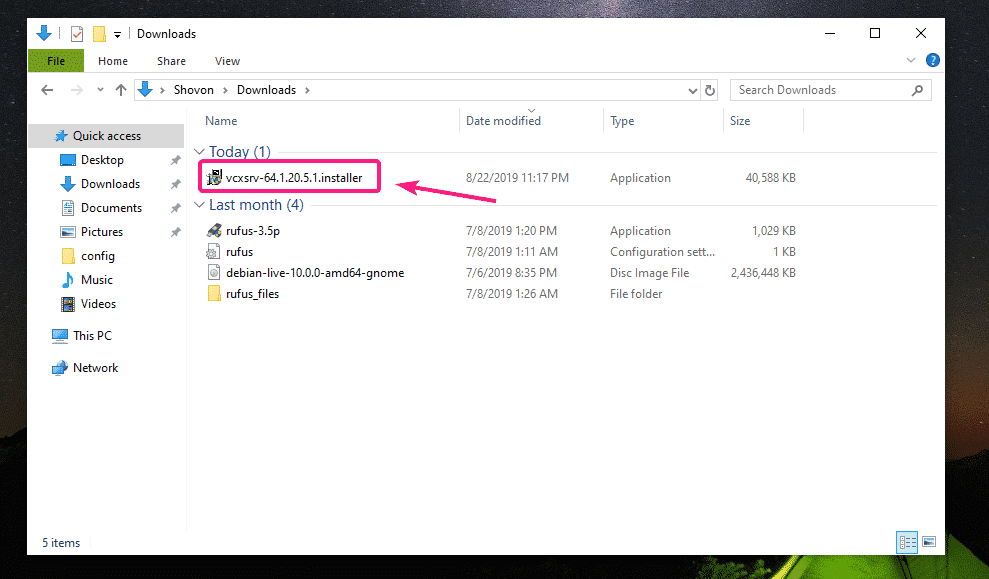
Once the download is complete, run the VcXsrv installer.
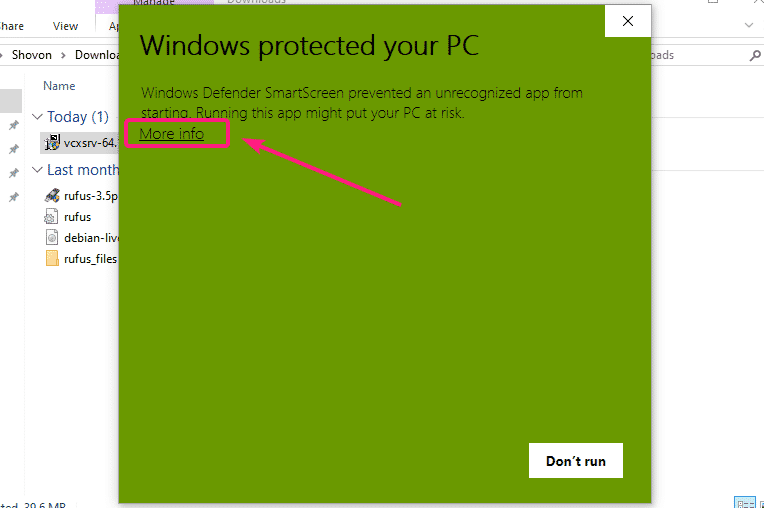
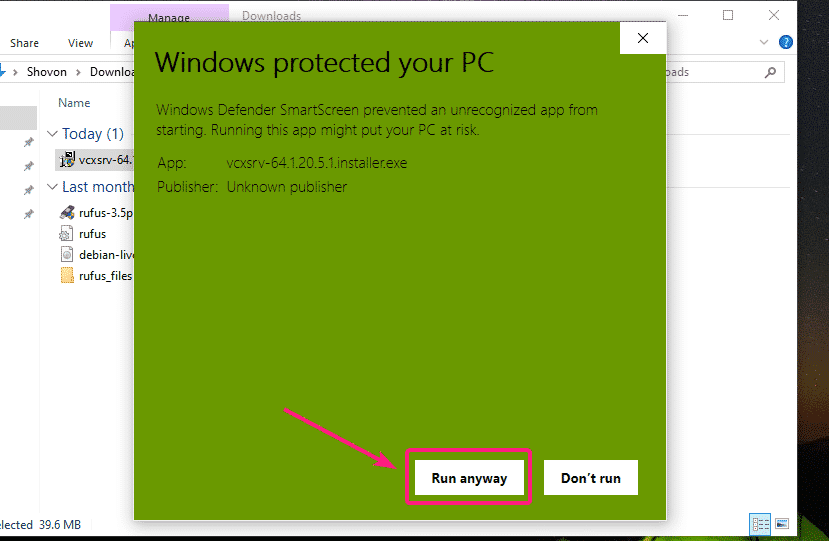
Click on More info.
Then, click on Run anyway.
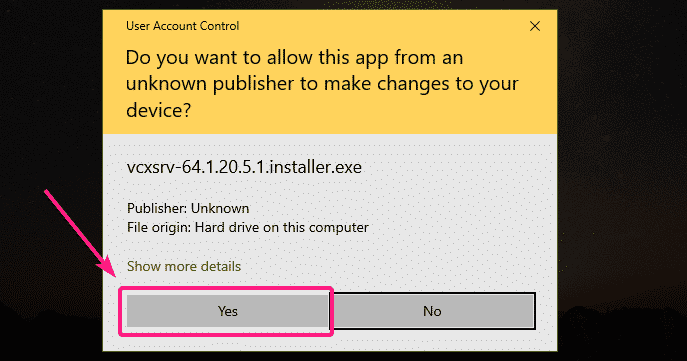
Now, click on Yes.
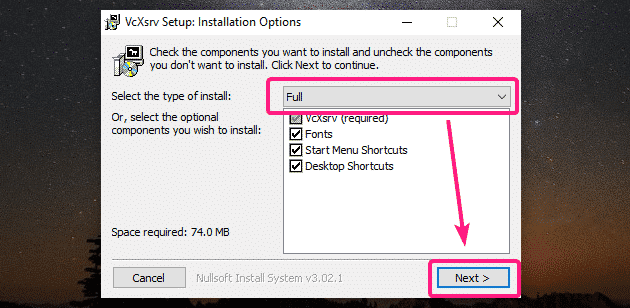
Make sure Full is selected on the type of install and click on Next >.
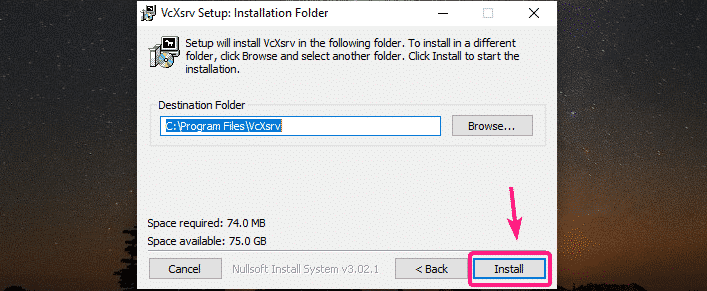
Click on Install.
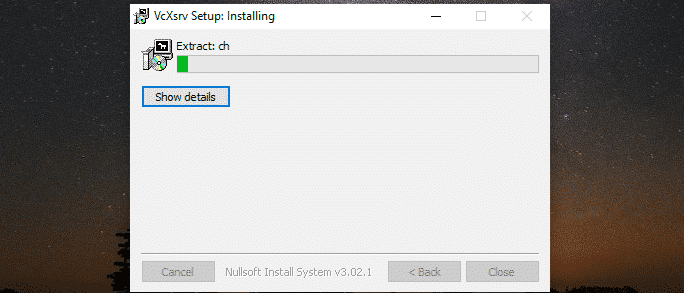
VcXsrv is being installed.
Once the installation is finished, click on Close.

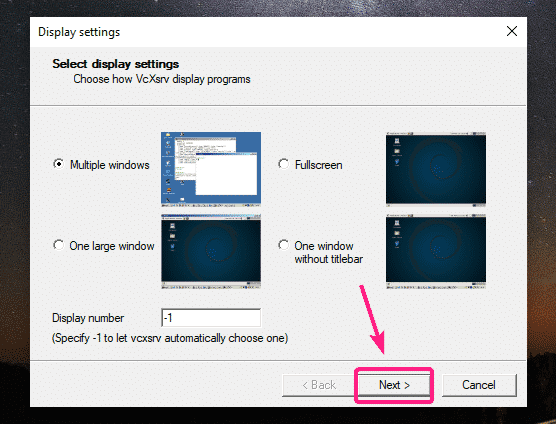
Once the installation is finished, run XLaunch from your Desktop or Start Menu.

Click on Next >.
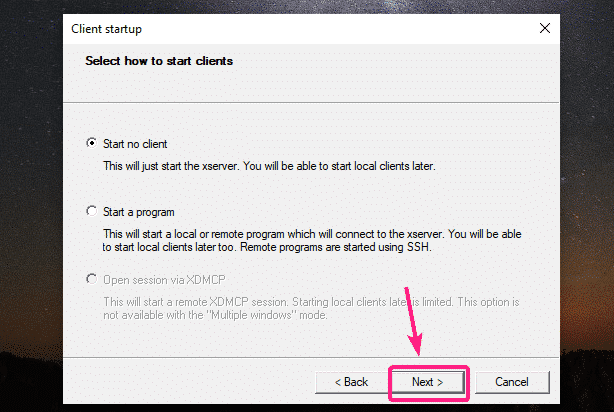
Click on Next >.
Click on Next >.

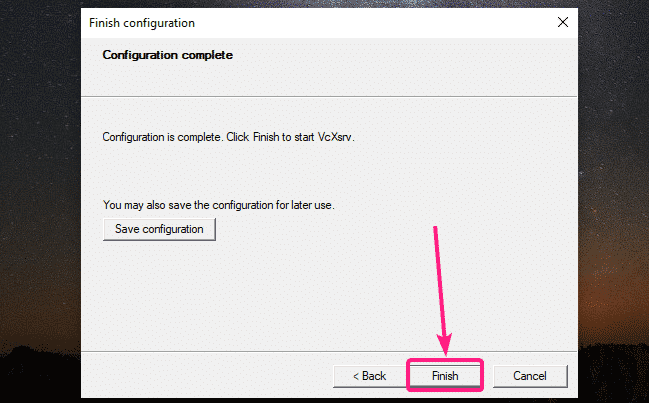
Now, click on Finish.
Now, click on Allow access.

X11 server should be running as you can see on the bottom right corner of the screen.

InstallingPuTTY:
PuTTY is a SSH client for Windows. PuTTY can also be used for X11 forwarding over SSH.
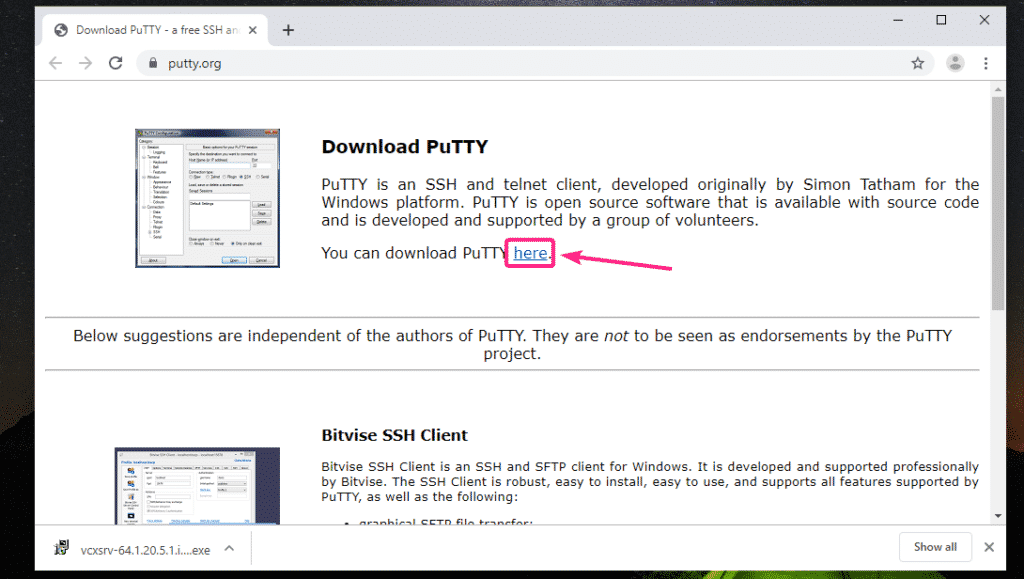
To download PuTTY, go to the official website of PuTTY. Once the page loads, click on the marked link from the Download PuTTY section.
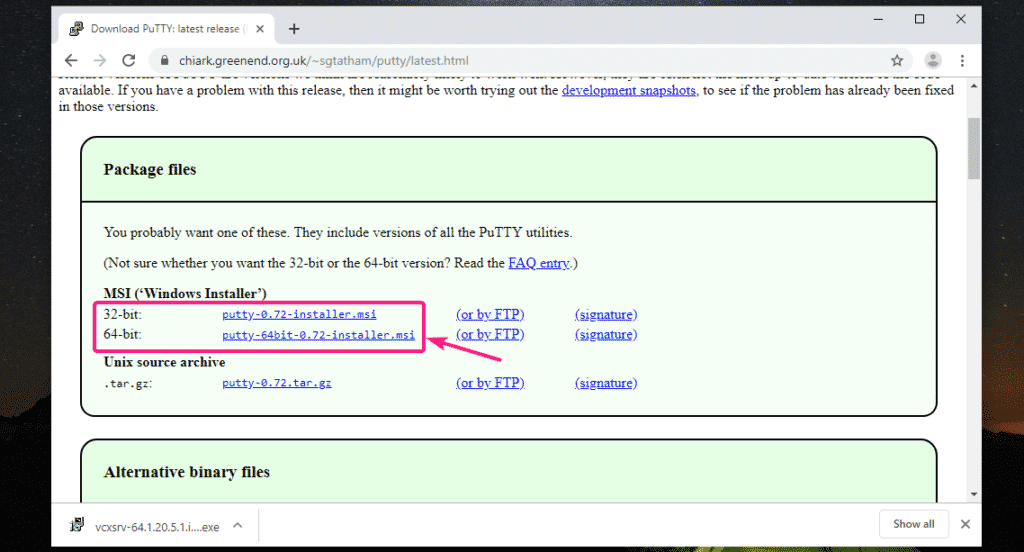
If you’re using a 32-bit version of the Windows operating system, click on the 32-bit download link.
If you’re using a 64-bit version of the Windows operating system, then click on the 64-bit download link.
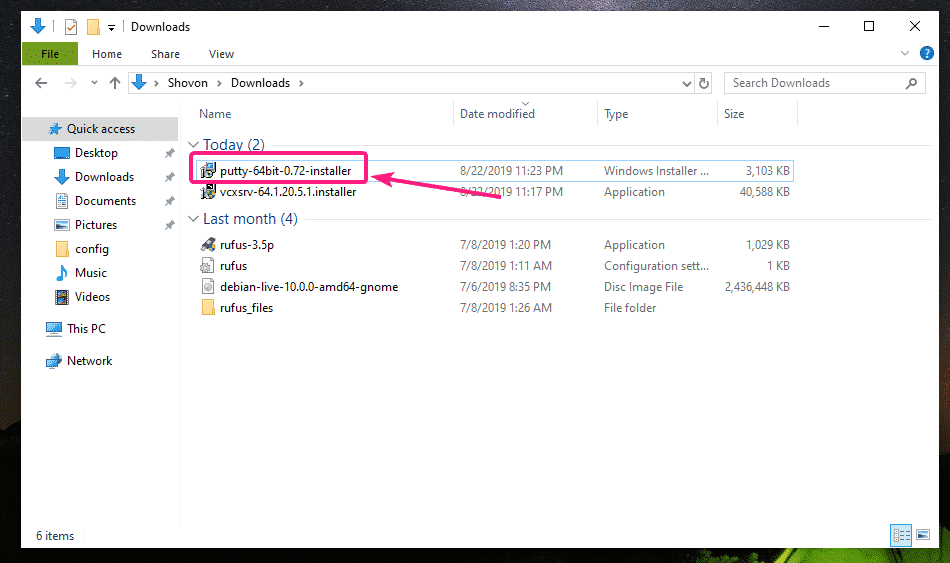
PuTTY is being downloaded.

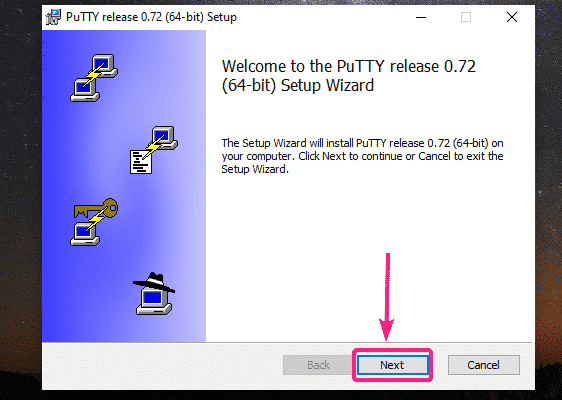
Once the download is complete, run the PuTTY installer.
Now, click on Next.
Click on Next.
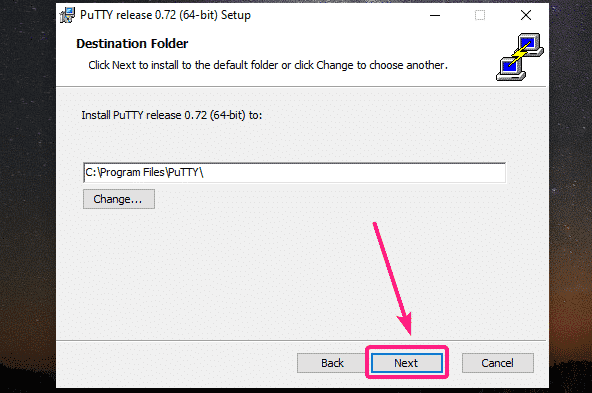
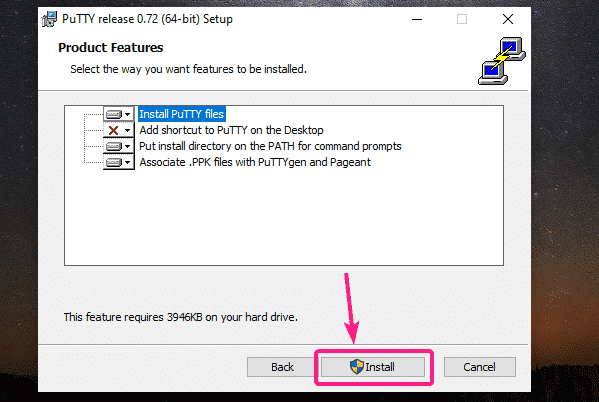
Click on Install.
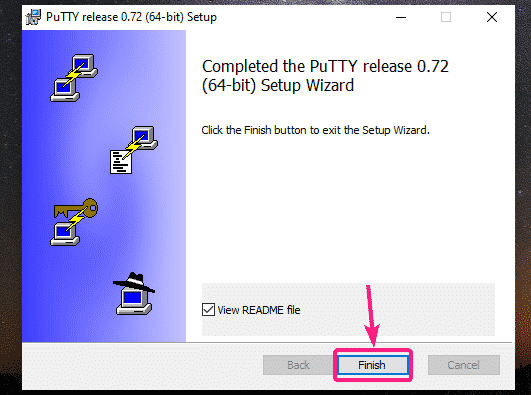
Now, click on Yes.

Uncheck the View README file checkbox (optional) and click on Finish.
Using PuTTY for X11 Forwarding Linux GUI Apps:
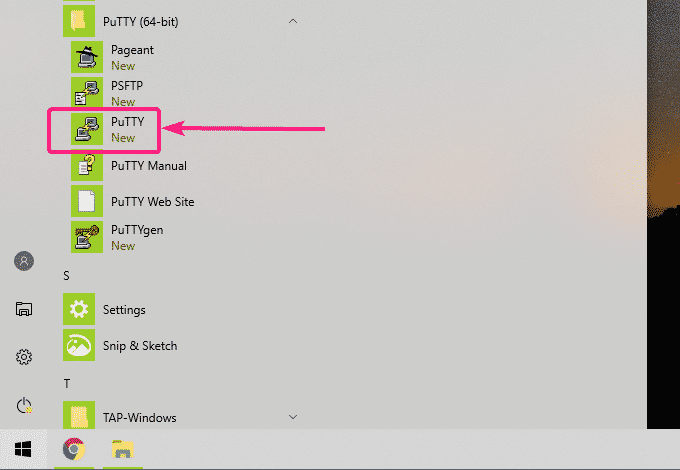
Once PuTTY is installed, start PuTTY from the Start Menu.
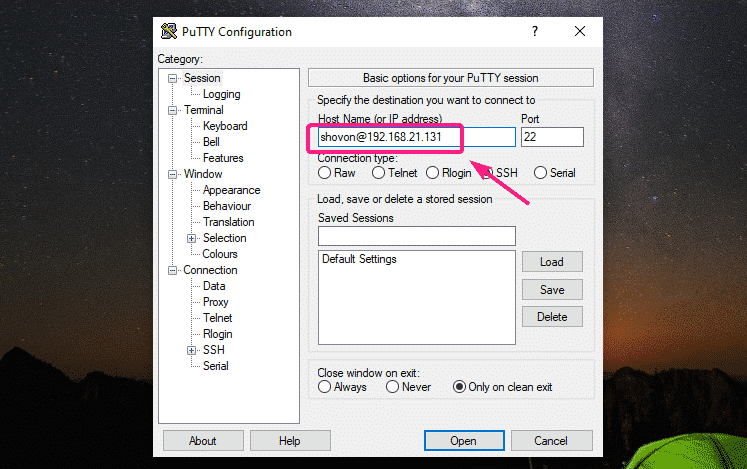
Now, type in the username and IP address of your remote Linux machine where SSH X11 forwarding is configured.
Use the following format username@IP_ADDR.
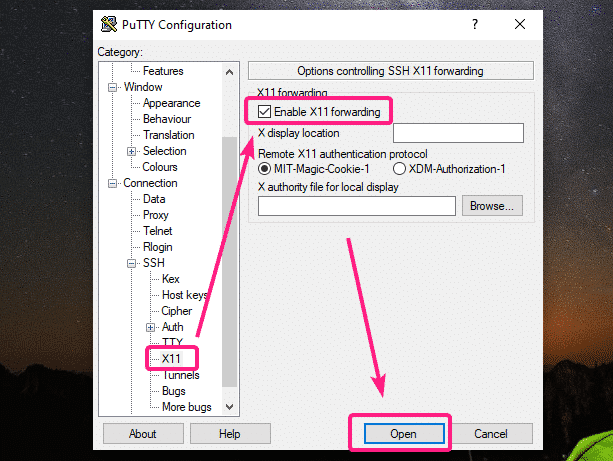
Now, click on Connection > SSH > X11 and check the Enable X11 forwarding checkbox. Once you’re done, click on Open.
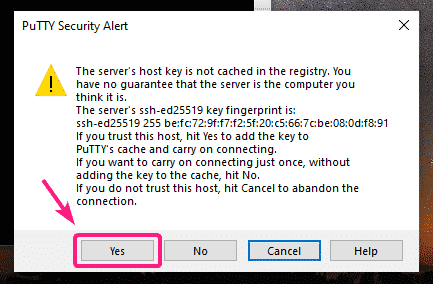
If you’re connecting to the remote server for the first time, you will see the following window. Click on Yes.
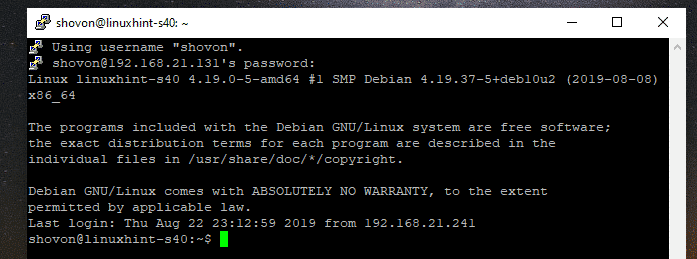
Now, type in the password of the login user of the remote server and press .

You should be logged in.
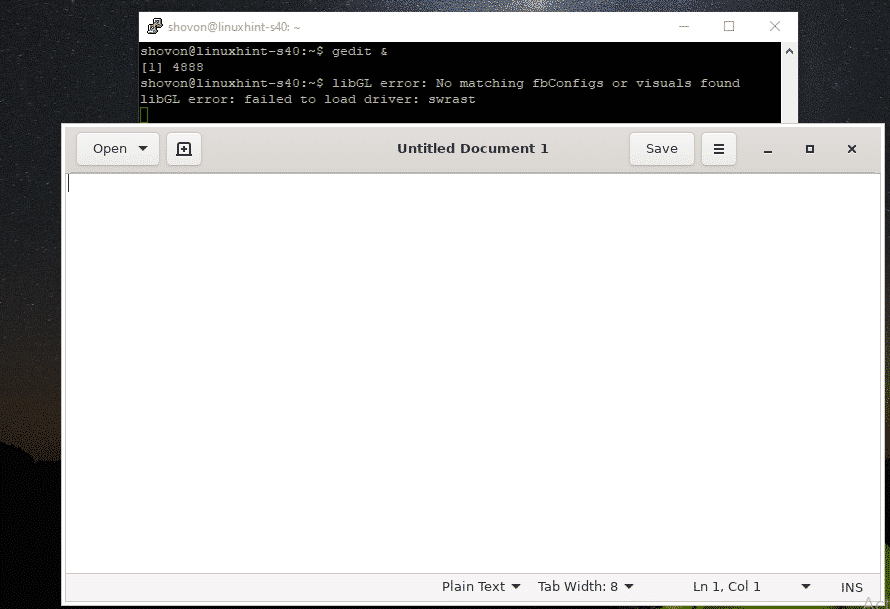
Now, to start a graphical application, just run the command that is responsible for starting the application that you need.
Let’s try to run Gedit text editor.

As you can see, Gedit is running correctly. The actual software is running on the remote Linux machine. But, the display is just forwarded to Windows. It really feels like a native Windows application. I tried it for a while, it works perfectly.
I also tried to run GNOME disk. It also worked nicely.

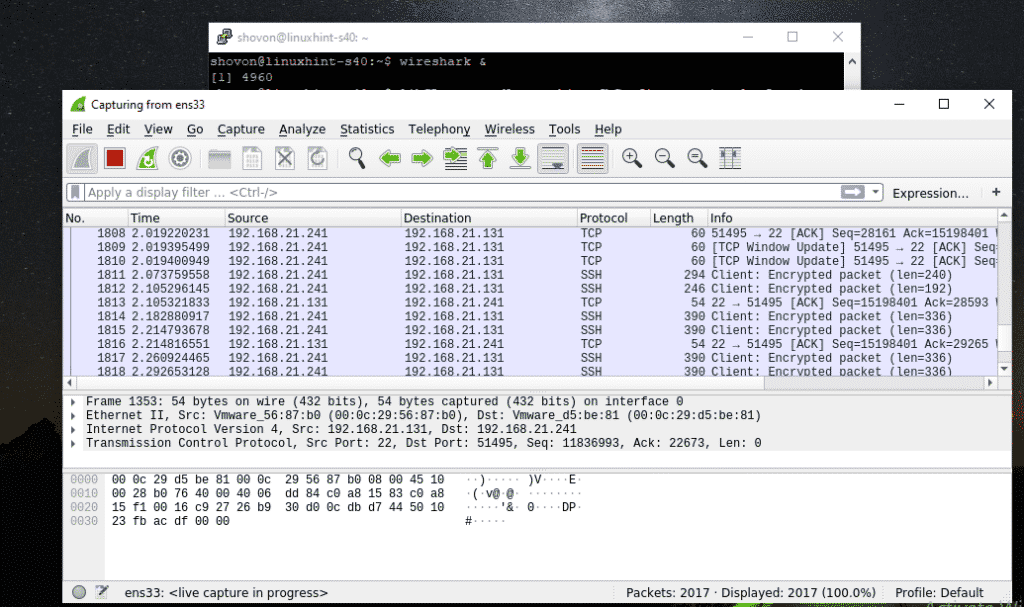
I tried to run Wireshark Network Analyzer. It also worked perfectly.
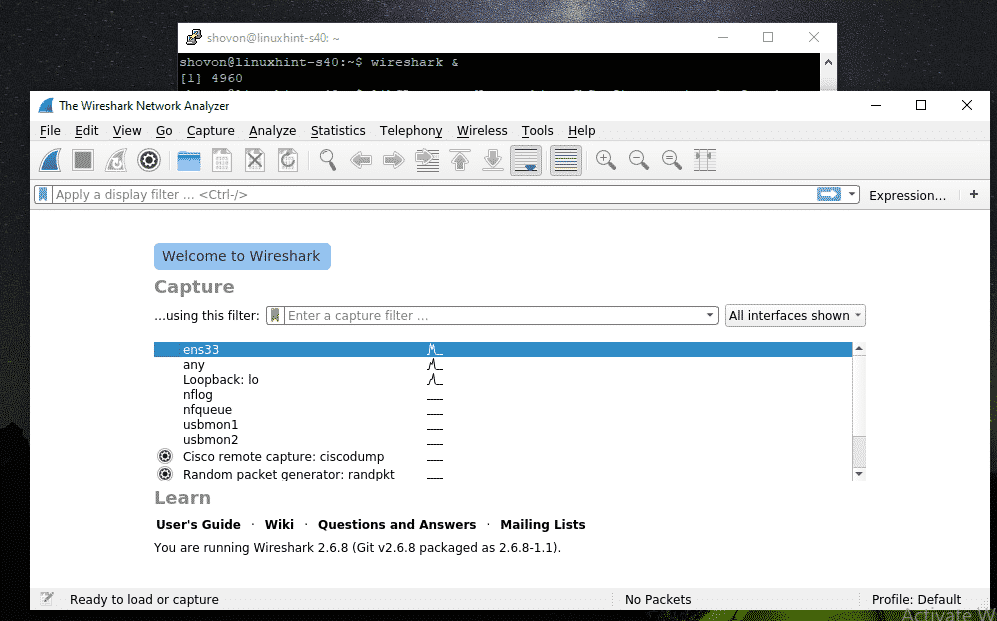
As you can see, I can monitor the network adapter of the remote Linux machine from the X11 forwarded Wireshark.
So, that’s how you set up X11 display server on Windows and use Linux graphical softwares on Windows via SSH X11 forwarding. Thanks for reading this article.
Навигация
X11 SSH Forwarding
Настройка сервера
Настройка клиента
Запуск
Заходим на удаленный хост и потом запускаем приложение kopete
Сразу запустить приложение kopete
X11 connection rejected because of wrong authentication
Убедитесь что права на удаленном хосте принадлежат пользователю
Настройка клиента Windows
Установка Xming
Xming — порт сервера X Window System для операционной системы Microsoft Windows.
Скачать Xming с SourceForge и установить.
Настройка PuTTy
Указать адрес дисплея
Просто запускаем программу в терминале
Обсуждение
спасибо, всё работает на ура! только очень тормознуто (или это только у меня так?).
Да есть такое, что тормозит жутко, даже если через локалку
Алексей, радует, что причина тормозов в данном случае — не мои кривые ручки. а что посоветуете вместо данного решения? пробую сейчас xrdp (в линуксах не шибко разбираюсь), и через rdp из winxp у меня только консольное окно появилось, рабочего стола как такового нет. думаю вот, что делать дальше. 🙂
Кроме VNC ничего другого не использовал, так что советовать мне особо нечем
у меня уже всё получилось. доставил xrdp в систему, из winxp запустил терминальную сессию на ip-адрес компа с linux, увидел окошко терминала, набрал google-chrome (ради чего всё и затевал) и получил нужное. что радует, после закрытия терминального окна и повторного входа вижу всё ту же картинку, что и до закрытия. сам не ожидал, что всё так просто получится. Алексей, спасибо за статью и успехов в делах! 🙂
тоже настроил, всё работает кроме PHPStorm. запускаю, он запускается, но картинку на клиента не передаёт, а локально отображается почему-то. А все остальные программы работают как надо, удалённо.
Setting up X11 forwarding over SSH on Windows 10 Subsystem for Linux?
I have a Raspberry Pi 3 Model B+ connected to my local network and I can SSH into it with no problems. This does cause some problems though as everything is done on the command line.
What I would really like to do is use X11 forwarding by using the SSH client that comes with Windows Subsystem for Linux. I am running Windows 10 Pro with the 1803 update installed.
I’m just curious about how I might go about using this feature? If it won’t work in Windows 10 natively then I can always run a Linux virtual machine to connect to the Raspberry Pi.
3 Answers 3
This is definitely possible given your current setup. Note that you also have the option of using Putty but either way, you’ll need to have an X server running on the client machine, your Windows Subsystem for Linux — WSL. The client-server model of the X window system is partially what makes X forwarding so easy to pull off. All you need is an X server running on host and client.
Raspberry Pi (Host) Configuration
First, you’ll want to make a minor config adjustment to your SSH server on the host machine (your Raspberry Pi). First, find your sshd_config file within the etc directory. You can run these commands by ssh-ing into the Raspberry Pi (with a sudo-capable account), or accessing the Pi directly and then opening a terminal.
Once you’re in, run the command:
Make a backup of your sshd config file:
Now open the original file in a text editor with:
You can choose any text editor you’re comfortable with (see here for the nano text editor shortcuts). This is the main config file for the ssh server. Find and uncomment the following lines:
Save and exit. Now you’ll need to restart your Pi’s SSH server with:
Windows (Client) Setup
You’re done with your host. Now all you need to do is install an X server for Windows. There are a few options to choose from but I would go with Cygwin X which you can download here. Install it and once you run it, it should spawn a little window on your client which will be used to display the X program. You can now test that X forwarding is happening by returning to your WSL shell and running the simple command:
A simple clock should appear in the window spawned by Cygwin. You can terminate the clock by returning to your WSL shell and hitting Ctrl+C. If this command isn’t recognized, you may first need to install x11-graphics applications on the host machine with:
X forwarding should now be enabled for you and you can now run most if not all of your Raspberry Pi’s applications from Windows.
Note on XDMCP, FreeNX
You may wish to take things a step further and set things up to run an entire desktop environment from your Pi rather than just app-by-app which is what X forwarding allows. Here are a couple common options available to you:
- XDMCP: This is the easiest to set up but is notoriously insecure and most authorities only recommend you ever run it on a trusted, wired LAN (like your home network). This may be more trouble than it’s worth but if you’re curious to look into it, see this Rasp Pi thread for the initial setup.
- FreeNX: More secure than XDMCP and probably worth the time to set up if you’ll want to do this regularly and possibly from another network entirely. You’ll need to install a FreeNX server on the host, then use another piece of software — NoMachine — on your Windows client. See here for a very detailed guide.
Windows and X11 forwarding with Xming
Usually I prefer to do thing directly from the Linux terminal but sometimes there is a need for remote graphical tools and X11 forwarding. Linux supports X Forwarding with no extra software, on OS X you need e.g. XQuartz and on Windows you need two pieces of software: a secure shell program (ssh) to establish the remote connection and an X Server to handle the local display. Here we concentrate on Windows and use Xming and PuTTY for those tasks.
Using Xming for X11 forwarding on Windows
There are different tools to do X11 forwarding on Windows but Xming is small, fast and simple software for X Window System Server for Microsoft Windows. You also need program like PuTTY or FuTTY to create the remote connection.
After you have Xming installed and started check what the icon says on the taskbar. Mine says «Xming Server:0.0» so for PuTTY settings we get «0.0». It might also be «0:0».
Next open Putty and in the Category list go to
- Connection > SSH > X11
- Check X11 forwarding: [x] Enable X11 forwarding
- Add to the «X display location» field: localhost:0.0
Choose Session in the Category list and add your Linux hostname and select SSH. Click Save and then Open the SSH connection to your remote host.
On the remote machine check that the X11 forwarding works with e.g. -bash-3.2$ xeyes &
X11 forwarding as other user
That’s the typical use case but if you change to another user and try the same command you get error «MIT-MAGIC-COOKIE-1 data did not match». Go back to previous user and check what the xauth list says. Take note of that line as you need it later.
Login again as another user e.g. -bash-3.2$ sudo su — oracle and add the original users MIT-MAGIC-COOKIE to xauth.
After that the command -bash-3.2$ xeyes & as oracle should work.
If you get error, -bash-3.2$ Error: Can’t open display: , correct the DISPLAY variable like:
Now you can run e.g. Oracle’s Database Configuration Assistant (DBCA) to setup a new database remotely with X11 forwarding:
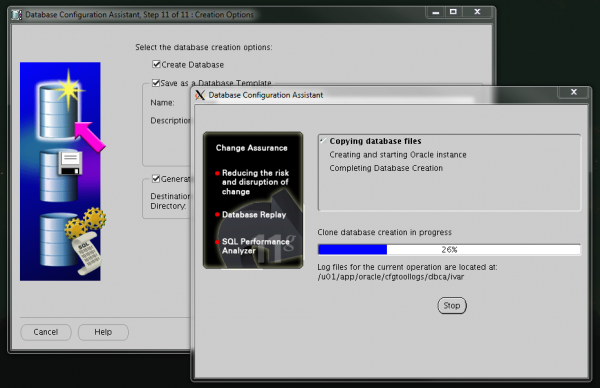 Runnign DBCA remotely with X11 forwarding
One thought on “Windows and X11 forwarding with Xming”
This was a very useful document for configuring Xming to use oracle installer. Thanks for this document.


