- How to Create and Use a RAM Disk with Your Mac (Warnings Included!)
- 9 Free Tools To Optimize RAM Memory For Windows And macOS
- ↓ 01 – Memory Cleaner X | macOS
- ↓ 02 – CleanMem Free | Windows
- ↓ 03 – Memory Clean 2 | macOS
- ↓ 04 – RAMRush | Windows
- ↓ 05 – Wise Memory Optimizer | Windows
- ↓ 06 – Mz RAM Booster | Windows
- ↓ 07 – Memory Cleaner | macOS
- ↓ 08 – Mem Reduct | Windows
- ↓ 09 – MemPlus | Windows
- ↓ 10 – Memory Optimizer [ Not Free Anymore ] | Windows
How to Create and Use a RAM Disk with Your Mac (Warnings Included!)
Once a popular option in the early days of the Mac, RAM disks, which were used to speed up the performance of a Mac, have fallen by the wayside.
Conceptually, RAM disks are a simple idea: a chunk of RAM set aside that looks, to the Mac system, like just another storage drive. The system, as well as any installed apps, can write files to or read files from the RAM disk, just as if it really were another storage drive mounted on your Mac.
But unlike any storage drive, a RAM disk can operate at the speed of RAM, which is usually many times faster than most drive storage systems.
RAM Disk History
RAM disks existed before the Macintosh ever hit the market, but we’re going to predominantly explore how RAM disks were used with the Mac.
The Mac Plus, released in 1986, had quite a few new features, including the use of SIM (Single Inline Memory) modules that users could easily upgrade. The Mac Plus shipped with 1 MB of RAM, but users could increase the memory size to 4 MB. That was an amazing amount of RAM in 1986, and begged the question: What can I do with all this memory space?
At the same time, many users were asking how they could speed up their Macs. And while many users were happy to just max out the RAM, and enjoy the performance gain of having more memory, which let them run more applications concurrently, some users discovered the joys of using a RAM disk to speed up the system and apps. Other users discovered that a RAM disk could be used to create an amazingly fast storage system. Remember, back then, most Mac Plus users were getting by with a single 800 KB floppy drive, while those who felt like splurging could add an additional external floppy drive. If you really had cash to burn, you could hook up a 20MB SCSI (Small Computer System Interface) hard drive, which would likely set you back well over $1,200.
The first prominent use of a RAM disk was to copy the Mac’s slow ROM (Read Only Memory), which contained many of the system’s core components, along with the operating system, which was stored on a floppy drive, and move them both to a RAM disk where they could operate at the speed of RAM; many, many times faster than either the floppy disk or the ROM.
The performance increase was amazing, and was achieved for just the cost of a RAM disk utility app.
The second common use of a RAM disk back in the Mac Plus days was to create a tiered storage system. Floppy drives weren’t fast enough for professionals or avid amateurs to work with new rich media editing systems, such as audio editors, image editors, or page layout apps. SCSI drives could meet the needs of image editing and page layout, but audio editing was at best iffy, with most SCSI drives being too slow to provide the needed bandwidth for audio or other real-time editing.
RAM disks, on the other hand, were very fast, and could easily meet the needs of real-time editing with their ability to write or read files as quickly as the RAM could be accessed, without the mechanical latency inherent in SCSI or floppy disks.
The only disadvantage to RAM disks was that the data stored in them was lost every time you turned your Mac off, or the power went out. You had to remember to copy the content of the RAM disk to your main storage system or your work would be lost.
Modern Uses for RAM Disks
RAM disks are likely to be the fastest storage location available on a Mac, easily outperforming any hard drive, and in most cases, beating out SSDs. If you can live with the downside of RAM disks, primarily their small sizes, and the issue of not being able to retain data when power to your Mac is turned off, then there are still plenty of good uses for them.
- Scratch space and temp files: Assigning RAM disk space for use with a multimedia app as scratch space can increase the app’s performance. This assumes the app in question prefers to use disk space for its temporary files.
- Games: Try loading your favorite game, or for small RAM disks, just the saved game files to a RAM disk. You should see faster load times and rendering speeds, and smoother play.
- Video or audio editing/rendering: Load textures, images, audio loops, or other media assets you’ll be using onto a RAM disk for better overall performance.
- Compression: If you need to compress a large number of files as part of your workflow, moving them to a RAM disk can speed up the compression time.
- Batch file processing: If you’re converting a number of image, audio, or video files from one format to another, moving the files to your RAM disk can increase performance.
Creating a RAM Disk
There are two ways to create a RAM disk; you can use the Terminal app to manually create a RAM disk, or you can make use of a third-party utility for creating a RAM disk.
It’s a good idea to start the process of creating a RAM disk by knowing how much free RAM space you have available to work with:
Launch Activity Monitor, located at /Applications/Utilities/.
Select the Memory button in the Activity Monitor window.
At the bottom of the window is a summary of how the RAM is being used. You should see entries for Physical Memory, and Memory Used. Subtract Memory Used from Physical Memory to figure out how much free memory is available to you.
It’s a good idea not to use all of the free memory; your Mac always needs some free memory to work with. Apps like web browsers can quickly swallow up free memory, not to mention the RAM disk you’re about to create. I suggest you leave the Activity Monitor app open, so you can see how memory is being used on your Mac as you experiment with creating and using RAM disks.
Note: The RAM disk you create will not affect the Memory Used entry until you actually use the RAM disk to store data.
Let’s start with using the included Terminal app:
Launch Terminal, located at /Applications/Utilities/.
The following command will create the RAM disk:
diskutil erasevolume HFS+ «RAMDisk» `hdiutil attach -nomount ram://2048`
The command has a number of parameters you’ll likely wish to change; the first is the name of the RAM disk, which in the example is “RAMDisk”. You can use any name you wish; just be sure the name is contained within the double-quotes.
The second option you may wish to change is the size of the RAM disk; in this example, the entry ram://2048 will create a 1 MB RAM disk. The size you enter is how many memory blocks to use in the RAM disk; 2048 blocks will create a 1 MB RAM disk. Multiply the 2048 value by the number of MB you wish to use for the RAM disk; some examples:
- 256 MB = 524288
- 512 MB = 1048576
- 1 GB = 2097152
- 2 GB = 4194304
The last note about the command is the accent grave ` character used before hdiutil and after the size parameter. The character is not a single quote; the accent grave character is found at the top left of most QWERTY keyboards; the accent grave character is usually on the same key as the tilde (
With all the notes taken into account, if you wished to create a 1 GB RAM disk, you would enter the following at the Terminal prompt:
diskutil erasevolume HFS+ «RAMDisk» `hdiutil attach -nomount ram://2097152`
and then press enter or return.
After a moment or two, the RAM disk will be mounted on your Mac’s desktop, ready for you to work with.
Third-Party RAM Disk Utilities
There are a number of utilities that make creating and managing a RAM disk a bit easier than using Terminal.
- TmpDisk: Available at github.com/imothee/tmpdisk, TmpDisk is a simple Open Source RAM disk management app. It allows you to create RAM disks by simply filling in a few fields. It installs as a menu bar item and includes the ability to create RAM disks automatically at startup.
- Ultra RAM Disk: Available from the Mac App Store, Ultra RAM Disk installs as a menu bar item that allows you to create RAM disks when needed.
- RAMDisk: Available from the Mac App Store, RAMDisk is an app for creating as well as backing up RAM disks, to allow you to save their contents as well as restore RAM disks when you restart your Mac.
Using the RAM Disk
Now that you have a RAM disk mounted on your Mac you can use it just as if it were another drive. Try copying an image file to the RAM disk and then open it in your favorite editor. You may be amazed at how fast it opens, as well as how fast you can perform edits and save the image.
If you have a favorite game, and enough free memory to house the game, try using the RAM disk to run the game from. You may be racking up points faster than ever.
Remember: The key to using a RAM disk is that the information stored within it is volatile. It won’t survive a shutdown or power loss. Make sure you copy any information you need from the RAM disk before shutting down.
Источник
9 Free Tools To Optimize RAM Memory For Windows And macOS
Increasingly both Microsoft Windows and Apple macOS are intelligent enough to manage the amount of RAM available in the system, especially newer operating systems such as Windows 10 and macOS. Memory optimization software is not necessary unless you are still using a very old OS such as XP or you have very little RAM to spare. Works great on Microsoft’s Windows 10 and Apple’s macOS.
↓ 01 – Memory Cleaner X | macOS

Memory Cleaner X monitors your memory usage and cleans up your Mac’s memory, increasing performance. Cached memory can take up the memory needed for new apps, and Memory Cleaner X increases performance by cleaning cached memory. Memory Cleaner X also monitors RAM usage on your computer, and you can free up unused memory in just one click.
The application monitors RAM usage on your computer and frees up unused memory with one click. With Memory Cleaner X, you can easily manage your memory usage. An animated status icon in the menu bar shows you the percentage of memory being used, as well as memory cleaning being run. Features:
- Memory usage information displayed in the menu bar
- Memory usage per application
- Manual memory free up when needed
- Automatic memory free up
↓ 02 – CleanMem Free | Windows
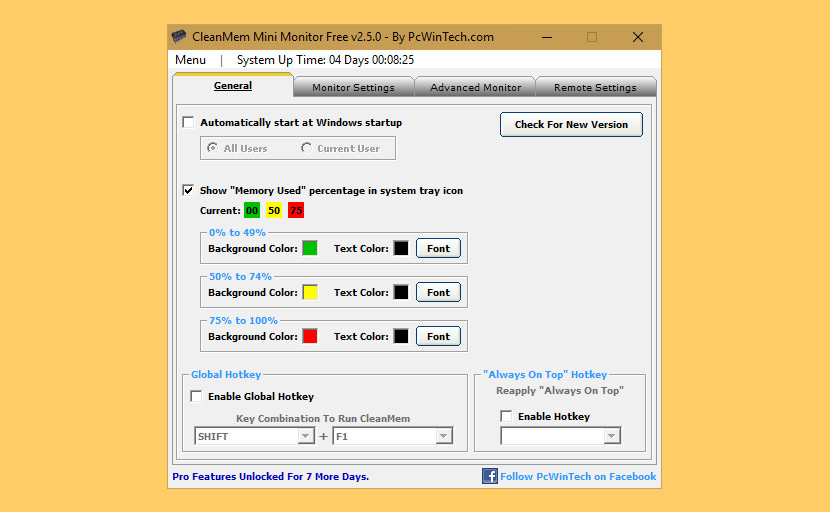
CleanMem is still a set it and forget program and is totally free. When you install CleanMem it will auto run every 15 min by the Windows Task Scheduler. Once installed it is set and forgotten. Just as it always has been. You can configure CleanMem to do more advanced things such as ignore lists, only lists, and log files. These can be set by the CleanMem Settings program in the start menu.
↓ 03 – Memory Clean 2 | macOS
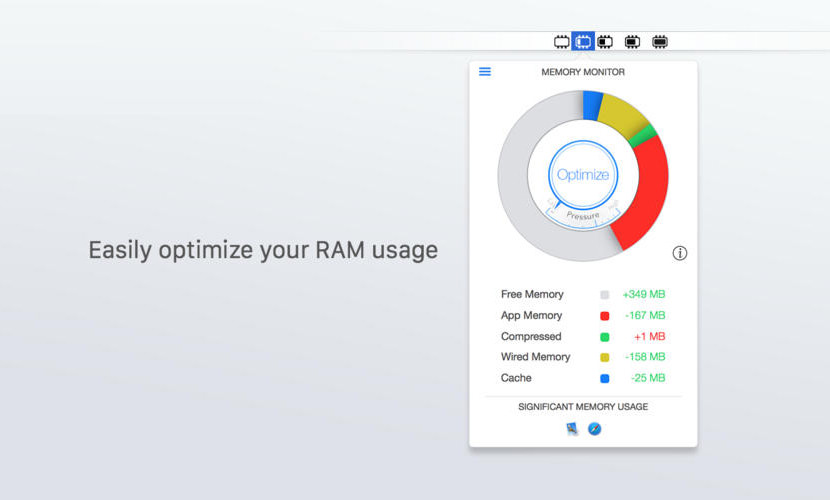
Memory Clean is the ultimate app for optimizing your Mac’s memory and is best used after you have finished using a memory (RAM) intensive app or game. It replicates the feeling of a fresh system restart. Memory Clean works by purging the Mac’s inactive memory and is best used when you close an intensive program that you do not plan to use again quickly within a few hours.
↓ 04 – RAMRush | Windows
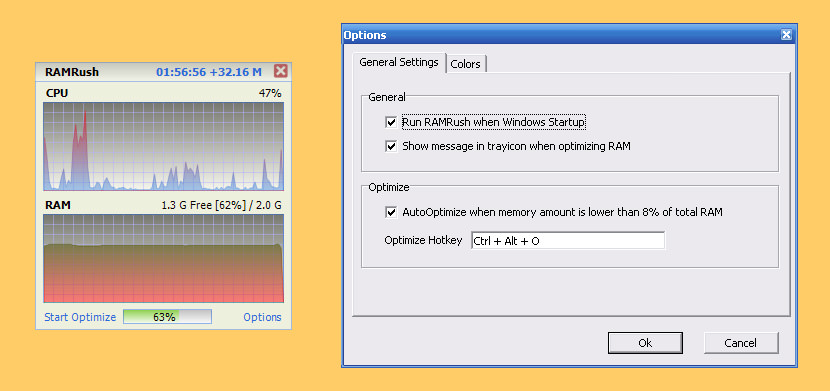
RAMRush is a free memory management and optimization tool. It can efficiently optimize memory usages of your Windows system, free up physical RAM and make your system work better. RAMRush uses an intelligent way to manage the physical memory and lets the RAM work in a better performance. It will help you to prevent system crashes, memory leaks and keep your computer running more efficiently.
- Increase system performance
- Increase the amount of memory available
- Defragment system physical memory
- Recover memory from Windows applications
- Remove memory leaks
- Prevent system crashes caused by memory problems
↓ 05 – Wise Memory Optimizer | Windows
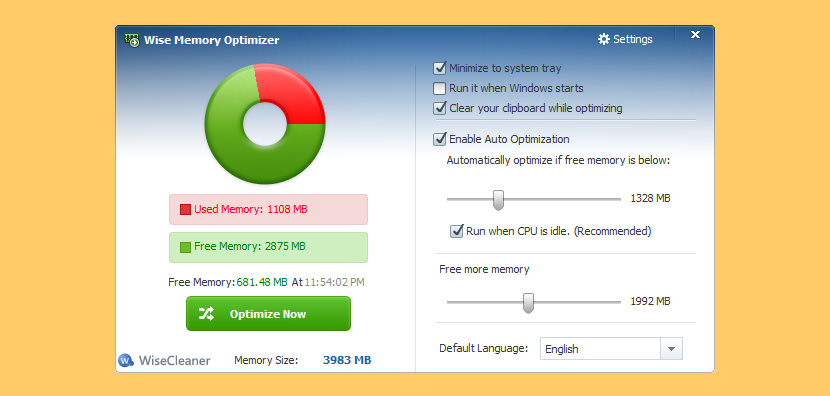
Most PC users have known and unknown applications running in the background that take up your computer’s physical memory and thereby affect its performance. Wise Memory Optimizer helps you free up and tune up the physical memory taken up by some useless applications to boost PC performance. The application requires a pretty low quantity of CPU and system memory, has a good response time and rapidly finishes an optimization job. Better yet, it also has a portable version. You can drop the program files anywhere on the hard drive or a flash drive and run it on any computer without prior install operations.
↓ 06 – Mz RAM Booster | Windows

Mz RAM Booster is a program created to improve the performance of your computer by auto-recovering RAM and fine tuning some Windows system settings! It uses minimal resources and almost no CPU time. Speed up your computer, stop memory leaks and increase free RAM.
↓ 07 – Memory Cleaner | macOS
Memory Cleaner can increase your free memory with a simple click and monitor memory usage in the menu bar. Memory Cleaner is the perfect tool to keep your computer going full speed and helps you to optimize your memory (RAM) usage with a simple click.
Memory Cleaner keeps your system’s memory (RAM) clean by monitoring and optimizing the memory usage. Helps you to quickly access detailed memory information and diagnosis from your menu bar and CLEAN your memory with a simple click. Main Features:
- One-click and automatic system memory optimization
- List of apps with significant memory usage
- Memory pressure meter and notifications
- Dynamic and customizable menu bar
- Detailed memory information
↓ 08 – Mem Reduct | Windows
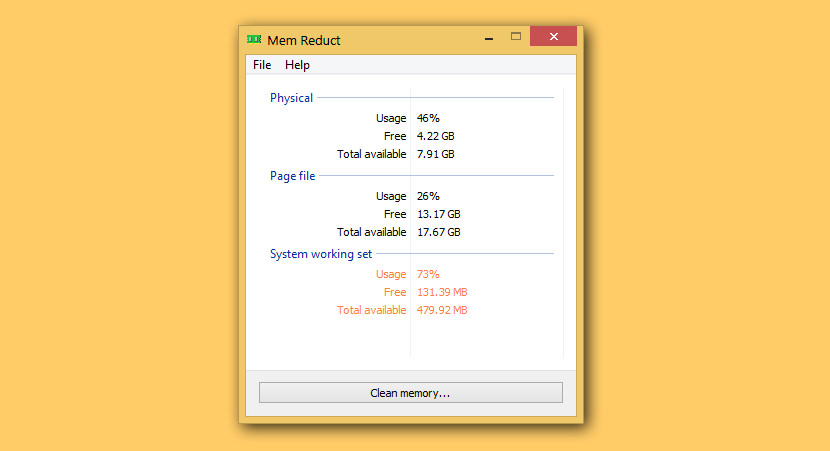
Lightweight real-time memory management application to monitor and clean system memory on your computer. The program used undocumented internal system features (Native API) to clear system cache (system working set, working set, standby page lists, modified page lists) with variable result
10-50%. It is compatible with Windows XP SP3 and higher operating systems, but some general features available only since Windows Vista.
↓ 09 – MemPlus | Windows
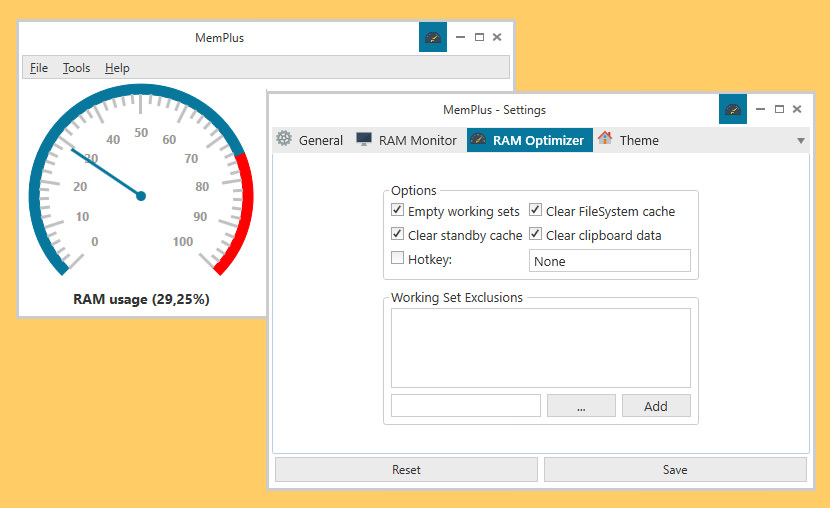
MemPlus can be used to monitor the RAM usage on your device. You can clear the memory of any non-essential processes by clicking the “Clear memory” button which is visible in the main window. This will clear both the working sets of processes and the FileSystem cache, if enabled. You also have the ability to clear the working set or FileSystem cache separately.
- RAM Optimizer – MemPlus can be used to reduce the amount of RAM that is being used by applications on your system. In essence, freeing up memory so that more memory is available to you!
- RAM Analyzer – MemPlus can help recover the specification of the RAM that is installed on your system. This information can be exported in TEXT, HTML, CSV and Excel formats.
↓ 10 – Memory Optimizer [ Not Free Anymore ] | Windows
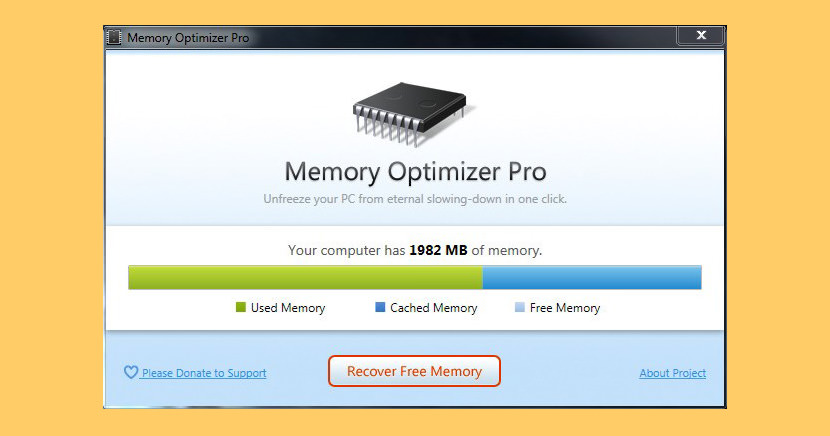
Lacking memory? Optimize with Memory Optimizer. You’d be surprised how much you can recover! Understand your computer’s memory usage and keep it under control – Memory Optimizer will graph your computer’s memory showing you what’s using it and giving you an easy way to optimize it’s usage. Just click “Optimize” and speed your computer up immediately!
Источник


