- Windows and Doors
- How to Seal a Gap Between a Door and Frame
- Why Are Gaps Between the Door and the Frame Bad?
- How Much of a Gap Should There Be?
- Why Is There a Gap Between Your Door and Frame?
- Signs That You Need New Weatherstripping
- How to Seal a Gap Between a Door and Frame
- 1. Install New Weatherstripping
- Types of Weatherstripping
- Top-Rated Weatherstripping for 2020
- How to Install New Weatherstripping
- 2. Install a Door Sweep
- Conclusion
- 8 Steps to Fix Gap between Door and Frame
- What you’ll need to fix the gap between the door and frame?
- Step-by-Step Guide for fixing the gap between the door and frame
- Step 1: Tighten the door hinges
- Step 2: Remove and replace old weather stripping
- Step 3: Measure the door
- Step 4: Mark the measurements on the weatherstripping
- Step 5: Cut the weatherstripping
- Step 6: Install weatherstripping
- Step 7: Screw the door sweep along the bottom edge of the inside of the door
- Final Step: Test the seal
- Conclusion
Windows and Doors
Manufacturing and distributing PVC-U windows and doors has become an integral part of GAP in recent years. Whilst GAPs history was built on successfully supplying the products associated with the installation of windows and doors, such as trims and fixings, our future firmly lies in manufacturing PVC-U windows and doors following a large capital investment in creating the most advanced fabrication and innovation plant in the country.
Products
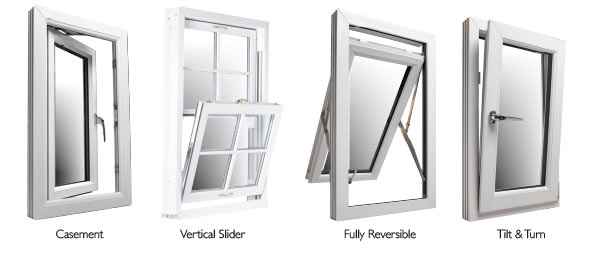
Marketed under the Homeframe brand using Spectus profile, our windows and doors are both thermally efficient and secure. Choose from a wide range of styles including Casements Windows, GRP Composite Doors, Patio Doors, French Doors, Reversible’s and Tilt & Turns.
We also supply Genesis Sash windows which features a unique mechanically jointed framing system which is innovatively designed to replicate timber sash windows, but with none of the drawbacks
As you’d expect, our windows and doors are extremely energy efficient and we offer both A & C ratings.
Depot Network
With over 100 depots currently, and growing fast, a GAP depot is never far away. Having a large nationwide network allows us to service customers both small and large from single window installations through the multi-plot developments. Find your closest depot here.

Quick Order / Quote
Whilst we like to think we have fitter friendly depots, we’re more than aware you want to spend as little an amount of time with us as possible, as you want to get back on the job. With this in mind, we built a customised software solution that allows customers to be quoted for windows and doors, within minutes and any of our depots. No Faxes. No Emails, No Time Wasted. Just fast quick quotes.

Guarantees
All Homeframe White and Foiled windows and doors are guaranteed for 10 years from date of manufacture.
Download the Homeline Style Guide Brochure to view the latest styles of PVC-U doors and windows.
How to Seal a Gap Between a Door and Frame

There is nothing worse than losing your valuable heat indoors in winter, and your cool air in summer through gaps between your door and the frame. Luckily there is a relatively simple solution to this problem, which you can do yourself.
To seal a gap between a door and frame, you should fix your hinges if it is a clearance problem or replace your weatherstripping that may have worn. You should also install or replace a door sweep at the bottom of your door to complete the door seal.
If you seek advice on installing new weatherstripping or how to seal a gap between your door and frame, you have come to the right place. Read on to find out how to get rid of those gaps once and for all.
Why Are Gaps Between the Door and the Frame Bad?
- Heat Loss – Besides Windows, doors are the worst culprits in heat loss. It causes a marked increase in residential homes’ energy consumption. Between your windows and doors account for 20 to thirty percent of a home’s heat loss.
- Loss of Cooling – Not only will gaps allow warm air to escape, but you will also lose your cold air-conditioned air in the summer and increase your bills.
- Water Damage – Gaps in exterior doors may let in rain and moisture, which could damage your home’s interior.
- Entry to Pests – Gaps in your doors are also an entryway to pests. A sturdy aluminum threshold and a door sweep can help keep out those unwanted little intruders.
How Much of a Gap Should There Be?
There should be some space between the door and the frame for your door to open and close properly. The gap between the sides and top should be the same as the Nickel’s width (2mm) and 8mm between the door and floor.
Even though a widened gap around your door and frame may not seem much of an emergency, it should be considered an important task. No one should pay unnecessary heating or cooling bills if they don’t have to.
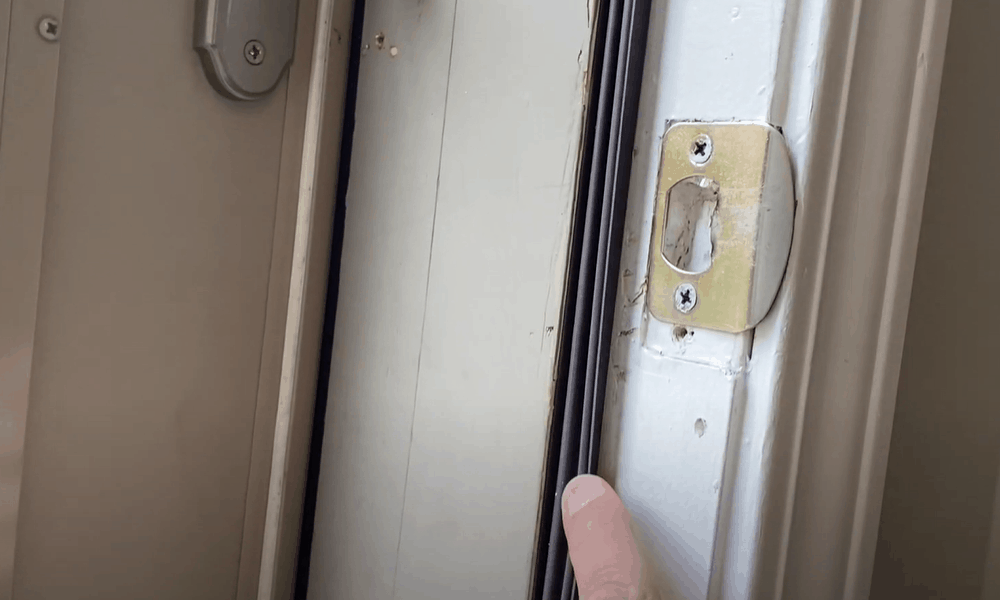
Why Is There a Gap Between Your Door and Frame?
Before you remove or replace your weatherstripping, ensure that the gaps are due to worn weatherstripping and not faulty hinges . To test if your hinges are loose, take your door by the handle and lift it. If the door moves upwards, then it is a hinge problem that causes the gaps, and a hinge repair will sort out your problems.
- Sometimes gaps may be caused by loose or missing screws. Open the door and ensure that the screws are in, and are correctly tightened.
- If your screws are loose and can not be appropriately aligned, you may use a thread lock to secure them.
- Ensure that all the hinges are the same size and that a heavyweight hinge is not mixed with the standard weight hinges.
Your door’s weather seals can often bend, compress, or wear out over time and leave a gap that lets your internal temperatures go outside. Weatherstrips are the soft and flexible material placed in the door jamb and header to keep out wind, water and keep your temperatures indoors.
Signs That You Need New Weatherstripping
- There is light shining around your closed door. If you can see the light shining and gaps around your external door, it’s an excellent sign that you need to replace your weatherstripping. Even the smallest gaps are going to lose you heat in winter and coolness in summer, so installing new weatherstripping will save you money as well as comfort.
- There is water leakage around your door frame. If you notice water around your door jamb or frame when it rains, your weatherstripping is no longer functioning. The water leakage through the gaps can cause mold or rot-related damage and affect your home’s door and interior. Remember that once damp and rot has set in, it can be costly to eradicate.
- Your weatherstripping is bent, cracked, or flattened. When your weatherstrip becomes aged, it becomes dry and warped and no longer acts as a seal to the outside air. For weatherstripping to function, it needs to provide consistent compression around your door that forms a proper seal. This seal protects your home from water damage and reduces your energy consumption from air conditioning and indoor heating.
How to Seal a Gap Between a Door and Frame
A properly sealed door needs two main components. The weatherstripping covering the top and sides of your door, and a door sweep covering the bottom of your door. Remember, even a deceptively small gap around your doorway can increase your heat or AC loss to the outside.
1. Install New Weatherstripping
Choose the weatherstripping best suited to the area where the door is situated. The weatherstripping that you chose should seal well when the door is closed but still allow it to open freely.
Types of Weatherstripping
- Felt and Open-Cell Foams. These are much cheaper, but they are not very weather resistant. They are somewhat visible and aren’t the best at blocking airflow because of their porous nature. However, they are straightforward to apply and may be fine in your home’s low traffic area.
- Vinyl Weatherstripping. This is slightly more pricey. However, it is more durable and has high moisture resistance.
- Felt-Based Weatherstripping. It can be plain or reinforced, but is quite delicate and needs to be replaced yearly. They are not useful in high moisture or high traffic environments.
- Metal Weatherstripping. This is available in bronze, stainless steel, and copper. Although they are more pricey, they are extremely durable and can fit in more with an older home aesthetic.
- Tubular Rubber and Vinyl. This weatherstripping is resilient and holds a tight seal. This type of stripping can be more challenging to install but has a lifespan of 5 years plus. This type of stripping is highly durable and does not suffer compression easily as your door swells and shrinks.
- Foam Tape. This is made from open or closed-cell foam or EPDM rubber and sold in varying widths and thicknesses. It is suited well to fit irregular gaps. It is easy to use and only requires fitting and adhering to the inside of your door frames.
Top-Rated Weatherstripping for 2020
- KELIIYO Door Weather Stripping with silicone and PVC foam is resilient and flexible
- Fixman Self-Adhesive Black EVA Foam is a self-adhesive and versatile weather seal that can cover 3-8mm gaps.
- CloudBuyer Door Window Adhesive Rubber Soundproofing Strip is a high-quality rubber seal for doors and windows and is durable and stretch resistant.
- Aurora Miracle Door Seal Strip is a double seal foam stripping great for a wider gap cover with the added benefit of soundproofing.
- Uxcell Weather Stripping Frameless Door Bottom is frameless and easy to apply on your door bottom and is extremely weather-resistant.
How to Install New Weatherstripping
If your door is not previously fitted for weatherstripping, installing the new weatherstripping shouldn’t be difficult. Ensure that your surfaces and grooves are scrupulously clean before laying new weatherstripping.
Installation process:
- Cut and nail the door jamb weatherstripping. Close your door and measure the top part of the frame from side to side. Mark this measurement down on your weatherstripping with a precise thin line.
- Cut the top piece of your weatherstripping. Cut the soft part of your weatherstripping with a knife or scissors and cut the plate with a fine-tooth saw or hacksaw.
- Nail in your top piece of weatherstripping. Pace your weatherstrip with the soft side has its entire length against the door. Tap 1-½ inch nails into the flange by lightly tacking it in place without driving the nails home. Then measure the side frames of your doorway.
- Cut your side pieces. Cut each end of your side stripping to fit your top piece’s shape by using a piece of scrap as a guide. Cut the foam with scissors and the flange with a fine-tooth saw.
- Adjust your cut. Either file or sand your cut edge for the tightest possible fit. Measure and cut the bottom to length and pace the strips so that the entire seal is against the door and tack it into place.
- Check the fit. Make sure the stripping fits flush without affecting the movement of your door and that your door locks. Once the fit is right, you may drive in the nails. Ensure that you place the nails about 2 inches from the ends and about 12 inches (30cm) apart to prevent splitting. Make sure your joins are flush before nailing in the nails.
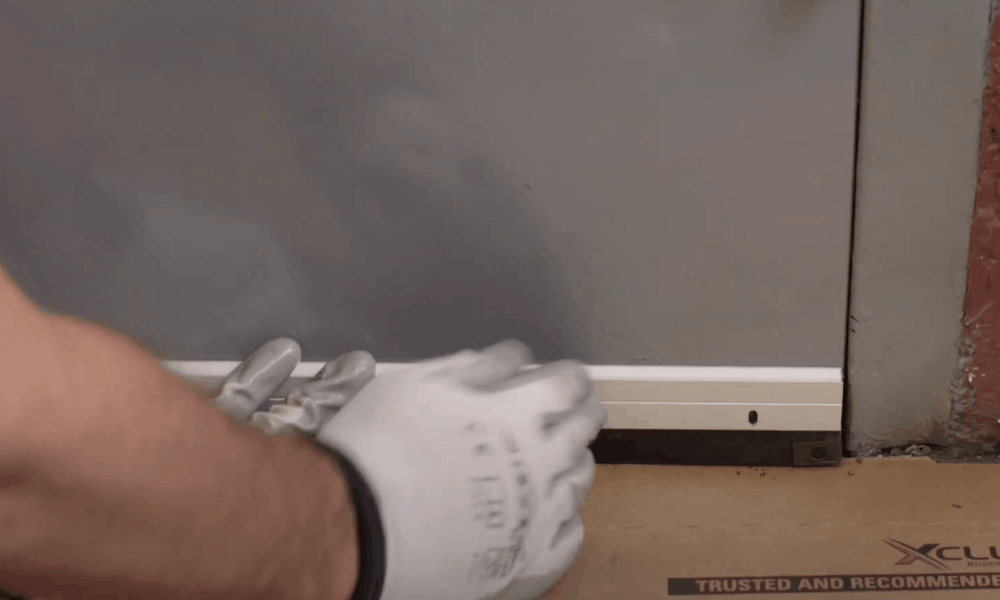
2. Install a Door Sweep
Door sweeps fit between the bottom of the door and the floor and are pieces of flat plastic, aluminum, and stainless steel fitted with a strip of vinyl, nylon, or a brush. The brush neatly closes up your gaps without interfering with the movement of your door.
How to install a door sweep:
- Measure the bottom of your door. Remove the old sweep and clean the area thoroughly. Measure the width of the bottom of your door from the inside and mark the length on your sweep.
- Cut Your sweep to size. Using your measurements, cut the foam with scissors or a knife, and trim the flange with a fine-tooth saw.
- Mark your placement points. Place your sweep with the soft portion lightly touching the top of your door threshold. Mark the screw positions and drill with a 3/32″ drill bit.
- Attach the sweep. Screw the sweep down against the threshold and open and close your door to test if the sweep is in the right position.
- Attach felt pads to the bottom door edge. Cut out two 1-¾ (4.44cm) inch pads from ⅛ inch thick felt. Nail the pads to the bottom of each side of the frame. Open and shut the door to ensure the fit. The felt size could be adjusted to fit your particular frame, or overlaid to add thickness.
Conclusion
With these few simple steps, not only will your home be more comfortable in hot or wintry weather, but you can save on your energy consumption and reduce noise . Although small gaps may seem innocuous, they can end up costing you in the long run. As we have shown, you don’t need to hire an expert and pay for their time when you can achieve the same results yourself with just the price of the parts.
We have included this video clip which shows how to tackle older doors with some frame damage that still need weatherstripping if you would like to see how it is done:
8 Steps to Fix Gap between Door and Frame
What happens when there is a gap between a door and its frame? The first issue that you’ll notice is that the door won’t close snug and tight. It will let cool air out during the scorching summer days and the cold air in during the frigid days of winter. Your home’s heating and cooling efficiency will also suffer.
However, if you know how to fix gap between door and frame, you’d never have to face the issues mentioned in the previous paragraph. It is quick and easy to do, as shown in this video, and won’t take more than a few hours off of your busy routine
What you’ll need to fix the gap between the door and frame?
Here’s a list of all the tools and equipment you’ll need to seal your door
- Screwdriver
- Wood plugs (optional)
- Weatherstripping
- Damp rag
- Paint scraper
- Measuring tape
- A pair of scissors
- Hammer and 1 ½’’ nails
- Vinyl or metal door sweep
Step-by-Step Guide for fixing the gap between the door and frame
Follow these steps to fix the gap:
Step 1: Tighten the door hinges
Check whether the door is loose by lifting it by the doorknob. If you can move it upward with little effort, use a screwdriver to tighten its hinges. That’s because, in some cases, the gap between the door and its frame exists only due to loose hinges.
If you notice that the screws are spinning without tightening the hinges, it means that the wood in the hole is hollowed out. You’d then need to buy wider or longer screws that can dig into that portion of the wood that isn’t stripped out.
Step 2: Remove and replace old weather stripping
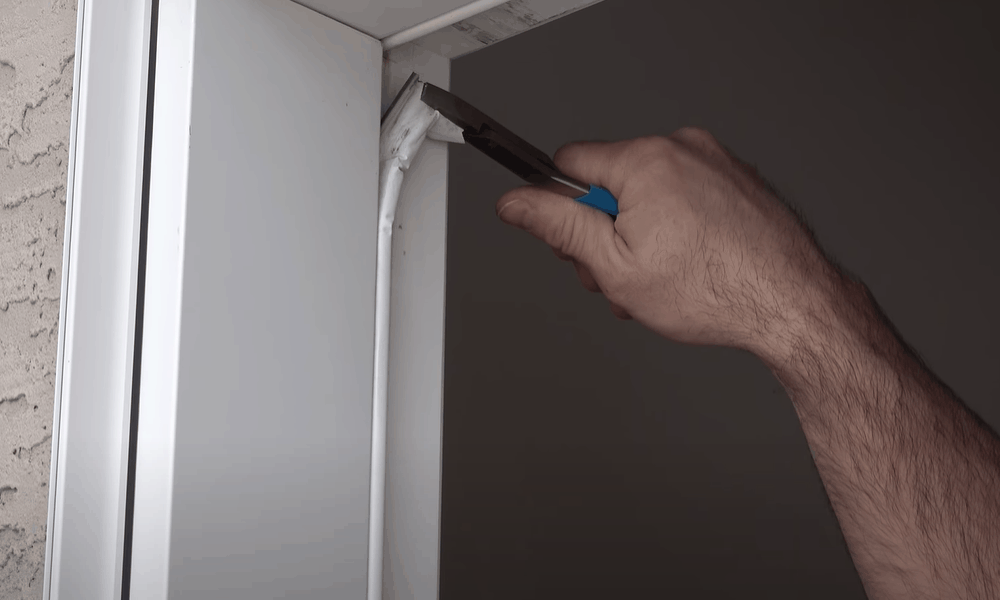
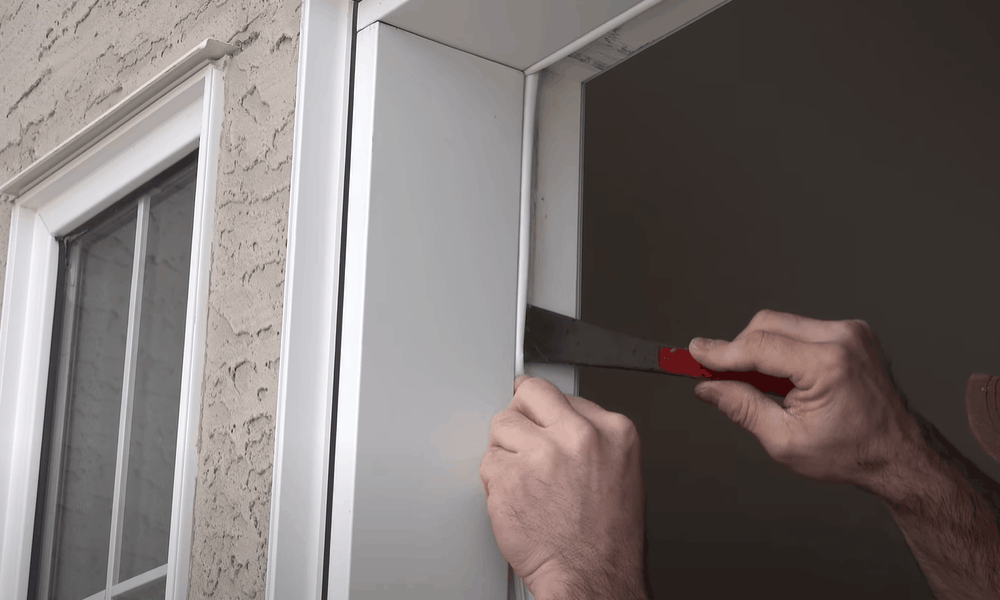
Have you previously installed weather stripping on the door? Then the presence of the gap indicates that the stripping is damaged. Remove old stripping by slicing it away from the top, bottom, and sides of the door with a paint scraper. Use a damp rag to clean the edges of the door and the door frame.
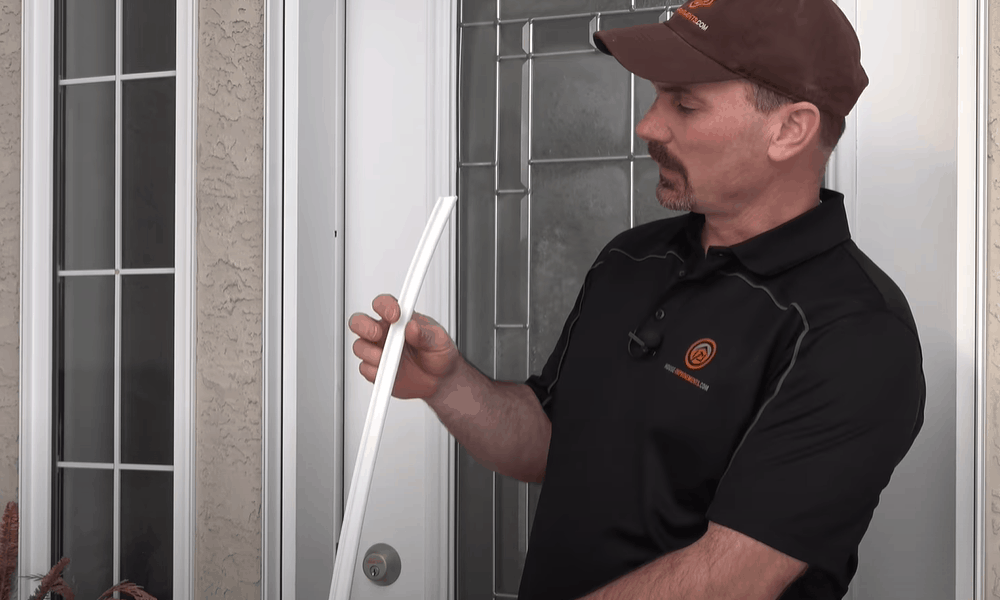
Afterward, you have two choices when it comes to buying new stripping: wrapped foam and metal. The former is durable and can be used to fill gaps of various sizes. Metal stripping is difficult to work with and isn’t a good choice for someone who has never sealed a door before.
However, if you have prior experience of sealing doors, you might do better with metal stripping that comes with a flexible vinyl flap. It is easy to work with for veterans and provides a seal that is more secure and durable
Pro Tip: Once you have purchased weather stripping, you may find that its kit only contains weatherstripping for the sides and top of your door. That means that you’ll need to purchase a door sweep separately. Flexible door sweeps work well with all types of floors, as well as carpets.
Step 3: Measure the door
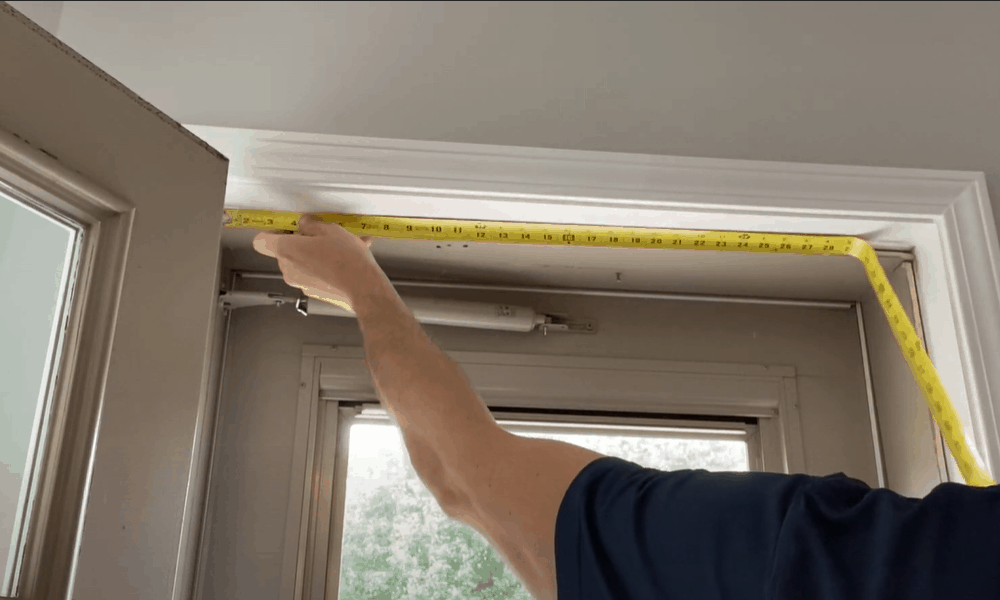
Close the door and use a tape measure to measure along both sides of its frame. Also measure along the top of its frame. Make sure that you measure the ‘frame’ of the door, as it is separate from the ‘door’ itself that ends at the beginning of the latch.
Open the door and measure its bottom with a tape measure. You should be facing the inside (room side) of the door when you’re taking this measurement. As this is the surface where you’re going to apply the weather stripping.
Step 4: Mark the measurements on the weatherstripping
You now have four measurements in your possession. Two of them are of the sides of the door, whereas the other two are of the door’s top and bottom. Use a tape measure and pencil to mark all the four measurements on the weatherstripping.
Step 5: Cut the weatherstripping
At the marks you measured out in the previous step, cut the weatherstripping with scissors. The cuts should be as even and clean as possible. One end of each side of the weather stripping – and both the ends of the top side – should be angled to fit into each other. You don’t have to angle the bottom side.
Step 6: Install weatherstripping
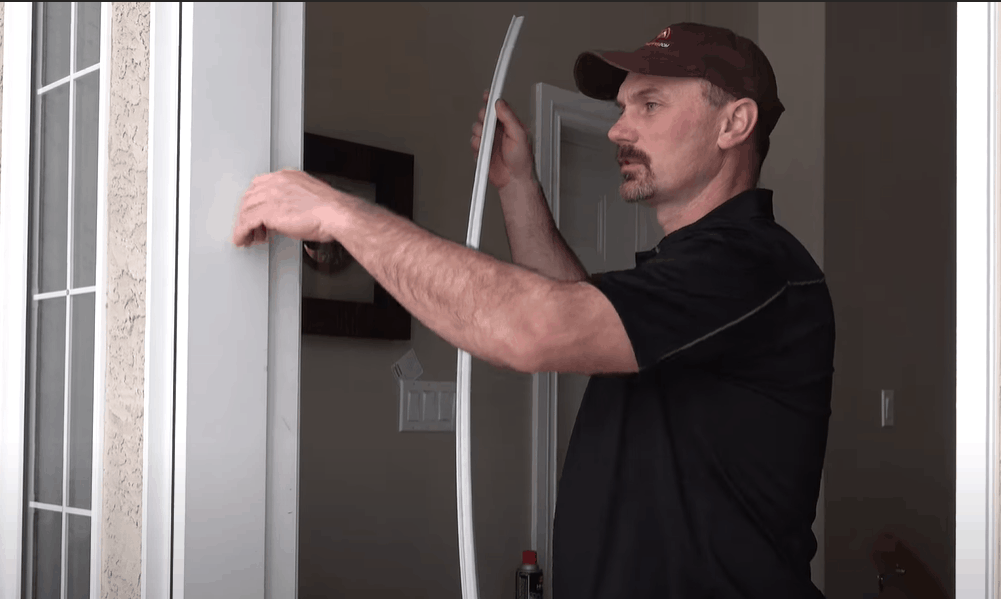
Step into your room and close the door. Position the top piece of weatherstripping along the top side of the door and nail it into place. You’d have to hammer the nails in. The nails should be 1 ½’’ in length and must be placed 2’’ from both sides to prevent splitting.
As the door stays closed, nail the side pieces of the weatherstripping along the sides of the door’s frame. Similar to what you’ve done with the top piece, you’d once again have to tack the side pieces into place with nails and a hammer.
Once you’ve done hammering in all four sides of the weatherstripping into the door frame, open and close the door to make sure that the seal is holding.
Step 7: Screw the door sweep along the bottom edge of the inside of the door
Provided you have bought metal door sweep, it will already have holes screwed in it. Mark the position of these holes along the bottom edge of the inside of the door with a pencil. Then, remove the metal sweep and use a drill bit to drill holes into these positions.
Afterward, place the sweep against the bottom threshold of the door and screw it in with the help of a screwdriver.
Pro Tip: If you decide to use vinyl door sweep, you can install it along the bottom edge of the door by placing a wood block over the weather stripping and them tapping it with a hammer to drive the weatherstripping’s flanges deep into the door’s bottom’s threshold.
Final Step: Test the seal
Just as you did to check the weatherstripping, open and close the door several times to test the snugness of the door sweep. If you have followed all the steps to the letter, your door should be adequately sealed by now, leaving no gap between itself and the frame.
Conclusion
Gaps between the door and its frame allow air to pass through them, thereby disturbing the inner temperature as well as the energy efficiency of your home. However, as you have now seen, it is fairly easy to fix the gaps. All you have to do is to determine the location of the leak, seal it with weatherstripping or door sweep (or both, if there are multiple sources of the leak).


