- How to Install GCC compiler on Linux Mint 20
- Installing GCC compiler on Linux Mint 20
- Getting started with GCC compiler on Linux Mint
- Conclusion
- About the author
- Kamran Sattar Awaisi
- youmych / how-to-install-latest-gcc-on-linux-mint.txt
- This comment has been minimized.
- guidanoli commented Jun 24, 2020
- Как установить GCC на Linux Mint 20
- Как установить GCC на Linux Mint 20
- Установить GCC на Linux Mint 20 Ulyana
- Шаг 1. Перед запуском приведенного ниже руководства важно убедиться, что ваша система обновлена, выполнив следующие apt команды в терминале
- Шаг 2. Установка GCC на Linux Mint 20.
- How to install GCC 4.7.2 on Linux Mint? [closed]
- 2 Answers 2
- How to install latest stable release of GCC in Linux Mint?
- 4 Answers 4
How to Install GCC compiler on Linux Mint 20
The GNU compiler collection, which is the abbreviation for GCC, contains multiple compilers for various languages like C, C++, Go, etc. Using GCC, you can easily compile your programs on Linux Mint. Many open-source projects, including Linux Kernel, are compiled using the GCC compiler.
The build-essential package contains the GCC compiler, debugger, and many additional development tools. By installing the build-essential package, we can use GCC compiler on Linux Mint.
Installing GCC compiler on Linux Mint 20
The build-essential package is included in the Linux Mint base repository. open the terminal and update the apt package listing by typing:

Now, install the build-essential package with the command:
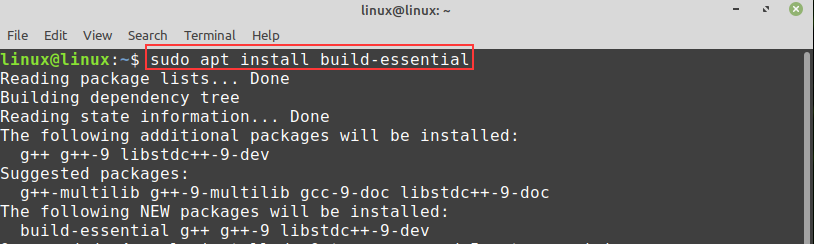
To continue installing the build-essential package, type ‘y’ on the command line.

Once the build-essentials package is installed, verify the GCC compiler installation with the command:

Getting started with GCC compiler on Linux Mint
Let’s compile our first C++ program with GCC compiler. Open your text editor and create a hello.cpp file:
printf ( «Hello from LinuxHint \n » ) ;
To compile this C++ program with GCC compiler, write on your terminal

My “hello.cpp” file is compiled successfully, and a new executable file, “a.out,” is created.
Let’s execute the ‘a.out’ file:

You can see that the message is printed on the terminal.
Conclusion
GCC compiler is used to compile the programming files on Linux. This post describes the installation of the GCC compiler on Linux Mint 20.
About the author

Kamran Sattar Awaisi
I am a software engineer and a research scholar. I like to write article and make tutorial on various IT topics including Python, Cloud Computing, Fog Computing and Deep Learning. I love to use Linux based operating systems.
Источник
youmych / how-to-install-latest-gcc-on-linux-mint.txt
| These commands are based on a askubuntu answer http://askubuntu.com/a/581497 and https://askubuntu.com/questions/26498/choose-gcc-and-g-version |
| To install gcc-7 (gcc-7.2.0), I had to do more stuff as shown below. |
| USE THOSE COMMANDS AT YOUR OWN RISK. I SHALL NOT BE RESPONSIBLE FOR ANYTHING. |
| ABSOLUTELY NO WARRANTY. |
| If you are still reading let’s carry on with the code. |
| sudo apt-get update && \ |
| sudo apt-get install build-essential software-properties-common -y && \ |
| sudo add-apt-repository ppa:ubuntu-toolchain-r/test -y && \ |
| sudo apt-get update && \ |
| sudo apt-get install gcc-snapshot -y && \ |
| sudo apt-get update && \ |
| sudo apt-get install gcc-7 g++-7 gcc-6 g++-6 gcc-multilib -y && \ |
| sudo update-alternatives —install /usr/bin/gcc gcc /usr/bin/gcc-7 70 —slave /usr/bin/g++ g++ /usr/bin/g++-7 && \ |
| sudo update-alternatives —install /usr/bin/gcc gcc /usr/bin/gcc-6 60 —slave /usr/bin/g++ g++ /usr/bin/g++-6 && \ |
| sudo apt-get install gcc-5 g++-5 -y && \ |
| sudo update-alternatives —install /usr/bin/gcc gcc /usr/bin/gcc-5 50 —slave /usr/bin/g++ g++ /usr/bin/g++-5; |
| When completed, you must change to the gcc you want to work with by default. Type in your terminal: |
| sudo update-alternatives —config gcc |
| To verify if it worked. Just type in your terminal |
| gcc -v |
| If everything went fine you should see gcc 7.2.0 by the time I am writing this gist |
| Happy coding! |
| See blog post at https://www.application2000.com |
This comment has been minimized.
Copy link Quote reply
guidanoli commented Jun 24, 2020
Great gist! Worked perfectly on my brand new Linux Lint. Needed to update gcc in order to build me the latest version of CMake 🙂
You can’t perform that action at this time.
You signed in with another tab or window. Reload to refresh your session. You signed out in another tab or window. Reload to refresh your session.
Источник
Как установить GCC на Linux Mint 20

Как установить GCC на Linux Mint 20
В этом руководстве мы покажем вам, как установить GCC на Linux Mint 20. Для тех из вас, кто не знал, GNU Compiler Collection (GCC) — это система компиляции, созданная проектом GNU для поддержки различных языков программирования. Текущая версия — GCC 9.3, выпущенная 12 марта 2020 года, поддерживает несколько основных языков программирования: C, C ++, Objective-C, Objective-C ++, Fortran, Ada, D, Go и BRIG (HSAIL).
В этой статье предполагается, что у вас есть хотя бы базовые знания Linux, вы знаете, как использовать оболочку, и, что наиболее важно, вы размещаете свой сайт на собственном VPS. Установка довольно проста и предполагает, что вы работаете с учетной записью root, в противном случае вам может потребоваться добавить ‘ sudo ‘ к командам для получения привилегий root. Я покажу вам пошаговую установку GNU Compiler Collection (GCC) на Linux Mint 20 (Ульяна).
Установить GCC на Linux Mint 20 Ulyana
Шаг 1. Перед запуском приведенного ниже руководства важно убедиться, что ваша система обновлена, выполнив следующие apt команды в терминале
Шаг 2. Установка GCC на Linux Mint 20.
Теперь мы запускаем следующую команду для установки компилятора GCC:
Иногда бывает целесообразно также иметь справочную страницу. Установите справочные страницы с помощью следующей команды:
Проверьте установку компилятора GCC с помощью команды:
Вы увидите что-то вроде того, что показано ниже:
Поздравляю! Вы успешно установили GCC . Благодарим за использование этого руководства для установки последней версии компилятора GCC в системе Linux Mint. Для получения дополнительной помощи или полезной информации мы рекомендуем вам посетить официальный сайт GCC .
Источник
How to install GCC 4.7.2 on Linux Mint? [closed]
Want to improve this question? Update the question so it’s on-topic for Stack Overflow.
Closed 8 years ago .
I need to install the latest version of GCC on Linux Mint 13. I found some useful terminal commands for Ubuntu 12.04, but it seems that nothing similar for Mint exists on the Internet.
Edit: I solved the problem, so, in order to help everybody else, write these commands:
sudo add-apt-repository ppa:ubuntu-toolchain-r/test
sudo apt-get update
sudo apt-get install g++-4.7 c++-4.7
And everything works fine. 🙂

2 Answers 2
I built it from source when I did this not too long ago.
I followed the instructions here, but I downloaded and extracted gcc 4.7.2 first instead of last and replaced steps 3 to 5 with running this script that comes with it (which does those steps for you):
You can download the gcc sources from one of the mirror sites: http://gcc.gnu.org/mirrors.html
Edit: added the instructions in-post
Download and extract g++-4.7.2
$sudo apt-get install gcc-multilib m4
In order to compensate for insufficient path information, added this to .bashrc
export LIBRARY_PATH=/usr/lib/i386-linux-gnu export
export C_INCLUDE_PATH=/usr/include/i386-linux-gnu export
Add these symlinks for the same reason:
$sudo ln -s /usr/include/i386-linux-gnu/gnu/stubs-32.h /usr/include/gnu
$sudo ln -s /usr/lib/i386-linux-gnu/crti.o /usr/lib/crti.o
$sudo ln -s /usr/lib/i386-linux-gnu/crt1.o /usr/lib/crt1.o
Источник
How to install latest stable release of GCC in Linux Mint?
I want to install the latest version of GCC (GNU compiler collection) in Linux Mint 17.3. Currently g++ —version returns 4.8.4, whereas the latest stable release is 5.3.

4 Answers 4
Your Linux Mint comes pre-installed with a GCC package. So first I would recommend you to check if the package is already present in your system by typing the following command in terminal.
In case you’re not having any such package then use the following command in terminal firstly you’ve add the following repository:
then use the next command:
There is always basic thing we should learn; take it as prerequisite before linux.. Learn googling. try to do more hard search .
download the latest version of gcc
use command: tar -xjf to unzip the file
Enter the directory that you unzipped just now, say in $HOME/Downloads/gcc-5.3.0 , then type command:
Dependency installation:build GCC requires GMP4.2+, MPFR 2.4.0+, and MPC 0.8.0+ and build essential
install a C++ compiler
Edit if you still get errors message like » zlib.h not found!» you can do the below to fix it:
I am not quiet sure what should be the lastest, because there are always some latest comes out. But you can install any of them in this way.
Take gcc-8 as example:
if you want to select gcc-8/g++-8 with higher priority(20 in this case), you also need to

Truth be told I’m simply too lazy to move off 17.3 — it works for me. That being said, I still needed a newer gcc. To compile it repeatedly for different targets I have a bash script (see below) that I modify and run (I’m writing my own toy OS, hence I have to use a specially generated gcc).
Change the directories in the script below to match the directories you have. I keep the compiled version in my own directory so I can easily switch between my compiled version and the system’s version. I suggest you do the same. You need to download binutils-2.23.2 as well as the gcc version you are interested in (I’m using 7.1.0 below). Put them into a
/contrib directory along with the script below.
You might also want to change the line «—enabled-languages=c» to «—enabled-languages=c,c++,objc» — my project only needs C. Another change would be the value of PLATFORM. I use «i686-elf» but that won’t work for you (I changed it below to something that will work for 32-bit platform). You can try «x86_64-linux-gnu» for a 64-bit platform.
For the curious — the reason I build it like this is because the gcc build process used to have a bug that prevented rebuilding in the source directory. I do not know if this bug still exists (I last encountered it in 4.8.0), but the only workaround was to explicitly build in a separate directory if you ever wanted to rebuild.
[EDIT: Perform the installation of the dependencies suggested above by GAD3R]
Источник


