- Fix problems in Windows Search
- Check for updates
- Run the Search and Indexing troubleshooter
- Restart Windows Search or your device
- Reset Windows Search
- Windows 10, version 1809 and earlier
- Windows 10, version 1903 and later
- Help us improve Search in Windows 10
- Как открыть поиск в Windows 10
- Добавление кнопки поиска Виндовс 10
- Восстановление работоспособности функции поиска
- Вызов поиска в Виндовс 10
- Вариант 1: Поиск на панели задач
- Вариант 2: Поиск в системных приложениях
- Использование функции поиска
- Заключение
- How do I search files in Windows 10 with a specific date range
- Replies (49)
Fix problems in Windows Search
If Windows Search is unresponsive or the search results don’t appear as expected, try any of the following solutions in this article.
If you’re running Windows 10 May 2019 Update (version 1903) or later versions and Windows can detect a problem, we’ll run the Search troubleshooter automatically. This troubleshooter will reset Windows Search back to the default experience. View your troubleshooter history under Settings > Update & Security > Troubleshoot > View History. Follow the steps below if your issue is still not resolved.
Original product version: В Windows 10 — all editions
Original KB number: В 4520146
Check for updates
Windows 10 lets you choose when and how to get the latest updates to keep your device running smoothly and securely. To manage your options and see any available updates, select the Start button, and then go to Settings > Update & Security > Windows Update > Check for updates. Install any available updates, and then restart your computer if the updates require it.
For more information, see Update Windows 10.
Run the Search and Indexing troubleshooter
Your PC automatically indexes content to deliver faster search results. Learn more about Search indexing in Windows 10.
Use the Windows Search and Indexing troubleshooter to try to fix any problems that may arise. To use the troubleshooter, follow these steps:
- Select Start, then select Settings.
- In Windows Settings, select Update & Security >Troubleshoot. Under Find and fix other problems, select Search and Indexing.
- Run the troubleshooter, and select any problems that apply. Windows will try to detect and solve them.
You can also use a command prompt to open the troubleshooter. Press Windows logo key+R, enter cmd in the Open box, and then select OK. At the command prompt, run the following command:
Restart Windows Search or your device
End the SearchUI process to restart Windows Search by following these steps:
- Press Ctrl+Alt+Delete, and select Task Manager.
- In the Task Manager window, select the Details tab.
- In the Name column, right-click SearchUI.exe, and then select End task.
- When you’re prompted to end SearchUI.exe, select End process.
The Windows Search process will automatically restart the next time that you search.
If this solution doesn’t fix your problem, try restarting your device. Restarting will also install any pending updates.
You may want to bookmark this page before you restart.
Reset Windows Search
Try resetting Windows Search by using the method that’s appropriate for your version of Windows.
To determine which version of Windows your device is running, follow these steps:
Select Start > Settings > System > About.
Under Windows specifications, check which version of Windows your device is running.
Resetting Windows Search does not affect your files. However, it may temporarily affect the relevance of search results.
Windows 10, version 1809 and earlier
If the Windows 10 October 2018 Update or an earlier update is installed, reset Cortana to reset Windows Search by following these steps:
- Select Start, right-click Cortana, select More, and then select App settings.
- In the Cortana settings, select Reset.
Windows 10, version 1903 and later
If the Windows 10 May 2019 Update or a later update is installed, use Windows PowerShell to reset Windows Search by following these steps:
You must have administrator permissions to run this script.
Download the ResetWindowsSearchBox.ps1 script from the Reset Windows Search PowerShell script, and save the file to a local folder.
Right-click the file that you saved, and select Run with PowerShell.
If you’re asked the following question, select Yes.
Do you want to allow this app to make changes to your device?
The PowerShell script resets the Windows Search feature. When the word Done appears, close the PowerShell window.
If you receive the following error message:
Cannot be loaded because running scripts is disabled on this system
enter the following command on the command line of the PowerShell window, and then press Enter:
The current policy appears in the window. For example, you might see Restricted. We recommend that you note this value because you’ll have to use it later.
Enter the following command on the command line of the PowerShell window, and then press Enter:
You’ll receive a warning message that explains the security risks of an execution policy change. Press Y, and then press Enter to accept the change.
To learn more about PowerShell execution policies, see About Execution Policies.
After the policy change is completed, close the window, and then repeat steps 2-4. However, when the Done message appears this time, DON’T close the PowerShell window. Instead, press any key to continue.
Revert to your previous PowerShell execution policy setting. Enter the following command on the command line of the PowerShell window, press the Spacebar, enter the policy value that you noted in step 5, and then press Enter:
For example, if the policy that you noted in step 5 was Restricted, the command would resemble the following one:
You’ll receive a warning message that explains the security risks of an execution policy change. Press Y, and then press Enter to accept the change and revert to your previous policy setting.
Close the PowerShell window.
If your organization has disabled the ability to run scripts, contact your administrator for help.
Help us improve Search in Windows 10
If the previous suggestions don’t fix the problem, let us know by sending feedback in the Feedback Hub. Provide details, such as a description of the problem, screenshots, log files, and any other information that might be helpful. In the Feedback Hub, select the appropriate category and subcategory. In this case, submit your feedback in the Cortana and Search category.
Как открыть поиск в Windows 10

Возможность поиска данных, в той или иной степени, в операционных системах семейства Windows появилась довольно давно, но именно в десятой Microsoft ее полностью переработали и улучшили, превратив в полноценный рабочий инструмент, благодаря которому можно найти практически все что угодно не только на компьютере, но и в сети. При этом далеко не все пользователи «десятки» знают, как вызвать столь полезную функцию, и сегодня мы расскажем именно об этом.
Добавление кнопки поиска Виндовс 10
Открыть поиск на ПК или ноутбуке с Windows 10 несложно, однако иногда эта функция может не работать или попросту быть скрытой (значок или поле для ввода отсутствует). Решение первой проблемы будет рассмотрено в следующей части статьи, а пока что расскажем, как активировать встроенную поисковую систему.
- Правой кнопкой мышки (ПКМ) кликните по панели задач.
- Наведите указатель курсора на пункт «Поиск».
- Выберите второй или третий вариант из доступных:
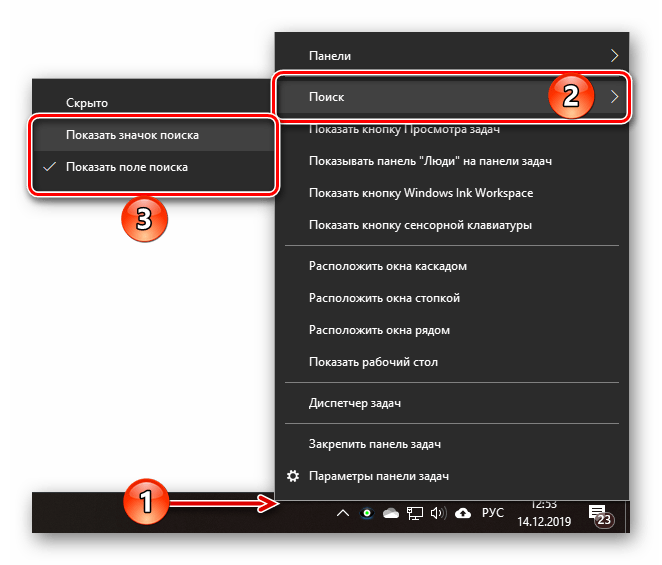

«Показать поле поиска».

На скриншотах выше можно увидеть, как выглядит каждый из них. При этом стоит отметить, что поиск в виде поля для ввода запроса может быть активирован только в том случае, если на панели задач используются большие значки.
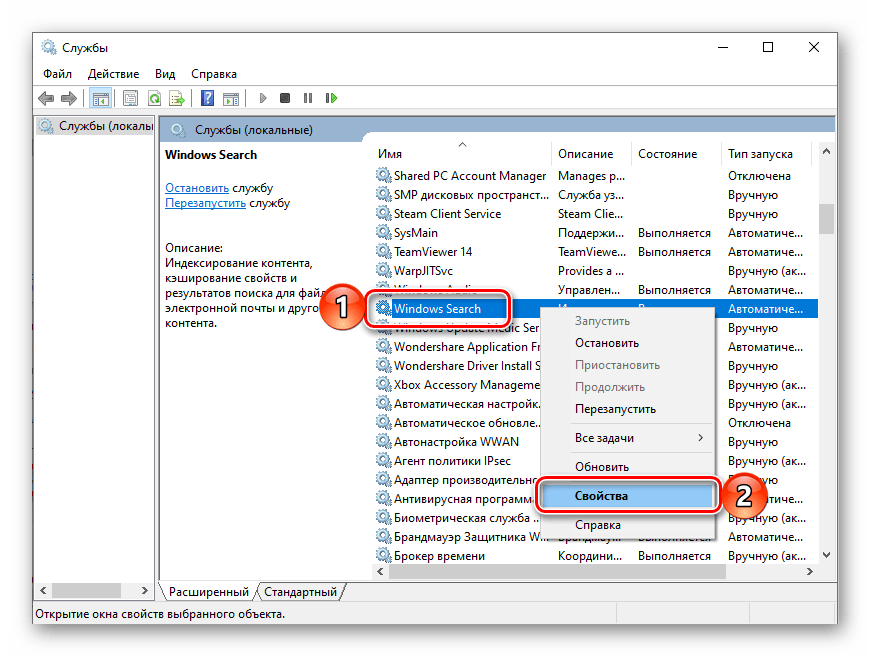
Восстановление работоспособности функции поиска
Если же функция поиска изначально была представлена на панели задач, но не работала, это говорит о наличии серьезных проблем в операционной системе, особенно если стартовое меню «Пуск» тоже не реагирует на обращение. Причин у такого поведения может быть несколько, но к основным стоит причислить остановку ответственной за работу поиска службы, повреждение системных файлов, некорректные записи в реестре, а также возможные ошибки и сбои в ОС Windows, с которыми, к сожалению, время от времени приходится сталкиваться большинству. Узнать подробно о том, что могло вызвать неработоспособность поиска конкретно в вашем случае, и как это исправить, поможет представленная по ссылке ниже статья.
Вызов поиска в Виндовс 10
Открыть поиск, представленный на панели задач, можно всего лишь двумя способами, однако эта функция доступна и в других системных компонентах и приложениях, о чем мы тоже расскажем далее.
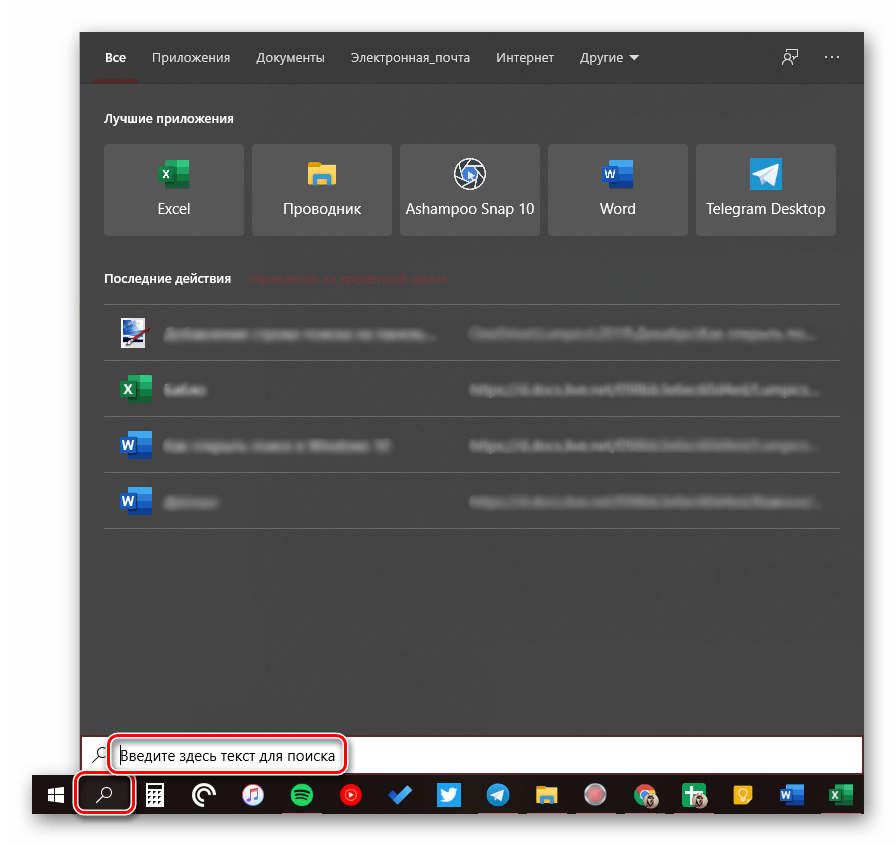
Вариант 1: Поиск на панели задач
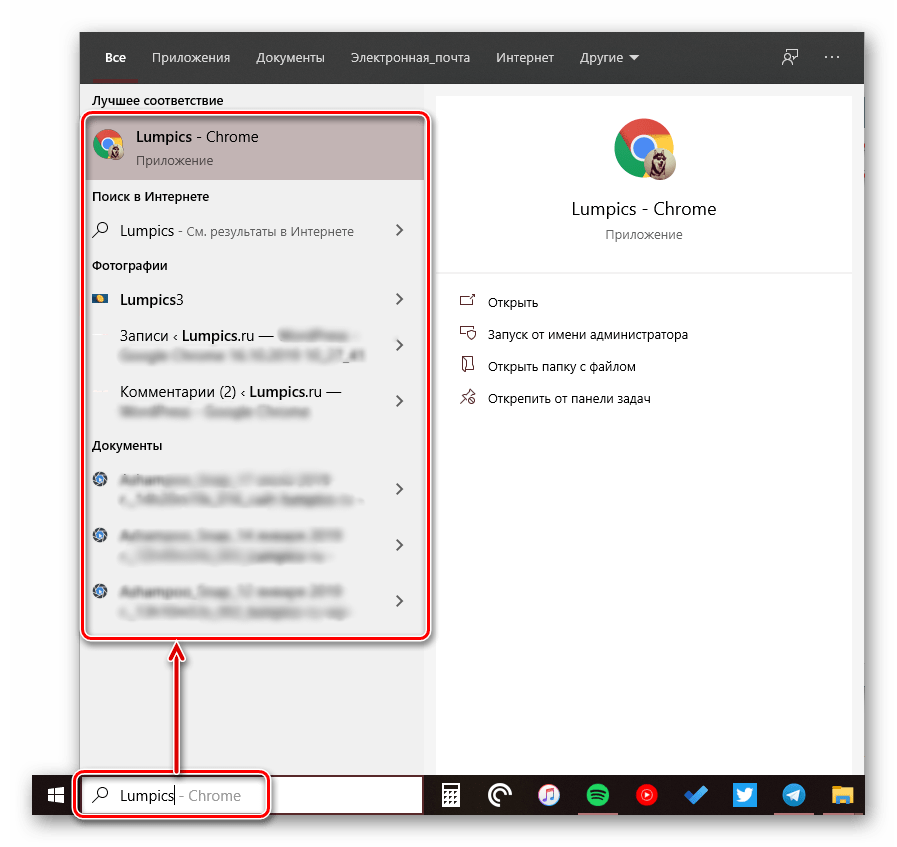
Самый простой и очевидный способ вызова поиска заключается в нажатии по его значку или полю левой кнопкой мышки (ЛКМ), в зависимости от того, какой из вариантов отображения вы выбрали сами. Дополнительно пояснять здесь ничего не нужно – все видно на изображении ниже.
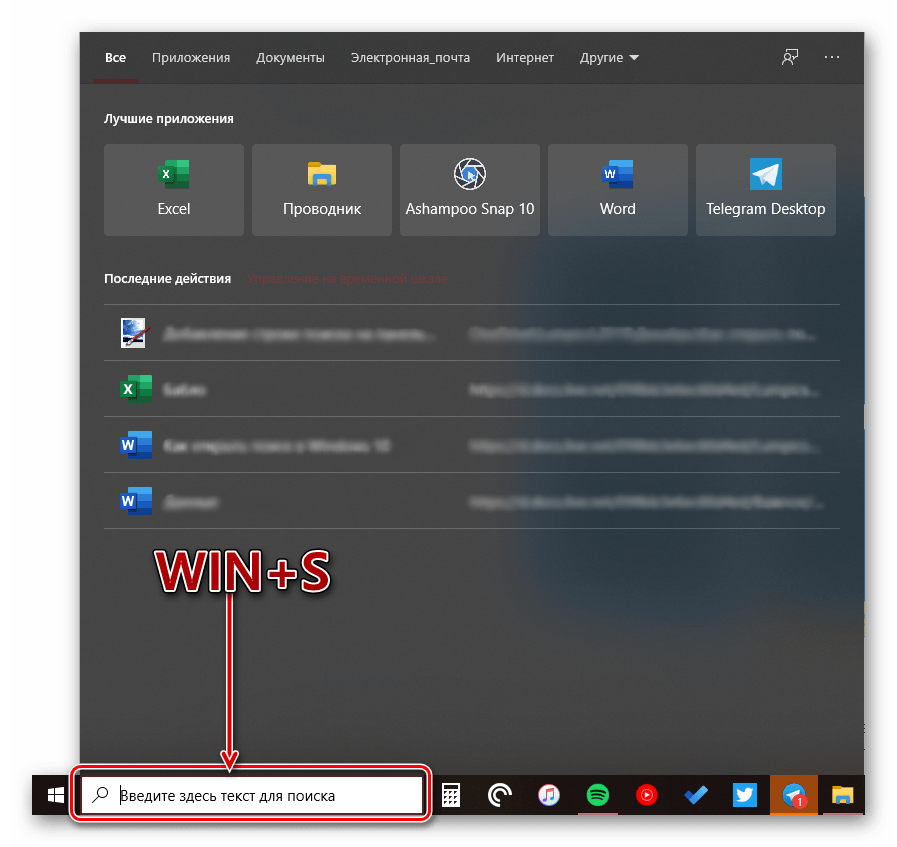
Если же вы не хотите постоянно перемещать указатель курсора в левый нижний угол экрана (или любой другой, смотря где располагается панель задач), можно воспользоваться горячими клавишами – нажатие «WIN+S» мгновенно активирует функцию.
Вариант 2: Поиск в системных приложениях
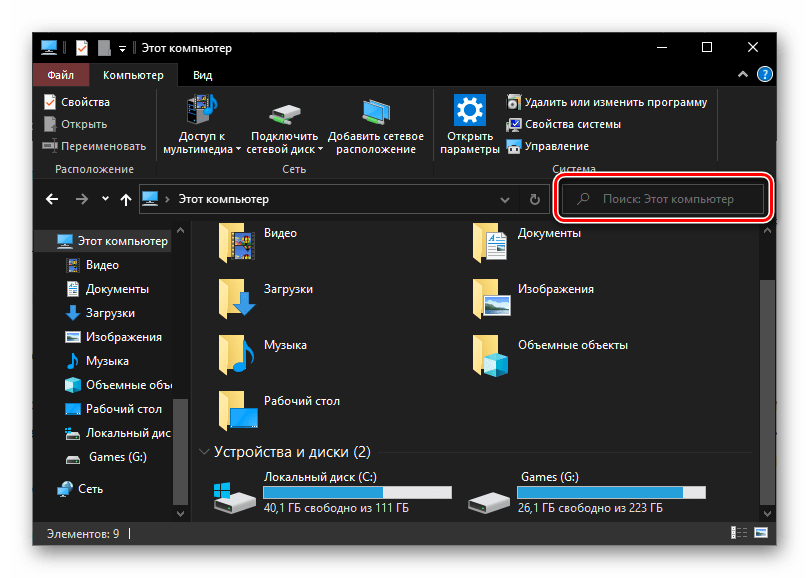
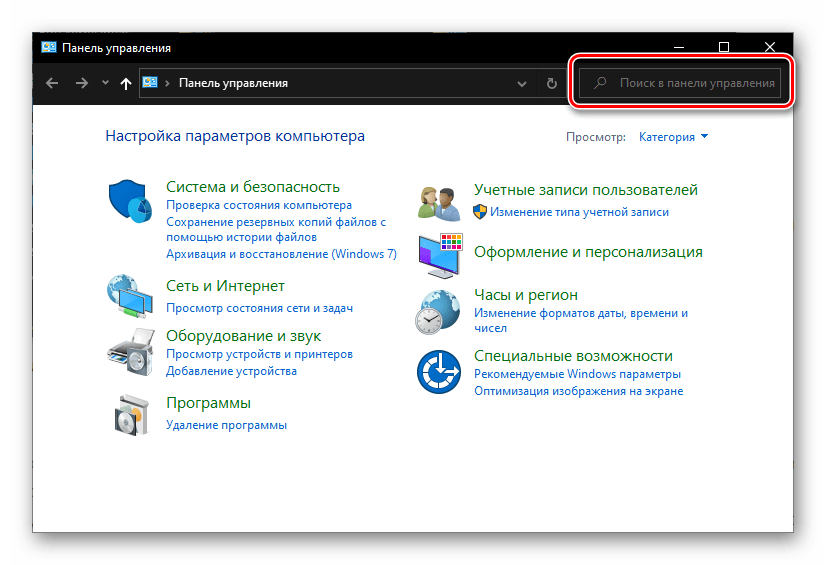
Встроенный в Windows 10 поиск доступен не только на панели задач, но и в других разделах этой операционной системы, например, в «Проводнике», «Панели управления», «Параметрах». В первых двух случаях он выглядит одинаково и работает по тому же принципу, только ищет уже в непосредственном месте обращения (конкретной директории или оснастке). В третьем же с помощью рассматриваемой функции можно быстро перейти к интересующему разделу настроек.
Поиск в «Панели управления»
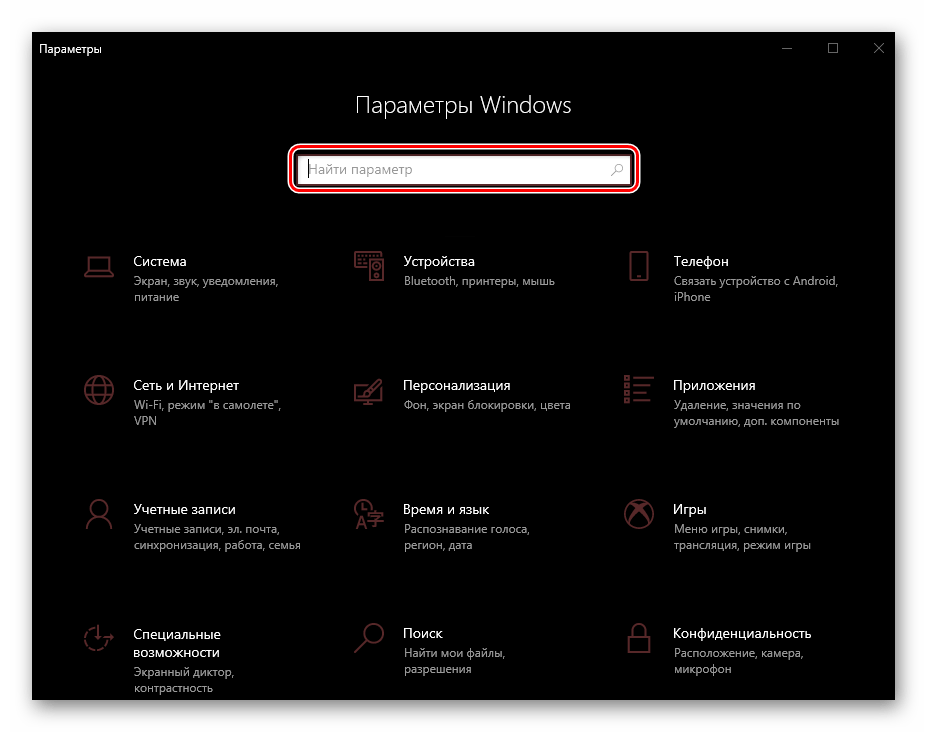
Примечание: В «Параметрах» ОС Windows имеется возможность более тонкой настройки функции поиска — для этого предусмотрен отдельный раздел с недвусмысленным названием.
Для того чтобы воспользоваться поиском, необходимо просто кликнуть по обозначенной на каждом из изображений выше строке и начать вводить свой запрос. Имеется также сочетание клавиш для более быстрого обращения – «CTRL+F». К слову, последнее работает не только в стандартных для Виндовс приложениях, но и в ряде других программ (браузеры, компоненты офисных пакетов, мессенджеры и т.д.).

Использование функции поиска
Интегрированный в операционную систему поиск работает довольно хорошо, и с его помощью можно находить не только файлы, документы и папки, но и приложения (как стандартные, так и сторонние), письма в электронной почте, информацию в интернете и многие другие данные. На нашем сайте есть отдельные статьи, в которых рассмотрены особенности работы и использования данной функции, предлагаем с ними ознакомиться.
Заключение
Теперь вы знаете обо всех способах запуска поиска в Windows 10, потенциальных местах его применения и том, что делать, если в работе данной функции возникают проблемы.
How do I search files in Windows 10 with a specific date range
So FRUSTRATED! Recently had to upgrade from Windows 7 Home to Windows 10 due to computer dying. Need to perform a file search with specific date range but keep getting everything but what I want. (i.e. — 04/01/2015 to 06/30/2015
This shouldn’t be rocket science. I have already tried >04/01/2015 but it brought up dates before and after with over 400 files to go through. Help.
***Post moved by the moderator to the appropriate forum category.***
Replies (49)
* Please try a lower page number.
* Please enter only numbers.
* Please try a lower page number.
* Please enter only numbers.
![]()
Thank you for posting your query in Microsoft Community.
Share this information to assist you better.
- Are you looking for the files you from the earlier version of the operating system?
- Do you find Windows.old folder in c: drive?
Try using modified:> 04/01/15 will help you find the files after that date you mentioned
To search for files with a particular file name extension, you can simply enter the extension in the search box, like this:
The results will include files that incorporate the extension in their contents as well as in their file names—which might or might not be what you want.You will get a more focused search by using the ext: operator including an asterisk wildcard and a period, like this:
If you want to search by a specific format, you can use this for example
Type:excel
The number of search filter options that appears below the search box is constrained by the width of the search box. To see the entire selection, drag the handle between the address bar and the search box to the left. “Add a search filter” will remain grey, but if you enter a recognized property or operator followed by a colon, the text turns blue.
Hope this helps. If the issue remains unresolved, please get back to us and we would be happy to help.


