- door2windows
- Download door2windows App Bundle
- How to use:
- Troubleshooting:
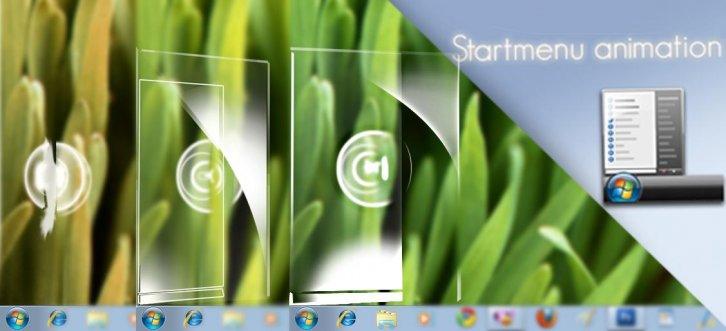
- Startmenu Animation
- Quick guide to change Windows 10 Start Menu back to classic
- How do I change the Windows Start menu to classic?
- How do I switch back to the classic view in Windows 10?
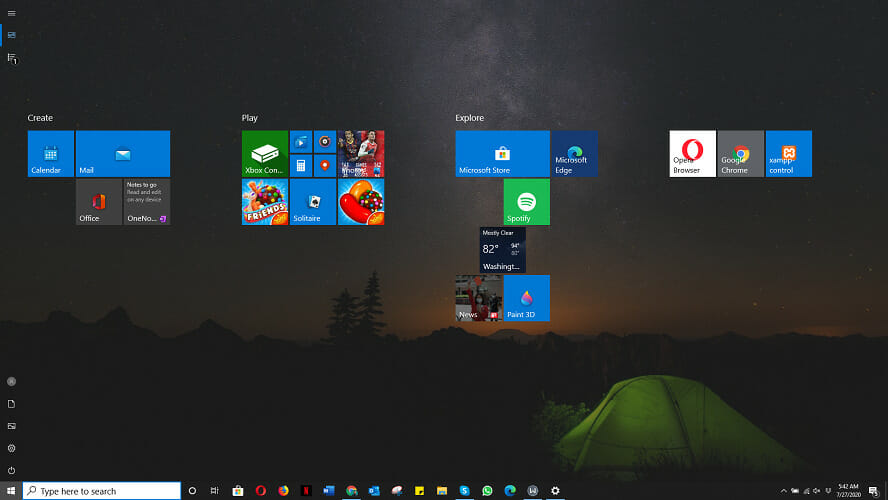
- Customize the Start Menu in Windows 10
- Enable full-screen mode
- Change the size of the start menu
- Pin an application to the Start menu
- Unpin an application from the Start menu
- Change application tile sizes
- Add folders to the Start menu
- Move tiles in the Start menu
- Rename groups of tiles
- Change the Start menu color
- Turn off Live Tiles
- How to Change Windows Menu Animations to Get a Faster Experience
- Adjust Windows Menu Animations Duration
- Disable Windows Menu Animations
- Conclusion
 door2windows
 door2windows
 Windows 7 Start Button Animator is a free portable tool that allows you to set an animated start button in Windows 7. You can set any animated GIF image as your start button.
Apps from door2windows are truly free and DON’T include any offers to install 3rd-party apps/adware/toolbars/unwanted software and never will. The apps are portable and don’t require installation.
Download door2windows App Bundle
How to use:
Run the tool. You will now see an animated orb instead of the old unanimated orb: 
Click on the orb icon in the system tray: 

Click on Select Orb and choose your desired GIF animation. You can get animated GIF images here.
Change Image Style to the style that best matches to your image.
Change Taskbar Position to the position of your taskbar.
If you want the tool to run everytime Windows starts up then select Run on Startup. 
Click Apply.
Troubleshooting:
P.1 The start button appears on top of the video I am watching.
S. Select Video Mode in the Settings.
P.2 When I close the tool, the default orb is absent.
S. Click on Restore Orb in the Settings.
P.3 When I click on Restore Orb, the default orb is still absent.
Startmenu Animation

Startmenu Animation – оригинальная и лёгкая при установке и использовании программа предназначена для анимации запуска Меню пуск. Стоит Вам только нажать на кнопку пуск, как перед глазами вместо привычной панели задач сначала появляются полупрозрачные тонкие стёкла, создающие блики в движении, и только после показывается меню пуск. При установке программа сама предлагает Вам выбрать одну из четырёх скоростей анимации меню. Чтобы выбрать новый вид анимации запуска меню пуск необходимо удалить старую программу и установить Startmenu Animation заново, выбрав новый режим запуска панели задач. Преобразите Меню пуск Вашего компьютера!

- 6008 загрузок
- 5 906 просмотров
- 2 комментов
Прозрачный интерфейс имитирующий эффект стекла был внедрен компанией Microsoft в 2006 году и с тех пор достаточно активно применяется в оформлении интерфейса операционных систем windows 10/8/7/XP но в некоторых случаях для включения эффекта прозрачности windows требуется установка дополнительных программ к примеру Startmenu Animation
За безопасный Интернет
Проверить безопасность файла «Startmenu Animation» с помощью G o o g l e , способ который гарантирует 100% результат. Если на странице есть рекламные баннеры G o o g l e значит страница проверена, а файл «Startmenu Animation» является безопасным. Что бы убедиться в этом отключите на время блокировщик рекламы и обновите страницу.
Quick guide to change Windows 10 Start Menu back to classic

- The Start menu is where most work begins on your Windows computer.
- The Windows 10 Start menu is a massive improvement from that of Windows 8 /8.1, but many users still prefer the classic Start menu .
- For more easy-to-follow DIY guides on different tech elements, visit our How-To section.
- Windows 10 comes packed with amazing features . Improve your knowledge of the operating system with our Windows 10 articles.
- Download Restoro PC Repair Tool that comes with Patented Technologies (patent available here).
- Click Start Scan to find Windows issues that could be causing PC problems.
- Click Repair All to fix issues affecting your computer’s security and performance
- Restoro has been downloaded by 0 readers this month.
When Windows 8 dropped, there was an uproar from users regarding the fullscreen Start menu. Despite Microsoft responding by modifying the Start menu in Windows 8.1 and later, fans took things into their hands and devised ways to get back the classic Start menu.
How do I change the Windows Start menu to classic?
How do I switch back to the classic view in Windows 10?
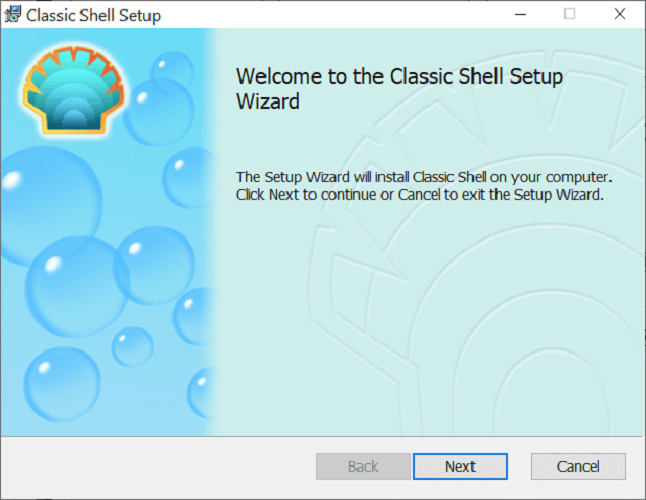
- Download and install Classic Shell.
- Click on the Start button and search for classic shell.
- Open the topmost result of your search.
- Select the Start menu view between Classic, Classic with two columns and Windows 7 style.
- Hit the OK button.
- Back up the selected styles as XML.
- Apply the settings.
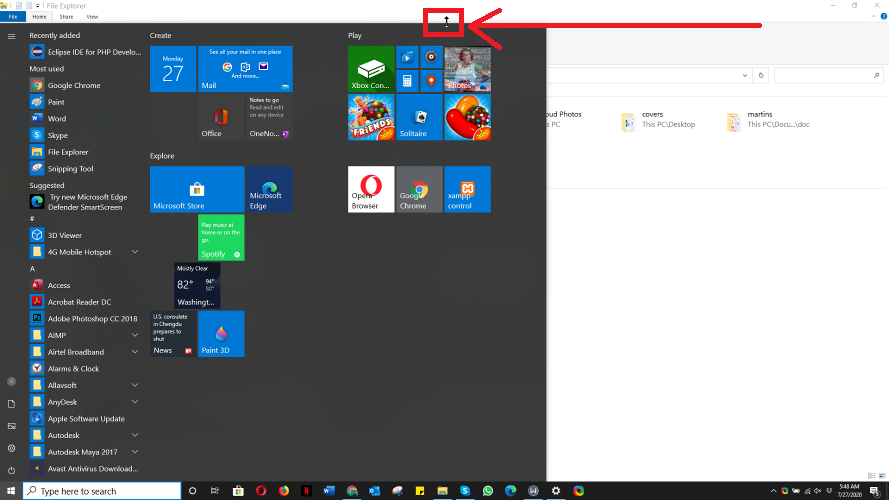
Customize the Start Menu in Windows 10
Enable full-screen mode
- Click on the Start.
- Select the Settings icon.
- Select Personalization.
- Hit the Start from the left sidebar.
- Click the Switch button below the Use Start Full-Screen text.
Change the size of the start menu
- Click on the Start button.
- Take your cursor to the edge of the Start Menu, so it turns to a double-sided arrow.
- Click on it and drag it up or down to resize.
- Release your cursor when you’re done.
Pin an application to the Start menu
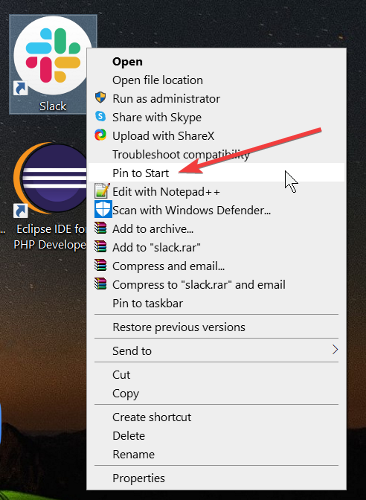
- Locate the application.
- Right-click on the application to be pinned.
- Select the Pin to Start.
Unpin an application from the Start menu
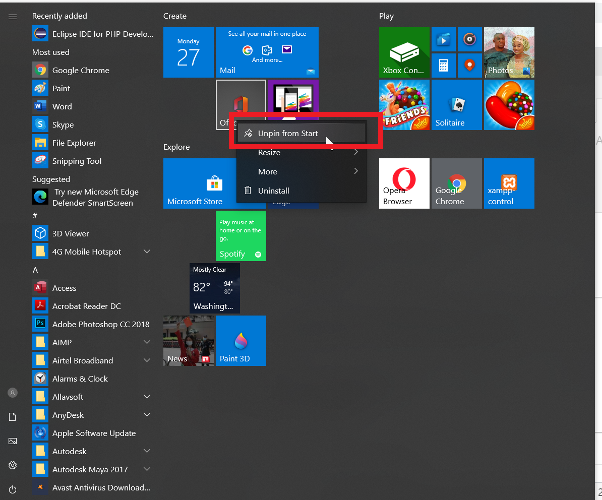
- Open the Start
- Right-click on the application.
- Select Unpin from Start.
Change application tile sizes
- Click on the Start
- Right-click on the application.
- Select Resize.
- Select the option of your choice.
Add folders to the Start menu
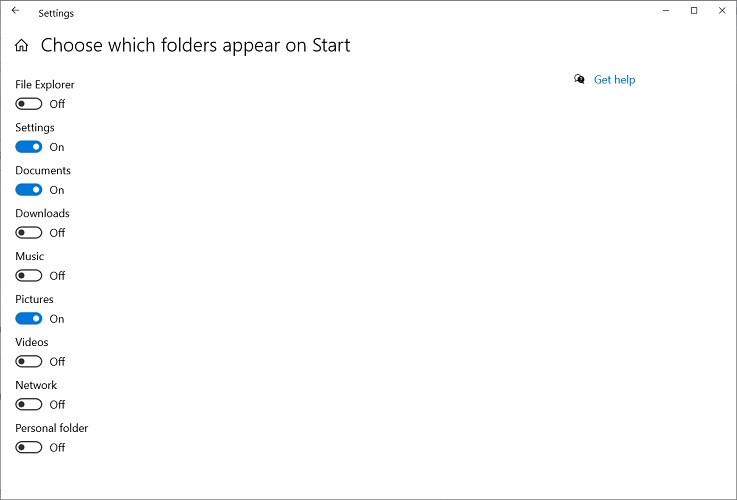
- Click on the Start menu button.
- Select Settings.
- Click the Personalization tile.
- Choose Start from the sidebar.
- Click Choose which folders appear on Start.
- Toggle on or off the applications on the screen.
Move tiles in the Start menu

- Click on the Start button.
- Click and hold on the tile.
- Drag-and-drop the tile to your desired position.
Rename groups of tiles

- Click on the Start
- Select the tile for renaming.
- Delete any text in the Type field
- Rename the tile.
Change the Start menu color

- Click on the Start
- Select Settings
- Click the Personalization
- Pick a color from Windows colors.
- Mark the checkbox for Start, taskbar, and action center under Show accent color on the following surfaces.
Turn off Live Tiles
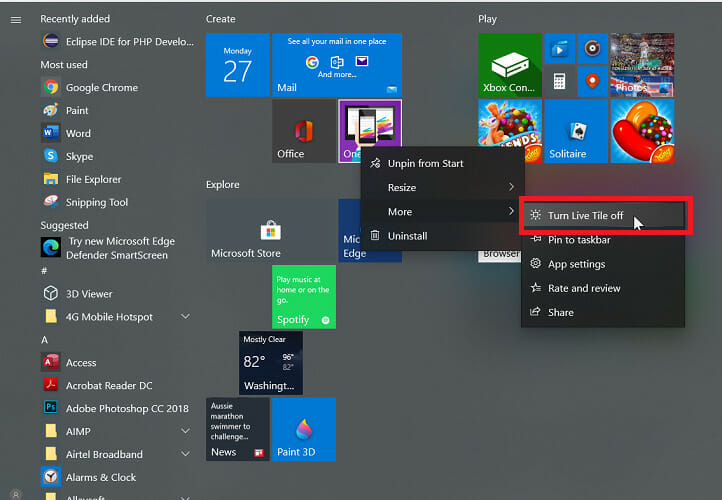
- Click on the Start menu button.
- Right-click on the live tile.
- Click the Move.
- Select the Turn live tile off option
We hope that this guide has proven useful in your case and that you now have the Start Menu and icons in the exact way you wanted.
Feel free to let us know if this guide has helped by using the comment section below.
How to Change Windows Menu Animations to Get a Faster Experience

Windows comes with cool animations to give you that smoother look while navigating the system. The smooth feeling is great, but it may also make you feel a little sluggish. If you prefer faster navigation over style, then you can easily shorten the duration of the animations or even completely disable it. We are going to show you how you can shorten the Windows menu animations duration and how to disable it.
Adjust Windows Menu Animations Duration
To adjust the duration of Windows menu animations you need to make some changes in the Windows registry. The process isn’t complicated and should not be a problem for even less tech savvy people. Although, it is always recommended that you back up the registry in case something goes wrong.
Press “Windows + R” keys and type regedit in the “Run” dialog to open the registry.

In the registry you need to navigate to the below-mentioned location:
Look for the entry “MenuShowDelay” in the right panel. Double-click on it to open it. This is the menu animation entry with a default value of 400 (milliseconds). You can change this value to a lower number to shorten the duration. A value of 200 should work fine for most users, but you can further reduce it if you like.


When you are done editing, you will have to restart the PC to be able to see the effects.
Disable Windows Menu Animations
If you are looking for instant navigation without bells and whistles, you can also completely disable menu animations. You don’t need any registry hacks for this; Windows menu animations can be easily disabled from the “Performance options.” Disabling animations will not directly affect the way you use your PC; it will only make it snappier without that lively feeling.
Note: We are using a Windows 10 PC for demonstration. The process to access the “Performance options” varies from different versions of Windows. Try taking advantage of the Windows search feature if you can’t find the performance options.
In Windows 10 right-click on the start button and select “System” from the menu. Here in the left panel, click on “Advanced system settings.”


Now click on “Settings” under the “Performance” heading. Here you will see lots of performance tweaks you can make under the “Visual Effects” tab. You can disable these options to sacrifice visual appearance for some performance boost. However, it is not recommended that you disable all of these options just to get a performance boost; you may not be comfortable with the look afterwards. (It’s like going back to Windows 98.)


To disable menu animations just uncheck the two below-mentioned options:
- Animate controls and elements inside windows – This option will disable animations inside a particular window, like the one you see while navigating “Settings.”
- Animate windows when minimizing and maximizing – This will disable animation you see when you minimize or maximize any window.
When you are done, just click on “OK” to apply all the changes.

Conclusion
This is how you can adjust Windows menu animations and make it look a little faster. I personally like disabling menu animations completely to get that instant navigation feeling. Although, if you like the animation you can always decrease its duration to both get a snappier feeling and enjoy menu animations. What do you prefer, smooth navigation or instant results? Share with us in the comments below.
Karrar is drenched in technology and always fiddles with new tech opportunities. He has a bad habit of calling technology “Killer”, and doesn’t feel bad about spending too much time in front of the PC. If he is not writing about technology, you will find him spending quality time with his little family.


