Просмотр журнала обновлений WindowsUpdate.log в Windows 10 / Windows Server 2016
Исторически для анализа работы агента и службы обновления Windows используется текстовый файл WindowsUpdate.log. Однако в Windows 10 (Windows Server 2016/2019) вместо привычного текстового файла логи Windows Update ведутся в формате Event Tracing for Windows (ETW). За счет этого увеличивается быстродействие подсистемы записи логов и экономится место на диске.
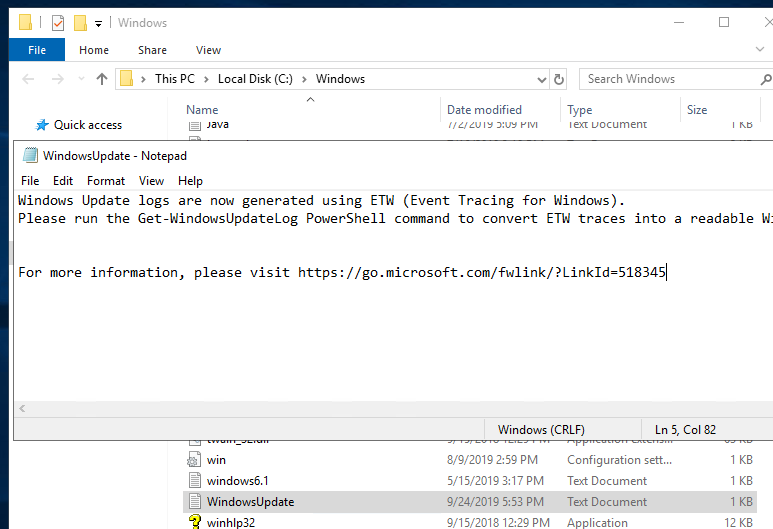
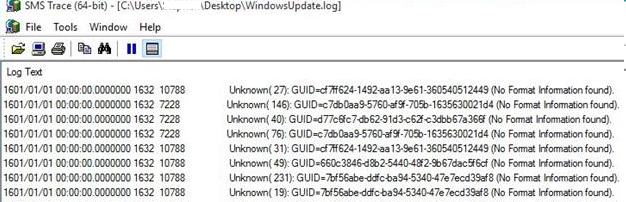
Таким образом, события Windows Update теперь больше не записываются в реальном времени в файл %windir%\WindowsUpdate.log. И хотя сам файл все еще присутствует в корне папки Windows, в нем лишь указано, что для сбора логов теперь применяется формат ETW.
Главное неудобство для администраторов – теперь вы не можете быстро проанализировать текстовый файл WindowsUpdate.log, найти ошибки в службе агента обновлений Windows (см. полный список ошибок Windows Update), проверить настройки WSUS и проанализировать историю установки обновлений.
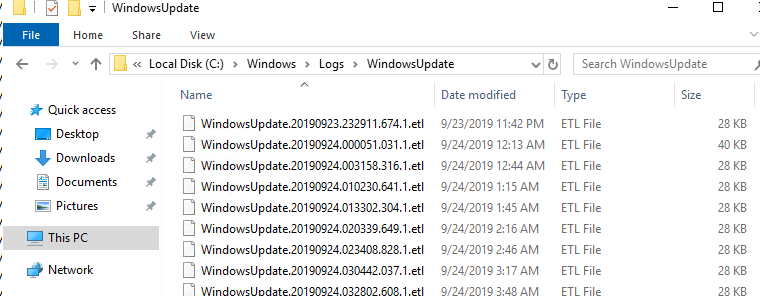
Вы можете сконвертировать события ETW в привычный текстовый формат WindowsUpdate.log для более удобного анализа событий службы обновлений. Для этого используется командлет PowerShell — Get-WindowsUpdateLog. Данный командлет позволяет собрать информацию со всех .etl файлов (хранятся в каталоге C:\WINDOWS\Logs\WindowsUpdate) и сформировать один файл WindowsUpdate.log.
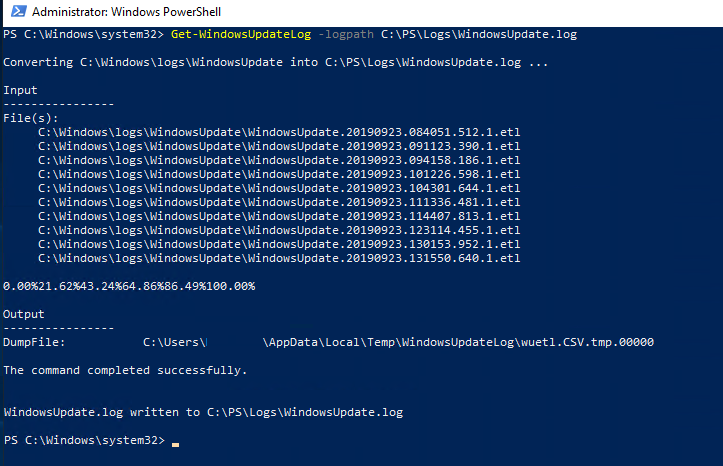
Чтобы сформировать файл WindowsUpdate.log и поместить его в каталог C:\PS\Logs, выполните следующую команду в консоли PowerShell:
Get-WindowsUpdateLog -logpath C:\PS\Logs\WindowsUpdate.log

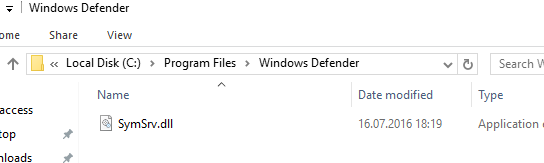
Файл “C:\Program Files\Windows Defender\SymSrv.dll” обычно отсутствует, если на сервере не установлен антивирус Windows Defender.
Чтобы исправить ошибку, вы можете установить Defender, скопировать файл SymSrv.dll с другого Windows Server 2016/ Windows 10 или поиском найти его в каталоге “C:\Windows\WinSxS\” (у меня каталог назывался C:\Windows\WinSxS\amd64_windows-defender-service-cloudclean_…) и скопировать его в папку C:\Program Files\Windows Defender.
В старых версиях Windows 10 при первом запуске командлет Get-WindowsUpdateLog скачает и установит сервер символов Microsoft (Microsoft Internet Symbol Store). В последних версиях Windows 10 выполняется онлайн доступ к серверу символов Microsoft в Azure. Затем командлет:
- Собирает данные из всех .etl файлов;
- Преобразует данные в CSV (по-умолчанию) или XML формат;
- Переконвертирует данные из промежуточных файлов и добавляет их в текстовый файл журнала, указанного в параметре LogPath (если параметр LogPath не задан, файл WindowsUpdate.log создается на рабочем столе пользователя, запустившего команду).
Это значит, что у вас не установлен сервер символов Windows Symbol (сейчас нельзя скачать отдельную программу установки Windows symbols, т.к. они автоматически загружаются из хранилища символов в Azure). Для изолированных сред вы можете использовать офлайн версию сервера символов согласно статье Offline Symbols for Windows Update.
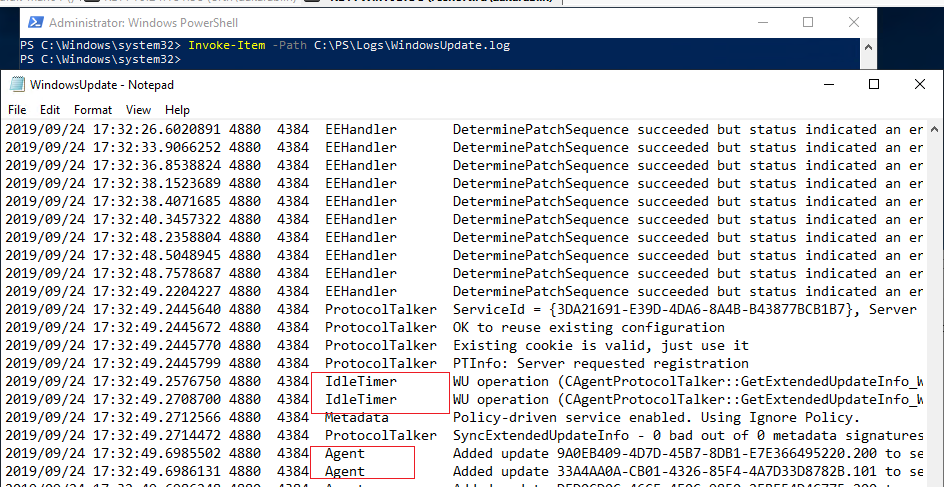
Откройте файл журнала с помощью такой команды PowerShell:
Invoke-Item -Path C:\PS\Logs\WindowsUpdate.log
Анализировать получившийся файл WindowsUpdate.log довольно сложно, т.к. в нем собираются данные из множества источников:
- AGENT- события агента Windows Update;
- AU – автоматическое обновление;
- AUCLNT- взаимодействие с пользователем;
- HANDLER- управление установщиком обновлений;
- MISC- общая информация;
- PT- синхронизация обновлений с локальным хранилищем;
- REPORT- сбор отчетов;
- SERVICE- запуск/выключение службы wuauserv;
- SETUP- установка новых версий клиента Windows Update;
- DownloadManager – загрузка обновлений в локальных кэш;
- Handler, Setup – заголовки установщиков (CBS и т.п.);
- И т.д.
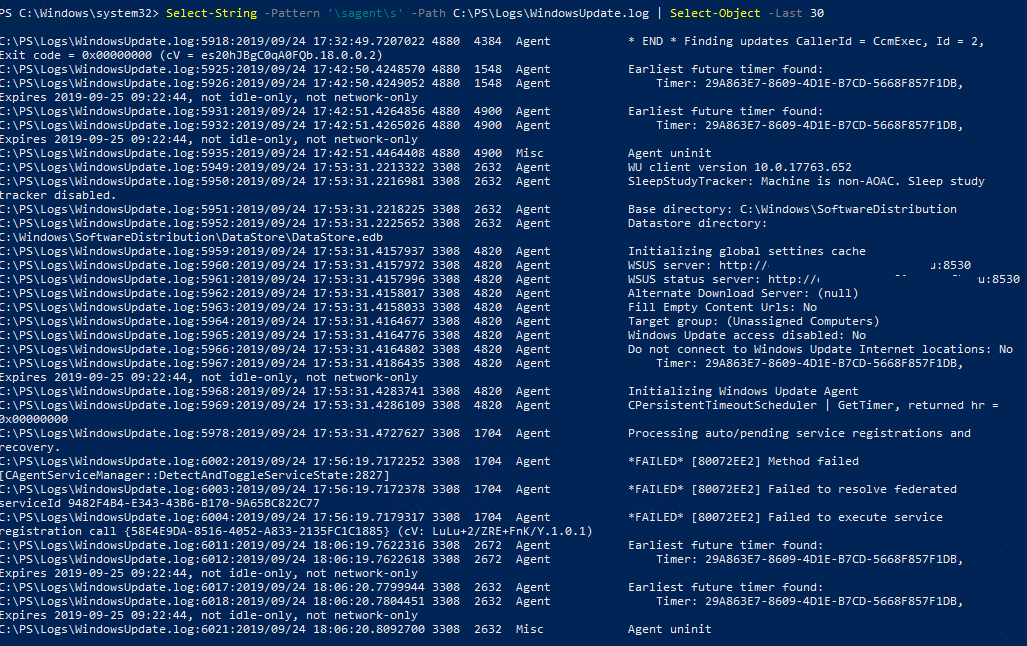
Вы можете выбрать последние 30 событий от агента обновления Windows (agent) с помощью простого регулярного выражения:
Select-String -Pattern ‘\sagent\s’ -Path C:\PS\Logs\WindowsUpdate.log | Select-Object -Last 30
Можно отфильтровать события в логе по нескольким источникам:
Select-String -Pattern ‘\sagent\s|\smisc\s’ -Path c:\PS\Logs\WindowsUpdate.log | Select-Object -Last 50
Аналогично вы можете искать события по номеру KB, ошибка (строки FAILED, Exit Code, FATAL).
Также вы можете сформировать файл WindowsUpdate.log для удаленного компьютера/сервера:
Get-WindowsUpdateLog -ETLPath \\PC221\C$\windows\Logs\WindowsUpdate -LogPath C:\PS\Logs\windowsupdatePC221.log
Также для анализа работы службы обновлений Windows может быть полезны журналы Event Viewer в разделе Applications and Services Logs -> Microsoft -> Windows –> WindowsUpdateClient -> Operational.
Управление Windows Update с помощью PowerShell
Модуль PSWindowsUpdate, автором которого является Michal Gajda, позволяет управлять параметрами обновления ОС Windows на любом компьютере под управлением PowerShell 2.0 или выше.
PSWindowsUpdate даёт возможность администраторам предприятий проверять и устанавливать обновления на удаленных рабочих станциях и серверах. Он особенно удобен в использовании для установки обновлений на Windows Server Core, у которых нет GUI, а также во время настройки Windows в режиме аудита.
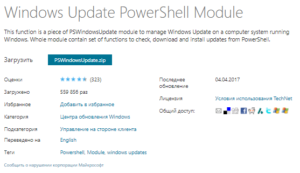
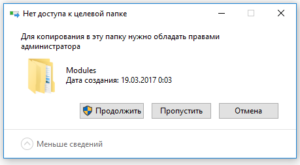
После загрузки, извлекаем содержимое файла в папку C:\Windows\System32\WindowsPowerShell\v1.0\Modules\ .

Если на данном этапе появляется предупреждение User Access Control, выбираем «Продолжить».
Для извлечения файлов, необходимо запустить консоль PowerShell с правами администратора и выполнить команду, которая разрешит выполнять системные сценарии:
Данная команда дает возможность выполнять нам неподписанные скрипты PowerShell, но при этом несколько снижает уровень безопасности (т.к. в случае ошибки администратора может быть запущен скрипт, способный навредить системе).
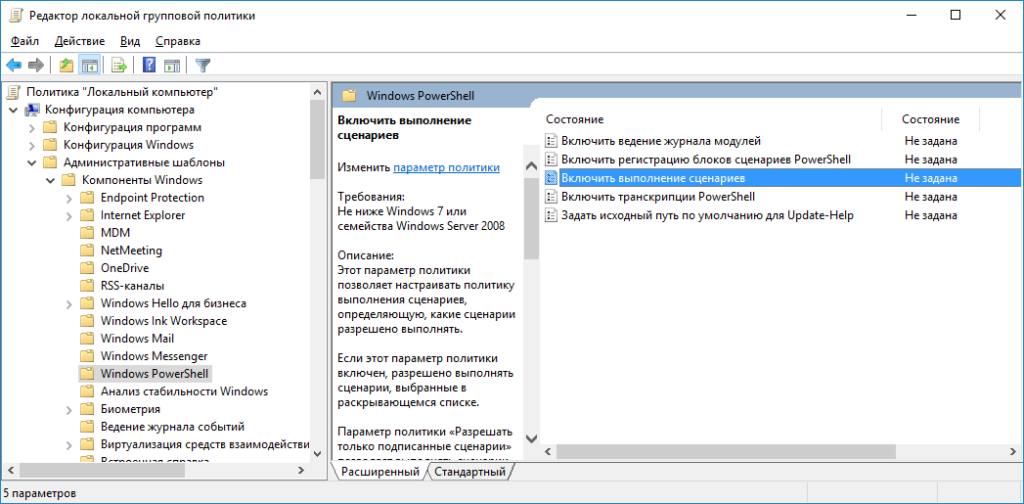
В случае, если на данном этапе возникнет ошибка:
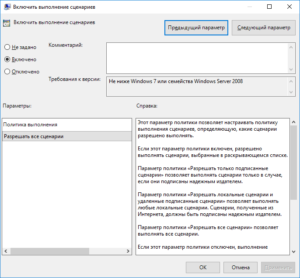
…необходимо зайти в gpedit.msc (Нажать сочетание клавиш Windows + R, откроется окно выполнить, ввести gpedit.msc и нажать Enter), перейти в раздел Конфигурация компьютера > Административные шаблоны > Компоненты Windows > Windows PowerShell и переключить состояние политики «Включить выполнение сценариев» в режим «Включено».
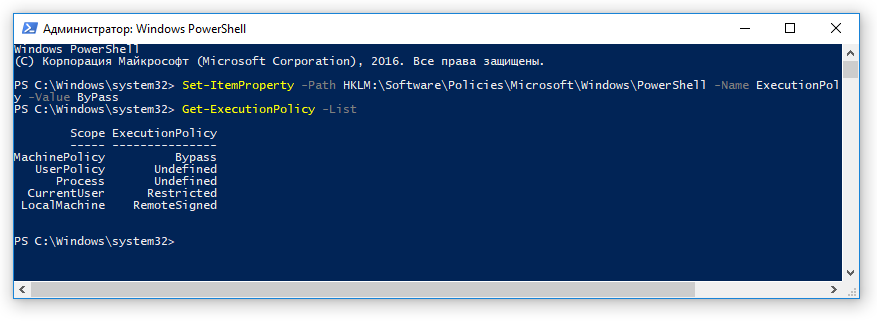
После изменения настроек политики, необходимо перезапустить консоль PowerShell, повторно выполнить команду, разрешающую сценарии, и проверить, повторится ли ошибка. Если выполнение завершится без ошибок, то можно проверить состояние политики с помощью команды:
Теперь, если всё прошло успешно, вывод PowerShell будет примерно следующим:
Затем, импортируем модуль PSWindowsUpdate и запрашиваем список доступных команд:
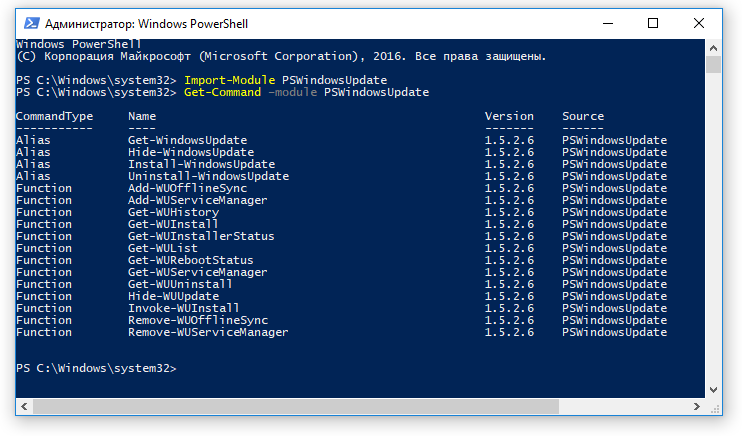
Одним из наиболее значимых командлетов является Get-WUInstall , который предназначен для загрузки и установки обновлений. Для просмотра обновлений, доступных для установки из MicrosoftUpdate, выполним команду

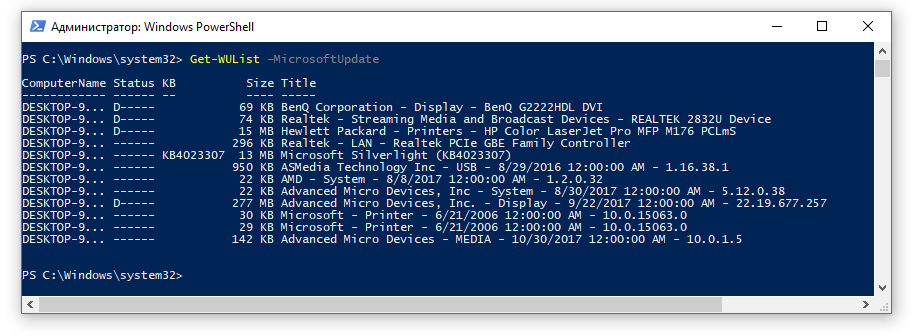
Точно такой же результат можно получить с помощью команды Get-WUList –MicrosoftUpdate :
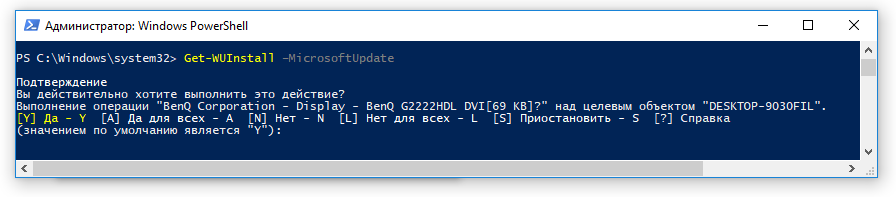
Для установки с подтверждением вручную для каждого обновления можно использовать команду Get-WUInstall –MicrosoftUpdate :

Прочие параметры PSWindowsUpdate
Рассмотрим некоторые параметры, способные упростить жизнь системному администратору:
- Установка всех доступных обновлений из MicrosoftUpdate с последующей перезагрузкой:
- Запрет установки отдельного обновления из MicrosoftUpdate по названию и номеру KB:
и отмена запрета в случае необходимости:
Скрипт совместим со всеми операционными системами, начиная с Windows Vista и заканчивая Windows 10. Работоспособность сценария пока не проверялась на Windows Server 2016. Операционная система Windows Server 2003 не поддерживается.
При необходимости, для задания параметру ExecutionPolicy значения Restricted (настройки по умолчанию), можно воспользоваться следующей командой:
Get Windows Update Status Information by Using PowerShell

January 20th, 2012
Summary: Learn how to use the WSUS Update Scope with Windows PowerShell to get update status information for client computers.
Microsoft Scripting Guy, Ed Wilson, is here. What a week. Boe Prox has certainly been sharing quite a bit of Windows PowerShell goodness. In case you have missed them, here are links to the blog series thus far. You can also see Boe’s biography in the Day 1 blog.
Today we are moving from working with the Computer Target Scope and generating some cool reports to working with the Update Scope on the WSUS server. Much like yesterday, I will dive into some of the objects that we have worked with throughout the week and make use of some of the methods that require the Update Scope object to work properly.
If you are asking, “What is the Update Scope?”
…As the name implies, this is a scope that can be used to filter a list of updates on the WSUS server.
Creating the Update Scope object
Much as we did with the Computer Target Scope object, we need first to create the Update Scope object so we can then look at its properties and make adjustments, if needed. To create this object, we need to use the Microsoft.UpdateServices.Administration.UpdateScope class. For more information about this class, see UpdateScope Class on MSDN. The code that follows creates an instance of the UpdateScope.
$updatescope = New-Object Microsoft.UpdateServices.Administration.UpdateScope
OK, let’s take a look at these properties. The image that follows displays this information.
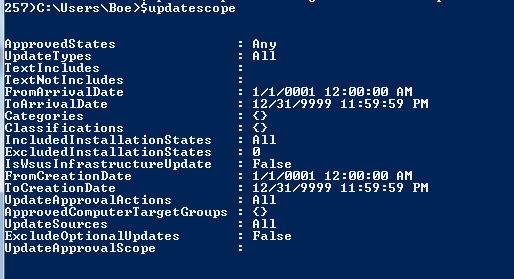
Here is a list of the editable properties for the Update Scope object:
Gets or sets the approval states to search for. An update will be included only if it matches at least one of the specified states. This value may be a combination of any number of values from ApprovedStates. Defaults to Any.
Gets or sets the installation states to exclude. An update will be included only if it does not have any computers in any of the specified states. This value may be a combination of any number of values from UpdateInstallationStates. Defaults to 0.
Gets or sets whether to exclude optional updates from the list.
Gets or sets the minimum arrival date to search for. An update will be included only if its arrival date is greater than or equal to this value.
Gets or sets the minimum creation date to search for. An update will be included only if its creation date is greater than or equal to this value.
Gets or sets the installation states to search for. An update will be included only if it has at least one computer in one of the specified states. This value may be a combination of any number of values from UpdateInstallationStates.
Gets or sets whether or not to filter for WSUS infrastructure updates. If set to true, only WSUS infrastructure updates will be included. If set to false, all updates are included. Defaults to false.
Gets or sets the string to search for. An update will be included only if its Title, Description, Knowledge Base articles, or security bulletins contains this string.
Gets or sets the string to exclude. An update will be not be included if its Title, Description, Knowledge Base articles, or security bulletins contains this string.
Gets or sets the maximum arrival date to search for. An update will be included only if its arrival date is less than or equal to this value.
Gets or sets the maximum creation date to search for. An update will be included only if its creation date is less than or equal to this value.
Gets or sets the update approval actions to search for. An update will be included only if it is approved to at least one computer target group for one of the specified approval actions. This value may be a combination of any number of values from UpdateApprovalActions. Defaults to All.
Gets or sets the UpdateApprovalScope object that can be used to filter updates based on their approval properties.
Gets or sets the update sources to search for. An update will be included only if its update source is included in this value. This value may be a combination of any number of values from UpdateSources.
Gets or sets the update types to search for. An update will be included only if its update type is included in this value.
Yes, that is a fairly large list of properties that we can modify to suit our filtering needs. For the sake of simplicity, I am only going to update ApprovedStates, IncludedInstallationStates, and FromArrivalTime to show how you can see all of the updates that are needed by all of the clients since the last patch Tuesday. The code that follows updates these three properties.
Note: For the purposes of this blog, the last patch Tuesday was December 13. I set the ApprovedStates property to NotApproved because I only want to see updates that are required by the clients that are not already approved for installation. I set the IncludedInstallationStates to NotInstalled. This will tell the filter to look for only updates that are required by the clients, but have not been installed yet. This works fine for us because these updates are new to us and because we only want those for the most recent patch Tuesday.
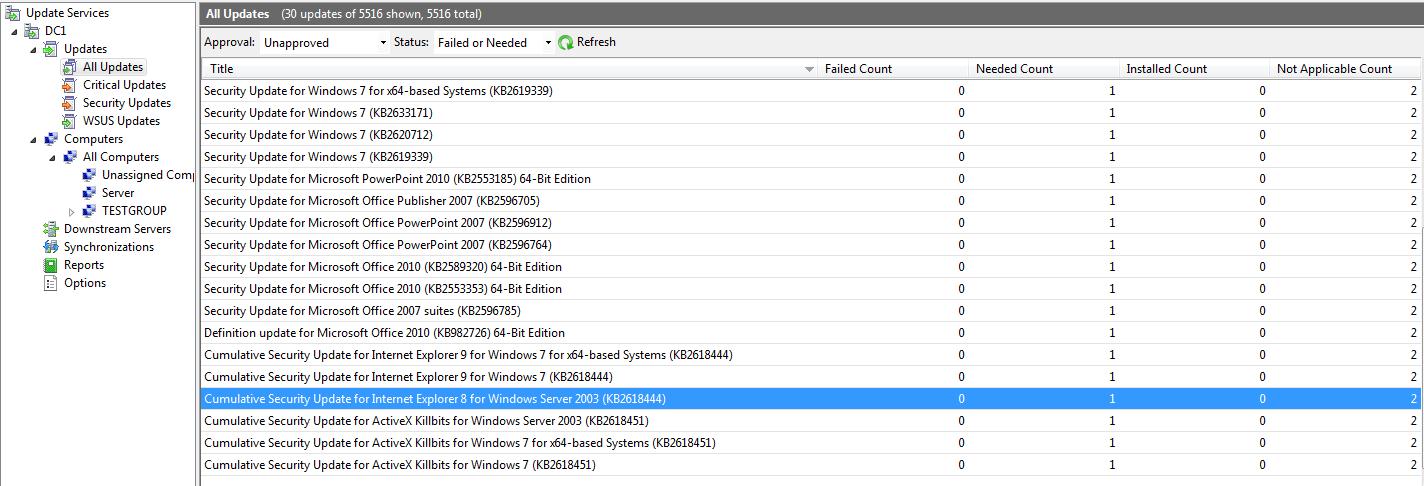
First, I am going to show you the Administration Console and look at all updates that are required by the clients on the network since patch Tuesday. This is shown in the image that follows.
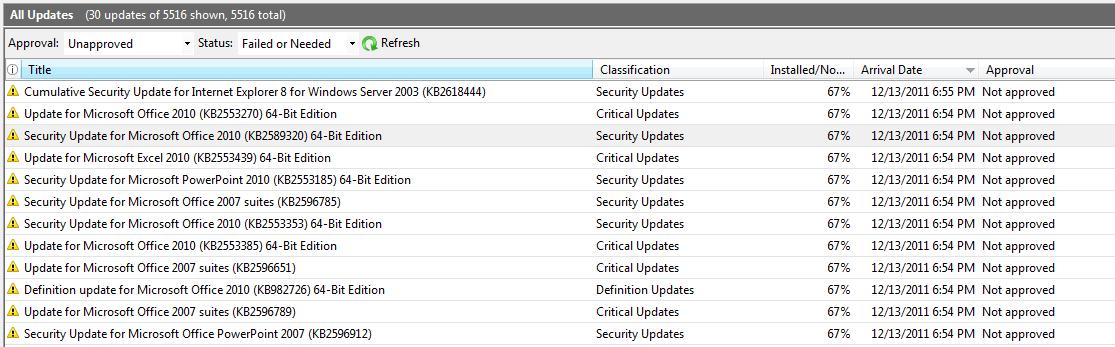
Note the number of updates (30) and some of the titles listed here. Although not all of the updates are listed in the image, I will show you a couple of methods that we can use to pull the exact same information by using Windows PowerShell!
This method, as you can probably tell, will allow us to view the number of updates that are returned by using the previously configured Update Scope.

Look at that, 30 updates—just as if it showed on the console.
I am going to expand on this slightly by using another method similar to one I showed you yesterday for the Computer Target Scope.
This will return a little more information about the updates, as you will see. Besides supplying the Update Scope object, I need to supply a Boolean value for whether to include DownStream Computers.

That is pretty cool, but we want to see those updates as well. Sure enough, we can use the GetUpdates() method and supply our Update Scope object to pull this information.
$wsus.GetUpdates($updatescope) | Select Title
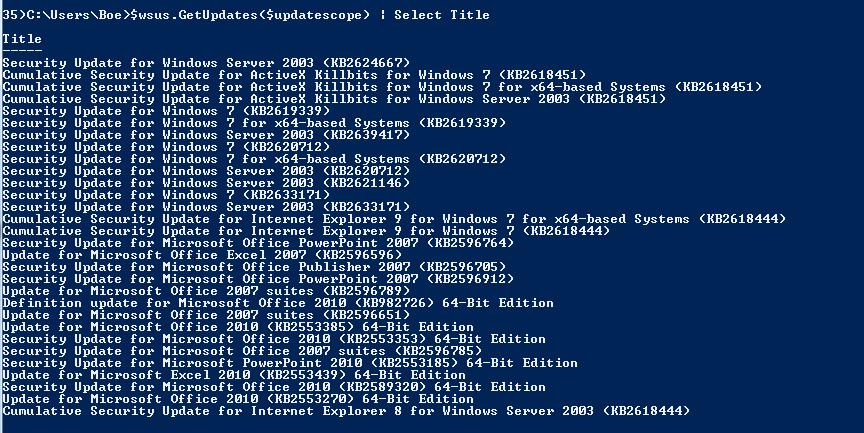
And there you have it! You can compare the screenshots and you will see that the titles in the console match the titles from our query.
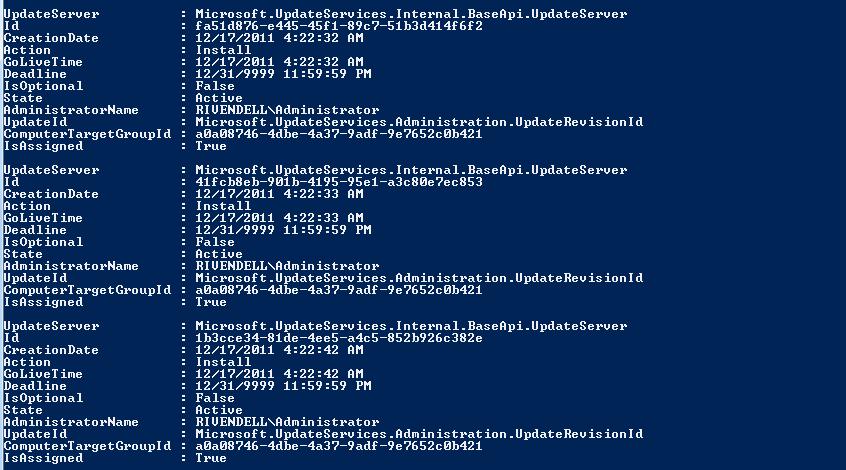
Now I will show you how to view the update approvals by using the Update Scope object and the GetUpdateApprovals() method. To make this work and to provide some useful information, I will make a couple of adjustments to the existing Update Scope. This revision is shown here.
Now we can use this scope in the method and pull some information. To do this, I use the GetUpdateApprovals method, and pass it the Update Scope. This technique is shown in the code that follows.
The result from the previous command is shown in the following image.
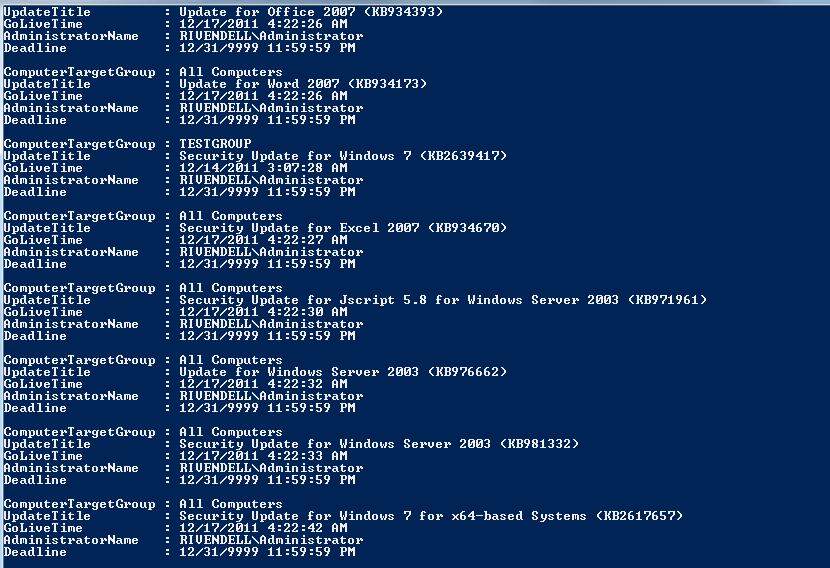
Let us clean this up a little so it is more readable and not just a bunch of GUIDs. The code that follows produces an easier to read output.
The result of the previous code is shown here.
The last two things I will show you in this blog are a couple of methods that require the Update Scope object and the Computer Target Scope object to work properly. They provide some nice reporting features similar to what you would see in the Administration Console.
This method gets per-computer summaries for each of the specified computers, summed across all of the specified updates.
Let’s see this in action, where I use the following code to gather this information.
$computerscope = New-Object Microsoft.UpdateServices.Administration.ComputerTargetScope
$updatescope = New-Object Microsoft.UpdateServices.Administration.UpdateScope
The output from the previous code produces a nice table, as shown here.

Let’s see how this compares to what you would see in the console. One thing you do not have available in the console is the DownloadedCount, which our previous code nicely displayed.

Lastly, let’s look at the GetSummariesPerUpdate() method to get per-update summaries for each of the specified updates, summed across all of the specified computers. The following code uses this method.
Note: I changed the Update Scope to what I had at the beginning of this blog. This is so I can more accurately compare the output here with what is in the Administration Console.
The output from the previous code is shown here.
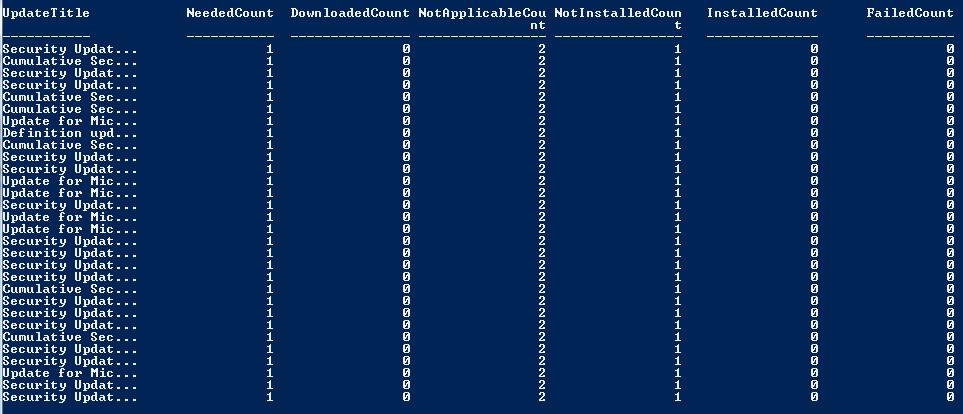
Now compare the previous image, with the console (shown here), and you will see that they match up as planned.
So there you have it. We spent the week starting out with a WSUS server installation, then doing some basic administration, and we finished by providing some reports using Windows PowerShell—and we haven’t even begun to scratch the surface of what we can do. But working with WSUS doesn’t end here! This weekend I will talk about update 2.0 to my WSUS module, PoshWSUS, which you can use to more easily manage and maintain a WSUS server.
Boe, this is great stuff. Thank you for sharing with us. WSUS Week will continue tomorrow.


