- Установка/настройка программной оболочки Arduino IDE для Windows
- Скачивание (загрузка) Arduino IDE с официального сайта:
- Установка Arduino IDE:
- Запуск Arduino IDE:
- Подключение платы Arduino:
- Загрузка скетча из программы Arduino IDE в плату Arduino:
- Getting Started with Arduino on Windows
- 1 | Get an Arduino board and USB cable
- 2 | Download the Arduino environment
- 3 | Connect the board
- 4 | Install the drivers
- 5 | Launch the Arduino application
- 6 | Open the blink example
- 7 | Select your board
- 8 | Select your serial port
- 9 | Upload the program
- Getting Started with Arduino UNO
- Use your Arduino Uno on the Arduino Web IDE
- Use your Arduino Uno on the Arduino Desktop IDE
- Install the board drivers
- Open your first sketch
- Select your board type and port
- Upload the program
- Learn more on the Desktop IDE
- Tutorials
Установка/настройка программной оболочки Arduino IDE для Windows
Для написания (редактирования) и загрузки (прошивки) программ (скетчей) в Arduino необходимо установить программу для программирования, как Arduino IDE, или воспользоваться on-line Web-редактором. Скачать (загрузить) программу Arduino IDE последней версии, или воспользоваться web-редактором можно из раздела Software сайта arduino.cc .
Скачивание (загрузка) Arduino IDE с официального сайта:
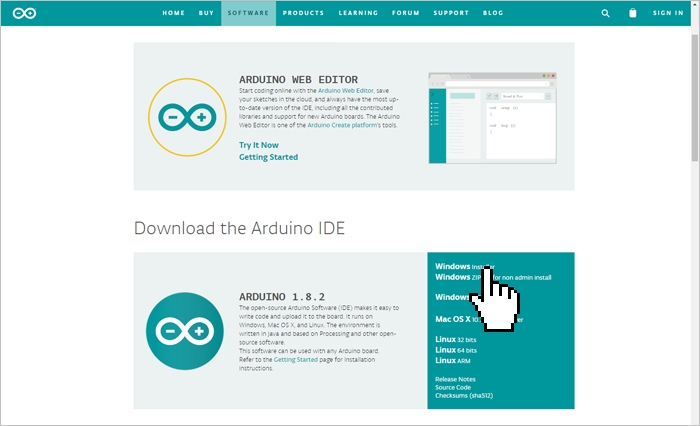
Зайдите на официальный сайт Arduino и выберите, из предложенного списка, операционную систему на которой работает Ваш компьютер. В данной статье мы рассмотрим установку Arduino IDE на операционную систему Windows. Выбрав первую строку «Windows Installer» Вы установите Arduino IDE (как устанавливаете любые другие программы), а выбрав вторую строку «Windows ZIP file for non admin install» Вы скачаете ZIP-архив с папкой программы, которую сможете запускать без установки (даже если у Вас нет прав администратора Вашего компьютера).
Вне зависимости от того, какую операционную систему Вы выберите, Вам будет предложено поблагодарить разработчиков, именно предложено, тут дело Ваше.
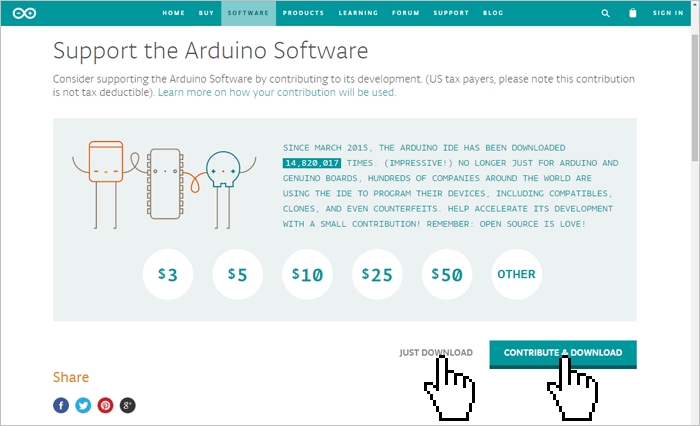
Если Вы просто хотите скачать программу, то нажмите на кнопку «JUST DOWNLOAD», если хотите скачать программу и поблагодарить разработчиков, способствуя дальнейшему развитию ПО, то нажмите на кнопку «CONTRIBUTE & DOWNLOAD».
Дождитесь завершения загрузки файла

После завершения загрузки, файл должен находиться в папке: « Этот компьютер > Загрузки » (если Вы не указали иное место для сохранения файла).
- Если Вы скачивали (загружали) ZIP-архив (выбрав на первом этапе пункт «Windows ZIP file for non admin install»), то распакуйте папку из архива в любое место на Вашем компьютере.
Следующий раздел «Установка Arduino IDE» не для Вас, так как устанавливать программу Вам не нужно, перейдите к разделу «Запуск Arduino IDE». Для начала работы в Arduino IDE нужно запустить файл «arduino.exe» , из того места, куда Вы распаковали архив.
 - Если Вы скачивали (загружали) установочный файл (выбрав на первом этапе пункт «Windows Installer»), то следуйте инструкциям в следующем разделе «Установка Arduino IDE».
 , из того места, куда Вы распаковали архив.
Установка Arduino IDE:
Запустите установочный файл

из папки: « Этот компьютер > Загрузки » (у Вас вместо символов X.X.X в названии файла будут цифры версии Arduino IDE).
Далее подряд будут появляться следующие сообщения:
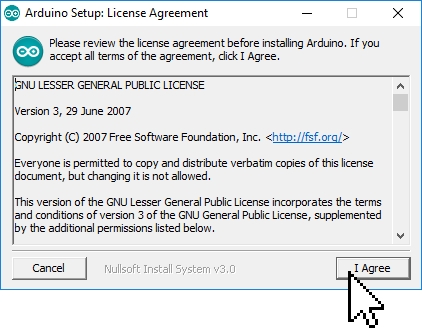

- 1 сообщение: ознакомляет Вас с лицензионным соглашением, нажмите на кнопку «I Agree», появится 2 сообщение.
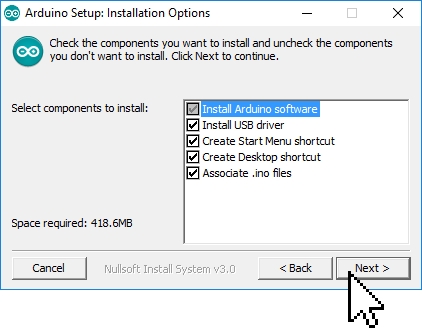
- 2 сообщение: предлагает Вам выбрать компоненты инсталляции, нажмите на кнопку «Next», появится 3 сообщение.
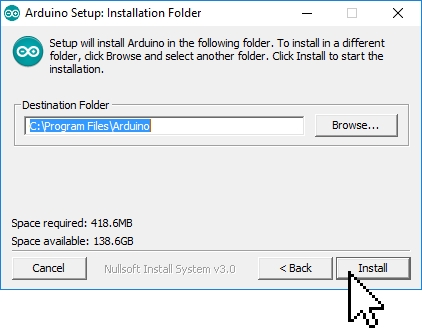
- 3 сообщение: предлагает Вам выбрать путь для установки Arduino IDE, нажмите на кнопку «Install», появится 4 сообщение.
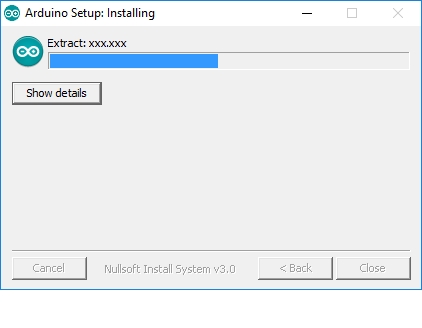
- 4 сообщение: информирует Вас о ходе выполнения установки Arduino IDE, по окончании которой появится 5 сообщение.
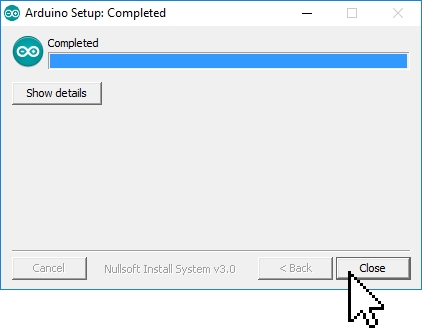
- 5 сообщение: информирует Вас об окончании установки Arduino IDE, нажмите на кнопку «Close».
В процессе установки, над окном 4 сообщения, могут появляться окна Windows запрашивающие у Вас разрешение на установку драйверов:
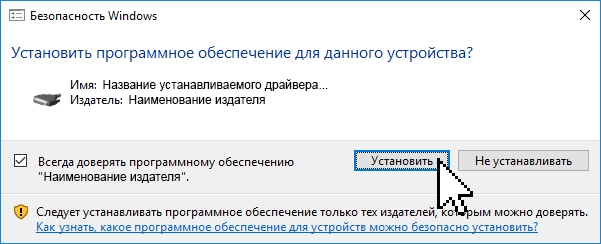
Разрешайте установку драйверов нажимая на кнопку «Установить», эти драйверы позволят определять и работать с платами Arduino подключёнными по шине USB.
На этом установка Arduino IDE завершена.
На Вашем рабочем столе должна появиться иконка программы:

Запуск Arduino IDE:
При первом запуске программы может появиться сообщение Брандмауэра Windows о блокировке доступа для некоторых сетевых функций Java Arduino IDE:
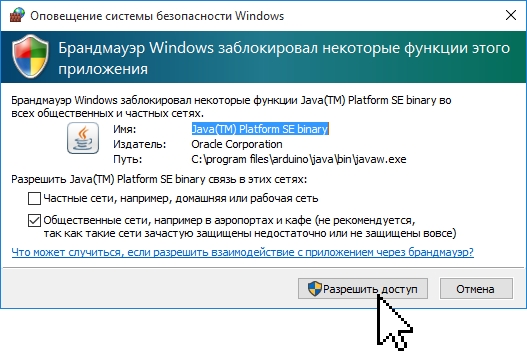
Разрешите доступ нажав на кнопку «Разрешить доступ». После чего, данное окно появляться не будет.
Откроется окно программы Arduino IDE:
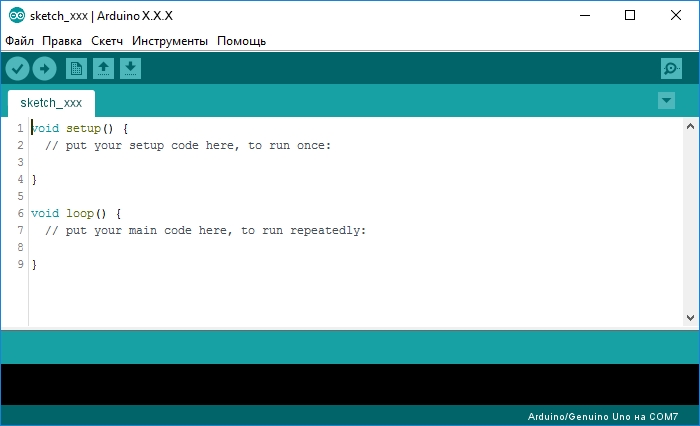
На следующем рисунке указано назначение областей и функциональных кнопок программы:
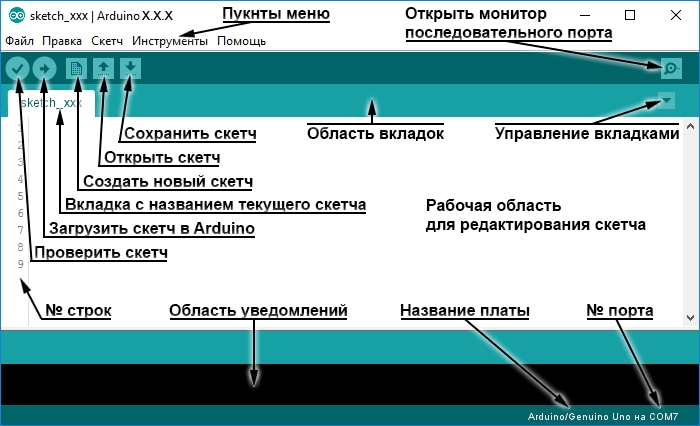
Теперь можно написать скетч (код) и загрузить (залить/прошить) его в Arduino. Но перед этим, надо подключить плату Arduino к компьютеру и указать программе Arduino IDE, какую именно плату Arduino Вы подключили, и к какому порту.
Подключение платы Arduino:
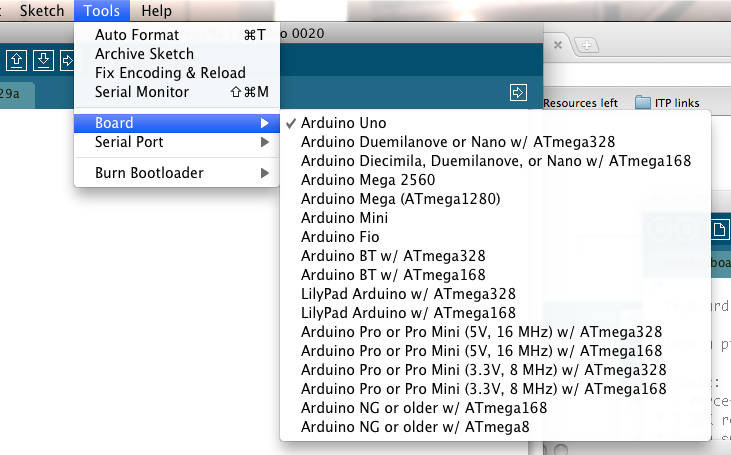
После того как Вы подключите плату Arduino через USB порт к компьютеру, программе Arduino IDE нужно указать, какую именно плату Arduino Вы подключили. Для этого выберите нужную плату из списка в разделе меню « Инструменты > Плата > Название Вашей платы », как это показано на следующем рисунке:

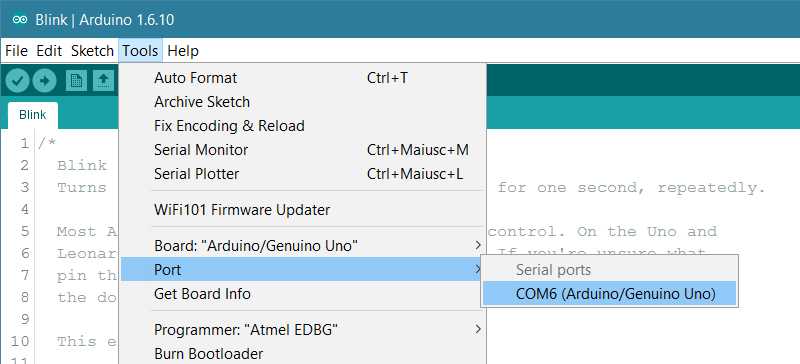
Теперь нужно выбрать Com-порт к которому подключена Ваша плата Arduino. Для этого выберите нужный Com-порт из списка доступных Com-портов в разделе меню « Инструменты > Порт > Номер доступного порта », как это показано на следующем рисунке:
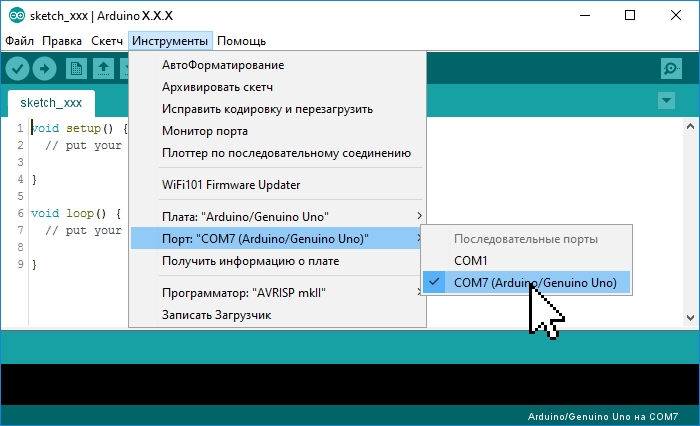
Если USB контроллер Вашей платы Arduino реализован на чипе FTDI или ему аналогичных, то в списке доступных Com-портов Вы не увидите название платы Arduino в скобках напротив Com-порта. В нашем случае Вы бы увидели просто «COM1» и «COM7», тогда возникает вопрос, а к какому из этих портов подключена плата Arduino?
Решается данный вопрос очень просто. Отключите плату Arduino от компьютера и откройте меню « Инструменты > Порт » . В списке Com-портов Вы увидите только доступные Com-порты, то есть в нашем случае только «COM1». Теперь подключите плату Arduino к компьютеру и опять откройте меню « Инструменты > Порт » . Теперь Вы увидите что список Com-портов увеличился на один (в нашем случае к «COM1» добавился «COM7»), именно к появившемуся Com-порту и подключена Ваша плата Arduino.
Если при подключении платы Arduino Вы не увидели появление нового Com-порта, значит USB контроллер Вашей платы Arduino реализован на чипах сторонних производителей и для него требуется установить дополнительный драйвер. Как, например, драйвер для чипа CH340G.
Загрузка скетча из программы Arduino IDE в плату Arduino:
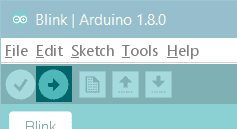
После того, как Вы указали тип платы Arduino, выбрали Com-порт и написали свой скетч (код программы), скетч можно загрузить (залить/прошить) в контроллер платы Arduino . Для этого выберите пункт меню « Скетч > Загрузка » или нажмите на кнопку в виде круга со стрелкой:

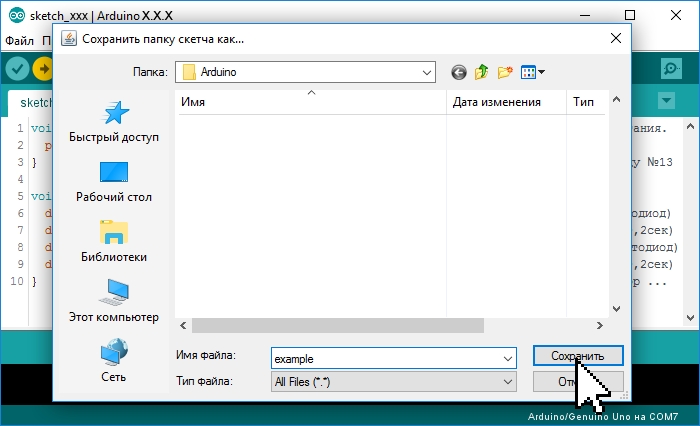
Если Вы написали скетч в новом окне и не сохраняли его в файл, то перед его загрузкой в плату Arduino, программ Arduino IDE предложит Вам его сохранить. Введите название, под которым Вы желаете сохранить скетч в файл и нажмите на кнопку «Сохранить».
Во время загрузки Вы увидите строку состояния которая будет отображать ход выполнения компиляции и загрузки скетча. Если в скетче нет ошибок и он успешно загружен, то в области уведомлений появится информация о количестве использованной и доступной памяти Arduino, а над областью уведомлений появится надпись «Загрузка завершена.».
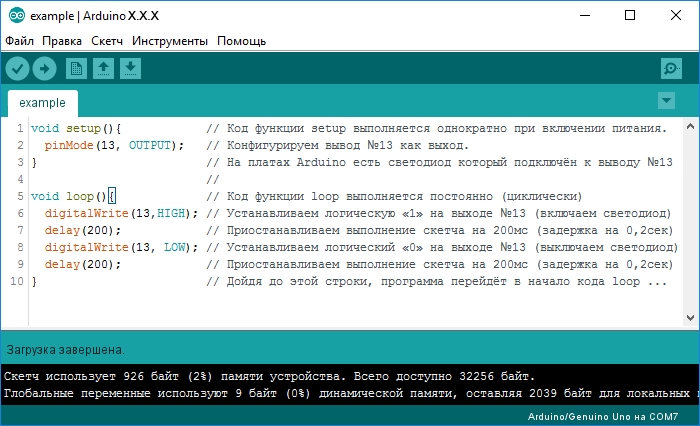
Небольшой скетч приведённый выше (на картинке) заставит мигать светодиод на плате Arduino. Многие скетчи упрощаются и сокращаются при использовании библиотек. О том что такое библиотеки и как их устанавливать, Вы можете узнать в разделе Wiki — Установка библиотек в Arduino IDE .
Getting Started with Arduino on Windows
This document explains how to connect your Arduino board to the computer and upload your first sketch.
1 | Get an Arduino board and USB cable
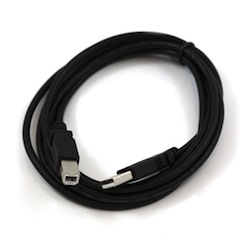
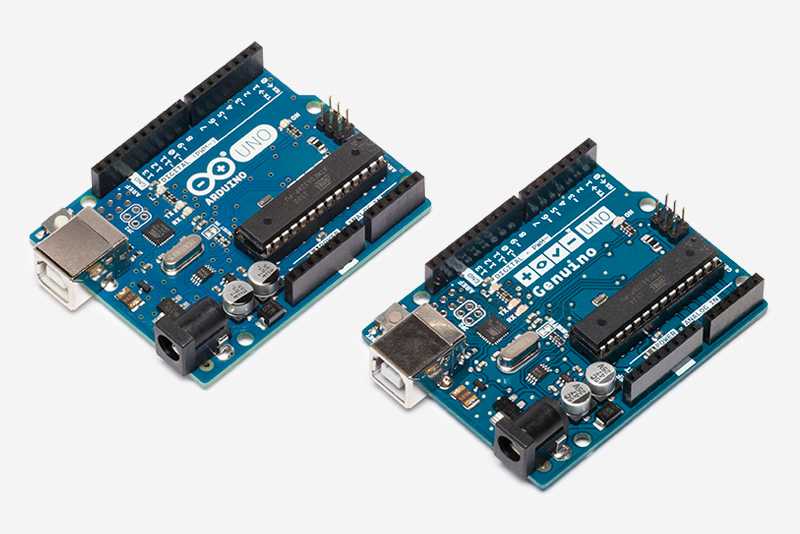
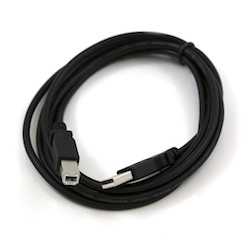
In this tutorial, we assume you’re using an Arduino Uno, Arduino Duemilanove, Nano, Arduino Mega 2560 , or Diecimila. You also need a standard USB cable (A plug to B plug): the kind you would connect to a USB printer, for example. (For the Arduino Nano, you’ll need an A to Mini-B cable instead.) 
2 | Download the Arduino environment
Get the latest version from the download page. When the download finishes, unzip the downloaded file. Make sure to preserve the folder structure. Double-click the folder to open it. There should be a few files and sub-folders inside.
3 | Connect the board
The Arduino Uno, Mega, Duemilanove and Arduino Nano automatically draw power from either the USB connection to the computer or an external power supply. Connect the Arduino board to your computer using the USB cable. The green power LED (labelled PWR) should go on.
4 | Install the drivers
Installing drivers for the Arduino Uno or Arduino Mega 2560 with Windows7, Vista, or XP:
- Plug in your board and wait for Windows to begin it’s driver installation process. After a few moments, the process will fail, despite its best efforts
- Click on the Start Menu, and open up the Control Panel.
- While in the Control Panel, navigate to System and Security. Next, click on System. Once the System window is up, open the Device Manager.
- Look under Ports (COM & LPT). You should see an open port named “Arduino UNO (COMxx)”
- Right click on the “Arduino UNO (COmxx)” port and choose the “Update Driver Software” option.
- Next, choose the “Browse my computer for Driver software” option.
- Finally, navigate to and select the driver file named “arduino.inf”, located in the “Drivers” folder of the Arduino Software download (not the “FTDI USB Drivers” sub-directory). If you are using an old version of the IDE (1.0.3 or older), choose the Uno’s driver file named “Arduino UNO.inf”
- Windows will finish up the driver installation from there.
5 | Launch the Arduino application
Double-click the Arduino application. (Note: if the Arduino software loads in the wrong language, you can change it in the preferences dialog.
6 | Open the blink example
Open the LED blink example sketch: File > Examples > 1.Basics > Blink. 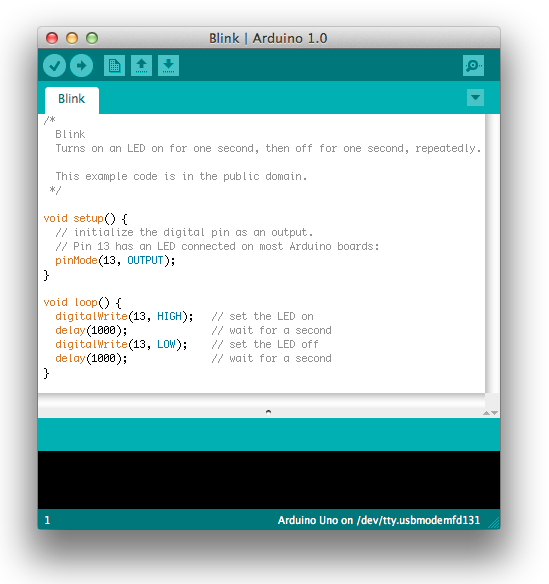
7 | Select your board
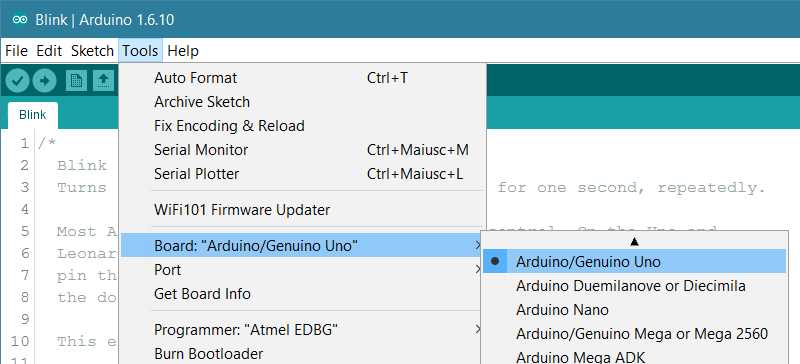
You’ll need to select the entry in the Tools > Board menu that corresponds to your Arduino.
8 | Select your serial port
Select the serial device of the Arduino board from the Tools | Serial Port menu. This is likely to be COM3 or higher (COM1 and COM2 are usually reserved for hardware serial ports). To find out, you can disconnect your Arduino board and re-open the menu; the entry that disappears should be the Arduino board. Reconnect the board and select that serial port.
9 | Upload the program
Now, simply click the “Upload” button in the environment. Wait a few seconds – you should see the RX and TX leds on the board flashing. If the upload is successful, the message “Done uploading.” will appear in the status bar. (Note: If you have an Arduino Mini, NG, or other board, you’ll need to physically present the reset button on the board immediately before pressing the upload button.)
A few seconds after the upload finishes, you should see the pin 13 (L) LED on the board start to blink (in orange). If it does, congratulations! You’ve gotten Arduino up-and-running.
Getting Started with Arduino UNO
This document explains how to connect your Uno board to the computer and upload your first sketch. The Arduino Uno is programmed using the Arduino Software (IDE), our Integrated Development Environment common to all our boards and running both online and offline. For more information on how to get started with the Arduino Software visit the Getting Started page.
Use your Arduino Uno on the Arduino Web IDE

All Arduino boards, including this one, work out-of-the-box on the Arduino Web Editor, you only need to install Arduino Create Agent to get started.
The Arduino Web Editor is hosted online, therefore it will always be up-to-date with the latest features and support for all boards. Follow this simple guide to start coding on the browser and upload your sketches onto your board.
Use your Arduino Uno on the Arduino Desktop IDE
If you want to program your Arduino Uno while offline you need to install the Arduino Desktop IDE The Uno is programmed using the Arduino Software (IDE), our Integrated Development Environment common to all our boards. Before you can move on, you must have installed the Arduino Software (IDE) on your PC, as explained in the home page of our Getting Started.
Connect your Uno board with an A B USB cable; sometimes this cable is called a USB printer cable
The USB connection with the PC is necessary to program the board and not just to power it up. The Uno automatically draw power from either the USB or an external power supply. Connect the board to your computer using the USB cable. The green power LED (labelled PWR) should go on.
Install the board drivers
If you used the Installer, Windows — from XP up to 10 — will install drivers automatically as soon as you connect your board.
If you downloaded and expanded the Zip package or, for some reason, the board wasn’t properly recognized, please follow the procedure below.
Click on the Start Menu, and open up the Control Panel.
While in the Control Panel, navigate to System and Security. Next, click on System. Once the System window is up, open the Device Manager.
Look under Ports (COM & LPT). You should see an open port named «Arduino UNO (COMxx)». If there is no COM & LPT section, look under «Other Devices» for «Unknown Device».
Right click on the «Arduino UNO (COmxx)» port and choose the «Update Driver Software» option.
Next, choose the «Browse my computer for Driver software» option.
Finally, navigate to and select the driver file named «arduino.inf», located in the «Drivers» folder of the Arduino Software download (not the «FTDI USB Drivers» sub-directory). If you are using an old version of the IDE (1.0.3 or older), choose the Uno driver file named «Arduino UNO.inf»
Windows will finish up the driver installation from there.
Open your first sketch
Open the LED blink example sketch: File > Examples >01.Basics > Blink.

Select your board type and port
You’ll need to select the entry in the Tools > Board menu that corresponds to your Arduino board.
Select the serial device of the board from the Tools | Serial Port menu. This is likely to be COM3 or higher (COM1 and COM2 are usually reserved for hardware serial ports). To find out, you can disconnect your board and re-open the menu; the entry that disappears should be the Arduino board. Reconnect the board and select that serial port.
Upload the program
Now, simply click the «Upload» button in the environment. Wait a few seconds — you should see the RX and TX leds on the board flashing. If the upload is successful, the message «Done uploading.» will appear in the status bar.
A few seconds after the upload finishes, you should see the pin 13 (L) LED on the board start to blink (in orange). If it does, congratulations! You’ve gotten Arduino up-and-running. If you have problems, please see the troubleshooting suggestions.
Learn more on the Desktop IDE
See this tutorial for a generic guide on the Arduino IDE with a few more infos on the Preferences, the Board Manager, and the Library Manager.
Tutorials
Now that you have set up and programmed your Uno board, you may find inspiration in our Project Hub tutorial platform
or have a look to the tutorial pages that explain how to use the various features of your board.
examples for using various sensors and actuators


