- How to clean windows
- Choose your time
- Tackle mildew on frames
- Give glass a going over
- Show sills some love
- Don’t neglect window screens
- How to clean windows
- Share
- Key Steps:
- Products for Cleaning Windows
- Window Cleaning Tools
- The Best Way to Clean Windows
- Here’s how to clean out your bloated hard drive in Windows 10
- Empty the recycle bin
- How to delete temporary files and downloads
- How to uninstall apps
- How to change how you use OneDrive
- Use your Xbox One
- Use an external drive
- Use a cloud storage service
How to clean windows
This is how to get your windows gleaming

Cleaning the windows can be a task people easily miss off their to-do list, as it is a somewhat arduous chore. But, if you aim to clean them a couple of times a year, you’ll be rewarded by more light being allowed into your home.
Forget the old advice about scrunched-up newspaper. In the past, papers were printed with petroleum-based oil ink, which is what gave windows their shine. Then, in the 1980s, this was switched to soy ink for environmental and cost reasons — and it doesn’t have the same effect on glass.
Whilst it may be a hated household chore, it doesn’t have to take up hours of your time. Here’s how to get your windows looking shiny and clean again in no time.
Choose your time
Like with a car, avoid cleaning your windows on very sunny days — the heat will make the glass dry too quickly and cause smears undoing all your hard work.
To do a proper job, take down curtains and blinds and clear windows and sills of any bits and bobs. Use a dustpan and brush or your vacuum’s upholstery tool to remove any loose debris before washing to avoid a muddy mess.

Tackle mildew on frames
You’ll want to put on an old pair of washing-up gloves before you tackle any window frames. Then, clean off mildew with an old lint-free cloth.
Dip the cloth in a branded mould remover to give your window frames a thorough clean or a weak solution of household bleach. The GHI recommends the HG Mould Spray.

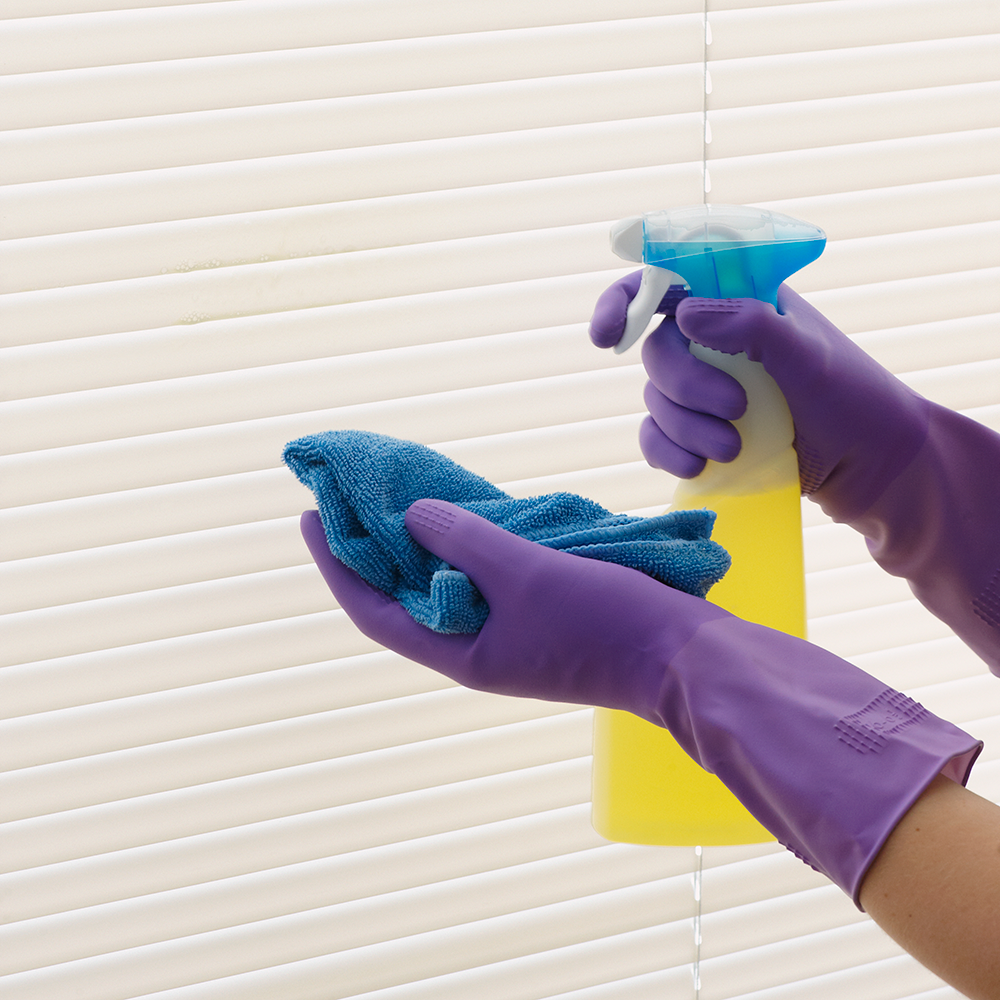
Give glass a going over
Use a branded window cleaner or create your own with a solution of one part distilled white vinegar to nine parts water into an old spray bottle. Use a lint-free cloth to wipe them down and then a chamois leather to buff them to a brilliant shine.
Vinegar is an age-old wonder and has the added benefit of being non-toxic and antibacterial, so a very handy product to have in your cupboard — and not just for your chips! You could also try adding dishwasher rinse aid to water when you wash your windows, for ensuring a streak-free finish.

Alternatively, the GHI also highly rates the e-cloth Window Pack, which is a microfibre cloth. Simply add water, no chemicals required.
If you have large areas of glass to clean, such as a conservatory or patio doors, it’s worth considering a window vacuum, to save you the energy. Once you’ve cleaned your windows, they vacuum up the remaining water in one sweep, making them far less messy than a squeegee which will result in water dripping onto your floors!

Show sills some love
Dust the internal sills regularly, taking time to get into any nooks or crannies that may need extra attention.
Check external sills regularly for rot, and replace any crumbling putty with the correct type for either timber or metal. Repaint as necessary.

Don’t neglect window screens
If you have metal window screens, write a number on each window in erasable pencil. Write a corresponding number on the screen before removing it from the window so you know which screen goes back where.
Remove the screens and dust the mesh and frame with the soft brush attachment of a vacuum cleaner. Scrub both sides of the screen with a stiff brush dipped in detergent solution (if you are doing this in the bath, line it with towels to prevent scratching the finish). Rinse using a shower attachment or the fine spray nozzle of a hosepipe. Leave to dry thoroughly in a sunny spot before refitting to the window.
How to clean windows
Cleaning the windows can make such a difference to your home! This guide describes the best way to clean windows & the ideal window cleaning tools to use.
Updated 8 April 2020
By Cleanipedia Team
Share

Key Steps:
Window Cleaning Checklist
Before you begin window cleaning make sure you have the appropriate tools:
- Cleaning product of your choice – whether it be a natural or commercial cleaner
- A clean, soft cloth or scrunched up newspaper
- A squeegee
The sun is shining, the birds are chirping, and yet your living room is as dull as dishwater. Have you checked your windows? When a little bit of sunlight comes our way, you might realise just how long it’s been since you cleaned your windows. Even just a little bit of dirt and dust can have a huge effect on how much light shines through, making it seem like a dark and dismal winter day even in the middle of summer. Cleaning windows is a task many of us put off because it seems like hard work, but with the right window cleaning tools and products, you can get your windows crystal clear with little to no fuss.
This video demonstration will show you how to get your windows looking great:
When using a ladder to reach high up windows, always take appropriate safety precautions: wear sensible footwear, make sure the ladder is fully extended, and have an extra person on hand to steady the ladder at the bottom. If you are unsure about working at heights, or do not own a ladder, seek the assistance of a professional window cleaner.
How concerned are you about disinfecting while cleaning?
Products for Cleaning Windows
To reduce the risk of stubborn streaks, you’ll want to use the right cleaning products. There are plenty of products that do the job, both natural and commercial.
- Commercial window cleaning products are readily available from stores. They get the job done, and are easy to use – make sure to read the directions on the label and test any product on a small area first. It’s best to use a product that is made to clean windows and glass – other products may leave streaks or smudges behind.
- Hot, soapy water can work wonders, too. Simply add a small amount of dishwashing liquid to some hot water, and you’ve got yourself one powerful cleaning product. Make sure to read the directions on the label and test any product on a small area first.
Window Cleaning Tools
Don’t worry, you don’t need to go out and spend a fortune on all manner of special window cleaning tools. Of course, you can, if you really want to, but it’s not necessary. Here are three options for tools you can use to clean your windows:
- For buffing up the window and making it sparkle, a clean and soft cloth is a good option. Clean rags from old t-shirts can be an easy (and cost-effective) option – they will buff nicely whilst protecting your window from damage.
- If you have a lot of windows to clean, a squeegee might be a good addition to your cleaning tools. You can buy squeegees with a soft trim, too, which just provides a little added protection against scratches.
- Believe it or not, some homeowners swear by newspaper for buffing their windows, claiming it produces the best shine. If trying this, always test in a small corner to ensure the newspaper doesn’t scratch your windows. You just need to scrunch up a piece of newspaper into a ball, and then use this to shine your windows.
The Best Way to Clean Windows
Our windows can get dirty very easily, especially if kids are around; you’ll notice a new sticky handprint or lots of fingerprints almost every day. Fortunately, keeping your windows clean is really easy once you know how – and it takes no time at all. Here’s a quick guide to cleaning your windows.
- First, prepare the area around the window. Remove any items from the windowsill and tie back the curtain.
- Apply the cleaning product to the window following the instructions on the label. Whether you’re using a specialised window spray or just soap and water, remember not to apply too much product to the glass.
- Next, it’s time to remove the cleaning product from the window – you don’t want to leave streaks behind. Use a clean and soft cloth for this (or a ball of newspaper, if you’d prefer). Start at the top of the window and work down in circles or small strokes. Avoid using kitchen roll or toilet roll, as these can leave streaks and debris behind.
- Streak-free windows should now be yours!
Here’s how to clean out your bloated hard drive in Windows 10
Is your hard drive feeling a little crowded lately? Having more free space on your hard disk can improve speed. By getting rid of files and moving data to other devices, you can quickly clean your hard drive in Windows 10. Here are the easiest ways to free up PC space quickly.
Empty the recycle bin
Ah, the beloved old recycle bin. It’s nice to know that some things about Windows haven’t changed in a long time. Windows 10 still uses the recycle bin to hide all the files you want to throw away, and emptying it can prove useful in freeing up extra space.
You can right-click on the Recycle Bin icon for the option to empty it directly. If you can’t find the icon, then head to the Start menu, and go to Settings > System > Storage. You will be able to select local storage under This PC — look for and click Temporary Files. Doing so will bring up any locations for temporary files, including Recycle Bin. Tick the box next to Recycle Bin, select the Remove Files option at the top of the screen, and confirm your decision. That’s all it takes!
It should be noted that emptying your recycle bin will only help clean your Windows 10 hard disk if there’s a lot of stuff in that bin. When you first download Windows 10 — and long afterward, depending on your desktop habits — emptying it may not affect your hard drive much at all. If you aren’t sure, take a peek inside your bin and see how full it is first. A few GBs worth of data can still make a difference.
How to delete temporary files and downloads
Remember how emptying the recycle bin took you through the temporary files section? If you want to broaden your hard drive cleaning activities, then you can delete all temporary files.
What exactly are you getting rid of here? Well, Windows temp files manage document editing, some application processes, various printing tasks, and so on.
These files are usually automatically deleted, but sometimes they hang on. Please get rid of them all by ticking the box next to each file type, then clicking on the Remove Files option at the top of the screen.
 Digital Trends
Another time files are automatically created occurs when you download anything from the internet. These files pop up in your downloads and tend to stick around — which means they can quickly stack up if you are downloading a lot of content to your Windows 10 desktop.
Go to your Downloads folder via File Explorer > This PC > Downloads and delete any files that you no longer need by highlighting them in groups or individually. This method is a great way to clear out space manually without accidentally deleting something you’ll need later.
How to uninstall apps
Too many apps can lead to an eventual slowdown or lack of space for other content, especially on smaller, lighter Windows devices (looking at you, Surface tablets). Some apps can take up a lot of space — the trick is finding which hog the most room on your hard drive and which you can live without.
From the Start menu, go to Settings, select Apps, and then select Apps & Features. Here, you can see all the apps downloaded. Windows 10 allows you to arrange them by various statistics — if you have a long list, organize them by the amount of hard drive space they are taking up.
See which apps are hogging the most data, and delete those that you don’t use. Double-check that the app doesn’t have anything too valuable, then select it and choose Uninstall.
 Digital Trends
How to change how you use OneDrive
OneDrive is a cloud service for Windows, so you would think that all the cloud data it uses would help free hard drive space, not take it up. This is true, except for one particular OneDrive feature — the ability to save files offline, which you may not even know that you are using.
Sometimes this is handy. If you are dealing with sensitive files or big projects with some sharp deadlines, it’s a good idea to have a backup. But if you are using OneDrive and automatically saving offline for every file and doc at work, school, or home, you probably waste hard drive space.
 Digital Trends
The OneDrive icon should be waiting on the right side of your taskbar (it may be lurking under the Show Hidden Icons arrow). Click on the Cloud icon, choose Settings (the three dots in the upper-right corner), and then select the Preferences option. Doing so will take you to all the file types that OneDrive is saving offline and how much space each takes up.
Unselect all the OneDrive folders that you don’t need. Remember, you can still access all these files online at OneDrive.com, so you aren’t losing anything.
Use your Xbox One
Microsoft platforms are growing increasingly interconnected, and the convergence is very apparent in Windows 10, which connects more freely to other Microsoft devices like the Xbox One game console. If you have an Xbox One, you can use it to help save some space by swapping out select apps and data. You can stream content from the Xbox to your Windows 10 PC with just a few steps.
This service allows you to store data on the game console and free up your PC if you have content you only use at home. Just remember to delete the data from your PC after you transfer it to the Xbox.
Use an external drive
From USB drives to full external hard drives, one of the simplest ways to clean up your hard drive on Windows 10 is to move extra data outside your computer.
First, hook up a hard drive and make sure that it is properly formatted and ready for uploads. Dragging and dropping a file into the new drive using File Explorer will create a copy of the file, allowing you to erase the original.
 Digital Trends
However, it is also possible for you to move large chunks of files at one time. Go to the taskbar and open your File, Explorer . From there, select all the files you want to transfer outside your PC hard drive. Once you have them all highlighted, go to the Home menu at the top of the screen. Select Move To , then select Choose Location . Find your external drive on the list and select it. All of your files will drop into that destination. This is a full transfer, so you don’t even have to erase anything from your computer afterward.
Use a cloud storage service
Purchasing an external hard drive or USB device isn’t your only option for offloading and saving your files. Instead, you can copy your files to free or paid cloud storage services . You can then delete the copy on your PC, which will free up more space on your computer.
Cloud storage is a safe and easy way to store your files. Some of the advantages include the ability to copy your operating system and files to transfer and restore them on a new device if you need to.
Rather than relying on physical storage like USBs and external hard drives, you can use a cloud-based service to “carry” documents with you and access them anywhere you need to. All you need is a login email or username and password to access your files.
Many smartphones will automatically save certain files, such as photos, to the cloud. The cloud is an ideal backup system because you can save your files even if your phone crashes. You’re also able to access any files in the cloud from different devices.
PC users can either drag-and-drop data to cloud storage or upload the files with little difficulty. Be aware of how much cloud storage space you have so you’ll know you have room for all of your files.
Widely-used examples of cloud-based services include iDrive (our favorite), plus Dropbox, Google Drive, Microsoft OneDrive, and iCloud. Companies are constantly developing cloud options, so you’ll be able to find the perfect fit for your storage needs.
Read reviews and consider how big of a name your cloud service has so you can be sure it’s trustworthy and secure. That way, you can practically guarantee your files aren’t going anywhere — ever.


