- 1.5 Введение — Установка Git
- Установка Git
- Установка в Linux
- Установка на Mac
- Установка в Windows
- Установка из исходников
- 1.5 Getting Started — Installing Git
- Installing Git
- Installing on Linux
- Installing on macOS
- Installing on Windows
- Installing from Source
- Git Guides
- Get started with git and GitHub
- Install Git
- Install Git on Mac OS X
- Git for Mac Installer
- Install Git with Homebrew
- Install Git with MacPorts
- Install the git-credential-osxkeychain helper
- Install Git with Atlassian Sourcetree
- Build Git from source on OS X
- Install Git on Windows
- Git for Windows stand-alone installer
- Install Git with Atlassian Sourcetree
- Install Git on Linux
- Debian / Ubuntu (apt-get)
- Fedora (dnf/yum)
- Build Git from source on Linux
1.5 Введение — Установка Git
Установка Git
Прежде чем использовать Git, вы должны установить его на своём компьютере. Даже если он уже установлен, наверное, это хороший повод, чтобы обновиться до последней версии. Вы можете установить Git из собранного пакета или другого установщика, либо скачать исходный код и скомпилировать его самостоятельно.
В этой книге используется Git версии 2.8.0. Хотя большинство используемых нами команд должны работать даже в старых версиях Git, некоторые из них могут не работать или действовать немного иначе, если вы используете старую версию. Поскольку Git отлично справляется с сохранением обратной совместимости, любая версия после 2.8 должна работать нормально.
Установка в Linux
Если вы хотите установить Git под Linux как бинарный пакет, это можно сделать, используя обычный менеджер пакетов вашего дистрибутива. Если у вас Fedora (или другой похожий дистрибутив, такой как RHEL или CentOS), можно воспользоваться dnf :
Если же у вас дистрибутив, основанный на Debian, например, Ubuntu, попробуйте apt :
Чтобы воспользоваться дополнительными возможностями, посмотрите инструкцию по установке для нескольких различных разновидностей Unix на сайте Git https://git-scm.com/download/linux.
Установка на Mac
Существует несколько способов установки Git на Mac. Самый простой — установить Xcode Command Line Tools. В версии Mavericks (10.9) и выше вы можете добиться этого просто первый раз выполнив ‘git’ в терминале.
Если Git не установлен, вам будет предложено его установить.
Если Вы хотите получить более актуальную версию, то можете воспользоваться бинарным установщиком. Установщик Git для OS X доступен для скачивания с сайта Git https://git-scm.com/download/mac.
Установка в Windows
Для установки Git в Windows также имеется несколько способов. Официальная сборка доступна для скачивания на официальном сайте Git. Просто перейдите на страницу https://git-scm.com/download/win, и загрузка запустится автоматически. Обратите внимание, что это отдельный проект, называемый Git для Windows; для получения дополнительной информации о нём перейдите на https://gitforwindows.org.
Для автоматической установки вы можете использовать пакет Git Chocolatey. Обратите внимание, что пакет Chocolatey поддерживается сообществом.
Установка из исходников
Многие предпочитают устанавливать Git из исходников, поскольку такой способ позволяет получить самую свежую версию. Обновление бинарных инсталляторов, как правило, немного отстаёт, хотя в последнее время разница не столь существенна.
Если вы действительно хотите установить Git из исходников, у вас должны быть установлены следующие библиотеки, от которых он зависит: autotools, curl, zlib, openssl, expat, and libiconv. Например, если в вашей системе используется dnf (Fedora) или apt-get (системы на базе Debian), вы можете использовать одну из следующих команд для установки всех зависимостей, используемых для сборки и установки бинарных файлов Git:
Для того, чтобы собрать документацию в различных форматах (doc, html, info), понадобится установить дополнительные зависимости:
Пользователи RHEL и производных от неё (таких как CentOS или Scientific Linux) должны подключить репозиторий EPEL для корректной установки пакета docbook2X
Если вы используете систему на базе Debian (Debian/Ubuntu/Ubuntu-производные), вам так же понадобится установить пакет install-info :
Если вы используете систему на базе RPM (Fedora/RHEL/RHEL-производные), вам так же понадобится установить пакет getopt , который уже установлен в системах на базе Debian:
К тому же из-за различий имён бинарных файлов вам понадобится сделать следующее:
Когда все необходимые зависимости установлены, вы можете пойти дальше и скачать самый свежий архив с исходниками из следующих мест: с сайта Kernel.org https://www.kernel.org/pub/software/scm/git, или зеркала на сайте GitHub https://github.com/git/git/releases. Конечно, немного проще скачать последнюю версию с сайта GitHub, но на странице kernel.org релизы имеют подписи, если вы хотите проверить, что скачиваете.
Затем скомпилируйте и установите:
После этого вы можете получать обновления Git посредством самого Git:
Источник
1.5 Getting Started — Installing Git
Installing Git
Before you start using Git, you have to make it available on your computer. Even if it’s already installed, it’s probably a good idea to update to the latest version. You can either install it as a package or via another installer, or download the source code and compile it yourself.
This book was written using Git version 2.8.0. Though most of the commands we use should work even in ancient versions of Git, some of them might not or might act slightly differently if you’re using an older version. Since Git is quite excellent at preserving backwards compatibility, any version after 2.8 should work just fine.
Installing on Linux
If you want to install the basic Git tools on Linux via a binary installer, you can generally do so through the package management tool that comes with your distribution. If you’re on Fedora (or any closely-related RPM-based distribution, such as RHEL or CentOS), you can use dnf :
If you’re on a Debian-based distribution, such as Ubuntu, try apt :
For more options, there are instructions for installing on several different Unix distributions on the Git website, at https://git-scm.com/download/linux.
Installing on macOS
There are several ways to install Git on a Mac. The easiest is probably to install the Xcode Command Line Tools. On Mavericks (10.9) or above you can do this simply by trying to run git from the Terminal the very first time.
If you don’t have it installed already, it will prompt you to install it.
If you want a more up to date version, you can also install it via a binary installer. A macOS Git installer is maintained and available for download at the Git website, at https://git-scm.com/download/mac.
Installing on Windows
There are also a few ways to install Git on Windows. The most official build is available for download on the Git website. Just go to https://git-scm.com/download/win and the download will start automatically. Note that this is a project called Git for Windows, which is separate from Git itself; for more information on it, go to https://gitforwindows.org.
To get an automated installation you can use the Git Chocolatey package. Note that the Chocolatey package is community maintained.
Installing from Source
Some people may instead find it useful to install Git from source, because you’ll get the most recent version. The binary installers tend to be a bit behind, though as Git has matured in recent years, this has made less of a difference.
If you do want to install Git from source, you need to have the following libraries that Git depends on: autotools, curl, zlib, openssl, expat, and libiconv. For example, if you’re on a system that has dnf (such as Fedora) or apt-get (such as a Debian-based system), you can use one of these commands to install the minimal dependencies for compiling and installing the Git binaries:
In order to be able to add the documentation in various formats (doc, html, info), these additional dependencies are required:
Users of RHEL and RHEL-derivatives like CentOS and Scientific Linux will have to enable the EPEL repository to download the docbook2X package.
If you’re using a Debian-based distribution (Debian/Ubuntu/Ubuntu-derivatives), you also need the install-info package:
If you’re using a RPM-based distribution (Fedora/RHEL/RHEL-derivatives), you also need the getopt package (which is already installed on a Debian-based distro):
Additionally, if you’re using Fedora/RHEL/RHEL-derivatives, you need to do this:
due to binary name differences.
When you have all the necessary dependencies, you can go ahead and grab the latest tagged release tarball from several places. You can get it via the kernel.org site, at https://www.kernel.org/pub/software/scm/git, or the mirror on the GitHub website, at https://github.com/git/git/releases. It’s generally a little clearer what the latest version is on the GitHub page, but the kernel.org page also has release signatures if you want to verify your download.
Then, compile and install:
After this is done, you can also get Git via Git itself for updates:
Источник
Git Guides

How to install Git on any OS
Git can be installed on the most common operating systems like Windows, Mac, and Linux. In fact, Git comes installed by default on most Mac and Linux machines!
Checking for Git
To see if you already have Git installed, open up your terminal application.
- If you’re on a Mac, look for a command prompt application called «Terminal».
- If you’re on a Windows machine, open the windows command prompt or «Git Bash».
Once you’ve opened your terminal application, type git version . The output will either tell you which version of Git is installed, or it will alert you that git is an unknown command. If it’s an unknown command, read further and find out how to install Git.
Install Git Using GitHub Desktop
Installing GitHub Desktop will also install the latest version of Git if you don’t already have it. With GitHub Desktop, you get a command line version of Git with a robust GUI. Regardless of if you have Git installed or not, GitHub Desktop offers a simple collaboration tool for Git. You can learn more here.
Install Git on Windows
- Navigate to the latest Git for Windows installer and download the latest version.
- Once the installer has started, follow the instructions as provided in the Git Setup wizard screen until the installation is complete.
- Open the windows command prompt (or Git Bash if you selected not to use the standard Git Windows Command Prompt during the Git installation).
- Type git version to verify Git was installed.
Note: git-scm is a popular and recommended resource for downloading Git for Windows. The advantage of downloading Git from git-scm is that your download automatically starts with the latest version of Git included with the recommended command prompt, Git Bash . The download source is the same Git for Windows installer as referenced in the steps above.
Install Git on Mac
Most versions of MacOS will already have Git installed, and you can activate it through the terminal with git version . However, if you don’t have Git installed for whatever reason, you can install the latest version of Git using one of several popular methods as listed below:
Install Git From an Installer
- Navigate to the latest macOS Git Installer and download the latest version.
- Once the installer has started, follow the instructions as provided until the installation is complete.
- Open the command prompt «terminal» and type git version to verify Git was installed.
Note: git-scm is a popular and recommended resource for downloading Git on a Mac. The advantage of downloading Git from git-scm is that your download automatically starts with the latest version of Git. The download source is the same macOS Git Installer as referenced in the steps above.
Install Git from Homebrew
Homebrew is a popular package manager for macOS. If you already have Homwbrew installed, you can follow the below steps to install Git:
- Open up a terminal window and install Git using the following command: brew install git .
- Once the command output has completed, you can verify the installation by typing: git version .
Install Git on Linux
Fun fact: Git was originally developed to version the Linux operating system! So, it only makes sense that it is easy to configure to run on Linux.
You can install Git on Linux through the package management tool that comes with your distribution.
- Git packages are available using apt .
- It’s a good idea to make sure you’re running the latest version. To do so, Navigate to your command prompt shell and run the following command to make sure everything is up-to-date: sudo apt-get update .
- To install Git, run the following command: sudo apt-get install git-all .
- Once the command output has completed, you can verify the installation by typing: git version .
- Git packages are available using dnf .
- To install Git, navigate to your command prompt shell and run the following command: sudo dnf install git-all .
- Once the command output has completed, you can verify the installation by typing: git version .
Note: You can download the proper Git versions and read more about how to install on specific Linux systems, like installing Git on Ubuntu or Fedora, in git-scm’s documentation.
Other Methods of Installing Git
Looking to install Git via the source code? Learn more here.
Get started with git and GitHub
Review code, manage projects, and build software alongside 40 million developers.
Источник
Install Git
Install Git on Mac OS X
There are several ways to install Git on a Mac. In fact, if you’ve installed XCode (or it’s Command Line Tools), Git may already be installed. To find out, open a terminal and enter git —version .
Apple actually maintain and ship their own fork of Git, but it tends to lag behind mainstream Git by several major versions. You may want to install a newer version of Git using one of the methods below:
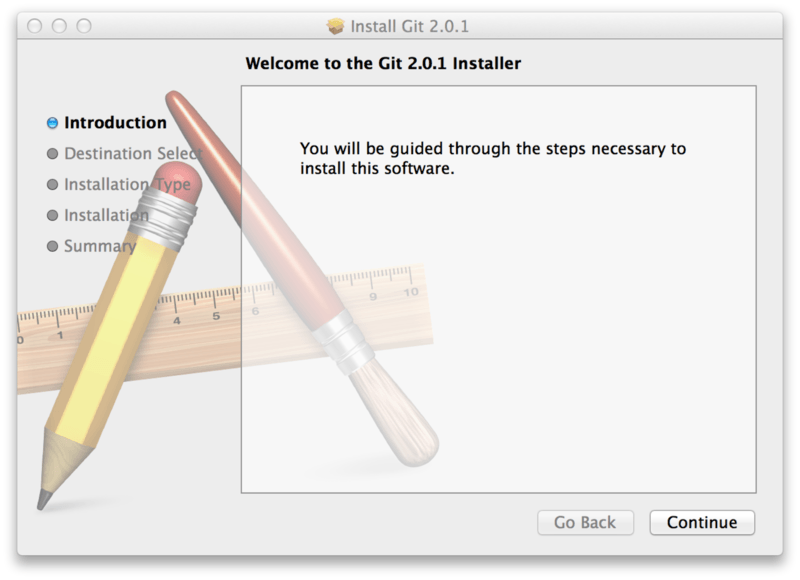
Git for Mac Installer
The easiest way to install Git on a Mac is via the stand-alone installer:
Follow the prompts to install Git.
Open a terminal and verify the installation was successful by typing git —version :
Configure your Git username and email using the following commands, replacing Emma’s name with your own. These details will be associated with any commits that you create:
(Optional) To make Git remember your username and password when working with HTTPS repositories, configure the git-credential-osxkeychain helper.
Install Git with Homebrew
If you have installed Homebrew to manage packages on OS X, you can follow these instructions to install Git:
Open your terminal and install Git using Homebrew:
Verify the installation was successful by typing which git —version :
Configure your Git username and email using the following commands, replacing Emma’s name with your own. These details will be associated with any commits that you create:
(Optional) To make Git remember your username and password when working with HTTPS repositories, install the git-credential-osxkeychain helper.
Install Git with MacPorts
If you have installed MacPorts to manage packages on OS X, you can follow these instructions to install Git:
Open your terminal and update MacPorts:
Search for the latest available Git ports and variants:
Install Git with bash completion, the OS X keychain helper, and the docs:
Configure your Git username and email using the following commands, replacing Emma’s name with your own. These details will be associated with any commits that you create:
(Optional) To make Git remember your username and password when working with HTTPS repositories, configure the git-credential-osxkeychain helper.
Install the git-credential-osxkeychain helper
Bitbucket supports pushing and pulling your Git repositories over both SSH and HTTPS. To work with a private repository over HTTPS, you must supply a username and password each time you push or pull. The git-credential-osxkeychain helper allows you to cache your username and password in the OSX keychain, so you don’t have to retype it each time.
If you followed the MacPorts or Homebrew instructions above, the helper should already be installed. Otherwise you’ll need to download and install it. Open a terminal window and check:
If you receive a usage statement, skip to step 4. If the helper is not installed, go to step 2.
Use curl to download git-credential-osxkeychain (or download it via your browser) and move it to /usr/local/bin :
Make the file an executable:
Configure git to use the osxkeychain credential helper.
The next time Git prompts you for a username and password, it will cache them in your keychain for future use.
Install Git with Atlassian Sourcetree
Sourcetree, a free visual Git client for Mac, comes with its own bundled version of Git. You can download Sourcetree here.
To learn how to use Git with Sourcetree (and how to host your Git repositories on Bitbucket) you can follow our comprehensive Git tutorial with Bitbucket and Sourcetree.
Build Git from source on OS X
Building Git can be a little tricky on Mac due to certain libraries moving around between OS X releases. On El Capitan (OS X 10.11), follow these instructions to build Git:
From your terminal install XCode’s Command Line Tools (if you haven’t already):
Using Homebrew, install openssl:
Clone the Git source (or if you don’t yet have a version of Git installed, download and extract it):
To build Git run make with the following flags:
Install Git on Windows
Git for Windows stand-alone installer
When you’ve successfully started the installer, you should see the Git Setup wizard screen. Follow the Next and Finish prompts to complete the installation. The default options are pretty sensible for most users.
Open a Command Prompt (or Git Bash if during installation you elected not to use Git from the Windows Command Prompt).
Run the following commands to configure your Git username and email using the following commands, replacing Emma’s name with your own. These details will be associated with any commits that you create:
Optional: Install the Git credential helper on Windows
Bitbucket supports pushing and pulling over HTTP to your remote Git repositories on Bitbucket. Every time you interact with the remote repository, you must supply a username/password combination. You can store these credentials, instead of supplying the combination every time, with the Git Credential Manager for Windows.
Install Git with Atlassian Sourcetree
Sourcetree, a free visual Git client for Windows, comes with its own bundled version of Git. You can download Sourcetree here.
To learn how to use Git with Sourcetree (and how to host your Git repositories on Bitbucket) you can follow our comprehensive Git tutorial with Bitbucket and Sourcetree.
Install Git on Linux
Debian / Ubuntu (apt-get)
Git packages are available via apt:
From your shell, install Git using apt-get:
Verify the installation was successful by typing git —version :
Configure your Git username and email using the following commands, replacing Emma’s name with your own. These details will be associated with any commits that you create:
Fedora (dnf/yum)
Git packages are available via both yum and dnf:
From your shell, install Git using dnf (or yum, on older versions of Fedora):
Verify the installation was successful by typing git —version :
Configure your Git username and email using the following commands, replacing Emma’s name with your own. These details will be associated with any commits that you create
Build Git from source on Linux
Git requires the several dependencies to build on Linux. These are available via apt:
From your shell, install the necessary dependencies using apt-get:
Clone the Git source (or if you don’t yet have a version of Git installed, download and extract it):
To build Git and install it under /usr , run make :
Git requires the several dependencies to build on Linux. These are available via both yum and dnf:
From your shell, install the necessary build dependencies using dnf (or yum, on older versions of Fedora):
or using yum. For yum, you may need to install the Extra Packages for Enterprise Linux (EPEL) repository first:
Symlink docbook2X to the filename that the Git build expects:
Clone the Git source (or if you don’t yet have a version of Git installed, download and extract it):
To build Git and install it under /usr , run make :
Источник


