- Git — создание ветвей (branch)
- September 04, 2014
- Инициализация Git-репозитория
- Git — создание новой ветви (branch)
- Git — переключение между ветвями (branches)
- Git — слияние ветвей (branches)
- Git — графическое представление ветвей (branches)
- Git — удаление ветви (branch)
- TypeScript — размеченные объединения
- Git Branch
- How it works
- Common Options
- Creating Branches
- Creating remote branches
- Deleting Branches
- Summary
- Git: Create a New Branch
- Creating a Branch from a Commit
- Free eBook: Git Essentials
- Creating a Branch from a Tag
Git — создание ветвей (branch)
September 04, 2014
Продолжаю совместно с вами постепенно изучать магию Git\GitHub.
Слово магия здесь применено не случайно — не иначе, как магией возможности Git\GitHub не назовешь. По крайней мере, я впечатлен этими возможностями. Другое дело, что процесс изучения Git у меня лично идет как-то тяжеловато. Ну, это не страшно — главное, не останавливаться!
В этом разделе я попытаюсь осветить для себя (и возможно, для вас, уважаемый читатель) вопрос создания ветвей (branches) в Git, перемещение между ветвями (branches), слияние (merge) ветвей. Этот вопрос очень подробно и хорошо описан на странице официальной документации — “Git Branching — Basic Branching and Merging”. Здесь я попробую самостоятельно описать данный вопрос.
Инициализация Git-репозитория
Создаю тестовую директорию git_branches , в которой будут производиться эксперименты по созданию ветвей в Git. Внутри этой директории создаю два файла — индексный файл и файл таблиц стилей. А затем инициализирую Git-репозиторий, добавляю созданные файлы под версионный контроль Git:
Обратите на строку On branch master в выводе команды git status . Это не пустой набор служебной информации — здесь говориться о том, что в ветви master нечего фиксировать и рабочая директория чистая.
Итак, мы уже кое-что узнали. А именно — при инициализации Git-репозитория была автоматически создана ветвь (branch) по имени master . И на данный момент мы находимся в этой ветви.
Конечно, на самом деле это пока мало о чем говорит, так как не с чем сравнивать. Поэтому давайте я немного отредактирую оба файла index.html и style.css , проиндексирую\зафиксирую их.
В браузере примерный вид странички будет выглядеть таким образом:
Git — создание новой ветви (branch)
В системе Git (как уже упоминалось ранее) имеется механизм ветвления (branches). Попробую на словах объяснить, что он из себя представляет.
Допустим, в моем текущем проекте, у которого имеются два файла, нужно внести кардинальные изменения. Причем, изменения такого рода, что они могут нарушить работу уже существующего проекта. Чтобы обезопасить себя (подстраховать), создаю точную копию существующего проекта и перехожу в нее для дальнейшей работы.
Давайте я на практике осуществлю вышесказанные действия. Для этого создаю новую ветвь с произвольным именем second , которая на этом этапе будет точной копией ветви master :
Строка Switched to a new branch ‘second’ услужливо информирует, что меня автоматически “перебросило” во вновь ветвь second . Можно проверить себя, набрав в консоли:
Строка On branch second говорит сама за себя.
Отлично! Теперь давайте я внесу некоторые изменения в файлы index.html и style.css и мы вместе посмотрим на результат в окне браузера. Изменения будут касаться добавления блока-обертки, еще нескольких параграфов и другой легкой стилизации.
Не забуду также проиндексировать и зафиксировать внесенные изменения. Обратите внимание на вид команды — git commit -a . Эта команда является сокращенным вариантом двух команд: git add и git commit -m . Применяется, когда нужно “проскочить” этап индексирования и сразу зафиксировать изменения.
Смотрим, что у нас получилось в окне браузера — то, что и ожидалось:
Git — переключение между ветвями (branches)
А теперь настал самый интересный момент. Как вы помните, мы сейчас находимся в ветви second . Давайте я переключусь в ветвь master и мы снова посмотрим в окно браузера:
Оп! Мы видим старую картину — Git “запечатлел” тот момент, когда мы совершили переход из ветви master в ветвь second . Другими словами, мы вернулись в последнее зафиксированное состояние ветви master :
Если я снова вернусь в ветку second и запущу команду просмотра логов Git, то коммитов окажется больше:
Мне кажется, уже сейчас должно быть понятно, что такое ветви (branches) в Git и для чего они предназначены. На самом деле это действительно очень просто.
Git — слияние ветвей (branches)
В предыдущем шаге я создал ветвь second , в которую внес “рискованные” изменения, чтобы проверить, “оправдают” ли они себя. Изменениями я доволен и хотел бы добавить их в первоначальную ветку master , чтобы потом продолжить развитие проекта уже с этого места.
Фактически, я хочу сделать слияние двух веток — master и second . Это сделать очень просто — для этого я перехожу в ветку master . То есть, я должен находиться в той ветке, в которую я вношу изменения из другой ветки. А затем произвожу само слияние:
Команда слияния проста — я просто указываю имя той ветки (branch), которую хочу слить (merge) с текущей, в которой я нахожусь на данный момент.
При слиянии ветвей зачастую может возникнуть ситуация, когда происходит конфликт между двумя ветвями. Рассмотрение вопроса решения конфликтов при слиянии не рассматривается мною, так как на данный момент еще не освоил этот вопрос до конца.
Давайте снова “заглянем” в окно браузера — что он нам интересного покажет?
Показал он то, что и следовало показать — результат объединения двух ветвей master и second .
Git — графическое представление ветвей (branches)
Система Git имеет в своем составе возможность графического представления ветвления в репозитории. Причем, такое представление можно сделать даже в консоли, с помощью псевдографики.
Это можно сделать, набрав в консоли команду:
На Stack Overflow я нашел примеры красивых изображений консоли с псевдографическим выводом команды git log :


На самом деле вариантов использования команды git log с ключом —graph бесчисленное множество. Поэтому нужно выбирать именно то, что нужно и нравиться именно вам.
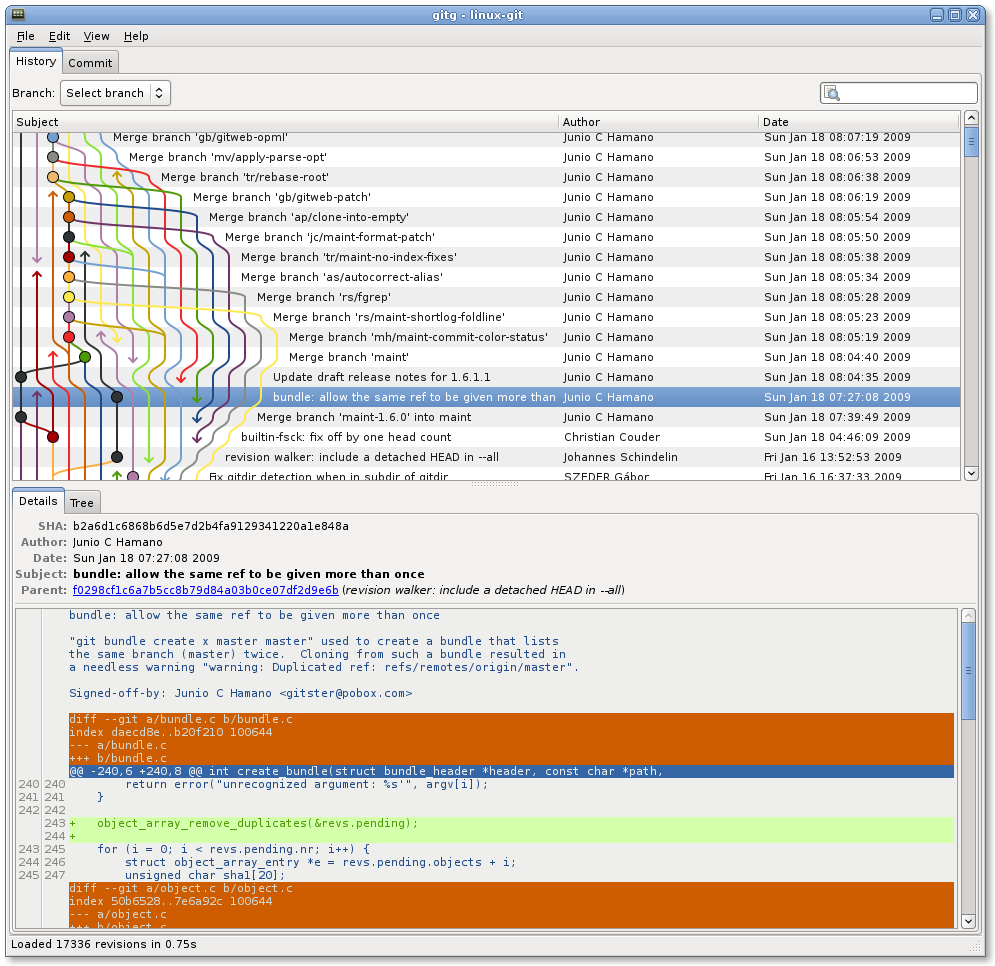
Помимо псевдографики, ветви в Git можно визуализировать с помощью настоящего графического приложения. Под Mac OS X и Linux имеется достаточно большое количество таких приложений. Например, под Mac OS X это GitX, под Linux — Gitk или Gitg:
Git — удаление ветви (branch)
В разделе слияния ветвей в Git я научился процессу объединения двух ветвей в одну. Такой процесс в Git имеет название merge (слияние). Теперь ветвь master имеет в себе все, что есть и в ветви second . Поэтому ветвь second можно удалить.
Выполняется это командой:
Посмотрим на вывод команды git hist :
У меня осталась одна ветвь — master .
TypeScript — размеченные объединения
> Пользовательское объединение типов — что это и как можно использоватьПомимо объединения **примитивных** типов данных (например):<% high. … Continue reading
Источник
Git Branch
This document is an in-depth review of the git branch command and a discussion of the overall Git branching model. Branching is a feature available in most modern version control systems. Branching in other VCS’s can be an expensive operation in both time and disk space. In Git, branches are a part of your everyday development process. Git branches are effectively a pointer to a snapshot of your changes. When you want to add a new feature or fix a bug—no matter how big or how small—you spawn a new branch to encapsulate your changes. This makes it harder for unstable code to get merged into the main code base, and it gives you the chance to clean up your future’s history before merging it into the main branch.

The diagram above visualizes a repository with two isolated lines of development, one for a little feature, and one for a longer-running feature. By developing them in branches, it’s not only possible to work on both of them in parallel, but it also keeps the main branch free from questionable code.
The implementation behind Git branches is much more lightweight than other version control system models. Instead of copying files from directory to directory, Git stores a branch as a reference to a commit. In this sense, a branch represents the tip of a series of commits—it’s not a container for commits. The history for a branch is extrapolated through the commit relationships.
As you read, remember that Git branches aren’t like SVN branches. Whereas SVN branches are only used to capture the occasional large-scale development effort, Git branches are an integral part of your everyday workflow. The following content will expand on the internal Git branching architecture.
How it works
A branch represents an independent line of development. Branches serve as an abstraction for the edit/stage/commit process. You can think of them as a way to request a brand new working directory, staging area, and project history. New commits are recorded in the history for the current branch, which results in a fork in the history of the project.
The git branch command lets you create, list, rename, and delete branches. It doesn’t let you switch between branches or put a forked history back together again. For this reason, git branch is tightly integrated with the git checkout and git merge commands.
Common Options
List all of the branches in your repository. This is synonymous with git branch —list.
Create a new branch called <branch> . This does not check out the new branch.
Delete the specified branch. This is a “safe” operation in that Git prevents you from deleting the branch if it has unmerged changes.
Force delete the specified branch, even if it has unmerged changes. This is the command to use if you want to permanently throw away all of the commits associated with a particular line of development.
Rename the current branch to <branch> .
List all remote branches.
Creating Branches
It’s important to understand that branches are just pointers to commits. When you create a branch, all Git needs to do is create a new pointer, it doesn’t change the repository in any other way. If you start with a repository that looks like this:

Then, you create a branch using the following command:
The repository history remains unchanged. All you get is a new pointer to the current commit:

Note that this only creates the new branch. To start adding commits to it, you need to select it with git checkout , and then use the standard git add and git commit commands.
Creating remote branches
So far these examples have all demonstrated local branch operations. The git branch command also works on remote branches. In order to operate on remote branches, a remote repo must first be configured and added to the local repo config.
This command will push a copy of the local branch crazy-experiment to the remote repo <remote>.
Deleting Branches
Once you’ve finished working on a branch and have merged it into the main code base, you’re free to delete the branch without losing any history:
However, if the branch hasn’t been merged, the above command will output an error message:
This protects you from losing access to that entire line of development. If you really want to delete the branch (e.g., it’s a failed experiment), you can use the capital -D flag:
This deletes the branch regardless of its status and without warnings, so use it judiciously.
The previous commands will delete a local copy of a branch. The branch may still exist in remote repos. To delete a remote branch execute the following.
This will push a delete signal to the remote origin repository that triggers a delete of the remote crazy-experiment branch.
Summary
In this document we discussed Git’s branching behavior and the git branch command. The git branch commands primary functions are to create, list, rename and delete branches. To operate further on the resulting branches the command is commonly used with other commands like git checkout . Learn more about git checkout branch operations; such as switching branches and merging branches, on the git checkout page.
Compared to other VCSs, Git’s branch operations are inexpensive and frequently used. This flexibility enables powerful Git workflow customization. For more info on Git workflows visit our extended workflow discussion pages: The Feature Branch Workflow, GitFlow Workflow, and Forking Workflow.
Источник
Git: Create a New Branch

In Git, and most other VCS tools, branching is one of the main constructs that really make it useful for software development. These branches are almost like a new copy of your code at the current state, which can then be used to develop new code.
For example, whenever you need to create a new feature, fix a bug, or rewrite any of your code, it’s a good idea to create a new branch so that none of your changes affect the «master» version of the code. This is important since it can be very difficult to revert code changes from memory, especially in complex systems.
There are a few ways you can create new branches in Git, with many of them differing in how your branch is created from the main branch, whether it be from your current branch, a different branch, a tag, etc.
The most common way to create a new branch is the following:
This is most commonly used because it will create the branch for you from your current branch and it will switch you to that branch in a single command.
You can also optionally specify a different branch from which the new one will be created:
Another common way is by using the branch command directly (which checkout does behind the scenes):
However, as you can see from the following example, this doesn’t automatically switch us over to the new branch and keeps us on our current one:
If you want to work on the branch immediately then you’ll need to switch to it manually using the checkout command:
Creating a Branch from a Commit
As mentioned above, there are a few other ways you can create new branches. One of those ways is by specifying a specific commit via its hash:
Free eBook: Git Essentials
Check out our hands-on, practical guide to learning Git, with best-practices, industry-accepted standards, and included cheat sheet. Stop Googling Git commands and actually learn it!
As always with Git, the entire hash doesn’t actually need to be specified, just a few characters.
You can also use the git checkout -b
syntax, which will create the branch and check it out, all in one command.
Creating a Branch from a Tag
Much like creating a branch from a commit, you can also create a branch from a tag. This is especially useful since tags are, in my opinion, a better way to reference a certain point in a project’s history.
So if you have created tags throughout your project’s history, you can create a new branch just like before, but with a tag as the identifier.
And again, the git checkout -b
syntax can also be used.
Источник


