- 1.5 Введение — Установка Git
- Установка Git
- Установка в Linux
- Установка на Mac
- Установка в Windows
- Установка из исходников
- Как установить git в Linux
- Git Guides
- Get started with git and GitHub
- How to Install Git on Linux Mint 20
- Installing Git on Linux Mint
- Configuring the Git on Linux Mint 20
- Conclusion
- About the author
- Kamran Sattar Awaisi
1.5 Введение — Установка Git
Установка Git
Прежде чем использовать Git, вы должны установить его на своём компьютере. Даже если он уже установлен, наверное, это хороший повод, чтобы обновиться до последней версии. Вы можете установить Git из собранного пакета или другого установщика, либо скачать исходный код и скомпилировать его самостоятельно.
В этой книге используется Git версии 2.8.0. Хотя большинство используемых нами команд должны работать даже в старых версиях Git, некоторые из них могут не работать или действовать немного иначе, если вы используете старую версию. Поскольку Git отлично справляется с сохранением обратной совместимости, любая версия после 2.8 должна работать нормально.
Установка в Linux
Если вы хотите установить Git под Linux как бинарный пакет, это можно сделать, используя обычный менеджер пакетов вашего дистрибутива. Если у вас Fedora (или другой похожий дистрибутив, такой как RHEL или CentOS), можно воспользоваться dnf :
Если же у вас дистрибутив, основанный на Debian, например, Ubuntu, попробуйте apt :
Чтобы воспользоваться дополнительными возможностями, посмотрите инструкцию по установке для нескольких различных разновидностей Unix на сайте Git https://git-scm.com/download/linux.
Установка на Mac
Существует несколько способов установки Git на Mac. Самый простой — установить Xcode Command Line Tools. В версии Mavericks (10.9) и выше вы можете добиться этого просто первый раз выполнив ‘git’ в терминале.
Если Git не установлен, вам будет предложено его установить.
Если Вы хотите получить более актуальную версию, то можете воспользоваться бинарным установщиком. Установщик Git для OS X доступен для скачивания с сайта Git https://git-scm.com/download/mac.
Установка в Windows
Для установки Git в Windows также имеется несколько способов. Официальная сборка доступна для скачивания на официальном сайте Git. Просто перейдите на страницу https://git-scm.com/download/win, и загрузка запустится автоматически. Обратите внимание, что это отдельный проект, называемый Git для Windows; для получения дополнительной информации о нём перейдите на https://gitforwindows.org.
Для автоматической установки вы можете использовать пакет Git Chocolatey. Обратите внимание, что пакет Chocolatey поддерживается сообществом.
Установка из исходников
Многие предпочитают устанавливать Git из исходников, поскольку такой способ позволяет получить самую свежую версию. Обновление бинарных инсталляторов, как правило, немного отстаёт, хотя в последнее время разница не столь существенна.
Если вы действительно хотите установить Git из исходников, у вас должны быть установлены следующие библиотеки, от которых он зависит: autotools, curl, zlib, openssl, expat, and libiconv. Например, если в вашей системе используется dnf (Fedora) или apt-get (системы на базе Debian), вы можете использовать одну из следующих команд для установки всех зависимостей, используемых для сборки и установки бинарных файлов Git:
Для того, чтобы собрать документацию в различных форматах (doc, html, info), понадобится установить дополнительные зависимости:
Пользователи RHEL и производных от неё (таких как CentOS или Scientific Linux) должны подключить репозиторий EPEL для корректной установки пакета docbook2X
Если вы используете систему на базе Debian (Debian/Ubuntu/Ubuntu-производные), вам так же понадобится установить пакет install-info :
Если вы используете систему на базе RPM (Fedora/RHEL/RHEL-производные), вам так же понадобится установить пакет getopt , который уже установлен в системах на базе Debian:
К тому же из-за различий имён бинарных файлов вам понадобится сделать следующее:
Когда все необходимые зависимости установлены, вы можете пойти дальше и скачать самый свежий архив с исходниками из следующих мест: с сайта Kernel.org https://www.kernel.org/pub/software/scm/git, или зеркала на сайте GitHub https://github.com/git/git/releases. Конечно, немного проще скачать последнюю версию с сайта GitHub, но на странице kernel.org релизы имеют подписи, если вы хотите проверить, что скачиваете.
Затем скомпилируйте и установите:
После этого вы можете получать обновления Git посредством самого Git:
Источник
Как установить git в Linux
Давеча ставил git на Linux Mint и опять пришлось загуглить пару моментов. Чтобы больше не допускать таких стыдных страниц в своей биографии, фиксирую набор команд на бумаге, а заодно объясняю всем интересующимся, что я делал и зачем. Если Вы уже устанавливали гит хотя бы раз, ничего нового не узнаете. Но если только начинаете интересоваться им, то минимальный набор команд для начала работы будет полезен. Подробности ниже.
Итак, последовательность действий. Во-первых, гит нужно установить
sudo — в Mint или например, в Debian. Для своей ОС наберите подходящее слово для запуска команды из-под рута.
Гит поставили. Теперь нужно сгенерировать пару ключей: публичный и приватный. Запускаем
Убедимся, что ключи созданы, перейдем в каталог .ssh своей домашней папки и посмотрим, что в ней лежит
Увидим там 2 файла: id_rsa и id_rsa.pub. Все правильно, первый ключ приватный, который хранится на Вашей машине и никому не передается. Второй — публичный. Именно его Вы передаете третьим лицам или ресурсам, чтобы получить доступ в нужные репозитории.
Откроем файл id_rsa.pub и скопируем все его содержимое
Или же как крутые хакеры наберем следующее
Эта волшебная строка скопирует содержимое оного файла в буфер обмена — удобно. Конечно, если у Вас установлена утилита xclip. Если нет, не переживайте, установите ее — sudo apt-get install xclip — и запустите команду заново.
Вот теперь все готово. Ключ скопирован, можно отдавать его админам/коллегам-программистам или прописать его самим, если владелец проекта — это Вы.
Я по сугубо сектантским соображениям предпочитаю bitbucket. Добавляются ключи в нем на этой странице — https://bitbucket.org/account/user/username/ssh-keys/, кнопочка «Add key».
После того, как Ваш ключ будет добавлен, можно приступать к полноценной работе с репозиторием, для начала склонировав его
Однако, прежде чем погружаться в дебри нужного проекта, не забудьте прописать в настройках гита имя и email, что гит и коллеги могли Вас идентифицировать
git config —list покажет нам все настройки, сейчас в списке должны присутствовать 2 вышеуказанные настройки.
А вот теперь можно начинать клонировать проект, коммитить, пушить и делать другие страшные вещи. Что плохого можно сотворить с гитом и как именно это сделать, можно узнать из статьи Мой набор команд при работе с git. А у меня на этом все.
Источник
Git Guides

How to install Git on any OS
Git can be installed on the most common operating systems like Windows, Mac, and Linux. In fact, Git comes installed by default on most Mac and Linux machines!
Checking for Git
To see if you already have Git installed, open up your terminal application.
- If you’re on a Mac, look for a command prompt application called «Terminal».
- If you’re on a Windows machine, open the windows command prompt or «Git Bash».
Once you’ve opened your terminal application, type git version . The output will either tell you which version of Git is installed, or it will alert you that git is an unknown command. If it’s an unknown command, read further and find out how to install Git.
Install Git Using GitHub Desktop
Installing GitHub Desktop will also install the latest version of Git if you don’t already have it. With GitHub Desktop, you get a command line version of Git with a robust GUI. Regardless of if you have Git installed or not, GitHub Desktop offers a simple collaboration tool for Git. You can learn more here.
Install Git on Windows
- Navigate to the latest Git for Windows installer and download the latest version.
- Once the installer has started, follow the instructions as provided in the Git Setup wizard screen until the installation is complete.
- Open the windows command prompt (or Git Bash if you selected not to use the standard Git Windows Command Prompt during the Git installation).
- Type git version to verify Git was installed.
Note: git-scm is a popular and recommended resource for downloading Git for Windows. The advantage of downloading Git from git-scm is that your download automatically starts with the latest version of Git included with the recommended command prompt, Git Bash . The download source is the same Git for Windows installer as referenced in the steps above.
Install Git on Mac
Most versions of MacOS will already have Git installed, and you can activate it through the terminal with git version . However, if you don’t have Git installed for whatever reason, you can install the latest version of Git using one of several popular methods as listed below:
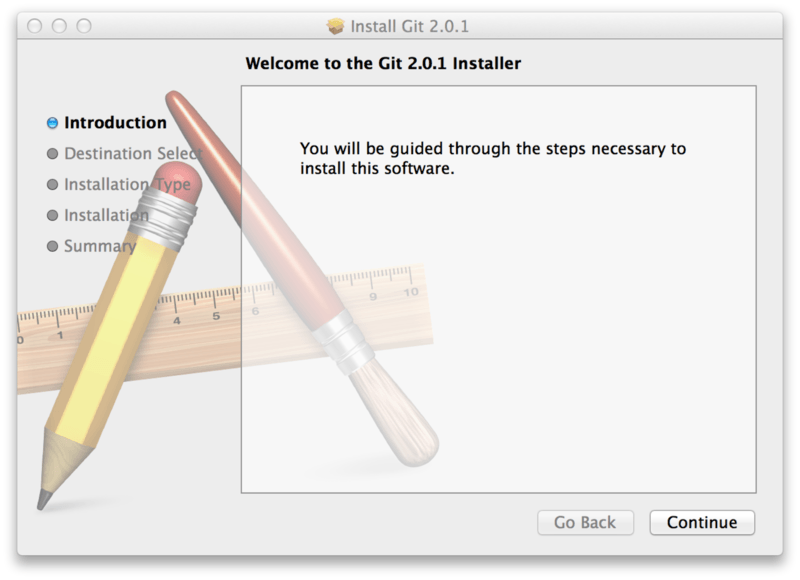
Install Git From an Installer
- Navigate to the latest macOS Git Installer and download the latest version.
- Once the installer has started, follow the instructions as provided until the installation is complete.
- Open the command prompt «terminal» and type git version to verify Git was installed.
Note: git-scm is a popular and recommended resource for downloading Git on a Mac. The advantage of downloading Git from git-scm is that your download automatically starts with the latest version of Git. The download source is the same macOS Git Installer as referenced in the steps above.
Install Git from Homebrew
Homebrew is a popular package manager for macOS. If you already have Homwbrew installed, you can follow the below steps to install Git:
- Open up a terminal window and install Git using the following command: brew install git .
- Once the command output has completed, you can verify the installation by typing: git version .
Install Git on Linux
Fun fact: Git was originally developed to version the Linux operating system! So, it only makes sense that it is easy to configure to run on Linux.
You can install Git on Linux through the package management tool that comes with your distribution.
- Git packages are available using apt .
- It’s a good idea to make sure you’re running the latest version. To do so, Navigate to your command prompt shell and run the following command to make sure everything is up-to-date: sudo apt-get update .
- To install Git, run the following command: sudo apt-get install git-all .
- Once the command output has completed, you can verify the installation by typing: git version .
- Git packages are available using dnf .
- To install Git, navigate to your command prompt shell and run the following command: sudo dnf install git-all .
- Once the command output has completed, you can verify the installation by typing: git version .
Note: You can download the proper Git versions and read more about how to install on specific Linux systems, like installing Git on Ubuntu or Fedora, in git-scm’s documentation.
Other Methods of Installing Git
Looking to install Git via the source code? Learn more here.
Get started with git and GitHub
Review code, manage projects, and build software alongside 40 million developers.
Источник
How to Install Git on Linux Mint 20
Git, developed by Linus Torvalds, is the most popular distributed system for version control. Git is a very efficient platform for open-source projects. Using Git, you can collaborate with the other developers, upload the new changes, keep track of the changes, and many more.
Installing Git on Linux Mint
The Git is included in Linux Mint 20 standard repositories can be installed easily using the apt command.
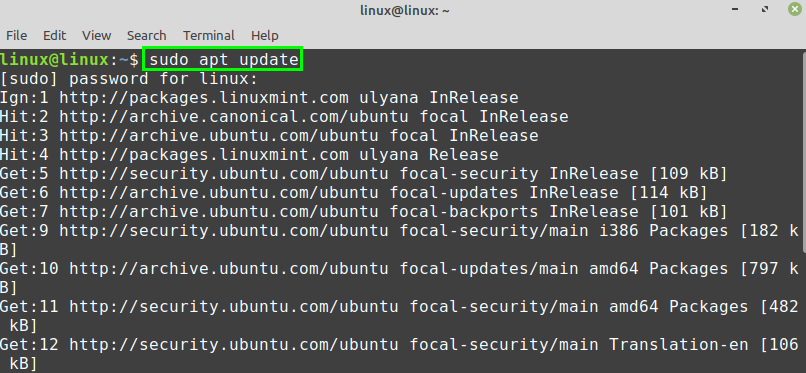
As always, update and upgrade your Linux Mint 20 system before installing the Git package.
Type the below-given command to update the apt package listing:
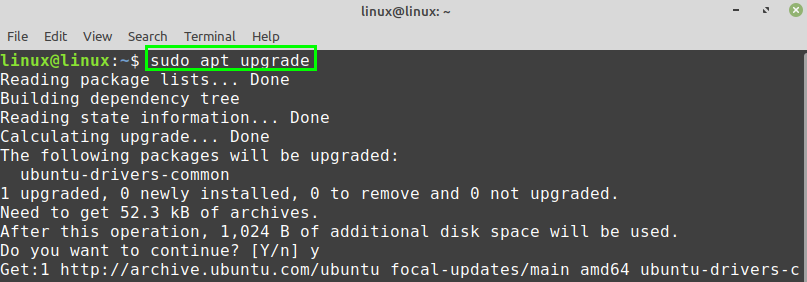
Next, upgrade the system with the command:
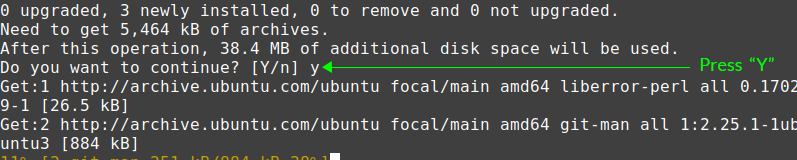
After successfully updating and upgrading the Linux Mint 20 system, install Git with the command:
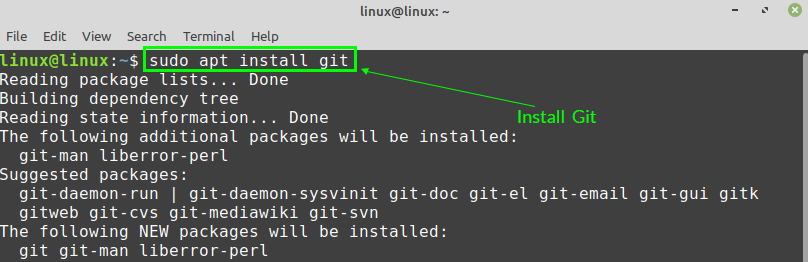
Press ‘y’ to continue installing Git.
When the Git is successfully installed, verify the installation:

Git 2.25.1 is successfully installed on my Linux Mint 20.
Configuring the Git on Linux Mint 20
Next, we have to configure Git. The Git can be configured from the command line. Configuring Git refers to setting a name and email address. The name and email are used while committing changes on the Git repository.
Fire up the terminal and use the below-given command syntax to set a global commit name:

Type the below-given command to set the global commit email:

Finally, when the global commit name and email are set, run the below-given command to check and verify the changes:

The output shows that the global commit name and email are sent successfully.
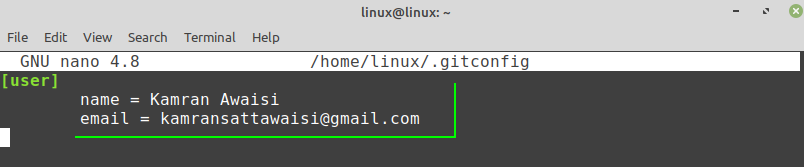
If the changes are not made correctly, or you want to change the global commit name and email any time, then you can edit the configuration settings any time by using the command:

The Git configuration file is opened in the nano editor. You can make any changes in the Git configuration file if you wish to.
Conclusion
Installing Git on Linux Mint 20 is very straightforward. Git is part of the Linux Mint 20 base repositories and can be downloaded and installed with apt command.
About the author

Kamran Sattar Awaisi
I am a software engineer and a research scholar. I like to write article and make tutorial on various IT topics including Python, Cloud Computing, Fog Computing and Deep Learning. I love to use Linux based operating systems.
Источник


