- GitHub Desktop
- Attribute commits with collaborators easily
- Checkout branches with pull requests and view CI statuses
- Syntax highlighted diffs
- Expanded image diff support
- Extensive editor & shell integrations
- Community supported
- Getting Started with GitHub Pages
- Create Your Website
- Making Changes
- Next Steps
- Websites for you and your projects.
- Hosted directly from your GitHub repository. Just edit, push, and your changes are live.
- What is GitHub Pages?
- Ready to get started? Build your own site from scratch or generate one for your project.
- You get one site per GitHub account and organization, and unlimited project sites. Let‘s get started.
- Create a repository
- What git client are you using?
- Download GitHub Desktop
- Clone the repository
- Clone the repository
- Clone the repository
- Hello World
- Create an index file
- Push it
- Commit & publish
- …and you’re done!
- Use a theme, or start from scratch?
- Repository Settings
- Theme chooser
- Pick a theme
- Edit content
- Commit
- Create an index file
- Hello World
- Commit the file
- Repository Settings
- …and you’re done!
- Now that you’re up and running, here are a few things you should know.
- Blogging with Jekyll
- Custom URLs
- Guides
- Как использовать GitHub Pages?
- Публикация контента
- Базовая установка Github
- Подготовка кода для загрузки
- В сторону интерфейсов командной строки
- Создание repo для вашего кода
- Загрузка файлов на GitHub
- Дальнейшее знание GitHub
GitHub Desktop
Focus on what matters instead of fighting with Git. Whether you’re new to Git or a seasoned user, GitHub Desktop simplifies your development workflow.
By downloading, you agree to the Open Source Applications Terms.


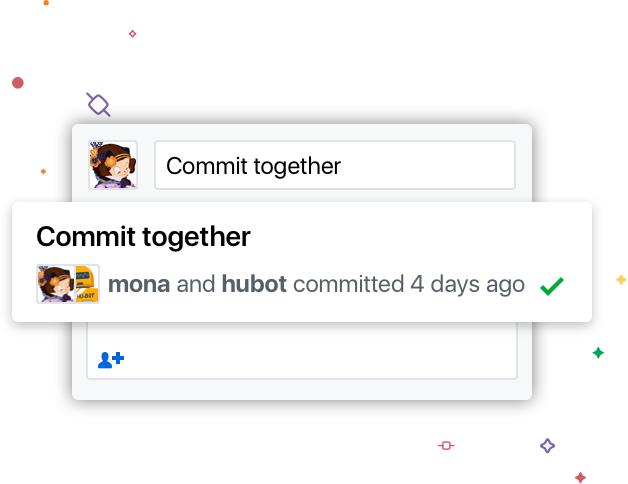
Attribute commits with collaborators easily
Quickly add co-authors to your commit. Great for pairing and excellent for sending a little love/credit to that special someone who helped fix that gnarly bug of yours. See the attribution on the history page, undo an accidental attribution, and see the co-authors on github.com

Checkout branches with pull requests and view CI statuses
See all open pull requests for your repositories and check them out as if they were a local branch, even if they’re from upstream branches or forks. See which pull requests pass commit status checks, too!

Syntax highlighted diffs
The new GitHub Desktop supports syntax highlighting when viewing diffs for a variety of different languages.
Expanded image diff support
Easily compare changed images. See the before and after, swipe or fade between the two, or look at just the changed parts.
Extensive editor & shell integrations
Open your favorite editor or shell from the app, or jump back to GitHub Desktop from your shell. GitHub Desktop is your springboard for work.
Community supported
GitHub Desktop is open source now! Check out our roadmap, contribute, and help us make collaboration even easier.
Getting Started with GitHub Pages
GitHub Pages are public webpages hosted and easily published through GitHub. The quickest way to get up and running is by using the Jekyll Theme Chooser to load a pre-made theme. You can then modify your GitHub Pages’ content and style remotely via the web or locally on your computer.

Create Your Website
Once you’ve signed in, you’ll create a new repository to get started.
On the new repository screen, you need to give this repository a special name to generate your website.

Your website’s files will live in a repository named username.github.io (where “username” is your actual GitHub user name). To begin setting up your site, you have to open the Settings tab

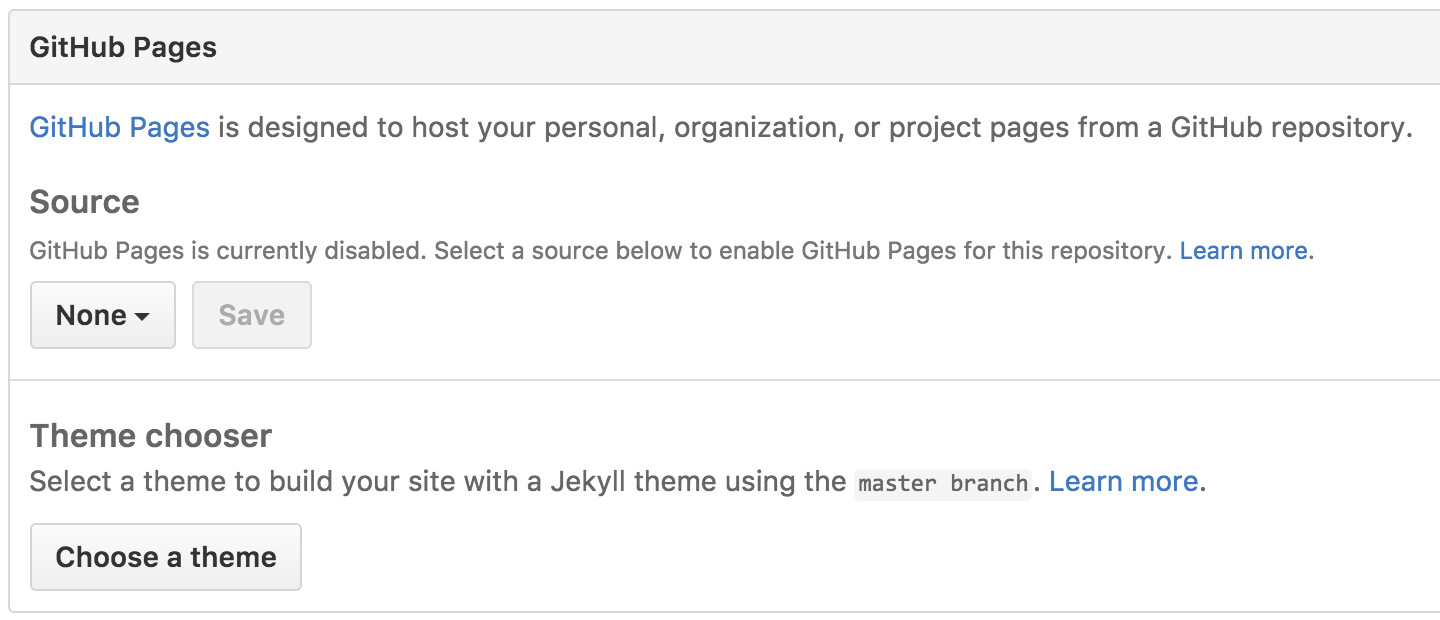
If you scroll down on the settings page, you’ll see the GitHub Pages section near the bottom. Click the Choose a theme button to start the process of creating your site.

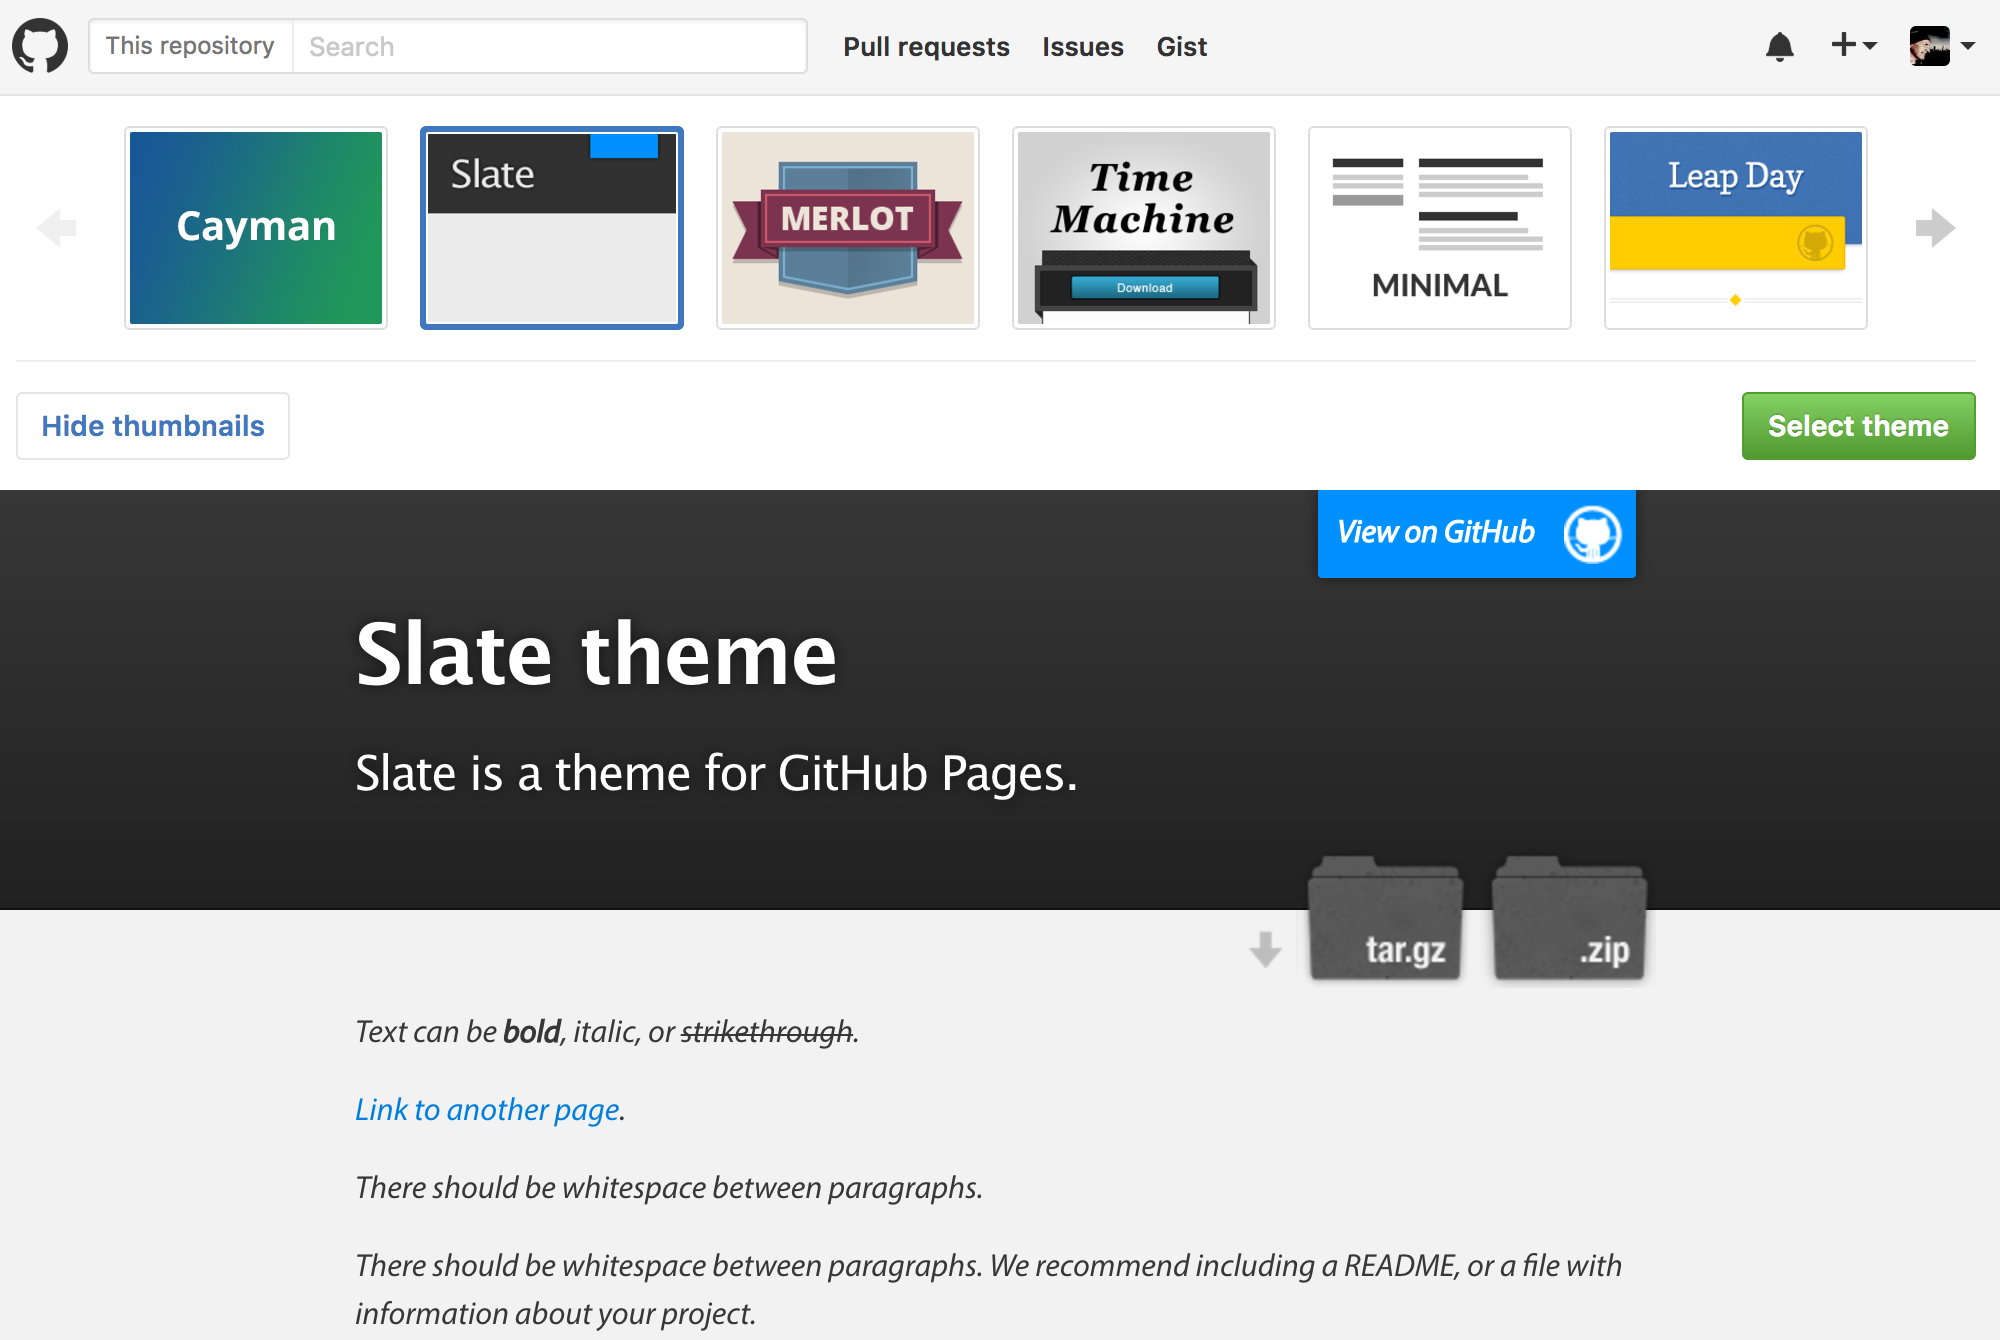
Once you’ve clicked the button, you’ll be directed to the Theme Chooser. You’ll see several theme options in a carousel across the top of the page. Click on the images to preview the themes. Once you’ve selected one, click Select theme on the right to move on. It’s easy to change your theme later, so if you’re not sure, just choose one for now.

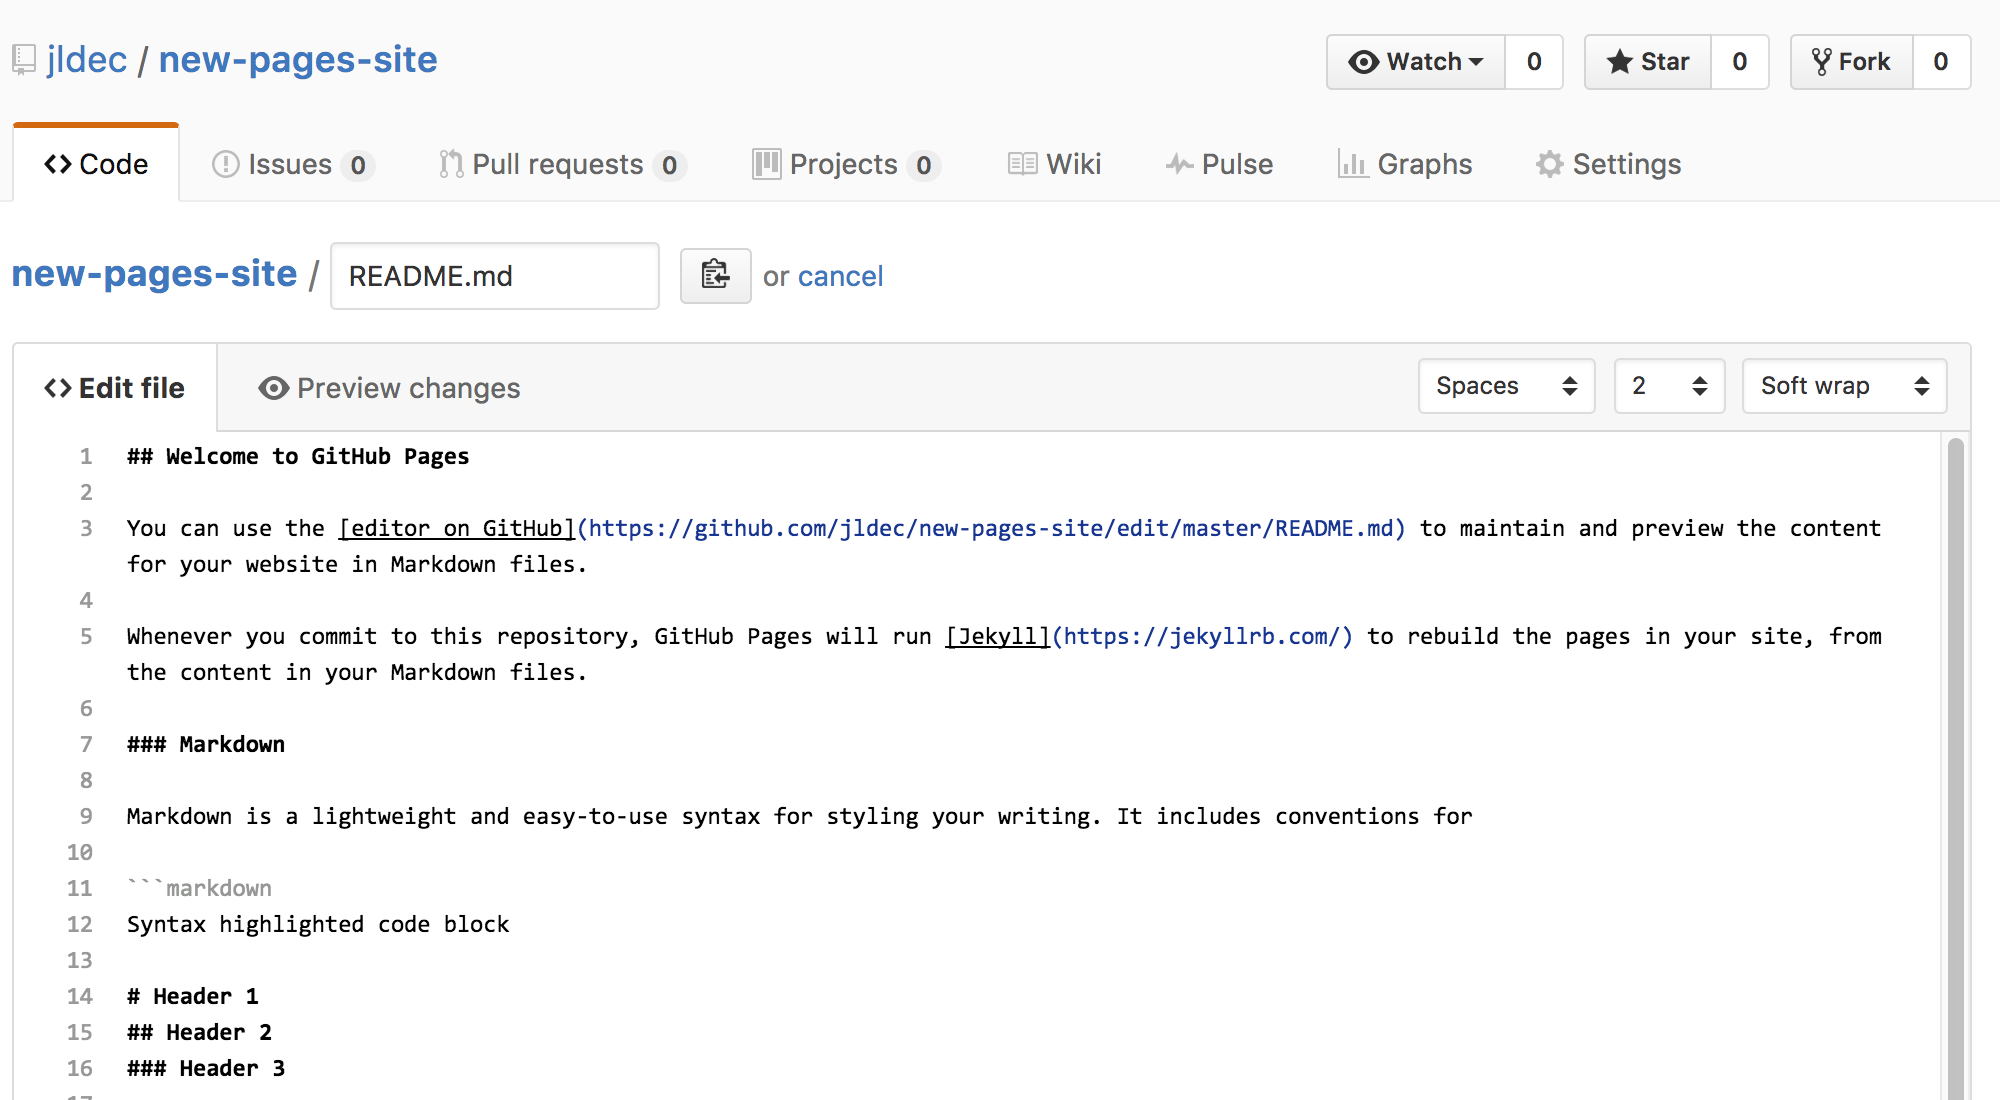
Here’s where you’ll write your own content (You can keep the default content for now, if you’d like).

Once you’re finished editing, scroll down to the bottom of the page and click Commit changes.

GitHub does all the work to direct visitors to username.github.io to view your new website. This can take up to 10 minutes. After some time has passed, you can open a new tab in your browser to go to your site!
Making Changes
One of the first things you can do is remove the default title of your index page, and add a friendlier message to it. Since this is a very quick change – and your first one – you’re going to make it on the default branch: main .
View the _config.yml file by navigating to it in the Code tab. You can edit the file by clicking on the pencil icon.

Currently your site has no set title, so we’re falling back to the name of the repo. To change this, I’m going to add the line “title: Welcome to the Octocat’s homepage!” to this file. Feel free to do the same, except for your own username.
Under this title, you can add a message about the purpose of the page and describe what you want people to do while they’re here. I’m going set mine to “Feel free to bookmark this to keep an eye on my project updates”

After you’re done making this small change, scroll to the bottom of the page to make your second commit. You have two places to write about this change: a subject and an extended description. The extended description is optional, so let’s leave a descriptive message in the subject.
When you’re done, click Commit changes and your updates will go live in just a few seconds!

Next Steps
Just because you’ve made some changes into your project doesn’t mean you should stop! Check out these other guides to learn how to contribute to other projects or perfect the way you work on projects:
Last updated July 24, 2020
GitHub is the best way to build and ship software.
Powerful collaboration, code review, and code management for open source and private projects.
Websites for you and your projects.
Hosted directly from your GitHub repository. Just edit, push, and your changes are live.
What is GitHub Pages?
Ready to get started? Build your own site from scratch or generate one for your project.
You get one site per GitHub account and organization,
and unlimited project sites. Let‘s get started.
Create a repository
Head over to GitHub and create a new public repository named username.github.io, where username is your username (or organization name) on GitHub.
If the first part of the repository doesn’t exactly match your username, it won’t work, so make sure to get it right.
What git client are you using?
Download GitHub Desktop
GitHub Desktop is a great way to use Git and GitHub on macOS and Windows.
Download GitHub Desktop
Clone the repository
Go to the folder where you want to store your project, and clone the new repository:
$ git clone https://github.com/username/username.github.io
Clone the repository
Click the «Set up in Desktop» button. When the GitHub desktop app opens, save the project.
If the app doesn’t open, launch it and clone the repository from the app.
Clone the repository
After finishing the installation, head back to GitHub.com and refresh the page. Click the «Set up in Desktop» button. When the GitHub desktop app opens, save the project.
If the app doesn’t open, launch it and clone the repository from the app.
Hello World
Enter the project folder and add an index.html file:
$ echo «Hello World» > index.html
Create an index file
Grab your favorite text editor and add an index.html file to your project:
Push it
Add, commit, and push your changes:
$ git commit -m «Initial commit»
$ git push -u origin main
Commit & publish
Enter the repository, commit your changes, and press the publish button.
…and you’re done!
Fire up a browser and go to https://username.github.io.
Use a theme, or start from scratch?
You have the option to start with one of the pre-built themes,
or to create a site from scratch.
- Choose a theme
- Start from scratch
Repository Settings
Head over to GitHub.com and create a new repository, or go to an existing one.
Click on the Settings tab.

Theme chooser
Scroll down to the GitHub Pages section. Press Choose a theme.
Pick a theme
Choose one of the themes from the carousel at the top.
When you’re done, click Select theme on the right.
Edit content
Use the editor to add content to your site.
Commit
Enter a commit comment and click on Commit changes below the editor.

Create an index file
Head over to GitHub.com and create a new repository, or go to an existing one.
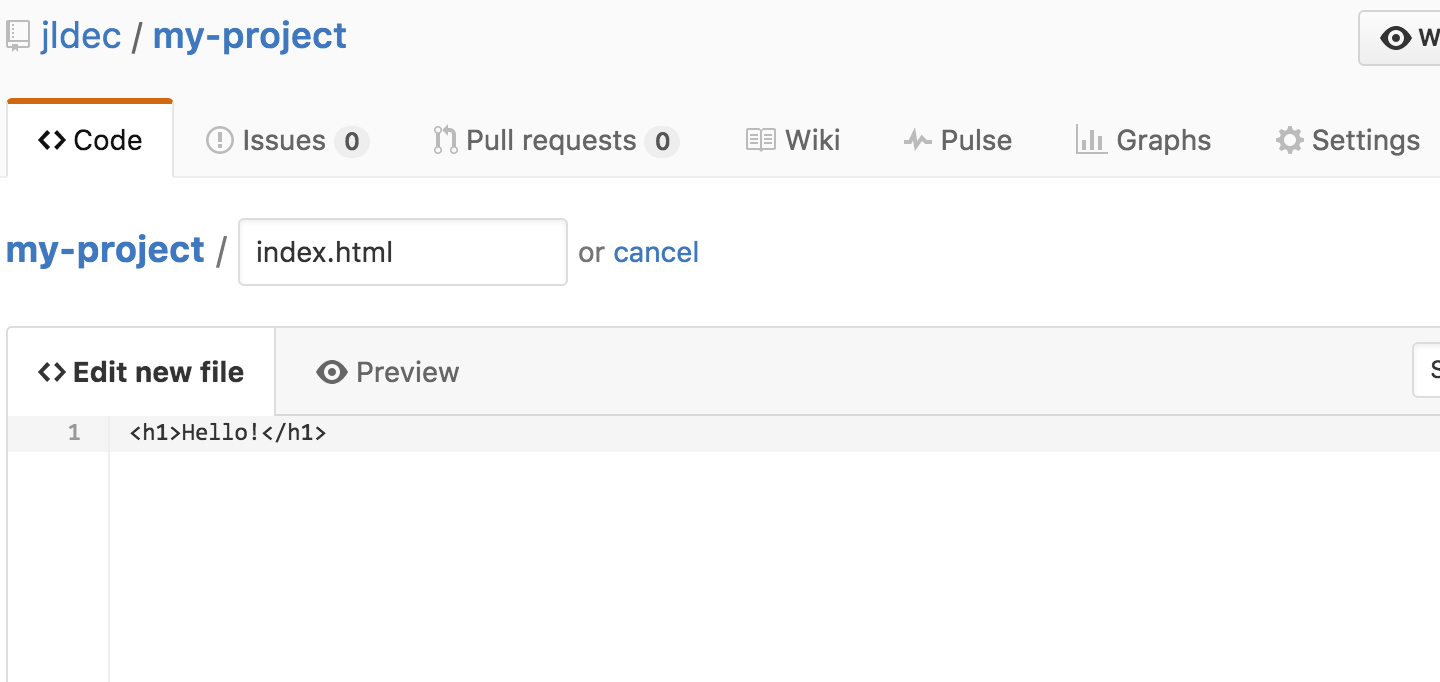
Click on the Create new file button.

Hello World
Name the file index.html and type some HTML content into the editor.
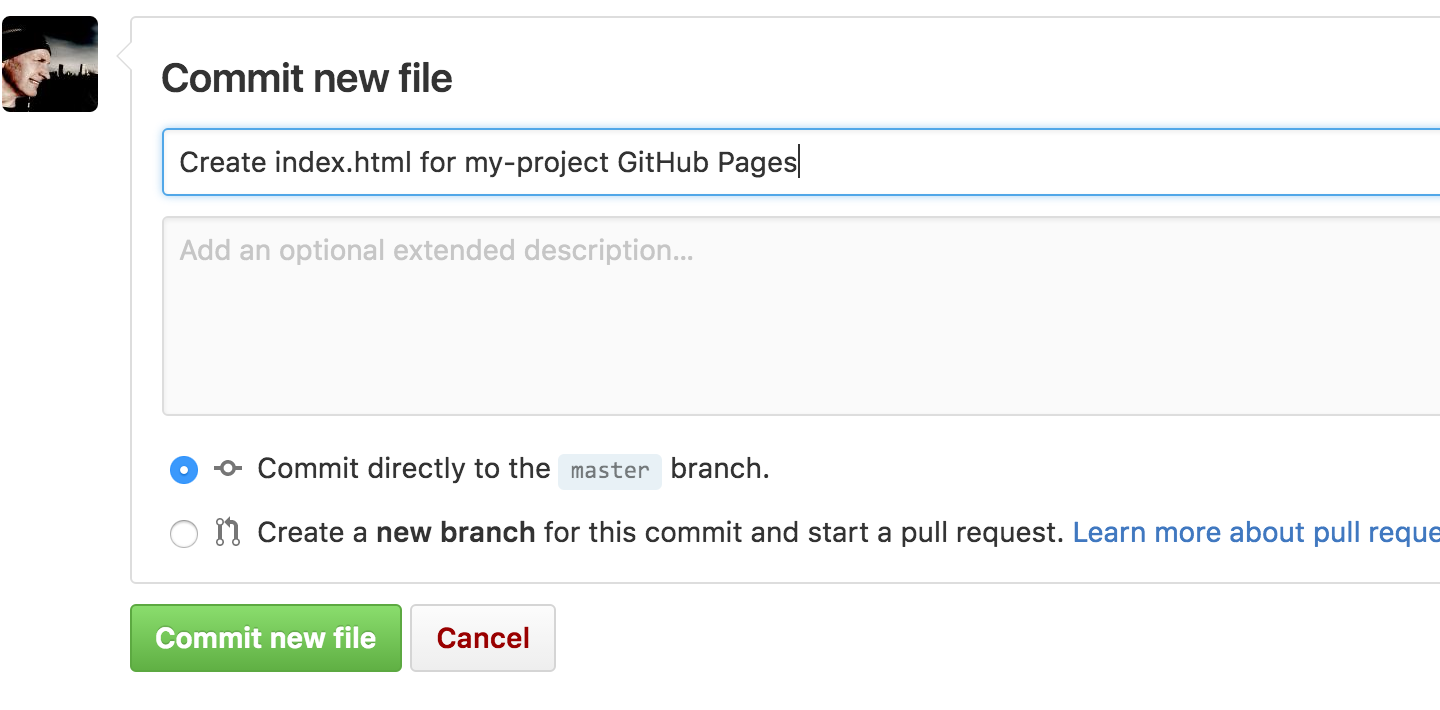
Commit the file
Scroll to the bottom of the page, write a commit message, and commit the new file.
Repository Settings
Click on the Settings tab and scroll down to the GitHub Pages section.
Then select the main branch source and click on the Save button.

…and you’re done!
Fire up a browser and go to http://username.github.io/repository.
Now that you’re up and running, here are a few things you should know.
Blogging with Jekyll
Using Jekyll, you can blog using beautiful Markdown syntax, and without having to deal with any databases. Learn how to set up Jekyll.
Custom URLs
Want to use your own custom domain for a GitHub Pages site? Just create a file named CNAME and include your URL. Read more.
Guides
Learn how to create custom 404 pages, use submodules, and learn more about GitHub Pages.
Как использовать GitHub Pages?
GitHub является сайтом «социального кодирования». Он позволяет загружать репозитории кода для хранения в системе управления версиями Git. Затем вы можете сотрудничать с проектами кода, а система по умолчанию открыта с открытым исходным кодом, что означает, что любой человек в мире может найти ваш код GitHub, использовать его, учиться на нем и улучшать его. Вы можете сделать это и с кодом других людей! В этой статье представлено основное руководство по публикации контента с использованием функции gh-pages Github.
Публикация контента
GitHub — очень важное и полезное сообщество для участия, а Git/GitHub — очень популярная система управления версиями (version control system) — большинство технологических компаний теперь используют её в своём рабочем процессе. GitHub имеет очень полезную функцию GitHub Pages, которая позволяет публиковать код сайта в прямом эфире в Интернете.
Базовая установка Github
- Прежде всего, установите Git на свой компьютер. Это базовое программное обеспечение для управления версиями, GitHub работает поверх него.
- Затем зарегистрируйтесь в учётной записи GitHub. Это просто и легко.
- После того, как вы зарегистрировались, войдите в github.com с вашим именем пользователя и паролем.
Подготовка кода для загрузки
Вы можете хранить любой код, который вам нравится, в репозитории Github, но для полнофункционального использования функции GitHub Pages ваш код должен быть структурирован как типичный веб-сайт, причём основной точкой входа является HTML-файл с именем index.html .
Другое, что вам нужно сделать, прежде чем двигаться дальше — это инициализировать вашу кодовую директорию как репозиторий Git. Сделать это:
- Направьте командную строку в каталог вашего test-site (или то, что вы назвали каталогом, содержащим ваш сайт). Для этого используйте команду cd (т.е. «change directory» — «каталог изменений»). Вот что вы набрали, если бы вы разместили свой сайт в каталоге, называемом test-site на рабочем столе:
- Когда командная строка указывает внутри вашего каталога веб-сайта, введите следующую команду, которая сообщает инструменту git , чтобы он превратил каталог в репозиторий git:
В сторону интерфейсов командной строки
Лучший способ загрузить код в Github — через командную строку — это окно, в котором вы вводите команды, чтобы делать такие вещи, как создавать файлы и запускать программы, а не щёлкать внутри пользовательского интерфейса. Он будет выглядеть примерно так:

Примечание: вы также можете использовать графический пользовательский интерфейс Git для выполнения одной и той же работы, если вам неудобно работать с командной строкой.
Каждая операционная система поставляется с инструментом командной строки:
- Windows: Командная строка (Command Prompt) может быть получена нажатием клавиши Windows, набрав Command Prompt и выбрав её из появившегося списка. Обратите внимание, что Windows имеет свои собственные условные обозначения команд, отличные от Linux и OS X, поэтому приведённые ниже команды могут отличаться на вашем компьютере.
- OS X: Терминал (Terminal) можно найти в Applications > Utilities.
- Linux: Обычно вы можете вытащить терминал с помощью Ctrl + Alt + T. Если это не сработает, найдите Terminal в панели приложений или меню.
Сначала это может показаться немного пугающим, но не волнуйтесь — вы скоро почувствуете основы. Вы говорите компьютеру что-то делать в терминале, введя команду и нажав Enter, как показано выше.
Создание repo для вашего кода
- Затем вам нужно создать новое repo для ваших файлов. Нажмите «Плюс» (+) в правом верхнем углу главной страницы GitHub и выберите «Новый репозиторий» (New Repository).
- На этой странице в поле Имя репозитория (Repository name) введите имя для своего репозитория, например my-repository.
- Также добавьте описание, чтобы сказать, что будет содержать ваш репозиторий. Ваш экран должен выглядеть так:

- Нажмите Создать репозиторий (Create repository); это приведёт вас к следующей странице:


Загрузка файлов на GitHub
- На текущей странице вас интересует раздел …or push an existing repository from the command line (. или нажмите существующий репозиторий из командной строки). Вы должны увидеть две строки кода, перечисленные в этом разделе. Скопируйте всю первую строку, вставьте её в командную строку и нажмите Enter. Команда должна выглядеть примерно так:
- Затем введите следующие две команды, нажав Enter после каждого из них. Они готовят код для загрузки в GitHub и просят Git управлять этими файлами.
- Наконец, нажмите код до GitHub, перейдя на веб-страницу GitHub, на которой вы находитесь, и введите в терминал вторую из двух команд, которые мы увидели …or push an existing repository from the command line:
- Теперь вам нужно создать ветвь gh-pages вашего repo; обновите текущую страницу и вы увидите страницу репозитория, как показано ниже. Вам нужно нажать кнопку, в которой говорится о Branch: master, введите gh-pages в текстовом вводе, затем нажмите синюю кнопку с надписью Create branch: gh-pages. Это создаёт специальную ветвь кода, называемую gh-pages, которая публикуется в специальном месте. URL-адрес принимает форму username.github.io/my-repository-name, поэтому в моем примере URL-адрес будет https://chrisdavidmills.github.io/my-repository. Отображаемая страница — это страница index.html.
- Перейдите на веб-адрес GitHub Pages на новой вкладке браузера, и вы должны увидеть свой сайт онлайн! Отправьте его по электронной почте своим друзьям и продемонстрируйте своё мастерство.

Примечание: Если вы застряли, страница GitHub Pages homepage также очень полезна.
Дальнейшее знание GitHub
Если вы хотите сделать больше изменений на своём тестовом сайте и загрузить их на GitHub, вам просто нужно внести изменения в свои файлы, как и раньше. Затем вам нужно ввести следующие команды (нажав Enter после каждого), чтобы вставить эти изменения в GitHub:
Вы можете заменить another commit более подходящим сообщением, чтобы описать, какое изменение вы только что сделали.
Мы едва коснулись Git. Чтобы узнать больше, начните с GitHub Help site.


