- How to use GitLab CI and MacStadium to build your macOS or iOS projects
- On this page
- Choosing a Mac mini plan
- Connecting to the Mac mini
- Connecting with VNC
- Connecting with SSH
- Setting up the development environment
- Installing Xcode
- Installing the command line tools
- Installing and configuring the GitLab Runner
- Testing a project with CI
- Conclusion
- Gitlab install mac os
How to use GitLab CI and MacStadium to build your macOS or iOS projects


In this article, we will see how to get started with MacStadium, a provider that offers dedicated Mac hardware which you can use with GitLab CI and build your macOS or iOS application.
Continuous Integration and Delivery with GitLab is easier if you are developing your application on Linux. All you need to do is find a provider, spin up a VM, install GitLab Runner on it and configure your project’s .gitlab-ci.yml file. On macOS on the other hand, things may not be that easy. Finding a provider that offers a Mac machine that will be online 24/7 can be hard. MacStadium is here to help achieve that goal and offers a discount to all GitLab users. Let’s see how to make this happen.
On this page
Choosing a Mac mini plan
The first step is to choose a plan. MacStadium offers many options, so you can pick whatever fits your needs. A Mac mini is perfect to test things out and is a good first choice. It should be enough to get you started, but depending on your needs you may have to upgrade to a more beefy machine.
Depending on your location and project needs, you have to:
- Choose the datacenter
- Choose the Mac mini
- Choose the macOS version
- Click Start Trial (24 hours) on the Mac mini of your choice to get going in a few steps
At first you’ll be asked to create a MacStadium account Fill in your information and when in the Secure Checkout page, be sure to check the I want to use a coupon code option and use GITLAB10 for 10% off.
At the time of this writing, the staged machines come with macOS 10.12.2. As new releases com from Apple, MacStadium tests them thoroughly and then update their staged machines. Of course, as a customer you can run the OS update on your own machine anytime.
Connecting to the Mac mini
When you sign up, you’ll receive an email with two important pieces of information:
The static IP address of your Mac. This will allow you to find your Mac mini from anywhere in the world, and you can also point domain names to this IP address so it’s easier to remember.
The username and password to access the machine. The user is standard for all installs, but the password is randomly generated. Upon the first login, you can and are encouraged to change it.
After you have this information, there are two ways of connecting to your Mac mini: VNC and SSH.
Connecting with VNC
If connecting from a Mac, Apple’s Screen Sharing is ideal. It’s installed on every Mac and can you can connect on your MacStadium Mac mini easily with the username and password that was sent to you via email.
If you don’t have a favorite VNC client already, there are a number of options to choose from:
When you connect with VNC, you can use the same password that is set up for the user on the Mac mini.
macOS has that as a separate setting, but MacStadium’s provision scripts enable VNC connections by default.
Connecting with SSH
You can SSH into your machine using the username and password. For example, if the username is administrator and the IP address of your machine 1.2.3.4 :
Enter the password when asked (you won’t be able to see it), hit Enter and you’re in!
Setting up the development environment
The following steps are to be performed to the remote Mac machine. We need to install Xcode and the command line tools that contain the SDKs and UNIX development applications like the LLVM compiler, etc.
Apart from the needed toolset, the screensaver needs to be disabled otherwise the machine will be put to sleep, thus disrupting the workflow of CI. Thankfully, all the machines hosted on MacStadium are set to never sleep by default. It’s just done in System Preferences > Energy Saver.
Installing Xcode
There are two ways to install Xcode. You can either download it from Apple’s developer portal or use the App Store where you might be asked to fill in your credit card information. To avoid that, manually download Xcode:
- Connect via VNC to the remote Mac machine
- Open a browser and go to https://developer.apple.com/download/more
- Login with your existing AppleID or create one
Select the Xcode version you wish to install
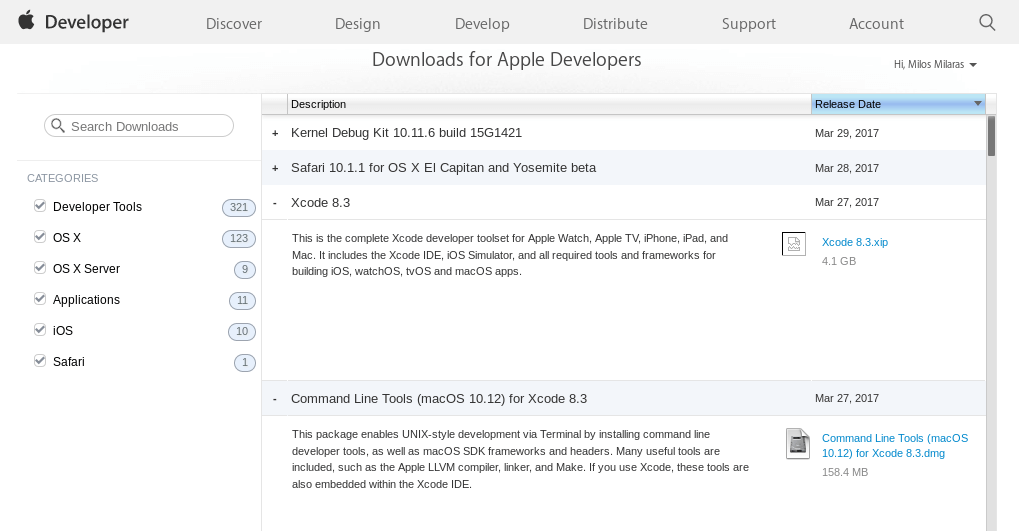
This should download the Xcode package in your Downloads folder and decompress it automatically. After a couple of minutes it should finish.
Open a terminal and move Xcode.app to /Applications so that it can be found by Launchpad:
In the next step we will install the command line developer tools.
Installing the command line tools
The command line tools are a subsection of Xcode, so if you installed Xcode, you may skip this part.
Open the Terminal app or run this command via SSH:
Accept the License Agreement and the installation will begin
Now that all development tools are installed, it’s time to install GitLab Runner.
Installing and configuring the GitLab Runner
GitLab Runner is responsible for running your jobs in macOS and then it reports the results back to GitLab.
Testing a project with CI
The final piece of this puzzle is to set up a project in GitLab (your own CE/EE instance or even GitLab.com) and hook it up with Mac mini. We will not expand on that, but you can follow this nice blog post by Angelo Stavrow on Setting up GitLab CI for iOS projects. It includes comprehensive steps to get you started.
Conclusion
Having a dedicated Mac machine for your development can save you precious time when you follow the Continuous Integration workflow with your team. In this tutorial, you’ve seen how to quickly get a remote Mac mini up and running for your needs. Be sure to add the promo code GITLAB10 on checkout for 10% off!
Get 10% off of all MacStadium plans by using GITLAB10 at checkout. The coupon can only be applied when signing up hardware, but if you are an existing customer who is using Gitlab and makes a change in hardware, you can always apply it again or request the discount in a ticket.
Источник
Gitlab install mac os
Installation guide for GitLab 10.1 on OS X 10.11
This is WIP version for OS X 10.11. For OS X 10.10 see 10.10 branch.
The GitLab installation consists of setting up the following components:
- Packages / Dependencies
- Ruby
- Go
- Node
- System User
- Database
- Redis
- GitLab
- Nginx
1. Packages / Dependencies
Command line tools
Make sure you have python 2.5+ (gitlab don’t support python 3.x)
Confirm python 2.5+
GitLab looks for python2
On OS X 10.11 it won’t work. You need to disable SIP.
Some more dependices
Install docutils from source.
The use of Ruby version managers such as RVM, rbenv or chruby with GitLab in production frequently leads to hard to diagnose problems. For example, GitLab Shell is called from OpenSSH and having a version manager can prevent pushing and pulling over SSH. Version managers are not supported and we strongly advise everyone to follow the instructions below to use a system Ruby.
On OS X we are forced to use non-system ruby and install it using version manager.
Install rbenv and ruby-build
Make sure rbenv loads in the git user’s shell
If you get the following error on OS X 10.8.5 or lower: ./bin/install:3: undefined method require_relative’ for main:Object (NoMethodError)` Do the following to update to the proper Ruby version
/.bash_profile echo ‘eval «$(rbenv init — —no-rehash)»‘ >>
Install ruby for the git user
Install ruby for your user too (optional)
Since GitLab 8.0, Git HTTP requests are handled by gitlab-git-http-server. This is a small daemon written in Go. To install gitlab-git-http-server we need a Go compiler.
Since GitLab 8.17, GitLab requires the use of node >= v4.3.0 to compile javascript assets, and yarn >= v0.17.0 to manage javascript dependencies. In many distros the versions provided by the official package repositories are out of date, so we’ll need to install through the following commands:
Run the following commands in order to create the group and user git :
Hide the git user from the login screen:
Gitlab recommends using a PostgreSQL database. But you can use MySQL too, see MySQL setup guide.
Login to PostgreSQL
Create a user for GitLab.
Create the GitLab production database & grant all privileges on database
Quit the database session
Try connecting to the new database with the new user
Redis config is located in /usr/local/etc/redis.conf . Make a copy:
Disable Redis listening on TCP by setting ‘port’ to 0
Edit file ( nano /usr/local/etc/redis.conf ) and uncomment:
Clone the Source
Clone GitLab repository
Note: You can change 8-11-stable to master if you want the bleeding edge version, but never install master on a production server!
Go to GitLab installation folder
Copy the example GitLab config
Update GitLab config file, follow the directions at top of file
Copy the example secrets file
Make sure GitLab can write to the log/ and tmp/ directories
Make sure GitLab can write to the tmp/pids/ and tmp/sockets/ directories
Make sure GitLab can write to the public/uploads/ directory
Make sure GitLab can write to the repositories directory
Change the permissions of the directory where CI build traces are stored
Copy the example Unicorn config
Find number of cores
Enable cluster mode if you expect to have a high load instance Ex. change amount of workers to 3 for 2GB RAM server Set the number of workers to at least the number of cores
Copy the example Rack attack config
Configure Git global settings for git user, used when editing via web editor
Disable git gc —auto because GitLab runs git gc for us already.
Configure Git to generate packfile bitmaps (introduced in Git 2.0) on the GitLab server during git gc.
Configure Redis connection settings
Change the Redis socket path to /tmp/redis.sock :
Important Note: Make sure to edit both gitlab.yml and unicorn.rb to match your setup.
Note: If you want to use HTTPS, see Using HTTPS for the additional steps.
Configure GitLab DB Settings
MySQL and remote PostgreSQL only: Update username/password in config/database.yml. You only need to adapt the production settings (first part). If you followed the database guide then please do as follows: Change ‘secure password’ with the value you have given to $password You can keep the double quotes around the password
PostgreSQL and MySQL: Make config/database.yml readable to git only
Note: As of bundler 1.5.2, you can invoke bundle install -jN (where N the number of your processor cores) and enjoy the parallel gems installation with measurable difference in completion time (
60% faster). Check the number of your cores with nproc . For more information check this post. First make sure you have bundler >= 1.5.2 (run bundle -v ) as it addresses some issues that were fixed in 1.5.2.
For PostgreSQL (note, the option says «without . mysql»)
Or if you use MySQL (note, the option says «without . postgres»)
Note: If you want to use Kerberos for user authentication, then omit kerberos in the —without option above.
Install GitLab Shell
GitLab Shell is an SSH access and repository management software developed specially for GitLab.
Run the installation task for gitlab-shell (replace REDIS_URL if needed):
By default, the gitlab-shell config is generated from your main GitLab config. You can review (and modify) the gitlab-shell config as follows:
Note: If you want to use HTTPS, see Using HTTPS for the additional steps.
Note: Make sure your hostname can be resolved on the machine itself by either a proper DNS record or an additional line in /etc/hosts («127.0.0.1 hostname»). This might be necessary for example if you set up gitlab behind a reverse proxy. If the hostname cannot be resolved, the final installation check will fail with «Check GitLab API access: FAILED. code: 401» and pushing commits will be rejected with «[remote rejected] master -> master (hook declined)».
Note: GitLab Shell application startup time can be greatly reduced by disabling RubyGems. This can be done in several manners:
- Export RUBYOPT=—disable-gems environment variable for the processes
- Compile Ruby with configure —disable-rubygems to disable RubyGems by default. Not recommened for system-wide Ruby.
Initialize Database and Activate Advanced Features
Type ‘yes’ to create the database tables. When done you see ‘Administrator account created:
Note: You can set the Administrator/root password by supplying it in environmental variable GITLAB_ROOT_PASSWORD as seen below. If you don’t set the password (and it is set to the default one) please wait with exposing GitLab to the public internet until the installation is done and you’ve logged into the server the first time. During the first login you’ll be forced to change the default password.
The secrets.yml file stores encryption keys for sessions and secure variables. Backup secrets.yml someplace safe, but don’t store it in the same place as your database backups. Otherwise your secrets are exposed if one of your backups is compromised.
Install Init Script
Download the init script (will be /etc/init.d/gitlab ):
Since you are installing to a folder other than default /home/users/git/gitlab , copy and edit the defaults file:
If you installed GitLab in another directory or as a user other than the default you should change these settings in /etc/default/gitlab . Do not edit /etc/init.d/gitlab as it will be changed on upgrade.
You can specify a different Git repository by providing it as an extra paramter:
Next, make sure gitaly configured:
For more information about configuring Gitaly see doc/administration/gitaly.
Check Application Status
Check if GitLab and its environment are configured correctly:
Compile GetText PO files
Start Your GitLab Instance
Note: Nginx is the officially supported web server for GitLab. If you cannot or do not want to use Nginx as your web server, have a look at the GitLab recipes.
Default nginx configuration has an example server on port 8080, same as Gitlab Unicorn instance, which will collide and Gitlab won’t start. Edit nginx configuration and comment out whole example server block for it to work together:
Copy the example site config:
Make sure to edit the config file to match your setup:
Change YOUR_SERVER_FQDN to the fully-qualified domain name of your host serving GitLab.
Note: If you want to use HTTPS, replace the gitlab Nginx config with gitlab-ssl . See Using HTTPS for HTTPS configuration details.
Validate your gitlab or gitlab-ssl Nginx config file with the following command:
You should receive syntax is okay and test is successful messages. If you receive errors check your gitlab or gitlab-ssl Nginx config file for typos, etc. as indicated in the error message given.
Double-check Application Status
To make sure you didn’t miss anything run a more thorough check with:
If all items are green, then congratulations on successfully installing GitLab!
NOTE: Supply SANITIZE=true environment variable to gitlab:check to omit project names from the output of the check command.
Visit YOUR_SERVER in your web browser for your first GitLab login.
If you didn’t provide a root password during setup, you’ll be redirected to a password reset screen to provide the password for the initial administrator account. Enter your desired password and you’ll be redirected back to the login screen.
The default account’s username is root. Provide the password you created earlier and login. After login you can change the username if you wish.
Enjoy!
You can use sudo sh /etc/init.d/gitlab start , sudo sh /etc/init.d/gitlab stop and sudo sh /etc/init.d/gitlab restart to manually start, stop and restart GitLab.
Autostart on boot
Copy Nginx and Gitlab plists and load it:
Advanced Setup Tips
Create log directory, copy in backup plist and load it To enable backup to function you will need to configure the backup options in config/gitlab.yml
Example external HD backup config settings
To use GitLab with HTTPS:
- In gitlab.yml :
- Set the port option in section 1 to 443 .
- Set the https option in section 1 to true .
- In the config.yml of gitlab-shell:
- Set gitlab_url option to the HTTPS endpoint of GitLab (e.g. https://git.example.com ).
- Set the certificates using either the ca_file or ca_path option.
- Use the gitlab-ssl Nginx example config instead of the gitlab config.
- Update YOUR_SERVER_FQDN .
- Update ssl_certificate and ssl_certificate_key .
- Review the configuration file and consider applying other security and performance enhancing features.
Using a self-signed certificate is discouraged but if you must use it follow the normal directions then:
- Generate a self-signed SSL certificate:
- In the config.yml of gitlab-shell set self_signed_cert to true .
If you’re installing from source and use SMTP to deliver mail, you will need to add the following line to config/initializers/smtp_settings.rb:
You can find more tips in official documentation.
Источник


