- How to Use GNOME Shell Extensions [Complete Guide]
- What is a GNOME Shell Extension?
- Installing GNOME Shell Extensions
- Method 1: Use gnome-shell-extensions package [easiest and safest way]
- Method 2: Install GNOME Shell extensions from a web browser
- Step 1: Install browser add-on
- Step 2: Install native connector
- Step 3: Installing GNOME Shell Extensions in web browser
- Method 3: Install GNOME Shell Extensions manually (for intermediate to advanced users)
- Remove GNOME Shell Extensions
- Bonus Tip: Get notified of GNOME Shell Extensions updates
- How do you manage GNOME Shell Extensions?
- Gnome shell extension windows
- What are GNOME Shell Extensions?
- What can GNOME Shell Extensions do?
- Are GNOME Shell Extensions safe?
- I don’t think I have GNOME Shell. What can I do to get it?
- I’m using GNOME 3. Why can’t I install extensions?
- How do I update my extensions?
- What is «System extension»? How to uninstall it?
- 22 лучших расширения оболочки Gnome
- Вот 22 из лучших расширений оболочки Gnome
- 1. Тире в док
- 2. Помодоро Таймер
- 3. Индикатор буфера обмена
- 4. Обновить Wi-Fi соединения
- 5. Выпадающий терминал
- 6. Открытая погода
- 7. Крышка потока Alt-tab
- 8. NetSpeed
- 9. Интеграция Skype
- 10. Отключите всплывающее окно переключения рабочей области
- 11. Темы пользователя
- 12. Индикатор медиаплеера
- 13. Todo.txt
- 14. Меню приложений
- 15. Конфигуратор деятельности
- 16. Индикатор состояния мест
- 17. Проект Хомяк Расширение
- 18. EasyScreenCast
- 19. Кофеин
- 20. Автоматическое перемещение окон
- 21. Рабочие места, чтобы док
- 22. Динамический Top Bar
How to Use GNOME Shell Extensions [Complete Guide]
Last updated September 21, 2020 By Abhishek Prakash 57 Comments
Brief: This is a detailed guide showing you how to install GNOME Shell Extensions manually or easily via a browser.
While discussing how to install themes in Ubuntu 17.10, I briefly mentioned GNOME Shell Extension. It was used to enable user themes. Today, we’ll have a detailed look at GNOME Shell Extensions in Ubuntu 18.04 and higher versions.
I may use the term GNOME Extensions instead of GNOME Shell Extensions but both have the same meaning here.
What are GNOME Shell Extensions? How to install GNOME Shell Extensions? And how to manage and remove GNOME Shell Extensions? I’ll explain all these questions, one by one.
Before that, if you prefer video, I have demonstrated all these on It’s FOSS YouTube channel. I highly recommend that you subscribe to it for more Linux videos.
What is a GNOME Shell Extension?
A GNOME Shell Extension is basically a tiny piece of code that enhances the capability of GNOME desktop.
Think of it as an add-on in your browser. For example, you can install an add-on in your browser to disable ads. This add-on is developed by a third-party developer. Though your web browser doesn’t provide it by default, installing this add-on enhances the capability of your web browser.
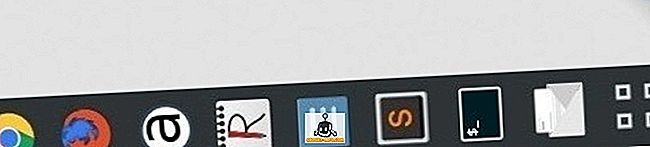
Similarly, GNOME Shell Extensions are like those third-party add-ons and plugins that you can install on top of GNOME. These extensions are created to perform specific tasks such as display weather condition, internet speed etc. Mostly, you can access them in the top panel.
There are also GNOME Extensions that are not visible on the top panel. But they still tweak GNOME’s behavior. For example, middle mouse button can be used to close an application with one such extension.
Installing GNOME Shell Extensions
Now that you know what are GNOME Shell Extensions, let’s see how to install them. There are three ways you can use GNOME Extensions:
- Use a minimal set of extensions from Ubuntu (or your Linux distribution)
- Find and install extensions in your web browser
- Download and manually install extensions
Before you learn how to use GNOME Shell Extensions, you should install GNOME Tweak Tool in Ubuntu or whichever distribution you are using. You can find it in the Software Center. Alternatively, you can use this command:
At times, you would also need to know the version of GNOME Shell you are using. This helps in determining whether an extension is compatible with your system or not. You can use the command below to find it:
Method 1: Use gnome-shell-extensions package [easiest and safest way]
Ubuntu (and several other Linux distributions such as Fedora) provide a package with a minimal set of GNOME extensions. You don’t have to worry about the compatibility here as it is tested by your Linux distribution.
If you want a no-brainer, just get this package and you’ll have 8-10 GNOME extensions installed.
You’ll have to reboot your system (or maybe just restart GNOME Shell, I don’t remember it at this point). After that, start GNOME Tweaks and you’ll find a few extensions installed. You can just toggle the button to start using an installed extension.
Method 2: Install GNOME Shell extensions from a web browser
GNOME project has an entire website dedicated to extensions. That’s not it. You can find, install, and manage your extensions on this website itself. No need even for GNOME Tweaks tool.
But in order to install extensions a web browser, you need two things: a browser add-on and a native host connector in your system.
Step 1: Install browser add-on
When you visit the GNOME Shell Extensions website, you’ll see a message like this:
“To control GNOME Shell extensions using this site you must install GNOME Shell integration that consists of two parts: browser extension and native host messaging application.”

You can simply click on the suggested add-on link by your web browser. You can install them from the link below as well:
Step 2: Install native connector
Just installing browser add-on won’t help you. You’ll still see an error like:
“Although GNOME Shell integration extension is running, native host connector is not detected. Refer documentation for instructions about installing connector”

This is because you haven’t installed the host connector yet. To do that, use this command:
Don’t worry about the ‘chrome’ prefix in the package name. It has nothing to do with Chrome. You don’t have to install a separate package for Firefox or Opera here.
Step 3: Installing GNOME Shell Extensions in web browser
Once you have completed these two requirements, you are all set to roll. Now when you go to GNOME Shell Extension, you won’t see any error message.
A good thing to do would be to sort the extensions by your GNOME Shell version. It is not mandatory though. What happens here is that a developer creates an extension for the present GNOME version. In one year, there will be two more GNOME releases. But the developer didn’t have time to test or update his/her extension.
As a result, you wouldn’t know if that extension is compatible with your system or not. It’s possible that the extension works fine even in the newer GNOME Shell version despite that the extension is years old. It is also possible that the extension doesn’t work in the newer GNOME Shell.
You can search for an extension as well. Let’s say you want to install a weather extension. Just search for it and go for one of the search results.
When you visit the extension page, you’ll see a toggle button.
Click on it and you’ll be prompted if you want to install this extension:

Obviously, go for Install here. Once it’s installed, you’ll see that the toggle button is now on and there is a setting option available next to it. You can configure the extension using the setting option. You can also disable the extension from here.
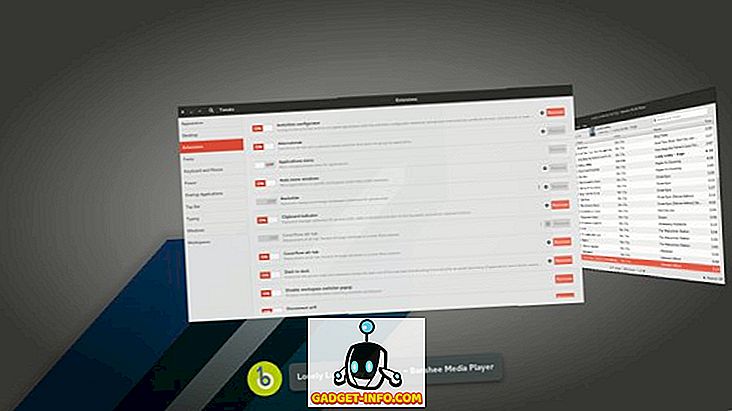
You can also configure the settings of an extension that you installed via the web browser in GNOME Tweaks tool:
You can see all your installed extensions on the website under installed extensions section. You can also delete the extensions that you installed via web browser here
One major advantage of using the GNOME Extensions website is that you can see if there is an update available for an extension. You won’t get it in GNOME Tweaks or system update.
Method 3: Install GNOME Shell Extensions manually (for intermediate to advanced users)
It’s not that you have to be always online to install GNOME Shell extensions. You can download the files and install it later, without needing internet.
Go to GNOME Extensions website and download the extension with the latest version.
Extract the downloaded file. Copy the folder to
/.local/share/gnome-shell/extensions directory. Go to your Home directory and press Crl+H to show hidden folders. Locate .local folder here and from there, you can find your path till extensions directory.
Once you have the files copied in the correct directory, go inside it and open metadata.json file. Look for the value of uuid.
Make sure that the name of the extension’s folder is same as the value of uuid in the metadata.json file. If not, rename the directory to the value of this uuid.
Almost there! Now restart GNOME Shell. Press Alt+F2 and enter r to restart GNOME Shell.
Restart GNOME Tweaks tool as well. You should see the manually installed GNOME extension in the Tweak tool now. You can configure or enable the newly installed extension here.
And that’s all you need to know about installing GNOME Shell Extensions.
Remove GNOME Shell Extensions
It is totally understandable that you might want to remove an installed GNOME Shell Extension.
If you installed it via a web browser, you can go to the installed extensions section on GNOME website and remove it from there (as shown in an earlier picture).
If you installed it manually, you can remove it by deleting the extension files from
Bonus Tip: Get notified of GNOME Shell Extensions updates
By now you have realized that there is no way to know if an update is available for a GNOME Shell extension except for visiting the GNOME extension website.
Luckily for you, there is a GNOME Shell Extension that notifies you if there is an update available for an installed extension. You can get it from the link below:
How do you manage GNOME Shell Extensions?
I find it rather weird that you cannot update the extensions via the system updates. It’s as if GNOME Shell extensions are not even part of the system.
If you are looking for some recommendation, read this article about best GNOME extensions. At the same time, share your experience with GNOME Shell extensions. Do you often use them? If yes, which ones are your favorite?
Like what you read? Please share it with others.
Gnome shell extension windows
GNOME Shell provides core user interface functions for GNOME, like switching to windows and launching applications. User interface elements provided by GNOME Shell include the Panel at the top of the screen, the Activities Overview, and Message Tray at the bottom of the screen.
What are GNOME Shell Extensions?
GNOME Shell extensions are small pieces of code written by third party developers that modify the way GNOME works. (If you are familiar with Chrome Extensions or Firefox Addons, GNOME Shell extensions are similar to them.) You can find and install GNOME Shell extensions using this website.
Since extensions are created outside of the normal GNOME design and development process, they are supported by their authors, rather than by the GNOME community. Some features first implemented as extensions might find their way into future versions of GNOME.
What can GNOME Shell Extensions do?
Extensions may make small changes, like moving your clock to the right-hand side of the screen, or make big changes, like arranging the windows in the Activities Overview in a different way.
Are GNOME Shell Extensions safe?
The code in a GNOME Shell extension becomes part of the core operating system. For this reason, the potential exists for an extension to cause system misbehavior, crashes, or even to have malicious behavior like spying on the user or displaying unwanted advertisements. All extensions uploaded to this site are carefully reviewed for malicious behavior before they are made available for download. This process of code review is similar to the process for Firefox add-ons submitted to addons.mozilla.org.
If you encounter problems with an extension, such as a crash, make sure to report the problem using the Bug Report link on the extension’s page.
I don’t think I have GNOME Shell. What can I do to get it?
The easiest way to get GNOME Shell is to install a Linux distribution that provides GNOME 3. See the Getting GNOME page on the main GNOME site to learn how to grab a Linux distribution with GNOME 3.
I’m using GNOME 3. Why can’t I install extensions?
If you are using GNOME 3.4 or newer and installation still doesn’t work, check to make sure that the «GNOME Shell Integration» plugin is installed and enabled in your browser preferences. Some browsers have a feature, click-to-play, which make it so the plugin cannot start without user intervention. Make sure that either https://extensions.gnome.org is whitelisted for the click-to-play feature, or click-to-play is turned off entirely. Check your browser’s help for more details.
If you are behind a proxy, make sure you have configured your proxy in both your browser’s configuration dialog as well as GNOME’s Network panel under System Settings. GNOME Shell Extensions needs both settings panels configured for the one-click installation to work.
Some distributions don’t quite package GNOME correctly. Make sure that you have the unzip package installed.
If you have checked all of these solutions and are still having trouble installing extensions, please file a bug report using the link in the footer of the page, giving your GNOME version, distribution and version, what solutions you have already tried, as well as what the Looking Glass says in both the Extensions and Errors tabs. It’s also helpful to have a copy of the
/.xsession-errors file from the session that you installed extensions from.
How do I update my extensions?
To update your extension to the latest version, go to the extension’s page, or the «Installed Extensions» page, and click the green update arrow. If there is no arrow, your extensions should be fully up to date.
What is «System extension»? How to uninstall it?
System extension is installed to system-wide location (usually «/usr/share/gnome-shell/extensions»). Such extension may be used by any PC user, however it can be uninstalled only by system administrator (root). To uninstall system extension use your distro’s package manager or ask your system administrator.
22 лучших расширения оболочки Gnome
Gnome Shell — одна из самых популярных настольных сред в Linux и других * nix операционных системах. Последняя версия, Gnome 3.18, еще лучше с множеством новых функций и улучшений на борту.
Несмотря на то, что он не без ненавистников, было доказано, что он очень удобен и продуктивен для большинства пользователей. Но, по правде говоря, конфигурация по умолчанию в Gnome 3 не совсем удовлетворительна, так как многие пользователи отмечают, что в ней отсутствуют параметры настройки. К счастью, существует множество расширений, которые значительно расширят функциональность оболочки Gnome.
Вот 22 из лучших расширений оболочки Gnome
1. Тире в док
Это расширение превращает обзор действий Dash в Gnome 3 в настраиваемую док-станцию, которую вы можете разместить в любом месте на рабочем столе. Эта док-станция позволяет запускать или переключать приложения быстрее, чем когда-либо.
Получи это здесь
2. Помодоро Таймер
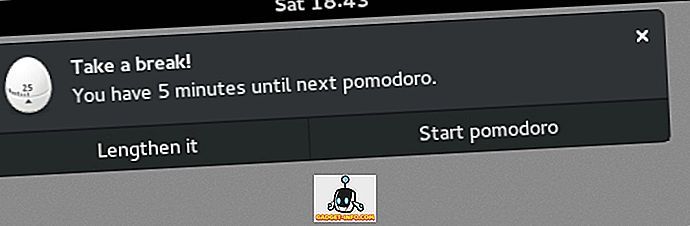
Если вы верный пользователь техники Pomodoro, вы найдете это расширение очень полезным. Это поможет вам повысить производительность труда, разделив ваше время на блоки и напомнив вам сделать короткие перерывы. Вы можете прочитать больше о Pomodoro Technique здесь.
Получи это здесь
3. Индикатор буфера обмена
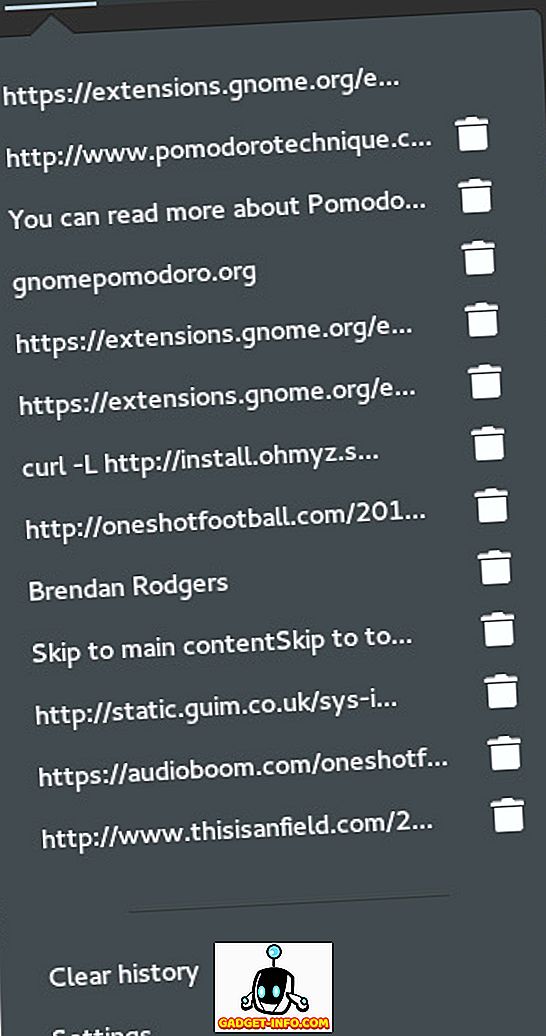
Это расширение просто интегрирует менеджер буфера обмена с оболочкой Gnome, которая кэширует историю буфера обмена, позволяя выбирать и вставлять до 50 записей.
Получи это здесь
4. Обновить Wi-Fi соединения
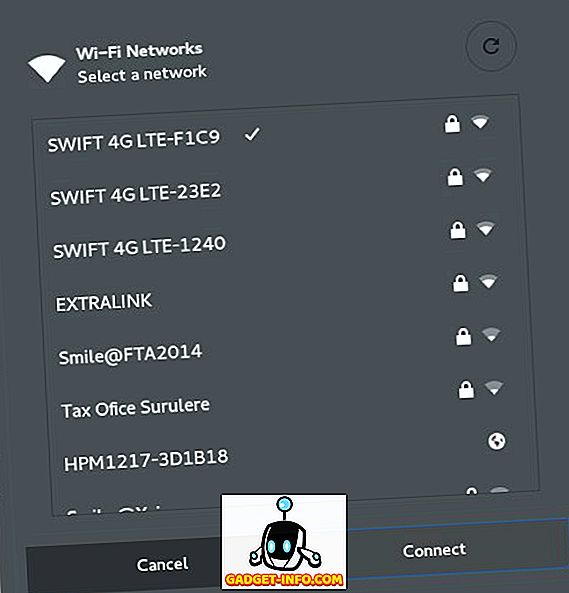
В Gnome 3 нет способа поиска новых подключений Wi-Fi по умолчанию, но вы можете легко добавить эту функцию, установив это расширение.
Получи это здесь
5. Выпадающий терминал

Повысьте удобство работы с терминалом, установив это фантастическое расширение, которое позволяет переключать выпадающий терминал с помощью сочетания клавиш. Это должно быть!
Получи это здесь
6. Открытая погода
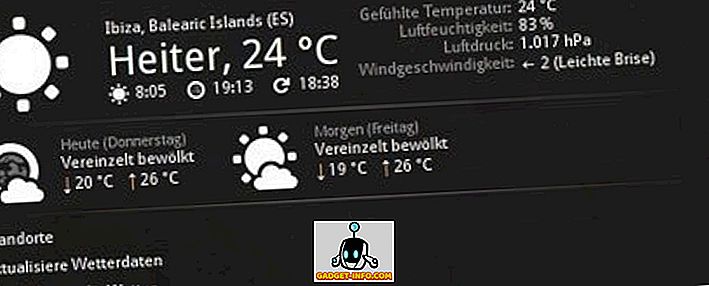
Open Weather предоставляет прогноз погоды с openweathermap.org или Forecast.io прямо на рабочий стол вашего гнома. Вы можете настроить его внешний вид в настройках, таких как место на панели, единицы измерения температуры и скорости ветра, поставщик погоды по умолчанию и т. Д.
Получи это здесь
7. Крышка потока Alt-tab
Этот существует для чисто эстетических целей. Это изменяет поведение комбинации alt-tab для итерации по окнам в режиме Coverflow.
Получи это здесь
8. NetSpeed
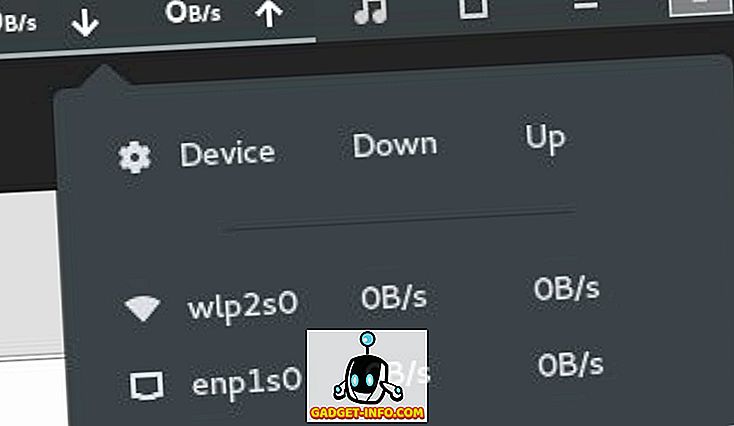
NetSpeed делает очень простую работу. Он показывает текущую скорость вашего интернет-соединения.
Получи это здесь
9. Интеграция Skype
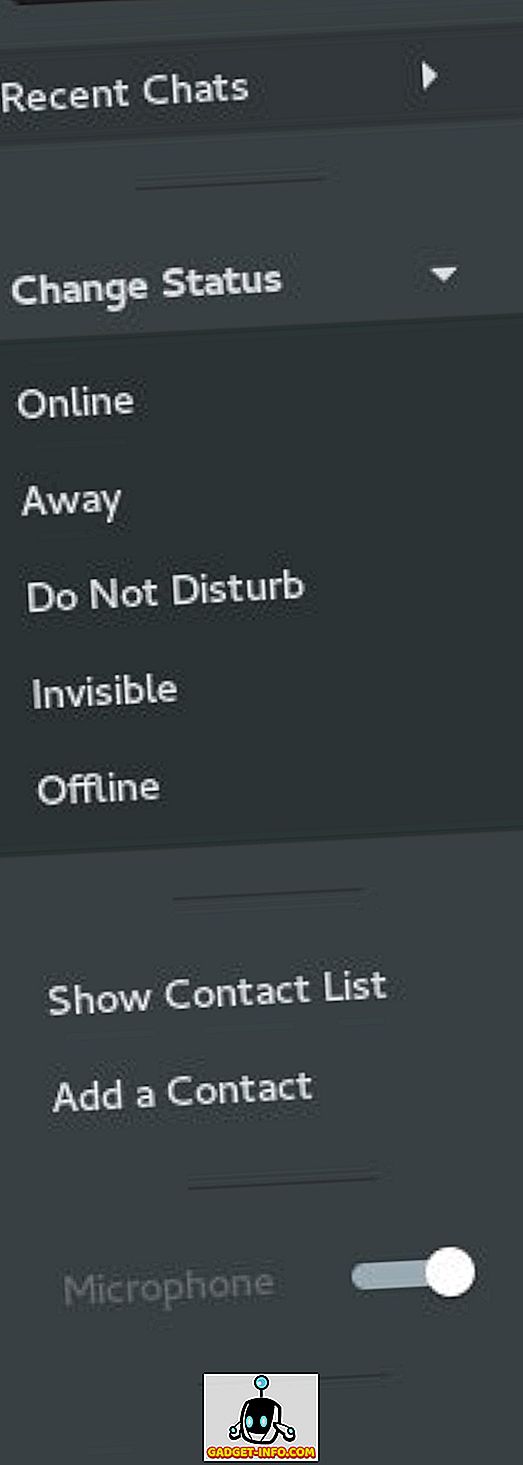
Использовать скайп? Вам понравится это расширение Gnome 3, которое позволяет использовать уведомления оболочки для новых сообщений, находить контакты и даже изменять свое присутствие в Интернете.
Получи это здесь
10. Отключите всплывающее окно переключения рабочей области
Если вас часто раздражает всплывающее окно, которое отображается на экране при переключении между рабочими пространствами, вы также можете отключить это с помощью этого аккуратного расширения.
Получи это здесь
11. Темы пользователя
Хотите настроить свой опыт работы с Gnome 3, установив темы оболочки? Вам понадобится это расширение, прежде чем что-либо сможет работать. Вы можете получить пользовательские темы Gnome 3 в Gnome Look.
Получи это здесь
12. Индикатор медиаплеера
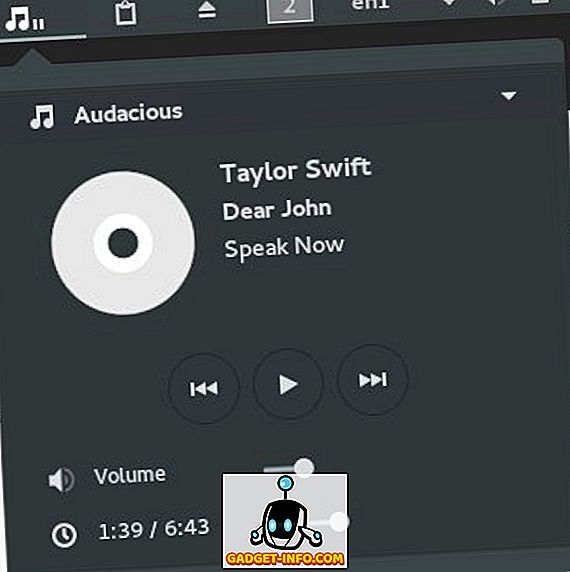
Это расширение дает вам легкий доступ к элементам управления несколькими медиапроигрывателями, такими как Clementine, Rhythmbox, Audacious и другими.
Получи это здесь
13. Todo.txt
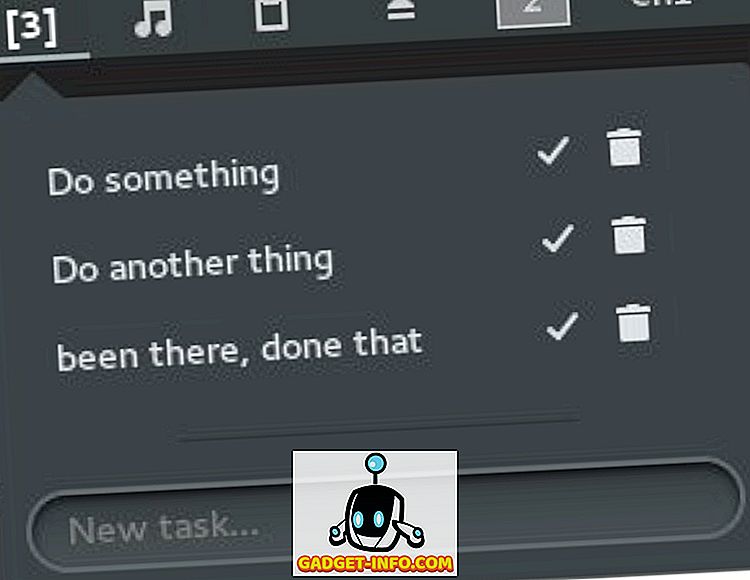
Это расширение интегрирует todo.txt с оболочкой Gnome, позволяя вам создавать или удалять задачи и помечать их как выполненные.
Получи это здесь
14. Меню приложений
Это расширение добавляет к Gnome 3 традиционное меню на основе категорий. Оно установлено по умолчанию, но для его включения необходимо использовать инструмент настройки Gnome.
Получи это здесь
15. Конфигуратор деятельности
Вы можете настроить внешний вид «кнопки действий» и панели с этим расширением. Просто установите его и откройте настройки, используя инструмент Tweak, чтобы просмотреть все доступные опции.
Получи это здесь
16. Индикатор состояния мест
Это расширение добавляет меню для быстрой навигации между точками монтирования в системе.
Получи это здесь
17. Проект Хомяк Расширение
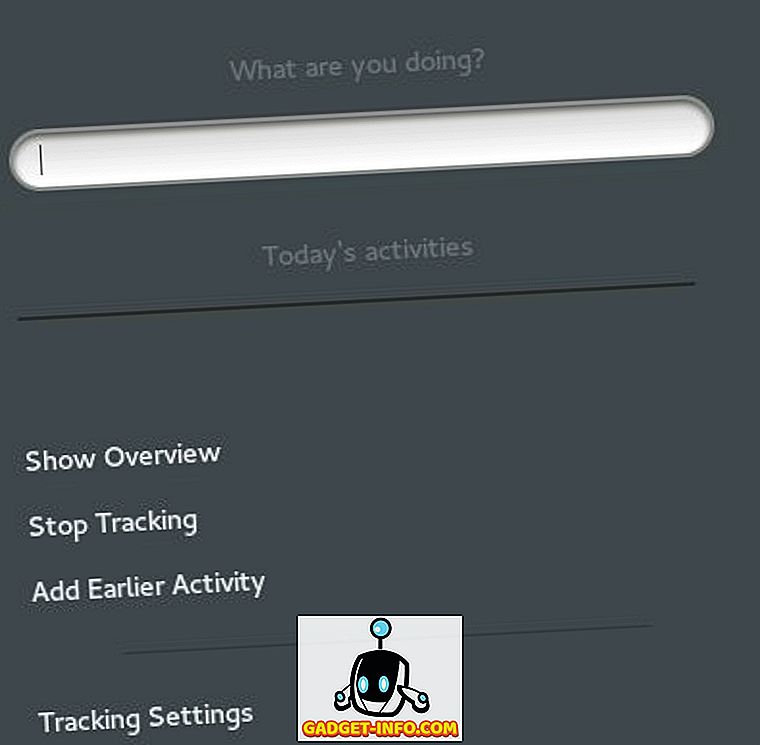
Расширение Project Hamster для Gnome 3 позволяет легко отслеживать время, затрачиваемое на различные действия. Отлично подходит для производительности.
Получи это здесь
18. EasyScreenCast
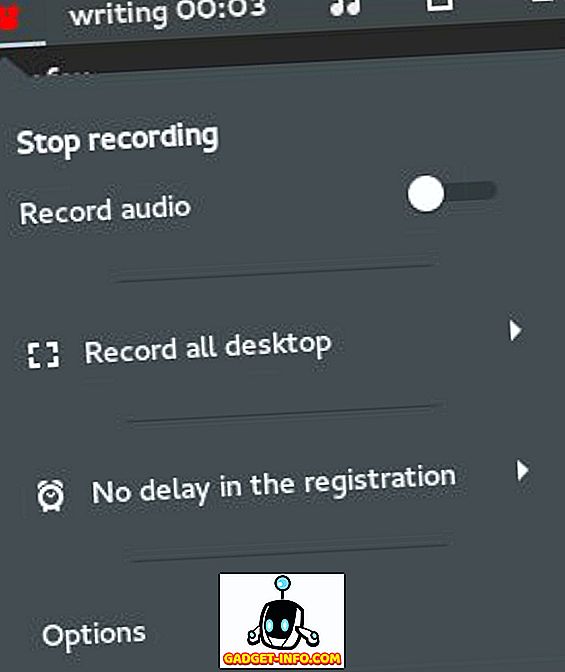
Это фантастическое расширение позволяет вам записывать скринкасты вашего рабочего стола gnome или даже выбранного окна или области на вашем экране. Он также может записывать аудио.
Получи это здесь
19. Кофеин

Кофеин предотвращает автоматическое отключение компьютера (переход в спящий режим).
Получи это здесь
20. Автоматическое перемещение окон
Это расширение позволяет вам организовать ваш рабочий стол, автоматически перемещая окна в предопределенные рабочие пространства, как только они открываются.
Получи это здесь
21. Рабочие места, чтобы док
Подобно Dash to Dock, Workspaces to Dock преобразует миниатюры рабочего пространства в обзоре действий в док на рабочем столе.
Получи это здесь
22. Динамический Top Bar
Это расширение делает верхнюю панель похожей на Wingpanel в Пантеоне. Он просто делает верхнюю панель прозрачной, если окно не развернуто, а затем снова становится непрозрачной.
Получи это здесь.
Дайте нам знать, если мы пропустили ваше любимое расширение Gnome Shell в разделе комментариев ниже.


