- Gnu Radio Software Download Mac
- Overview
- Building the dependencies
- Libtool
- Pkg-config
- Cppunit
- Boost
- Cmake
- Gnu Radio Osx
- Libusb
- Building UHD
- Building GNU Radio
- Gnu Radio Software Download Mac Installer
- Building gr-fcd
- Building and bundling the application
- Slack
- Gnu radio mac os
- Overview
- Environment variables
- Subversion checkout
- Bootstrap
- Configure
- Check
- Install
- Gnu radio mac os
- Prerequisites
- Procedure
- Take a test drive!
- Gnu radio mac os
- About
Gnu Radio Software Download Mac
GNU Radio is such a great tool, however it has so many flaws. It would be amazing if the developers tried to make it a plug and play software first and then moved to improving the blocks and all of that. I have high hopes for LuaRadio. GNU Radio is a free software development toolkit that provides signal processing blocks to implement software-defined radios and signal-processing systems. It can be used with external RF hardware to create software-defined radios, or without hardware in a simulation-like environment. GNURadio 3.7/3.8 Win64 Binaries — Download. Please ensure you pick the correct column for your CPU. If in doubt, choose the ‘Any CPU’ column as it will work on any machine.
This page describes how to build gnuradio-core, gnuradio-audio , gr-fcd and gr-uhd on Mac OS X 10.6.8 without using macports or any other ports. The objective is to create a GNU Radio application that bundles all non-standard libraries, including GNU Radio and UHD.
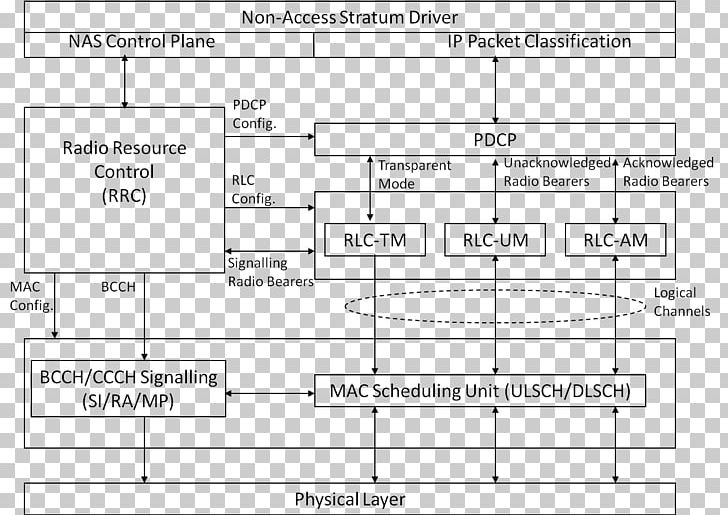
I created this procedure while developing gqrx.
- 2 Building the dependencies
Overview
We are going to work in the
directory, where we create following subdirectories:
- build – This is where we install tools and libraries that are only necessary for the build process (pkg-config and libtool).
- runtime – This is where we install the tools and libraries that are needed for both build and runtime.
- deps – This is where I put and build all the dependencies. You can use whatever you want since this is basically just a scratch folder.
- source – This is where I keep the GNU Radio and UHD sources.
Building the dependencies
Following packages need to be built before we can build GNU Radio:
- libtool (build only)
- pkg-config (build only)
- Cppunit (build only)
gr-fcd has no additional requirements. Note that on Mac OS X gr-fcd does not use libusb.
In addition to the above, UHD requires:
- cmake – available as .dmg here.
- libusb-1.0 – avaialble as .dmg?
We are going to install all dependencies into one target directory:
We can build both dynamic and static libraries and choose later whether we want to do static or dynamic linking in the application.
Libtool
Libtool is necessary for the bootstrap process, i.e. if we are building GNU Radio from git
Pkg-config
Get pkg-config-0.25, which is the last version that includes glib (0.26 wont compile).
Cppunit
Boost
The following will build all boost libraries which isn’t really necessary since we only need a few libraries.
This will build both static and dynamic libraries and install them under prefix (together with the headers).
Cmake
Gnu Radio Osx
Libusb

Building UHD
Building GNU Radio
- Ensure that PATH and PKG_CONFIG_PATH are set as instructed above.
- Get GNU Radio from git.
- This is without UHD
- Can’t build volk (neither static nor dynamic)
Now cross your fingers and pray that you end up with:
If make fails with:
Gnu Radio Software Download Mac Installer
delete ltmain.sh and rerun bootstrap and configure.
Building gr-fcd
- Get the latest gr-fcd from https://github.com/csete/gr-fcd
- Apply this patch: https://gist.github.com/1117088
Building and bundling the application
In order to compile an application the compiler needs to know two things:
- The location of the headers
- The location of the libraries
If we add the PATH and PKG_CONFIG_PATH to the Qt Creator config then we can use the same trick as on Linux:
This resulted in a working application http://twitpic.com/5z0f2bbut I have no idea how to specify audio device names?
- I think entering FUNcube Dongle V1.0 is OK, but it is not working because of this issue: http://www.ruby-forum.com/topic/1445451
- dial_tone.cc works well at 96 ksps

Slack
The GNU Radio Project maintains a Slack Workspace where the community can have discussions and conversations. This is a great way to chat in real-time with people from Ettus Research as well as with people in the community. The Slack Workspace has a two-way mirror with the GNU Radio #gnuradio IRC channel. Slack is free and open to everyone. You can use Slack from a desktop application, from a web browser such as Firefox, Chrome, Safari, or Edge, and also from your Android and Apple iOS smartphone.
Источник
Gnu radio mac os
4 Jan 2010   Emphasize this page is for OS X 10.4 only, also change gnuradio.org/trac to /redmine
To install GNU Radio on recent Mac hardware and operating systems, consult the Build Guide and Mac Install pages at the GNU Radio Wiki:
Overview
Now that we have all the prerequisites we are ready to install GNU Radio itself.
As explained in the Build Guide, the GNU Radio installation is a variant of the familiar procedure: configure, make, make install.
A single pass through the procedure builds all the modules specified in the build configuration.
Environment variables
We define some environment variables so we can build and run GNU Radio in our chosen locations.
I put these commands in a gr-defs shell script in my
/bin directory. Then I run that script in any shell (any terminal window) before I build or use GNU Radio.
Using source gr-defs rather than just gr-defs ensures that the definitions persist in that shell after the script exits. To confirm that:
Also, be sure your PATH includes /opt/local/bin. This is typically set in your .profile.
Subversion checkout
To check out the GNU Radio sources from the Subversion repository, execute this command:
This checks out all modules for the 3.1 stable branch and puts them in a new directory gnuradio under the current directory. This is the GNU Radio build directory. I put mine under my home directory.
Execute all the following commands in the gnuradio directory.
Bootstrap
The libtool programs installed by MacPorts are named glibtool and glibtoolize. The build scripts in the GNU Radio distribution assume that they are named libtool and libtoolize. We fix this by making a copy of the bootstrap script bootstrap_mp where we change the line
(Thanks to Michael Dickens for this fix.)
Configure
We create a file configure-gr that invokes the configure command with our build configuration. Here the —prefix option sets the location of the installed software and the —disable and —enable options select the modules to install.
Our configure-gr has these contents:
For more about build configuration options, see the Wiki.
When the configure command completes successfully, it writes this message:
On a 1 GHz Powerbook G4 this can take almost an hour.
Check
The check command executes tests.
Most tests pass. Messages similar to the following usually appear. They are expected and do not indicate a problem with the installation:
Install
Our installation directory is under our home directory, so there is no need to sudo.
Now we have a new installed GNU Radio directory gr.
Confirm that Python can find the GNU Radio installed files:
If Python imports gr without complaint, GNU Radio is ready to use.
Источник
Gnu radio mac os
(Last updated: May 2015)
Prerequisites
- The installation involves running commands from the Terminal. If you don’t know about the Terminal, here is a nice and light introduction: Introduction to the Mac OS X Command Line.
- GNU Radio applications are written primarily in the Python Programming Language. While you certainly don’t need to know Python for installing GNU Radio, having at least some exposure to Python will help you understand GNU radio. Here is a good one hour video tutorial on Python: Learn Python in One Video.
- For downloading GNU Radio, we will be following the basic procedure from gnuradio.org for installing GNU Radio via MacPorts.
- Hardware! These installation instructions are geared towards the RTL-SDR receiver. These receivers can be VERY cheap (less than $40). Type in «RTL-SDR» in, say, Amazon or Ebay and purchase one that gets good reviews. I’m using the NooElec R820T SDR&DVB-T NESDR Mini. The «RTL» in RTL-SDR refers to the Realtek RTL2832U chipset, which is found in many cheap DVB-T (digital television) dongles. With the right software these dongles can be used as an SDR, since the Realtek RTL2832U allows transferring the raw I/Q samples to a host.
Procedure
- Download and install X11/XQuartz first. If you don’t know what X11 is, then read about it, so you understand what you are installing.
- Install MacPorts next. Installation involves selecting your version of OS X on the MacPorts site and downloading the appropriate PKG file. This file contains the installer scripts and compressed installation files that are used to install MacPorts onto your hard drive. Remember, MacPorts is your friend here. MacPorts is a package manager. If you don’t know what a package manager is, then check out this link to get up to speed: Terminal 101: Using MacPorts and Homebrew
- After successfully installing MacPorts, open a Terminal and type:
After typing this command, I see the result:
Verify that /opt/local/bin:/opt/local/sbin is in your PATH (like that above).
If you don’t see /opt/local/bin:/opt/local/sbin in your PATH, then you will have to add it manually. Why? Because MacPorts is going to save executables in the /opt/local directory by default. When you run a command from the Terminal (i.e. the shell), the shell looks for the executable file using the directories listed in your PATH variable as a map. For convenience, adding directories to this environment variable means you do not have to be in the directory of the executable itself, each time you run it from the Terminal. Here is a good link on the subject: What it is and How to Modify the Shell Path in OSX 10.10 Yosemite using Terminal. If you need to add to the path, then follow the previous link’s instructions for «Adding in a Permanent Location» with the command
You will interact with MacPorts using the Terminal. You should be able to open up a new Terminal and type:
If you get a «command not found» error then your path is not set correctly. In MacPorts, the word «port» refers to «portfile», which is a distribution of software that can be compiled and installed using MacPorts. To see a list of available ports, type the following at the Terminal:
Let’s check out a list of ports which contain the term «SDR» by typing the following at the Terminal:
port search sdr
We are going to download and install four of these ports: gnuradio, gqrx, gr-osmosdr, rtl-sdr
Ok, let’s finally install GNU Radio itself by opening the Terminal and typing the following:
sudo port install gnuradio
Look up «sudo Unix» if you don’t know what the sudo command does. The installation may take an hour or two to complete. Do not close the terminal until the installation is finished.
Check to see if gnuradio installed correctly by typing the following in the Terminal:
This should display the version of GNU Radio.
Let’s add RTL-SDR support. Type the following in the Terminal:
sudo port install rtl-sdr
You also want the OsmoSDR RTL-SDR source block for GNU Radio Companion. To download and install this, type the following in the Terminal:
sudo port install gr-osmosdr
For easy audio, also install a program called Sound eXchange by typing the following in the Terminal:
sudo port install sox
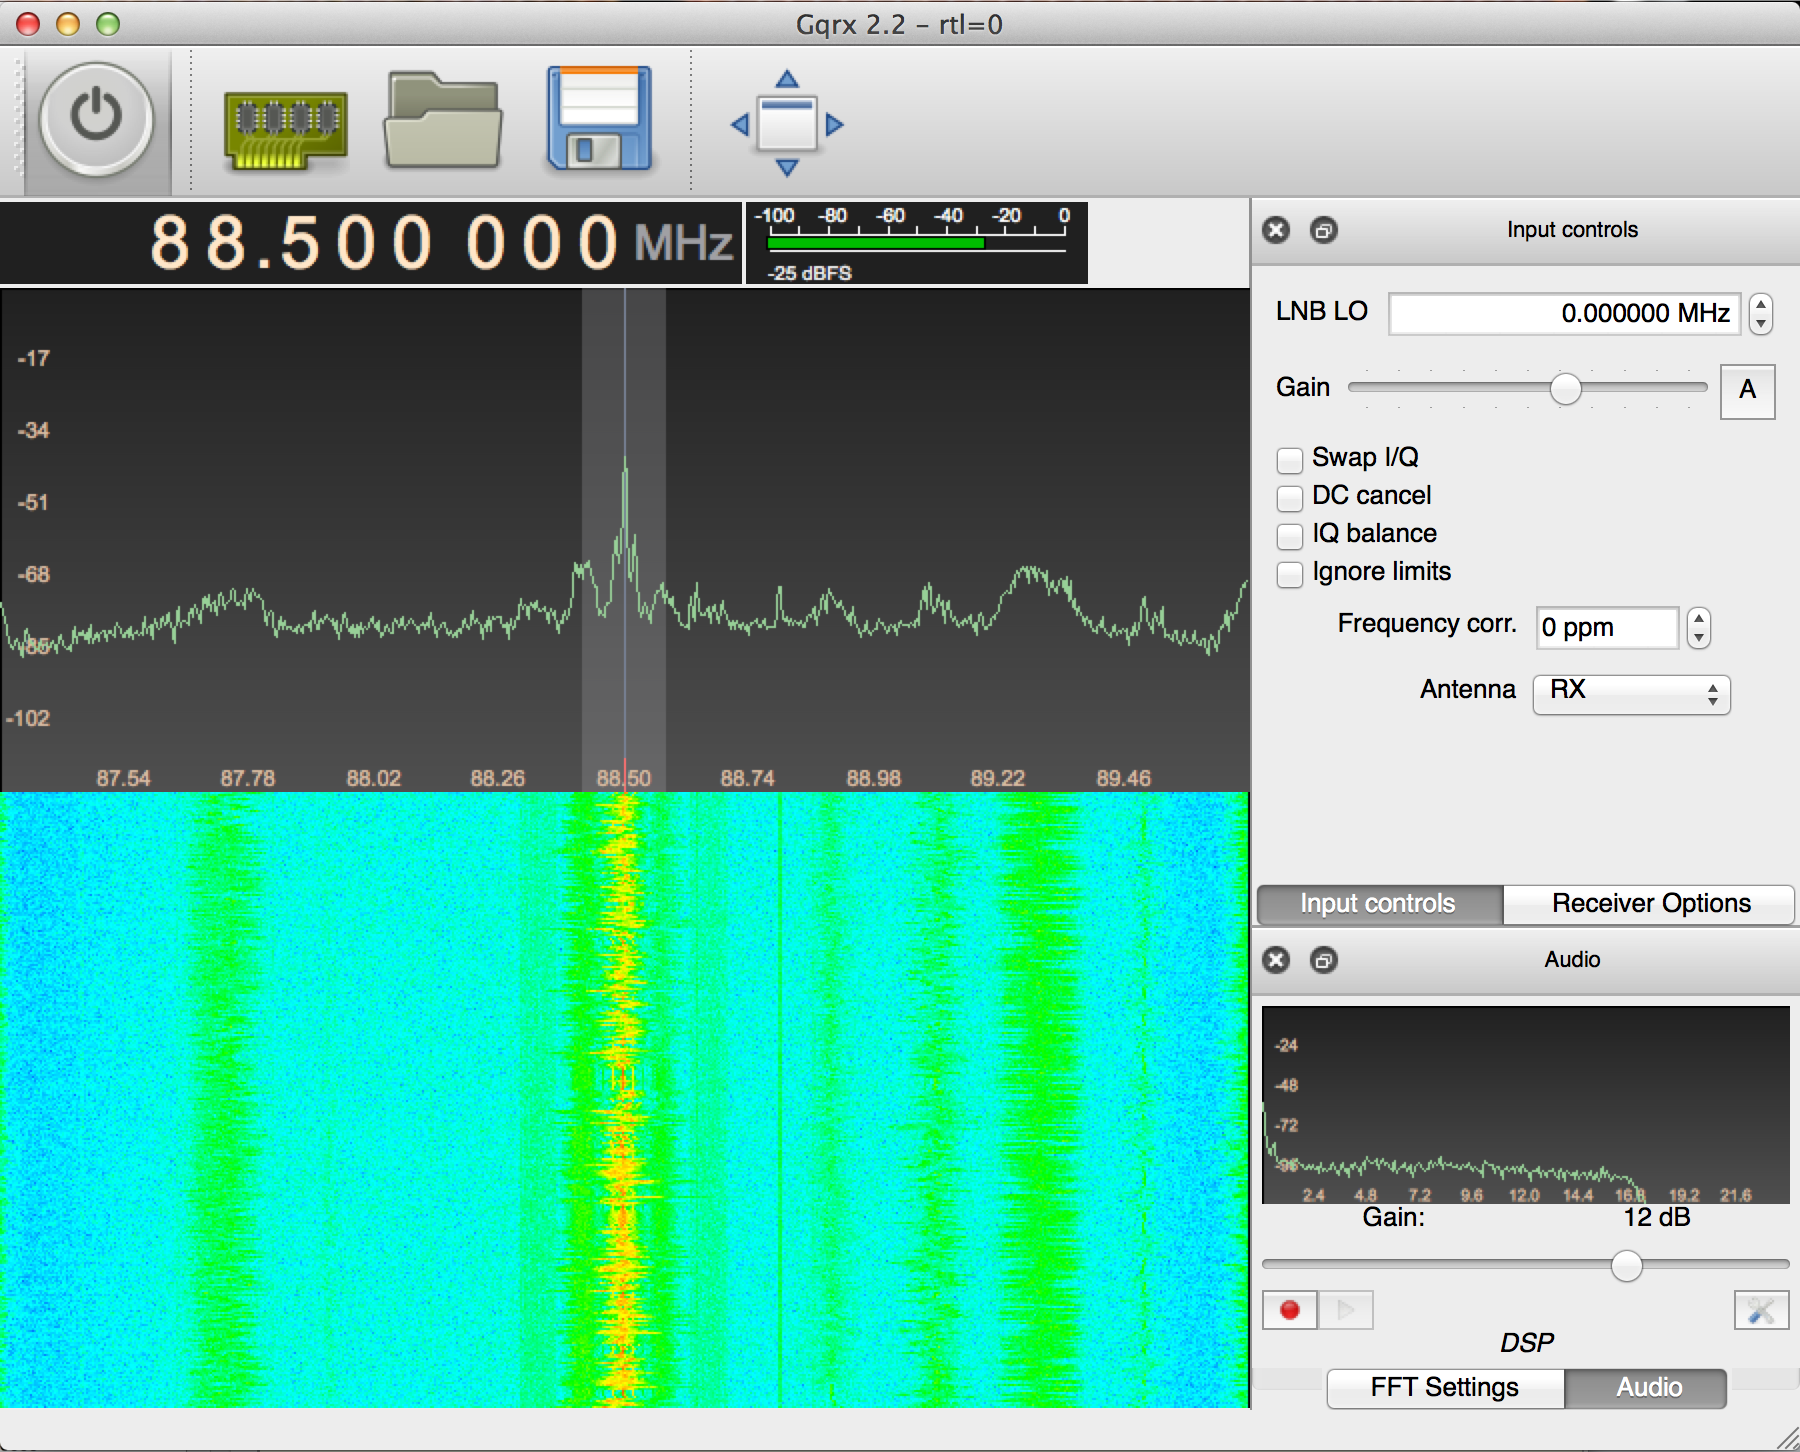
Finally, I recommend you install GQRX, which is a useful software defined radio receiver from http://gqrx.dk. Type the following in the Terminal:
sudo port install gqrx
Take a test drive!
Congratulations! You are done (hopefully). It’s time to verify that everything is downloaded and installed correctly.
- At the command Terminal type:
This should launch the GNR Radio Companion GUI. In the GUI, click on the little magnifying glass icon to search for a block by name. Type «rtl», and you should see the RTL-SDR Source available. If you see it, pat yourself on the back.
The RTL-SDR program contains many utilities. If you have a NooElec Brand RTL-SDR or some other DVB-T dongles based on the Realtek RTL2832U, then plug it into your Mac’s USB port and type the following at the Terminal:
This should indicate that a device is found, followed by some other information. If you get an error message after this, or something mentioning «abort», don’t worry about it. The key part to this test is that a device is found. I suggest you also test out the rtl_fm utility by visiting Kyle Keen’s site (he is the guy that wrote the utility) and follow the directions on his site.
Finally, check out your shiney new GQRX SDR receiver by typing the following in the Terminal:
Источник
Gnu radio mac os
This project is here to simplify installation of GNURadio for Mac OS X; and provides a standalone application that’s intended to be usable on modern MacOS systems and a variety of common SDR hardware. This branch provides GNURadio v3.8, which is configured to run on top of Python3, and with GTK3 and Qt5 for UI.
Note that this version contains some major changes from GNURadio 3.7: the WX UI has been removed following its deprecation; and, per the end-of-life of Python 2.x, we now are intended to run off of GNURadio 3.8.
Built with backend support for:
- Airspy (via osmosdr and soapy)
- AirspyHF (via soapy)
- BladeRF (via osmosdr and soapy; bitstreams included)
- HackRF (via osmosdr and soapy)
- LimeSDR (via gr-limesdr and soapy)
- NetSDR (via soapy)
- Pluto SDR (via soapy)
- Red Pitaya (via osmosdr and soapy)
- RTLSDR (via osmosdr and soapy)
- UHD/USRP (via osmosdr and soapy)
Currently tested platforms include:
If you’ve successfully tested one of the other backends, feel free to PR an addition to this list. 🙂
This distribution is meant to run on modern versions of macOS; technically, it should support releases as old as 10.7; but this is untested. It should support modern processor features (e.g. AVX512), but shouldn’t require them.
There are two software requirements you’ll need to install first:
You must install Python 3.7 using the python.org installer; GNURadio.app can’t use the version installed with macOS (or MacPorts or Homebrew).
Following Apple conventions, installation is easy.
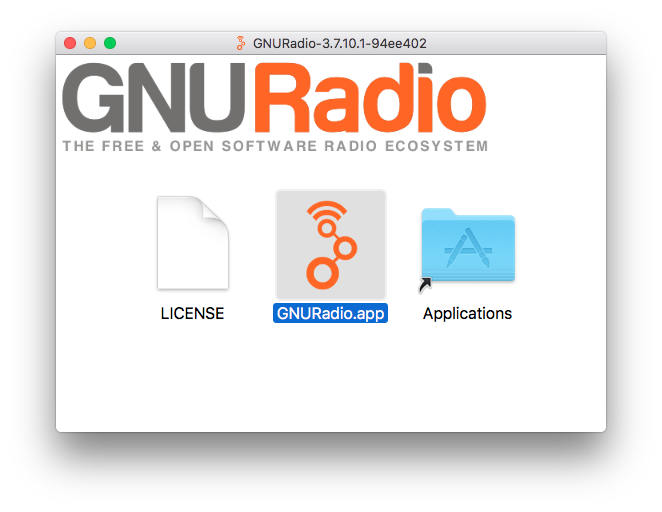
Simply download a release, open the DMG file, and then drag & drop GNURadio into your Applications directory.
Additional steps for specific platforms
You’ll need to download the USRP firmware images with the uhd_images_downloader.py tool.
If you’re using a trackpad you’ll need a way to emulate a middle-click, especially for configuring the GUI blocks. One such tool is MiddleClick.
Some users just do not want to install MacPorts only to use GNURadio. We get it. To each their own.
After you have installed GNURadio, check out the Tutorials.
Once you are confident with using some basic blocks, and if you don’t already have an SDR you might want to consider purchasing one. RTL-SDR has a good roundup of SDR devices.
Advanced Usage: Out of Tree Modules
There are only a few extra steps to use before following Out of Tree Module Guide.
TODO: write #exactsteps Issue #9
For those who desperately want to build GNURadio for Mac from scratch using our method, you will only need two requirements listed above and to run build.sh.
Keep in mind, that building most dependencies from scratch will take some amount of time, but it should work without any errors.
If you encounter any errors, or if there is a particular runtime bug or feature that you would like to see, please create a new Issue.
Pull Requests are welcome!
Our shell script is released under the same LICENSE that GNURadio is released under, namely the GPLv3.
GNURadio graphics are freely available under the CC BY-ND 2.0 license 1
1 Note, we have not transformed gnuradio_logo_icon-square.svg when building gnuradio.icns. It is identical to the original graphic in every way, sampled at various resolutions. See here for the #exactsteps followed. Also note that Issue #8 exists to simplify that process.
About
GNURadio bundled as an app for Mac OS X (does not require MacPorts)
Источник


