- Move your data from a Windows PC to your Mac
- Before you begin
- Move your data
- How to move your information from a PC to your Mac
- After you move your data
- If you have issues moving your data
- What data can I transfer?
- Запуск компьютера Mac в системе Windows или macOS с помощью Boot Camp
- Назначение операционной системы по умолчанию
- Перезагрузка в macOS
- Перезапуск компьютера Mac в macOS или Windows
- Запуск macOS из Windows
- Запуск ОС Windows из macOS
- Дополнительная информация
- How to create and run Windows To Go on a Mac computer?
- Tutorial to create and run Windows To Go on a Mac computer with WinToUSB.
Move your data from a Windows PC to your Mac
Use Windows Migration Assistant to transfer your pictures, documents, and other data from a Windows PC to your Mac.
Windows Migration Assistant transfers your contacts, calendars, email accounts, and more from a PC. It migrates this data to the appropriate places on your Mac. After migrating data to your Mac, authorize your computer for iTunes Store purchases. It’s important to authorize before you sync or play content that you download from the iTunes Store.
If you’re migrating from one Mac to another Mac, follow the steps to move your content to a new Mac.
Before you begin
To prepare for a smooth migration:
- Make sure that Windows is up to date. Migration Assistant works with Windows 7 and later.
- Make sure that you know the name and password of an administrator account on your PC.
- Connect your Mac and PC to the same network, such as your home Wi-Fi network. Or connect an Ethernet cable between the ports on your Mac and PC to create a direct network connection. Some Mac models require an Ethernet adapter, such as the Belkin USB-C to Gigabit Ethernet Adapter or Apple Thunderbolt to Gigabit Ethernet Adapter.
- If you’re using Microsoft OneDrive on your PC, follow Microsoft’s instructions for uninstalling OneDrive before continuing. You can reinstall OneDrive after migration is complete.
Then use the check disk (chkdsk) utility on your PC to make sure that your Windows hard drive doesn’t have any issues:
- Right-click the Start button, then click Run.
- Type cmd and press Enter. Command Prompt opens.
- At the prompt, type chkdsk and press Enter.
- If the utility reports that it found problems, type the following, where drive is the letter that represents your Windows startup disk, such as D:
- Press Enter.
- At the prompt, type Y , then restart your PC.
- Repeat this process until the check disk utility reports no issues. If the utility can’t fix every issue that it finds, you might need to have your PC serviced. Then migrate your data to your Mac.
Move your data
This section guides you through migration, post-migration, and what to do if the steps don’t work for you.
How to move your information from a PC to your Mac
- On your PC, download and install the appropriate Windows Migration Assistant, based on the version of macOS on your Mac:
- Windows Migration Assistant for macOS Big Sur
- Windows Migration Assistant for macOS Mojave and macOS Catalina
- Windows Migration Assistant for macOS Sierra and High Sierra
- Windows Migration Assistant for OS X El Capitan or earlier
- Quit any open Windows apps.
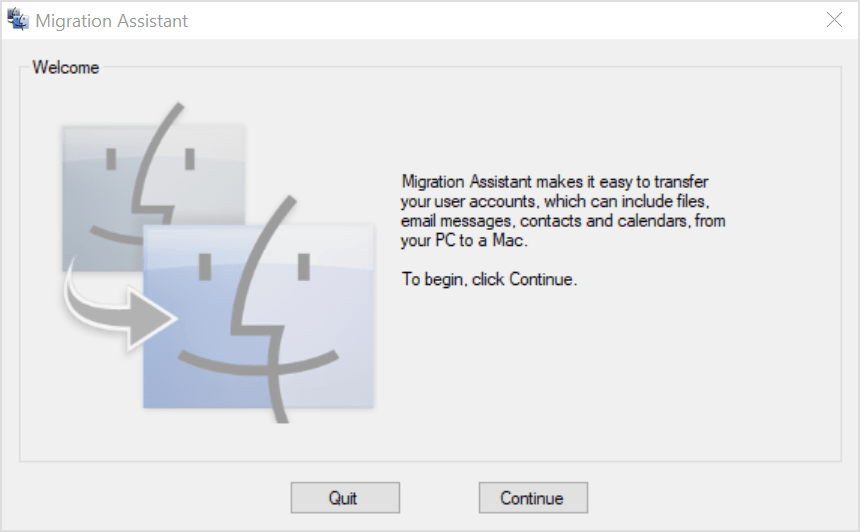
- Open Windows Migration Assistant, then click Continue.

- Start up your Mac. Setup Assistant automatically opens the first time you turn on your Mac. If you’ve already set up your Mac, open Migration Assistant, which is in the Utilities folder of your Applications folder.
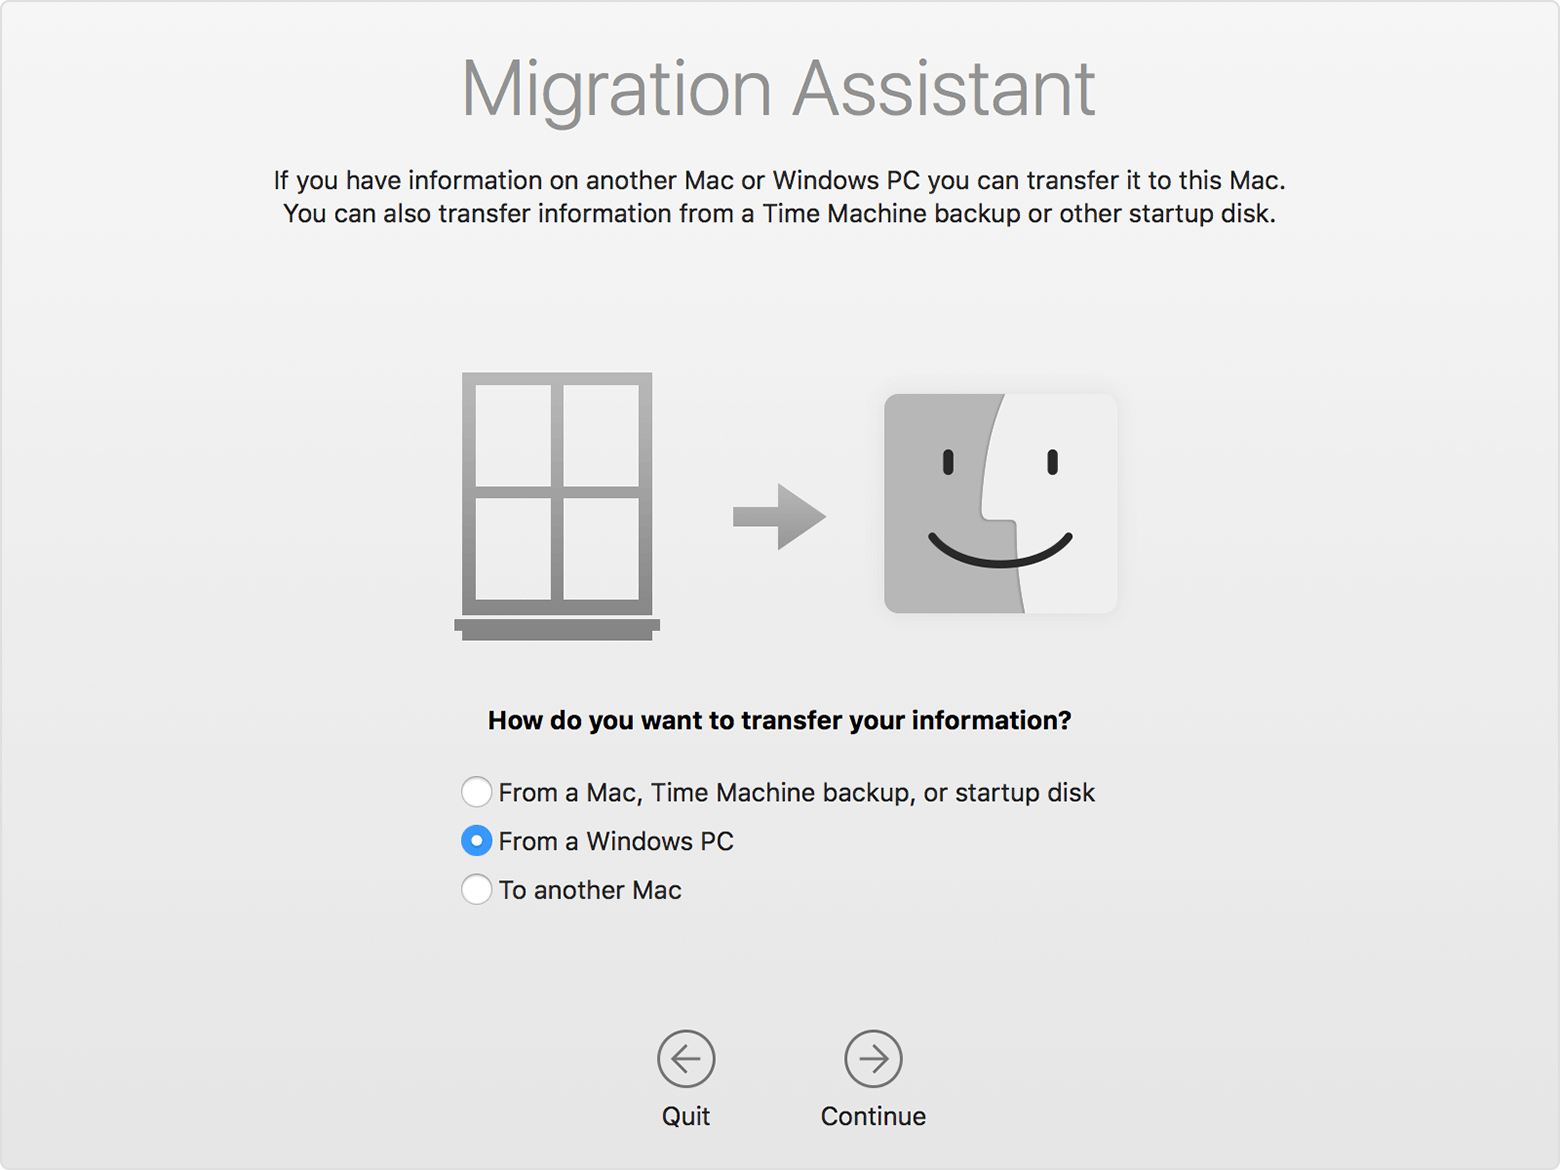
- On your Mac, follow the onscreen prompts until you get to the migration pane of the assistant. Select the option to transfer your information “From a Windows PC,” then click Continue.
- When prompted, enter an administrator name and password.
- Click Continue to close any other open apps.
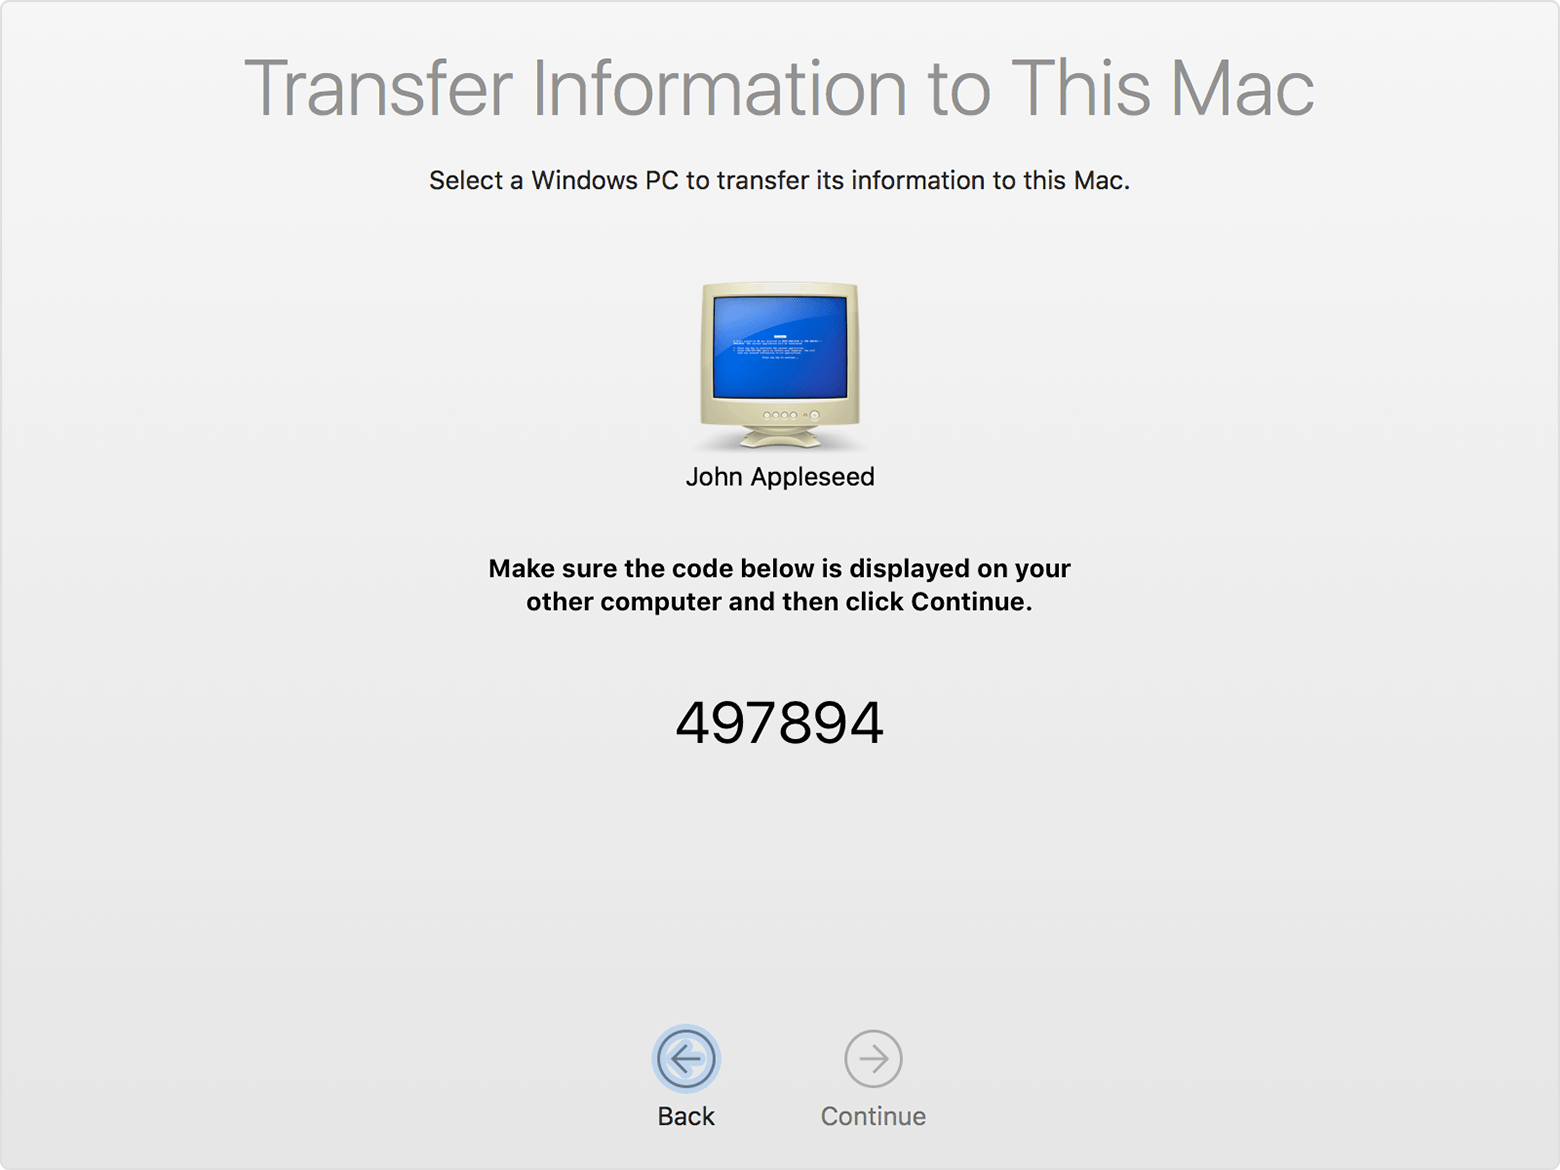
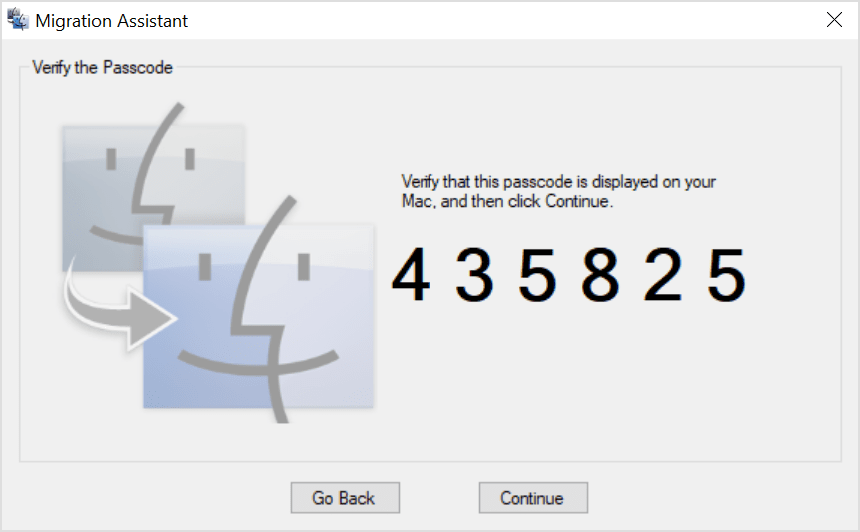
- In the migration window on your Mac, select your PC from the list of available computers. Then wait for the PC to show the same passcode that your Mac shows.
- When both computers display the same passcode, click Continue on your PC and Mac.
- Your Mac scans the drives on your PC to build a list of information to migrate. When the scan completes, select the information that you want to migrate to your Mac and click Continue. Learn about some of the data that you can transfer.
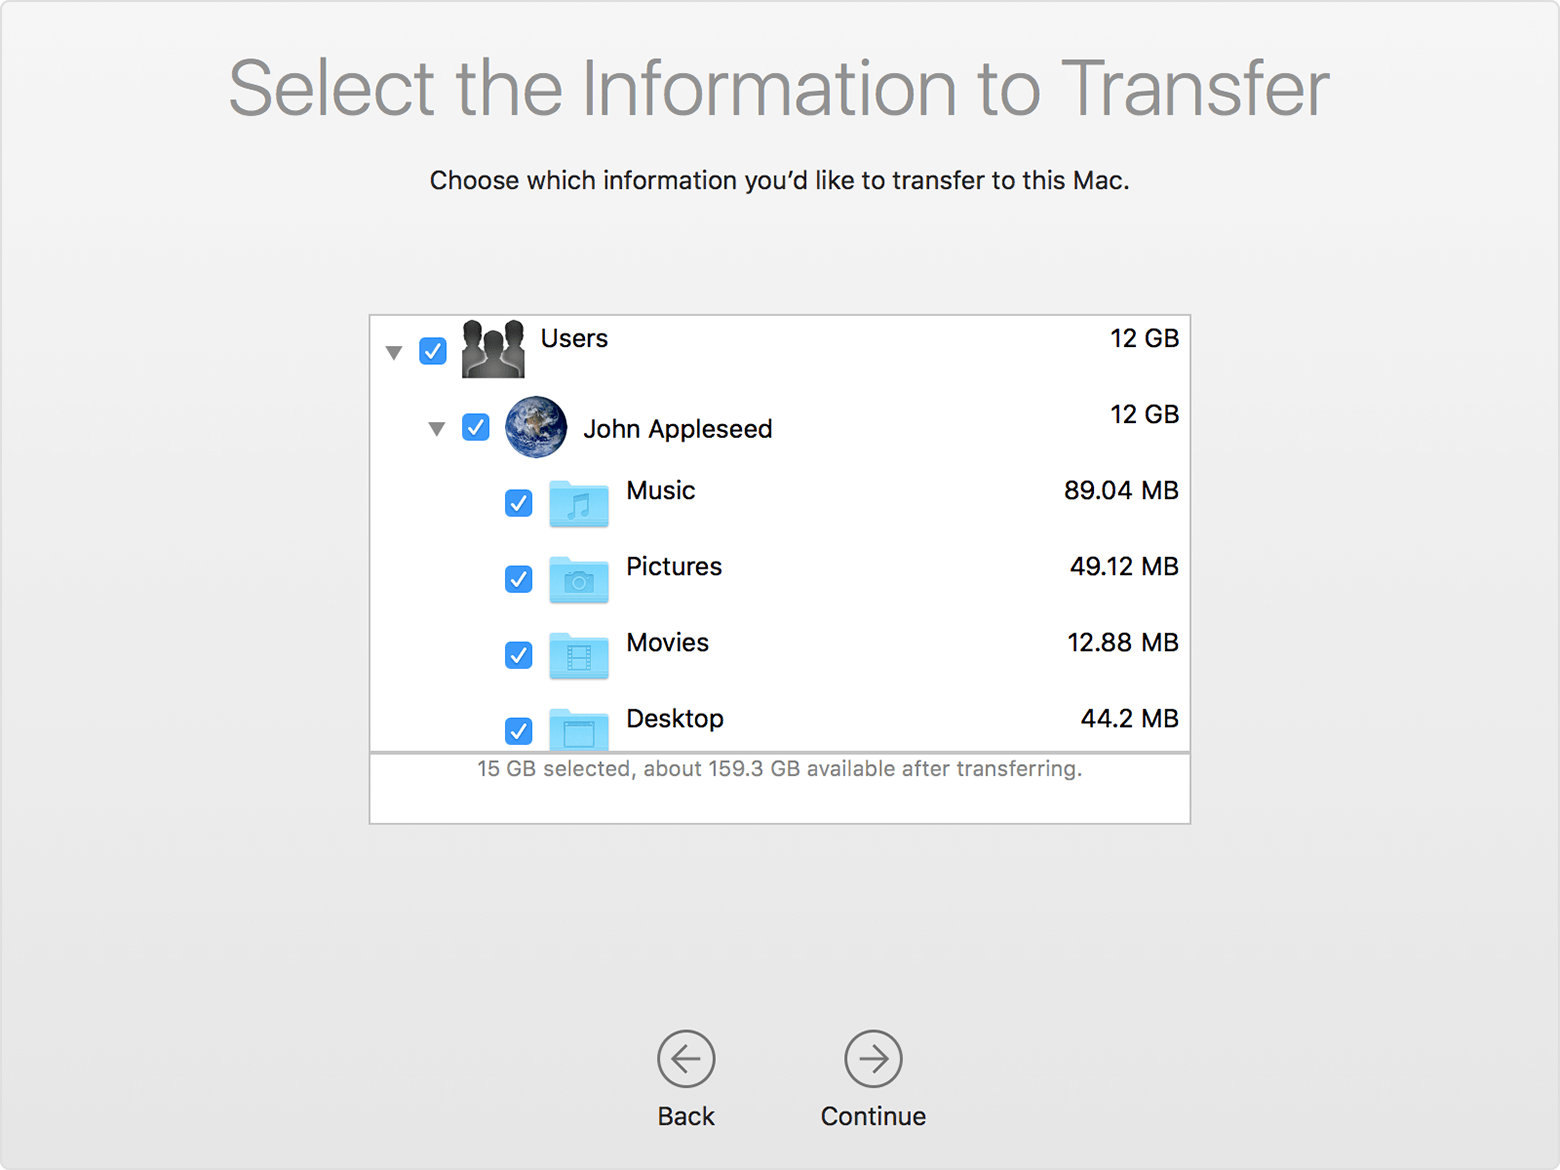
You can watch the progress and estimated time remaining on both the PC and your Mac. They tell you when migration is complete.
After you move your data
When migration completes, close Windows Migration Assistant on your PC. Then log in to the new user account on your Mac. The first time you log in to a user account migrated from your PC, you’re asked to set a password. You can use the same password that you used on your PC, or create a new password.
After logging in to the user account that you migrated, authorize your computer for iTunes Store purchases. It’s important to authorize before you sync or play content downloaded from the iTunes Store.
If you have issues moving your data
- Quit all open apps on your PC, then try migrating your content again. For example, you can press Alt-Tab to choose an open application, then press Alt-F4 to quit it.
- If your PC doesn’t appear in the Setup Assistant or Migration Assistant window on your Mac, make sure the computers are connected to the same network. You can create a network by connecting a single Ethernet cable between your Mac and PC. If that doesn’t help, check for firewall software on your PC and turn it off. After migration completes, you can turn firewall software on again.
- If Migration Assistant doesn’t open on your PC, turn off any antivirus software on your PC. Then try to open Migration Assistant again. After migration completes. You can turn that software on again.
- If you still can’t migrate your information successfully, you can use an external drive or file sharing to manually copy important data to your Mac.
What data can I transfer?
Migration Assistant lets you choose the data to move to your Mac. Here’s what moves over for specific apps and data types:
Email, contacts, and calendar information
Email messages, email-account settings, contacts, and appointments move based on which version of Windows you’re using and which accounts you have.
Outlook 1
Data from 32-bit versions of Outlook in Windows 7 and later move as follows:
- People move to Contacts 2
- Appointments move to the Calendar app
- IMAP and Exchange settings and messages move to the Mail app
- POP settings and messages move to Mail 2
Windows Live Mail
Data from Windows Live Mail in Windows 7 and later moves as follows:
- IMAP settings and messages move to Mail
- POP settings and messages move to Mail 2
Windows Mail
Data from Windows Mail in Windows 7 and later (excluding Windows 8) move as follows:
- IMAP settings and messages move to Mail
- POP settings and messages move to Mail 2
- People move to Contacts
Bookmarks
Bookmarks from Internet Explorer, Safari for Windows, and Firefox move to Safari.
System settings
Language and location settings, and custom desktop pictures move to System Preferences. Your web browser homepage moves to Safari preferences.
Pictures
Photos and other images move to your home folder. You can then add them to Photos, or open Photos and let it search your Mac for photos to import.
iTunes content
Migration Assistant transfers your iTunes media as follows: music to the Apple Music app, videos to the Apple TV app, podcasts to the Apple Podcasts app, and audiobooks to the Apple Books app.
Other files
Migration Assistant also moves these files:
- Files from the top-level folder of the currently logged-in user’s home directory
- Non-system files located in the Windows or Program Files folders
- Top-level folders located on the Windows system disk and other attached disks
1. Migration Assistant doesn’t support 64-bit versions of Outlook. You can manually migrate Mail, Contacts, or Calendars from Outlook 2013 or Outlook 2016 by signing in and entering the content on your Mac manually.
2. Migration Assistant transfers only the Mail or Contacts data that belongs to the logged-in Windows user. To transfer data from another user account, use Migration Assistant again while you’re logged in to another Windows account. Each time you migrate, your Mac creates a new user account.
Information about products not manufactured by Apple, or independent websites not controlled or tested by Apple, is provided without recommendation or endorsement. Apple assumes no responsibility with regard to the selection, performance, or use of third-party websites or products. Apple makes no representations regarding third-party website accuracy or reliability. Contact the vendor for additional information.
Источник
Запуск компьютера Mac в системе Windows или macOS с помощью Boot Camp
После установки на компьютере Mac с процессором Intel операционной системы Windows при помощи Ассистента Boot Camp можно выбрать macOS или Windows в качестве операционной системы по умолчанию. Операционная система по умолчанию загружается после включения или перезагрузки компьютера Mac.
Назначение операционной системы по умолчанию
В ОС Windows на Mac нажмите  в панели задач справа, нажмите значок Boot Camp
  , затем выберите Панель управления Boot Camp.
Если появится окно «Контроль учетных записей пользователей», нажмите «Да».
Выберите загрузочный диск с операционной системой, которую нужно использовать по умолчанию.
Если Вы хотите сразу запустить эту операционную систему, нажмите «Перезагрузить». В противном случае нажмите «ОК».
В операционной системе Windows нельзя изменить загрузочный том на внешний накопитель.
Сведения об изменении операционной системы по умолчанию в macOS приведены в статье Начало работы с Boot Camp.
Перезагрузка в macOS
В ОС Windows на Mac выполните одно из следующих действий.
Перезапуск с помощью диспетчера загрузки. Перезагрузите Mac, затем незамедлительно нажмите и удерживайте клавишу Option. После того как отобразится окно диспетчера загрузки, отпустите клавишу Option, выберите загрузочный диск macOS, затем нажмите клавишу Return.
Если у Вас ноутбук Mac с внешней клавиатурой, нажмите и удерживайте клавишу Option на встроенной клавиатуре.
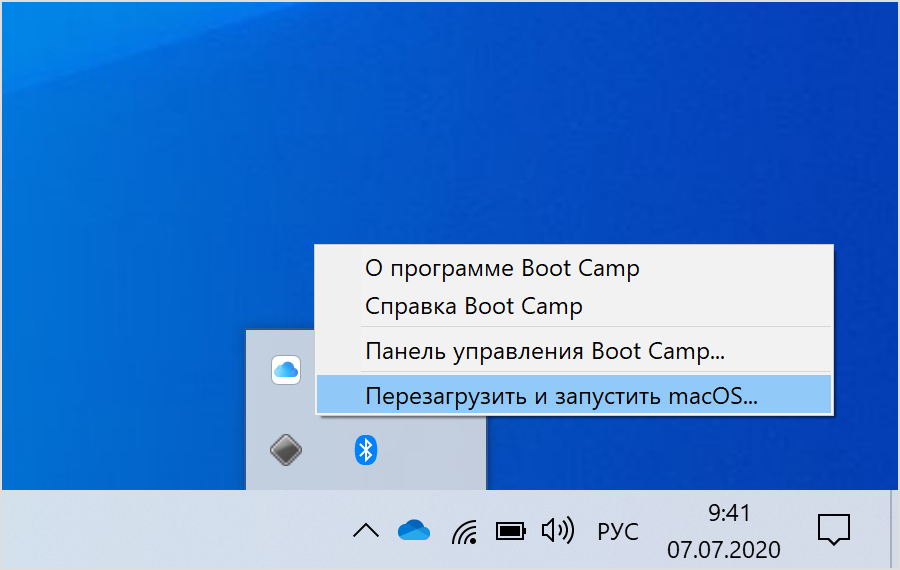
Перезапуск с помощью панели управления Boot Camp. Нажмите справа на панели задач, нажмите значок Boot Camp , а затем выберите пункт «Перезагрузить в macOS».
При этом macOS также будет назначена операционной системой по умолчанию.
Сведения о перезагрузке в macOS приведены в статье службы поддержки Apple Перезапуск компьютера Mac в macOS или Windows.
Источник
Перезапуск компьютера Mac в macOS или Windows
После установки Microsoft Windows на компьютер Mac можно переключать режим запуска компьютера между операционными системами MacOS или Windows.
Запуск macOS из Windows
- В области уведомлений в правой части панели задач Windows щелкните , чтобы показать скрытые значки.
- Щелкните значок Boot Camp .
- В появившемся меню выберите команду «Restart in macOS» (Перезапуск в macOS).
Если последние обновления Boot Camp не установлены, может отобразиться сообщение «Could not locate the OS X boot volume» (Не удалось найти загрузочный том OS X).
Также можно воспользоваться менеджером загрузки в процессе запуска компьютера Mac:
- Перезапустите Mac с помощью меню «Пуск» в ОС Windows.
- Нажмите и удерживайте клавишу Option (или Alt) ⌥, когда компьютер Mac начнет перезагружаться.
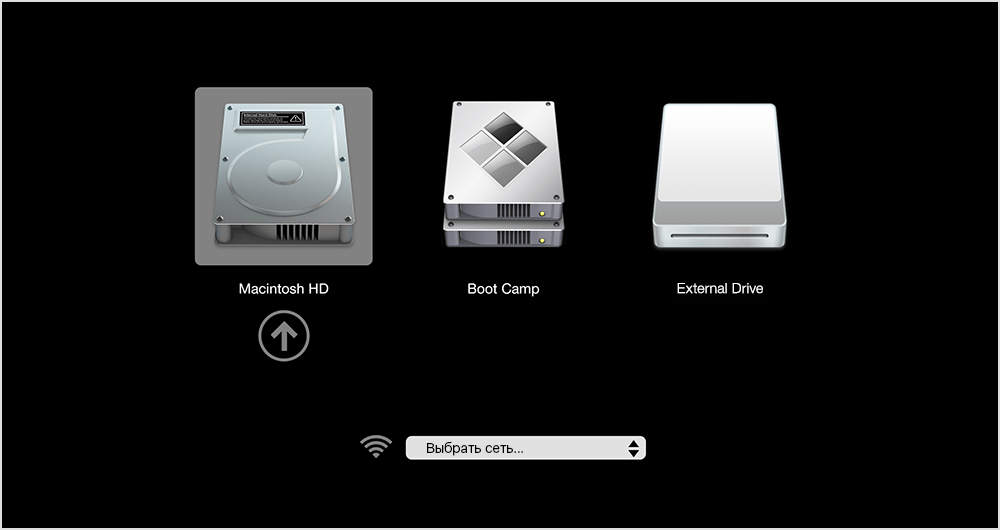
- Выберите загрузочный том Mac (Macintosh HD) в окне менеджера загрузки, затем нажмите клавишу «Return» или щелкните стрелку вверх:
Запуск ОС Windows из macOS
- Воспользуйтесь менеджером загрузки, чтобы выбрать том Windows (Boot Camp) при запуске компьютера.
- Также можно выбрать том Boot Camp в окне настроек «Загрузочный диск» и перезапустить компьютер.
Дополнительная информация
- Если у вас возникли проблемы с использованием VoiceOver или другой программы чтения с экрана для выполнения этих действий, обратитесь в службу поддержки Apple.
- Узнайте, как установить Windows 10 на компьютер Mac.
Информация о продуктах, произведенных не компанией Apple, или о независимых веб-сайтах, неподконтрольных и не тестируемых компанией Apple, не носит рекомендательного или одобрительного характера. Компания Apple не несет никакой ответственности за выбор, функциональность и использование веб-сайтов или продукции сторонних производителей. Компания Apple также не несет ответственности за точность или достоверность данных, размещенных на веб-сайтах сторонних производителей. Обратитесь к поставщику за дополнительной информацией.
Источник
How to create and run Windows To Go on a Mac computer?
This tutorial will show you how to create a Windows To Go USB drive that supports Mac computers, then you can run Windows to go on a Mac computer to complete the work that must be done under Windows.
I hav a late 2016 MacBook Pro with MacOS and Windows 10 Pro dual systems installed on it, so far so good, but I only use Windows 10 Pro to play some games that can’t be run on MacOS. Now I’m trying to get rid of my Bootcamp installation, because of low space on main SSD drive. I noticed that WinToUSB can install Windows to a USB drive, can the Windows USB drive created by WinToUSB be started from a Mac computer? How do I make it? Could let me know step by step for using your tools.
Yes, the Windows To Go USB drive created by WinToUSB can be started from a Mac computer, but not all Windows To Go USB drive created by WinToUSB can be started from a Mac computer. So we need to understand what causes the WinToUSB USB drive to fail to boot and then we can effectively avoid it.
1. Now All of Apple’s computers use Intel CPUs, and Apple selected the Intel-designed Extensible Firmware Interface (EFI) as its BIOS firmware to replace the Open firmware used on the PowerPC architecture. So in order to boot a Mac computer, we have to make sure that the Windows To Go USB drive that we created supports EFI booting.
2. For booting Windows on an (U)EFI-based computer, the Windows version must match the PC architecture, that means a 64-bit (U)EFI-based computer can only boot 64-bit versions of Windows and a 32-bit (U)EFI-based computer can only boot 32-bit versions of Windows. Mac computers use 64-bit Intel CPUs, so make sure you use 64-bit Windows to create Windows To Go.
Tutorial to create and run Windows To Go on a Mac computer with WinToUSB.
Step 1. Download Mac Boot Camp Support Software for Windows To Go, please refer to: How to download Boot Camp Windows Support Software for Windows To Go?
Step 2. Copy the Boot Camp Support Software downloaded in the previous step to the computer with an installed copy of WinToUSB, and connect the destination external hard drive or USB flash drive to this computer, then run WinToUSB.
Step 3. Click the button, then click the button and select the Windows installation ISO file from the open dialog box.
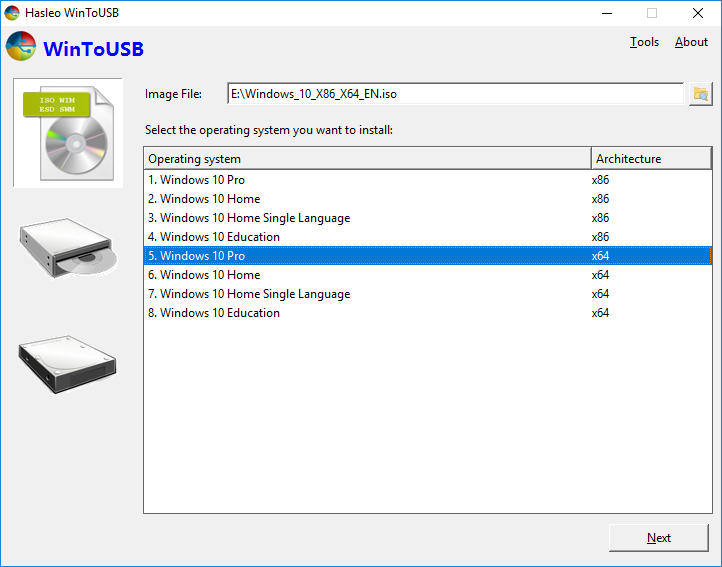
Step 4. WinToUSB scans for and lists available operating systems. Pleae select the edition of Windows you want to install, then click «Next».
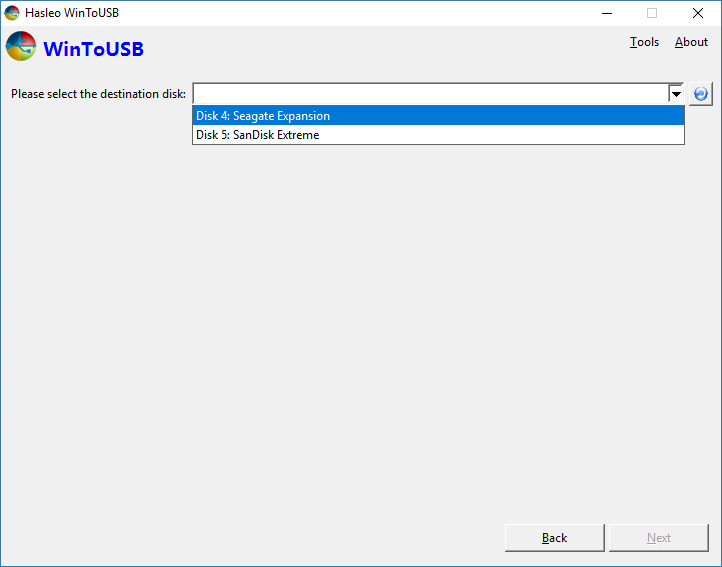
Step 5. Select the destination drive in the drop-down list. If the drive is not correctly recognized by WinToUSB, please click the button for the program to recognize the drive.
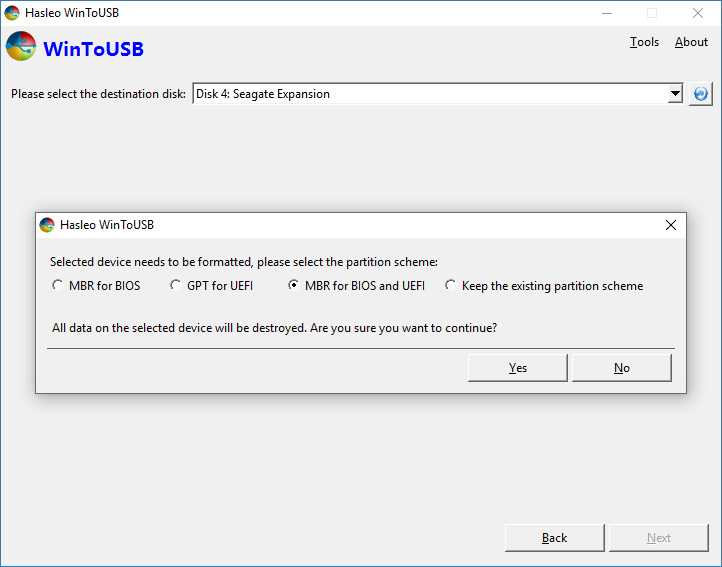
Step 6. A pop-up will appear asking you if you want to format it to continue, select the partition scheme you want to use and click «Yes» to format it. Mac computer is a UEFI based computer, so you have to select the ‘GPT for UEFI’ or ‘MBR for BIOS and UEFI’ option as the partition scheme. If you choose «Keep the existing partition scheme», you need to manually prepare the partitions on the USB drive before this step, and here is the user guide on how to manually prepare partitions for Windows To Go. Please note that the «Keep the existing partition scheme» option is valid only for an external disk.
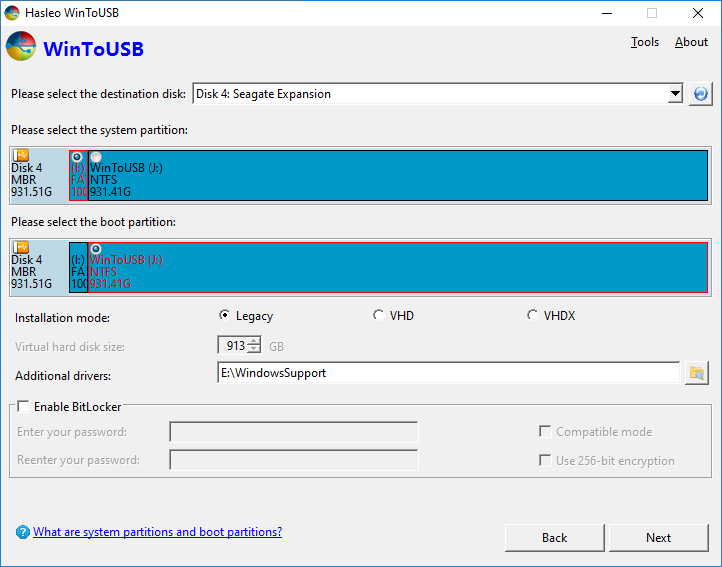
Step 7. Select the system partition and boot partition from the partition list, the selected partitions will be marked as red, specify the directory of the additional drivers as the save path of Boot Camp Support Software, then click «Next».
 Tips:
Tips:
- The directory of the additional drivers you specify should only contain drivers that need to be injected into Windows. If this directory contains too many useless files, the process of injecting drivers will become very slow.
Step 8. After clicking «Next», WinToUSB begins installing Windows.
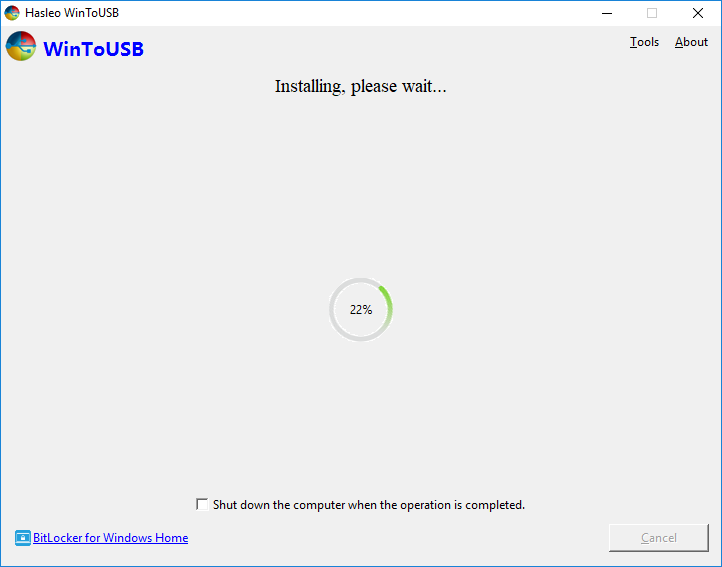
Step 9. It takes some time to install. After installation, safely unplug the USB drive from the Windows computer, then connect the USB drive to the Mac computer you want to boot. If you have only the USB-C interface on your Mac computer, you will need to use the USB-C to USB Adapter to connect the USB device to your Mac computer.
Step 10. Power on the Mac computer, and then immediately hold down the Option key, then select the USB drive and press Return to boot from it.
Step 11. Windows normal installation starts up and you have to complete all the installation steps. If the Mac’s own keyboard or touchpad does not work, you have to use an external USB keyboard or mouse to complete the installation. After that, you can install Windows Support Software (Boot Camp drivers), programs, copy files, etc.
Now you know how to create and run Windows To Go on a Mac computer with the best free Windows To Go Creator WinToUSB, you can also use WinToUSB to clone existing Windows to a USB drive and then boot Windows from that USB drive on a Mac computer.
Источник


