- Mount Google Drive In Linux With google-drive-ocamlfuse
- Install google-drive-ocamlfuse in Ubuntu
- Usage
- Как смонтировать Google Drive локально как виртуальную файловую систему в Linux
- 1. Google-drive-ocamlfuse
- Установка google-drive-ocamlfuse
- Использование
- 2. GCSF
- Установка GCSF
- Использование
- 3. Tuxdrive
- One thought on “ Как смонтировать Google Drive локально как виртуальную файловую систему в Linux ”
- How To Mount Google Drive Locally As Virtual File System In Linux
- Introduction
- 1. Rclone
- 1.1. Install Rclone in Linux
- 1.2. Configure Rclone to access Google drive
- 1.3. Mount Google Drive Locally As Virtual File System Using Rclone
- 2. Google-drive-ocamlfuse
- 2.1. Install google-drive-ocamlfuse in Linux
- 2.2. Mount Google Drive Locally As Virtual File System Using google-drive-ocamlfuse
- 3. GCSF
- 3.1. Install GCSF in Linux
- 3.2. Mount Google Drive Locally As Virtual File System Using GCSF
- 4. Tuxdrive
- Conclusion
Mount Google Drive In Linux With google-drive-ocamlfuse
Author : Andrew | Posted: September 02, 2013
More than a year after Google has announced its file storage and synchronization service called Drive, there’s still no official Linux client. There are some unofficial clients, but they’re not perfect: Insync is not free, Grive is command line only and its development seems to have stopped and so on.
So here’s another alternative for easily managing your Google Drive files under Linux: google-drive-ocamlfuse.
google-drive-ocamlfuse is a FUSE filesystem backend for Google Drive which you can use to mount your Google Drive under Linux.
google-drive-ocamlfuse is still under testing so while it works pretty well, you may encounter bugs. For instance, in my test, some Google documents weren’t converted for some reason.
Install google-drive-ocamlfuse in Ubuntu
Usage
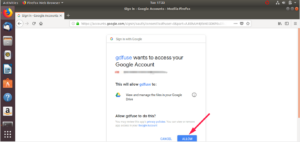
This should open a tab in your default web browser, asking to allow google-drive-ocamlfuse to access your Google Drive. Click «Allow», wait a few seconds for google-drive-ocamlfuse to retrieve the authorization code and you’re done.
To mount Google Drive on startup, add «google-drive-ocamlfuse /path/to/gdrive» (replacing «/path/to/ with the exact path to the folder where you want to mount Google Drive) to Startup Applications.
For more info, including using multiple accounts, see the google-drive-ocamlfuse wiki.
Источник
Как смонтировать Google Drive локально как виртуальную файловую систему в Linux
Google Drive является одним из популярных поставщиков облачного хранилища на планете.
По состоянию на 2017 год более 800 миллионов пользователей активно используют эту услугу по всему миру.
Несмотря на то, что за последнее десятилетие число пользователей резко возросло, Google еще не выпустил клиент для дисков Google для Linux.
Но это не остановило сообщество Linux.
Время от времени, некоторые разработчики принесли несколько клиентов для дисков Google для операционной системы Linux.
В этом руководстве мы увидим три неофициальных клиента диска Google для Linux.
Используя эти клиенты, вы можете монтировать Google диск локально как виртуальную файловую систему и получать доступ к вашим файлам дисков в вашем Linux-окне.
1. Google-drive-ocamlfuse
Google-disk-ocamlfuse является файловой системой FUSE Google Диск, написанной в OCaml.
Для тех, кто задается вопросом, FUSE означает файловую систему в пользовательском пространстве, это проект, который позволяет пользователям создавать виртуальные файловые системы на уровне пользователя. google-drive-ocamlfuse позволяет монтировать ваш Google Диск в системе Linux.
Он имеет доступ для чтения / записи к обычным файлам и папкам, доступ только для чтения к док-станции Google, листам и слайдам, поддержку нескольких учетных записей дисков Google, дублирование обработки файлов, доступ к вашему каталогу корзины накопителей и т. д.
Установка google-drive-ocamlfuse
google-drive-ocamlfuse доступен в AUR, поэтому вы можете установить его с помощью любых вспомогательных программ AUR, например Yay.
Чтобы установить последнюю бета-версию, выполните следующие действия:
Использование
После установки запустите следующую команду для запуска утилиты google-drive-ocamlfuse из вашего терминала:
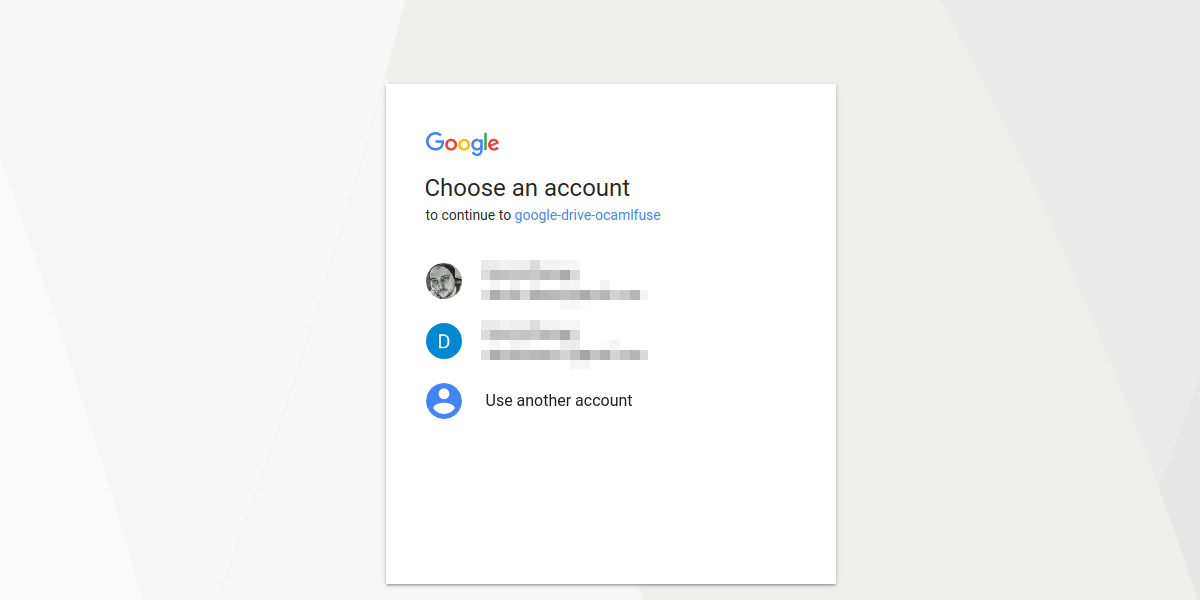
Когда вы запускаете его в первый раз, утилита откроет ваш веб-браузер и попросит вас разрешить авторизовать файлы вашего диска Google.
После того, как вы предоставили авторизацию, все необходимые файлы конфигурации и папки, необходимые для установки вашего диска Google, будут автоматически созданы.
После успешной проверки подлинности в вашем терминале появится следующее сообщение.
Наконец, смонтируйте свой Google диск с помощью команды:
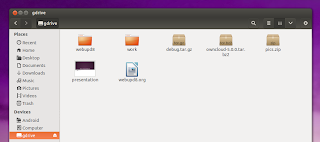
Вы можете получить доступ к своим файлам либо из терминала, либо из файлового менеджера.
Из диспетчера файлов:
Если у вас несколько учетных записей, используйте опцию label, чтобы различать различные учетные записи, например:
Как только вы закончите, отключите flesystem FUSE, используя команду:
Для получения дополнительной информации см. Справочные страницы.
2. GCSF
GCSF – файловая система FUSE на основе Google Диска, написанная с использованием языка программирования Rust.
Название GCSF произошло от румынского слова «Google Conduce Sistem de Fişiere», что означает «Файловая система Google Drive» на английском языке.
Используя GCSF, вы можете подключить свой Google диск как локальную виртуальную файловую систему и получить доступ к содержимому из терминала или файлового менеджера.
Вы можете задаться вопросом, как это отличается от других проектов Google FUSE FUSE, например google-drive-ocamlfuse
. Разработчик GCSF ответил на аналогичный комментарий Reddit «GCSF имеет тенденцию быть быстрее в нескольких случаях (перечисление файлов рекурсивно, чтение больших файлов с Диска).
Стратегия кэширования, которую он использует, также приводит к очень быстрым чтениям (улучшение x4-7 по сравнению с google-drive-ocamlfuse) для файлов, которые были кэшированы за счет использования большего количества оперативной памяти ».
Установка GCSF
GCSF доступен в AUR, поэтому пользователи Arch Linux могут установить его с помощью любого помощника AUR, например Yay.
Убедитесь, что установлены pkg-config и пакеты fuse.
Они доступны в репозиториях по умолчанию для большинства дистрибутивов Linux.
Например, на Ubuntu и производных вы можете установить их с помощью команды:
После установки всех зависимостей выполните следующую команду для установки GCSF:
Использование
Во-первых, нам нужно авторизовать ваш Google drive.
Для этого просто запустите:
Необходимо указать имя сеанса.
Замените mygoogledrive своим собственным именем сеанса.
GCSF создаст файл конфигурации в $ XDG_CONFIG_HOME / gcsf / gcsf.toml, который обычно определяется как $ HOME / .config / gcsf / gcsf.toml.
Учетные данные хранятся в одном каталоге.
После того, как вы прошли аутентификацию, смонтируйте свой Google диск с помощью команды:
Снова замените mygoogledrive своим именем сеанса.
Вы можете просмотреть существующие сеансы, используя команду:
Теперь вы можете получить доступ к своему содержимому диска Google либо из терминала, либо из диспетчера файлов.
Если вы не знаете, где установлен ваш Google диск, используйте команду df или mount, как показано ниже.
После этого отключите Google drive с помощью команды:
3. Tuxdrive
Tuxdrive – еще один неофициальный клиент для Google для Linux.
One thought on “ Как смонтировать Google Drive локально как виртуальную файловую систему в Linux ”
Гном умеет сам монтировать в наутилусе ГДрайв?, если ввести логин в “сетевых учетных записях” в настройках. Когда-то оттуда еще и цеплялись из диска и гуглофоточек фоточки в “Фото” их, но что-то там поломали и у меня по крайней мере не работает в самых разных дистрах.
Источник
How To Mount Google Drive Locally As Virtual File System In Linux
This guide explains how to mount Google drive locally as a virtual file system and access your Google drive files from the file manager in Linux.
Introduction
Google Drive is the one of the popular cloud storage provider on the planet. As of 2017, over 800 million users are actively using this service worldwide.
Even though the number of users have dramatically increased, Google haven’t released a Google drive client for Linux yet. But it didn’t stop the Linux community.
Every now and then, some developers have released a few google drive clients for Linux operating system. In this guide, we will see four unofficial google drive clients for Linux.
Using these clients, you can mount Google drive locally as a virtual file system and access your drive files in your Linux box.
1. Rclone
Rclone is my favorite command line tool to sync files and directories to and from local and remote cloud storage providers. It can also serve local or remote files over HTTP/WebDav/FTP/SFTP/dlna. Rclone is a free and open source application written using GO programming language.
It is not just for Google drive, Rclone will support a lot of other cloud storage providers as listed below.
- Alibaba Cloud (Aliyun) Object Storage System (OSS),
- Amazon Drive,
- Amazon S3,
- Backblaze B2,
- Box,
- Ceph,
- DigitalOcean Spaces,
- Dreamhost,
- Dropbox,
- Google Cloud Storage,
- Hubic,
- Jottacloud,
- IBM COS S3,
- Koofr,
- Memset Memstore,
- Mega,
- Microsoft Azure Blob Storage,
- Microsoft OneDrive,
- Minio,
- Nextcloud,
- OVH,
- OpenDrive,
- Openstack Swift,
- Oracle Cloud Storage,
- ownCloud,
- pCloud,
- put.io,
- QingStor,
- Rackspace Cloud Files,
- rsync.net,
- Scaleway,
- Wasabi,
- Yandex Disk.
1.1. Install Rclone in Linux
Rclone can be installed in couple ways.
Install Rclone using installation script:
This is the easiest way to install to install rclone on Linux Mac OS and BSD systems.
All you you have to run the following one-liner command from the Terminal:
For beta installation, run:
Some of you don’t like to directly pipe some script into your Bash using curl command. If so, skip this and follow other installation methods given below.
Install Rclone using default package manager:
Rclone is available in the default repositories of some Linux distributions.
On Arch Linux and its variants, enable [Community] repository and install Rclone using pacman like below.
On Debian, Ubuntu, Linux Mint and other Deb-based systems:
Install Rclone from precompiled binaries:
If Rclone is not available in default repositories or if it is outdated, you can install the most recent Rclone version as shown below.
Download and extract the latest precompiled binary:
Copy binary file to your $PATH :
Set proper permissions:
Finally install Rclone manpage:
Install Rclone using snap
Rclone is also available as Snap. You can install it using command:
1.2. Configure Rclone to access Google drive
Once installed, run the following command to give permission to Rclone to access your Google drive:
This will guide you through a series of interactive setup process. First, it will search for list of available remotes. We haven’t created any remotes yet, so let us create one.
To do so, simply type «n» and hit ENTER . Then type the name of the remote. I am going to name it as «mygoogledrive».
Next choose the cloud provider. In our case. it is Google drive, so I entered number 7 .
Next press ENTER to leave blank values for Google application client id and client secret:
Type «y» to use auto config:
Now your web browser will open and Rclone will then ask your permission to access your Google drive. Click «Allow» button to authorize it.
Once you clicked the «Allow» button, you will see a success message in the browser. Just close the browser window and go back to the Terminal.
The verification code is automatically copied to your Terminal. If this is OK to you, simply type «y» and press ENTER to continue creating the remote:
Done! A remote named «mygoogledrive» has just been created.
If you wish to create a new one, click «n» and follow the same procedure given above. Or else, quit the rclone config wizard by pressing «q» .
You can view the list of configured remotes at any time by using the following command:
1.3. Mount Google Drive Locally As Virtual File System Using Rclone
Create a mount point to mount your google drive files:
Then, mount the Google drive using command:
You can mount a specific directory/file from the google drive like below.
To unmount, simply press «CTRL+c» to stop the mount.
In my case, I mounted my Google drive in a mount point directory named «
/drive» . Replace remote name (i.e mygoogledrive ) and mount point name (i.e
/drive ) with your own values.
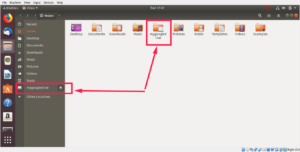
Open your file manager and you will see the drive folder in the left side. Click on it to access your Google drive.
From now on, you can create, copy, move, rename and delete files/folders as the way you do in your local file system. Anything you put in the local mount folder (i.e.
/drive folder) will be uploaded to your Google drive.
You can also list and copy files/directories from command line like below.
To view all files in your Google drive, run:
Replace «mygoogledrive» using your own remote name.
To list all directories in the top level, run:
Copy a directory from your local system, say «/home/sk/senthil» , to your Google drive directory called «ostechnix», use this command:
Rclone has many other command line options, but this is not the scope this guide. We will cover them in a separate guide later.
The umount operation may fail, for example when the mount point is busy. When that happens, you can stop the mount manually using command:
If you’re not happy with Rclone, you can try the following tools which are specifically designed for Google drive only.
Please note that these following tools won’t help you to mount other cloud storages, for example Dropbox, in your local system.
2. Google-drive-ocamlfuse
The google-drive-ocamlfuse is a FUSE filesystem for Google Drive, written in OCaml.
For those wondering, FUSE, stands for Filesystem in Userspace, is a project that allows the users to create virtual file systems in user level.
google-drive-ocamlfuse allows you to mount your Google Drive on Linux system.
It features read/write access to ordinary files and folders, read-only access to Google docks, sheets, and slides, support for multiple google drive accounts, duplicate file handling, access to your drive trash directory, and more.
2.1. Install google-drive-ocamlfuse in Linux
The google-drive-ocamlfuse is available in the AUR, so you can install it using any AUR helper programs, for example Paru or Yay.
To install latest beta version, do:
2.2. Mount Google Drive Locally As Virtual File System Using google-drive-ocamlfuse
Once installed, run the following command to launch google-drive-ocamlfuse utility from your Terminal:
When you run this first time, the utility will open your web browser and ask your permission to authorize your google drive.
Once you gave authorization, all necessary config files and folders it needs to mount your google drive will be automatically created.
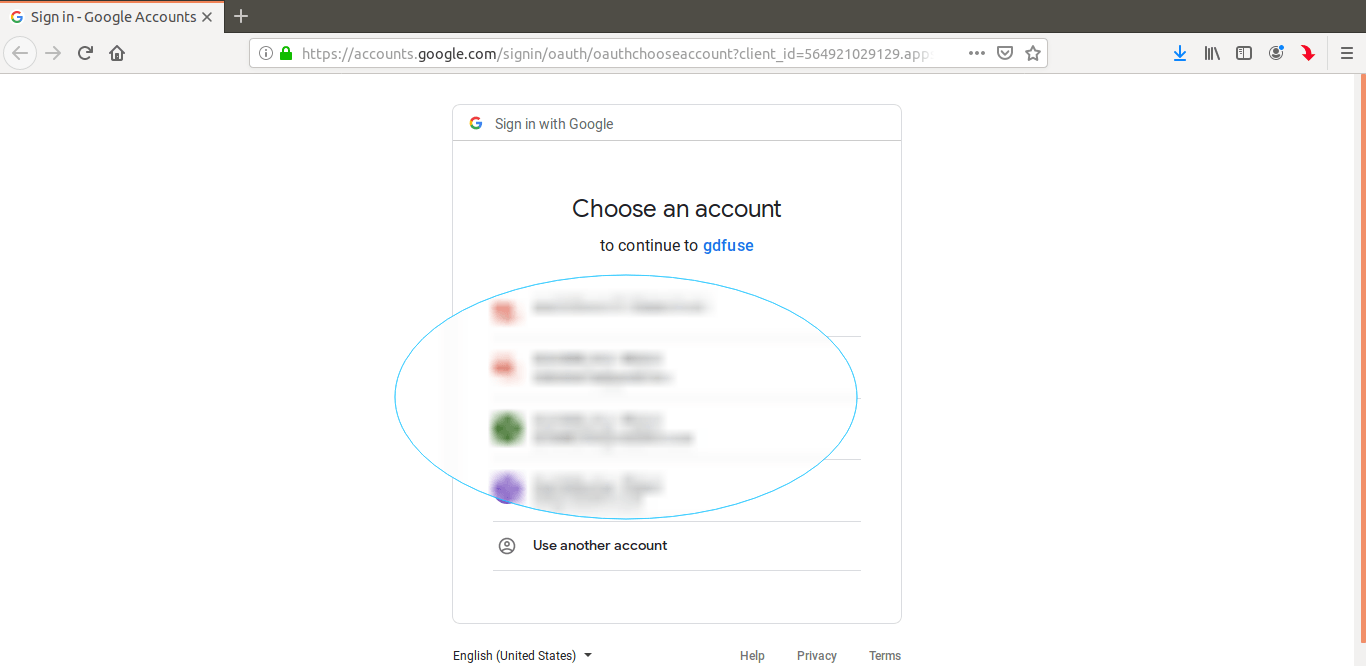
Authorize google drive
After successful authentication, you will see the following message in your Terminal.
You’re good to go now. Close the web browser and then create a mount point to mount your google drive files.
Finally, mount your google drive using command:
Congratulations! You can access access your files either from Terminal or file manager.
From Terminal:
From File manager:
If you have more than one account, use label option to distinguish different accounts like below.
Once you’re done, unmount the FUSE flesystem using command:
For more details, refer man pages.
3. GCSF
GCSF is a FUSE filesystem based on Google Drive, written using Rust programming language.
Using GCSF, you can mount your Google drive as a local virtual file system and access the contents from the Terminal or file manager.
You might wonder how it differ from other Google Drive FUSE projects, for example google-drive-ocamlfuse.
The developer of GCSF replied to a similar comment on Reddit » GCSF tends to be faster in several cases (listing files recursively, reading large files from Drive).
The caching strategy it uses also leads to very fast reads (x4-7 improvement compared to google-drive-ocamlfuse) for files that have been cached, at the cost of using more RAM «.
The name GCSF has come from the Romanian word «Google Conduce Sistem de Fișiere», which means «Google Drive Filesystem» in English.
3.1. Install GCSF in Linux
GCSF is available in the AUR, so the Arch Linux users can install it using any AUR helper, for example Paru or Yay.
On other Linux distributions, you can install GCSF using cargo package manager..
Make sure you have installed Rust on your system.
Make sure pkg-config and the fuse packages are installed. They are available in the default repositories of most Linux distributions.
For example, on Ubuntu and derivatives, you can install them using command:
Once all dependencies installed, run the following command to install GCSF:
3.2. Mount Google Drive Locally As Virtual File System Using GCSF
First, we need to authorize our google drive. To do so, simply run:
You must specify a session name. Replace ostechnix with your own session name. You will see an output something like below with an URL to authorize your google drive account.
Just copy and navigate to the above URL from your browser and click allow to give permission to access your google drive contents. Once you gave the authentication you will see an output like below.
GCSF will create a configuration file in $XDG_CONFIG_HOME/gcsf/gcsf.toml , which is usually defined as $HOME/.config/gcsf/gcsf.toml . Credentials are stored in the same directory.
Next, create a directory to mount your google drive contents.
Then, edit /etc/fuse.conf file:
Uncomment the following line to allow non-root users to specify the allow_other or allow_root mount options.
Save and close the file.
Finally, mount your google drive using command:
Sample output:
Again, replace ostechnix with your session name. You can view the existing sessions using command:
You can now access your google drive contents either from the Terminal or from File manager.
From Terminal:
From File manager:
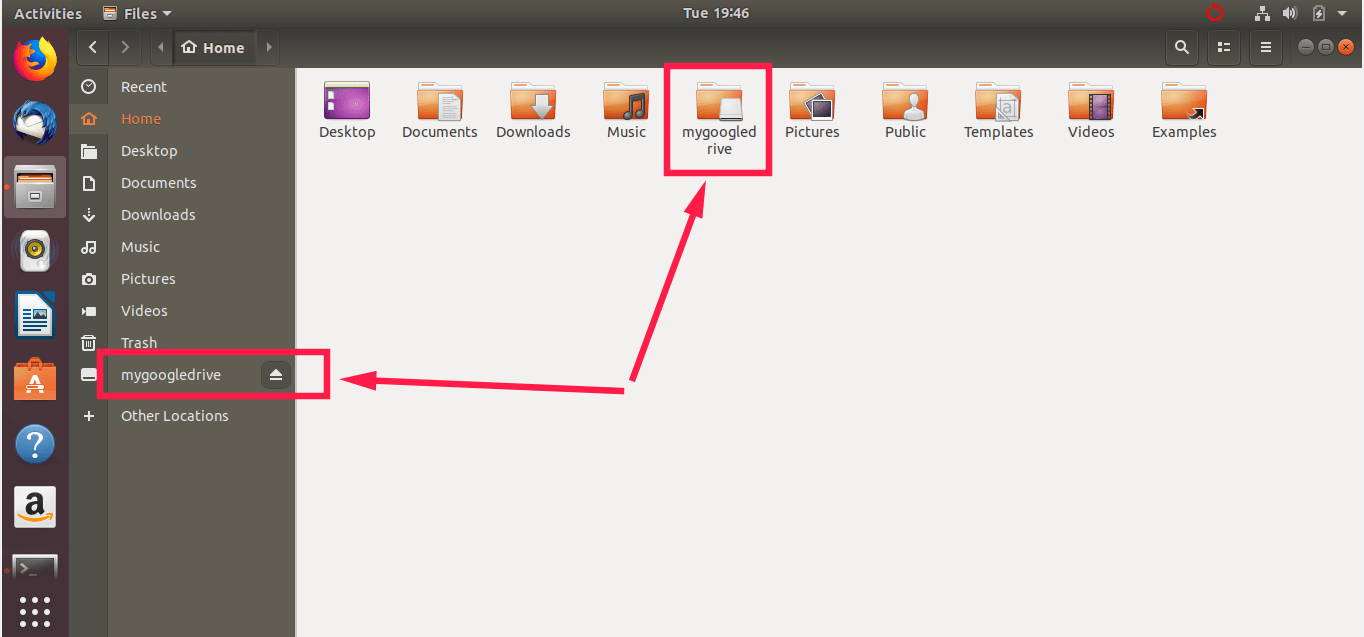
Mount Google Drive Locally As Virtual File System Using GCSF
If you don’t know where your Google drive is mounted, use df or mount command as shown below.
Once done, unmount the google drive using command:
4. Tuxdrive
Tuxdrive is yet another unofficial google drive client for Linux. We have written a detailed guide about Tuxdrive a while ago. Please check the following link.
Conclusion
In this guide, we have discussed about four unofficial Google drive client applications to mount Google drive locally as a virtual file system and access the Google drive contents from the file manager in Linux system.
Of course, there were few other unofficial google drive clients available in the past, such as Grive2, Syncdrive. But it seems that they are discontinued now. I will keep updating this list when I come across any active google drive clients.
Источник


