- How to Search Google from Linux Terminal
- Search Google from Linux Terminal Using Googler
- Install Googler on Ubuntu/Debian
- Googler Options
- Conclusion
- Googler: A Command Line Tool to Do ‘Google Search’ from Linux Terminal
- How Does Googler Works?
- Features of Googler
- How To Install Googler in Linux
- How to Use Googler in Linux Terminal
- If You Appreciate What We Do Here On TecMint, You Should Consider:
- Установка Google Chrome в Linux
- Устанавливаем Google Chrome в Linux
- Способ 1: Установка пакета с официального сайта
- Способ 2: Терминал
How to Search Google from Linux Terminal
Everyone knows how to google from a web browser, but an ambitious computer geek loves to shine in his or her terminal. Believes that you are on your server without a graphic environment and you need to verify an error message which appears.
In this tutorial, we learn how to search google from the Linux terminal.
Search Google from Linux Terminal Using Googler
The googler is a power tool to Google (Web & News) and Google Site Search from the command-line. It shows the title, URL, and abstract for each result, which can be directly opened in a browser from the terminal. Results are fetched in pages (with page navigation). Supports sequential searches in a single googler instance.
googler is developed using Python and can be found on its developer’s GitHub repository which isn’t affiliated to Google in any way. It was initially written to cater to headless servers without X. You can integrate it with a text-based browser. However, it has grown into a very handy and flexible utility that delivers much more.
Install Googler on Ubuntu/Debian
First Download .deb file from the release page of googler for your respective Ubuntu version. Here I am downloading googler on Ubuntu 20.04.
Now Install Googler using the following command:
Now that it’s installed, you can verify the version
You can search a website on google from your terminal

You can use p and n command to fetch the previous or next page. If you open your browser and go to google to view the result, you will have exactly the same thing.
You can do particular research on a website. You will indicate words. It is also possible to define the limit of the result to display.

it is possible to filter the result only for the last days or months.

Googler Options
Conclusion
In this tutorial, we learned how to search google from the Linux terminal. Please let us know your search experience from the command line.
Источник
Googler: A Command Line Tool to Do ‘Google Search’ from Linux Terminal
Today, Google search is a well known and the most-used search engine on the World Wide Web (WWW), if you want to gather information from millions of servers on the Internet, then it is the number one and most reliable tool for that purpose plus much more.
Many people around the world mainly use Google search via a graphical web browser interface. However, command line geeks who are always glued to the terminal for their day-to-day system related tasks, face difficulties in accessing Google search from command-line, this is where Googler comes in handy.
Googler is a powerful, feature-rich and Python-based command line tool for accessing Google (Web & News) and Google Site Search within the Linux terminal.
Note: Googler is not in any way associated to Google.
How Does Googler Works?
It provides an interface from the command line to Google search and displays results inform of title, URL and abstract information in pages, with page navigation similar to that on a GUI web browser.
Watch the quick demo of Googler.
![]()
Users can integrate it with a text-based web browser and open the result directly in the web browser.
It supports sequential searches in a single instance and importantly, users do not need to master any usage options as the shell completion scripts automatically invokes them.
Features of Googler
- Offers access to Google Search, Google Site Search, Google News.
- It is fast and clean with custom colors and no ads, stray URLs or clutter included.
- Allows navigation of search result pages from omniprompt.
- Supports fetching of number of results in a go, users can start at the nth result.
- Users can disable automatic spelling correction and search exact keywords.
- Supports limiting of search by attributes such as duration, country/domain specific search (default: .com), language preference.
- Supports Google search keywords in the form filetype:mime, site:somesite.com and many others.
- Permits non-stop searches: start new searches at omniprompt without exiting.
- Supports HTTPS proxy services.
- Ships in with a man page which includes examples, shell completion scripts for Bash, Zsh and Fish.
- Users can optionally open first search result in a web browser.
How To Install Googler in Linux
Users of Ubuntu Linux and its derivatives such as Linux Mint, Xubuntu can install it via this PPA by executing the commands below:
Important: If in case above installation instructions fails to install Googler, then you need to install it from source using latest version as shown.
Other distributions can install Googler from source using following instructions.
First download the latest version of Googler (at the time writing the latest version is v2.9).
How to Use Googler in Linux Terminal
The following are some examples showing how Googler works in Linux, the basic command below will show information about tecmint.com :
![]() Search Google from Linux Commandline
Search Google from Linux Commandline
At the end of the search result page, you can view the omniprompt help page by entering the “?” character and pressing Enter. Each key has a detailed functionality description alongside it.
![]() Google Search Options
Google Search Options
In the example, we will search for the quoted words (Linux command line tricks) on tecmint.com .
where the options:
- -n num – tells googler to display at most 8 results per a page (default is 10).
- -w – enables Google site(tecmint.com) search.
![]() Google Site Search Results
Google Site Search Results
You can as well display results of latest news concerning Linux from the Google search news section by using the -N switch as follows:
![]() Search Linux News from Commandline
Search Linux News from Commandline
Set an alias to get four results showing the meaning of a word (tecmint in this case) like so:
![]() Google Search for Keyword
Google Search for Keyword
Visit the Googler Github repository for more information and usage or view the Googler man page.
Googler is a handy tool, it works perfectly and reliably for Linux users who spend most of their time on the terminal and want to search the web from a text-based interface. Remember to share your thoughts about Googler in the comments.
If You Appreciate What We Do Here On TecMint, You Should Consider:
TecMint is the fastest growing and most trusted community site for any kind of Linux Articles, Guides and Books on the web. Millions of people visit TecMint! to search or browse the thousands of published articles available FREELY to all.
If you like what you are reading, please consider buying us a coffee ( or 2 ) as a token of appreciation.

We are thankful for your never ending support.
Источник
Установка Google Chrome в Linux

Одним из самых популярных браузеров в мире считается Google Chrome. Далеко не все пользователи довольны его работой из-за большого потребления системных ресурсов и не для всех удобной системой управления вкладками. Однако сегодня мы бы не хотели обсуждать достоинства и недостатки этого веб-обозревателя, а поговорим о процедуре его инсталляции в операционные системы на базе ядра Linux. Как известно, выполнение этой задачи значительно отличается от той же платформы Windows, поэтому и требует детального рассмотрения.
Устанавливаем Google Chrome в Linux
Далее мы предлагаем ознакомиться с двумя различными методами установки рассматриваемого браузера. Каждый будет наиболее подходящим в определенной ситуации, поскольку у вас имеется возможность выбрать сборку и версию самостоятельно, а потом уже добавлять все компоненты в саму ОС. Практически на всех дистрибутивах Линукс этот процесс осуществляется одинаково, разве что в одном из способов придется выбрать совместимый формат пакета, из-за чего мы предлагаем вам руководство, основанное на последней версии Ubuntu.
Способ 1: Установка пакета с официального сайта
На официальном сайте Google для скачивания доступны специальные версии браузера, написанные под дистрибутивы Linux. Вам нужно только загрузить пакет на компьютер и провести дальнейшую инсталляцию. Пошагово эта задача выглядит так:
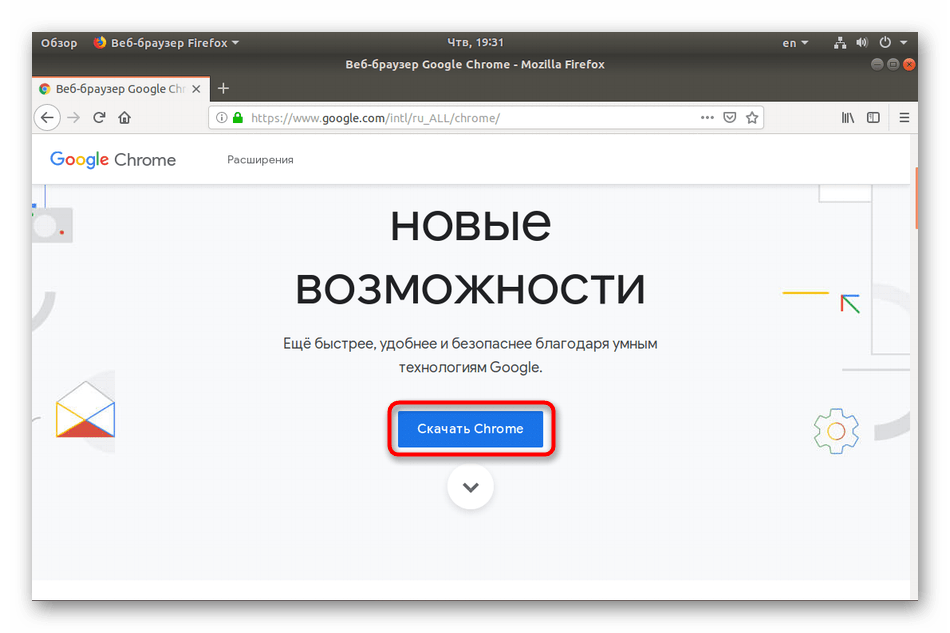
- Перейдите по указанной выше ссылке на страницу загрузки Google Chrome и нажмите на кнопку «Скачать Chrome».
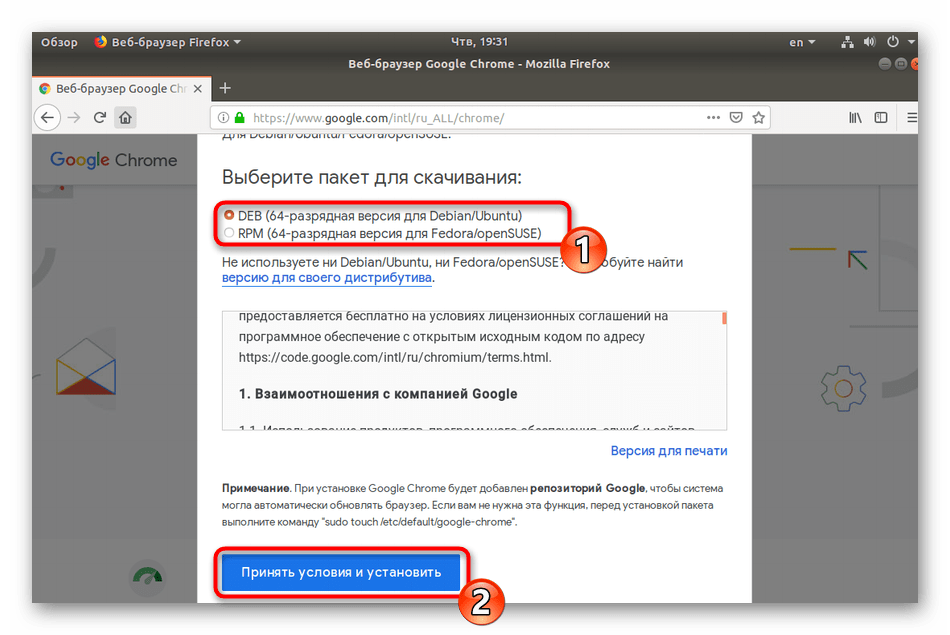
Выберите формат пакета для загрузки. В скобках указаны подходящие версии операционных систем, поэтому с этим сложностей возникнуть не должно. После этого щелкните на «Принять условия и установить».
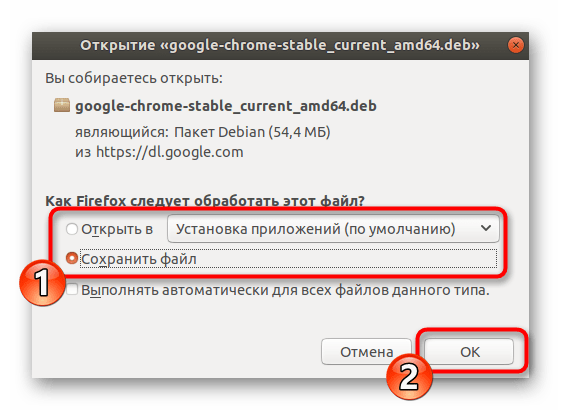
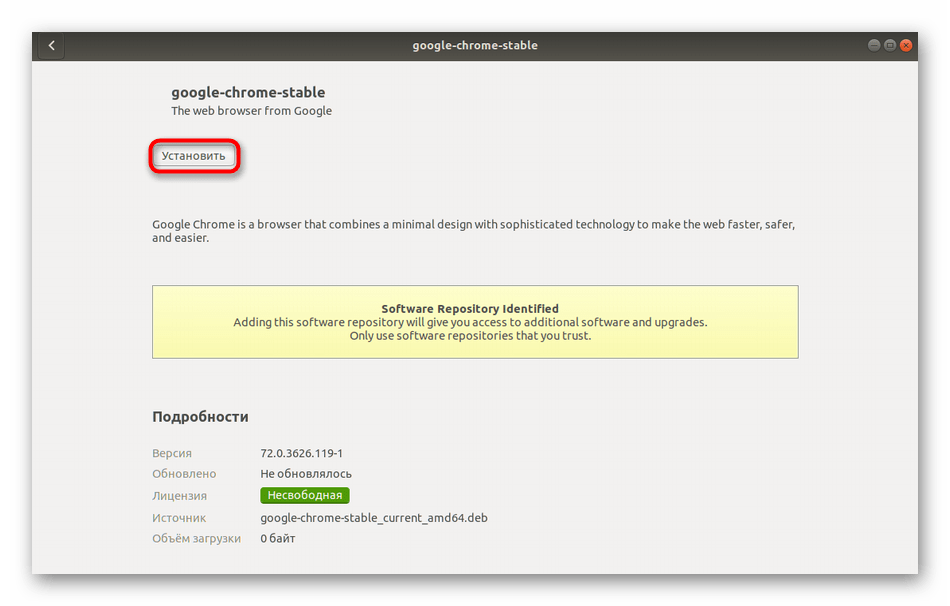
Теперь вы можете запустить скачанный DEB или RPM-пакет через стандартное средство ОС и кликнуть на кнопку «Установить». По завершении инсталляции запускайте браузер и приступайте к работе с ним.
Детально ознакомиться с методами установки DEB или RPM-пакетов вы можете в других наших статьях, перейдя по указанным ниже ссылкам.
Подробнее: Установка RPM-пакетов / DEB-пакетов в Ubuntu
Способ 2: Терминал
Не всегда у пользователя имеется доступ к браузеру или получается найти подходящий пакет. В таком случае на помощь приходит стандартная консоль, через которую можно загрузить и установить любое приложение на свой дистрибутив, включая рассматриваемый веб-обозреватель.
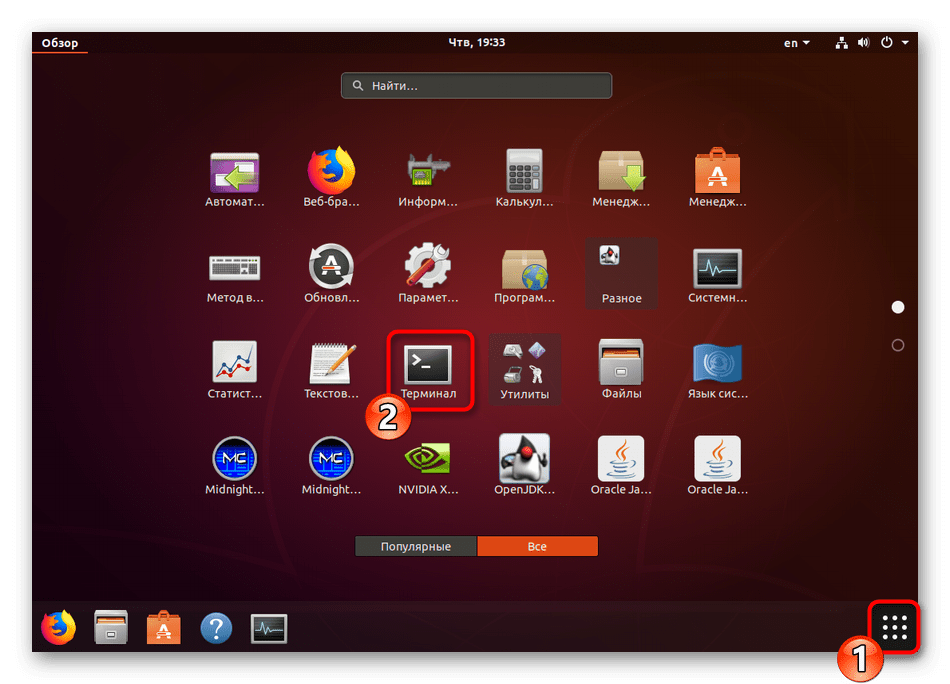
- Для начала запустите «Терминал» любым удобным образом.
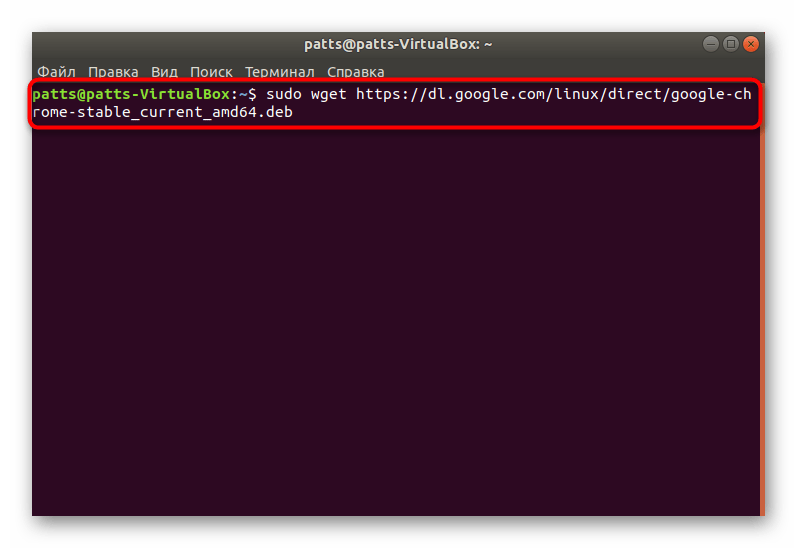
Загрузите пакет нужного формата из официального сайта, задействовав команду sudo wget https://dl.google.com/linux/direct/google-chrome-stable_current_amd64.deb , где .deb, может меняться на .rpm , соответственно.
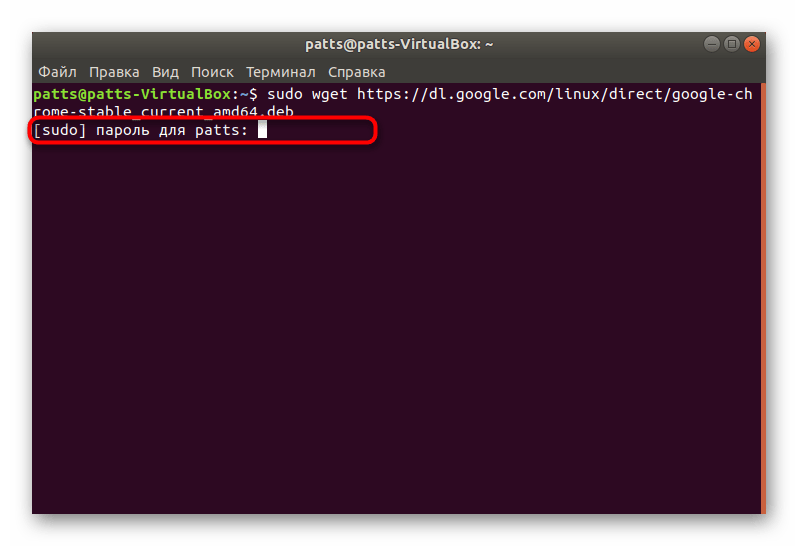
Введите пароль от своей учетной записи для активации прав суперпользователя. Символы при наборе никогда не отображаются, обязательно учитывайте это.
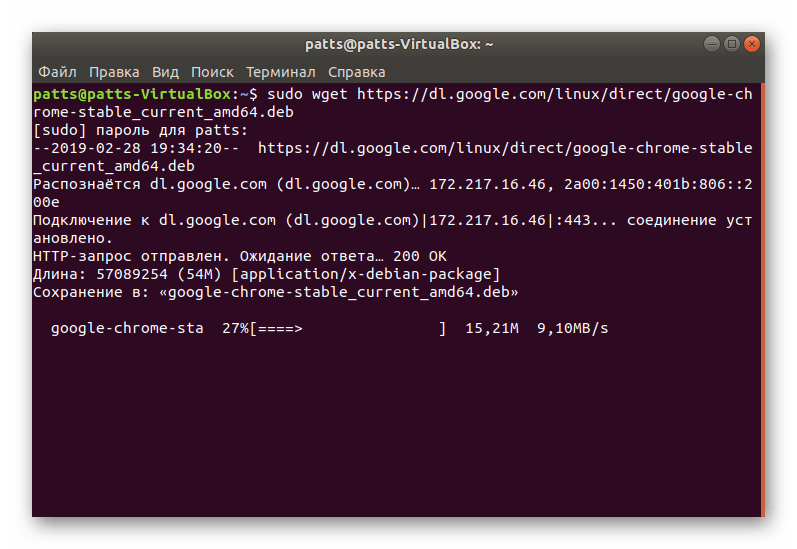
Ожидайте завершения загрузки всех необходимых файлов.
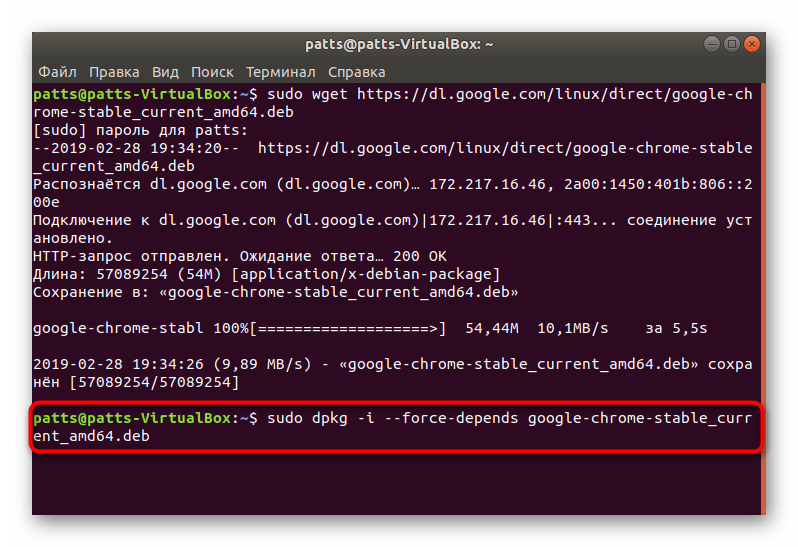
Установите пакет в систему с помощью команды sudo dpkg -i —force-depends google-chrome-stable_current_amd64.deb .
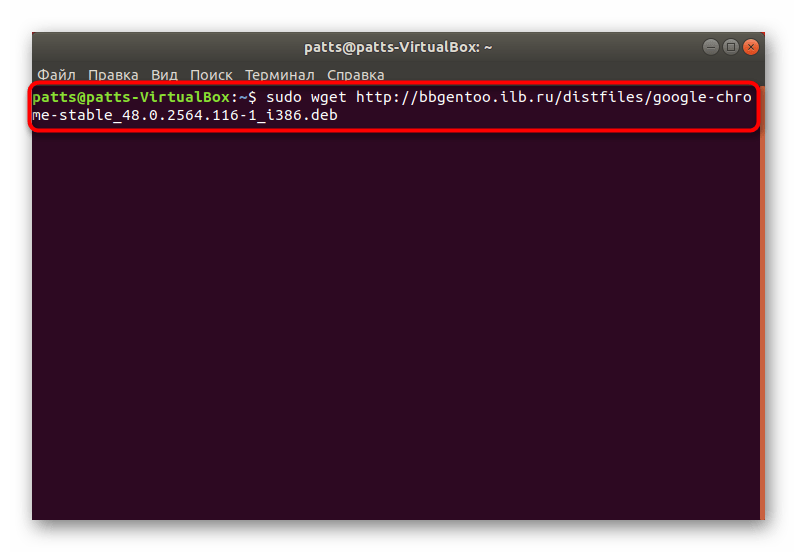
Вы могли заметить, что в ссылке содержится только приставка amd64, а это значит, что скачиваемые версии совместимы только с 64-разрядными операционными системами. Такая ситуация сложилась из-за того, что Google перестали выпускать 32-битные версии после сборки 48.0.2564. Если вы хотите получить именно ее, нужно будет проводить немного другие действия:
- Потребуется загрузить все файлы из пользовательского репозитория, а делается это через команду wget http://bbgentoo.ilb.ru/distfiles/google-chrome-stable_48.0.2564.116-1_i386.deb .
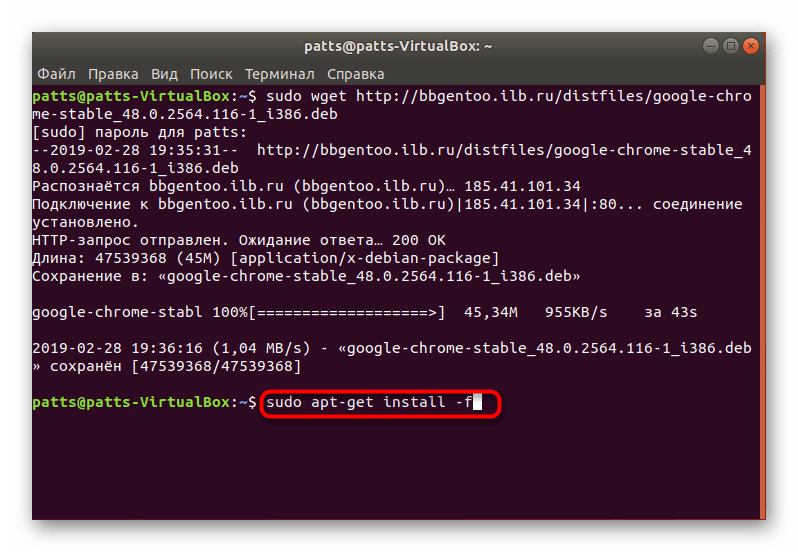
При получении ошибки о неудовлетворении зависимостей пропишите команду sudo apt-get install -f и все будет работать нормально.
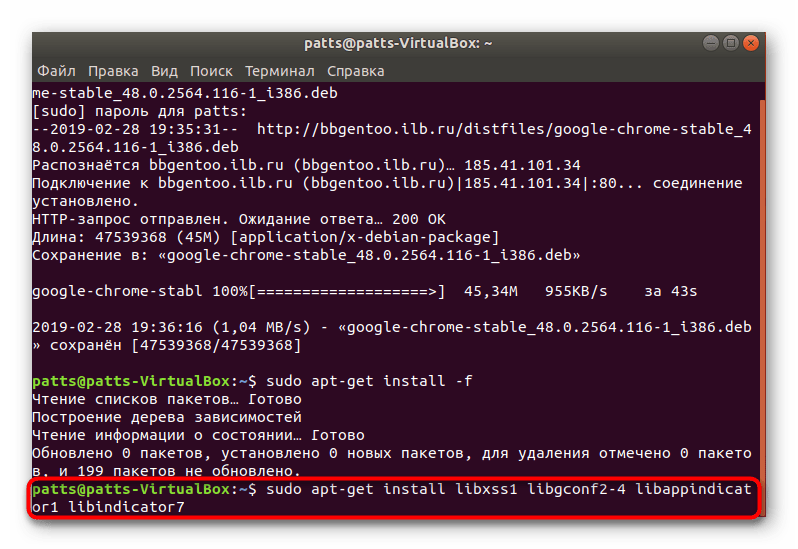
Альтернативный вариант — вручную проставьте зависимости через sudo apt-get install libxss1 libgconf2-4 libappindicator1 libindicator7 .
После этого подтвердите добавление новых файлов, выбрав соответствующий вариант ответа.

Запускается браузер с помощью команды google-chrome .

Откроется стартовая страница, с которой начинается взаимодействие с веб-обозревателем.

Инсталляция разных версий Chrome
Отдельно бы хотелось выделить возможность установки разных версий Google Chrome рядом или выбора стабильной, бета или сборки для разработчика. Все действия все так же выполняются через «Терминал».
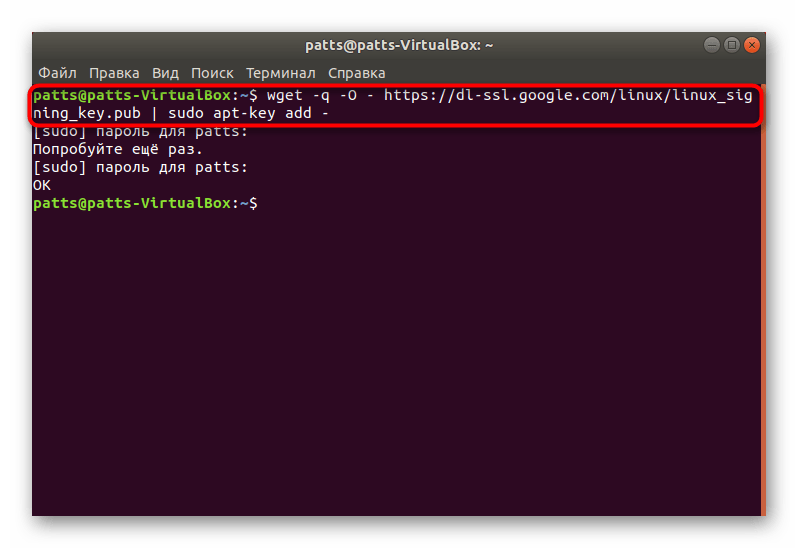
- Загрузите специальные ключи для библиотек, введя wget -q -O — https://dl-ssl.google.com/linux/linux_signing_key.pub | sudo apt-key add — .
Далее скачайте необходимые файлы с официального сайта — sudo sh -c ‘echo «deb [arch=amd64] http://dl.google.com/linux/chrome/deb/ stable main» >> /etc/apt/sources.list.d/google-chrome.list’ .

Обновите системные библиотеки — sudo apt-get update .

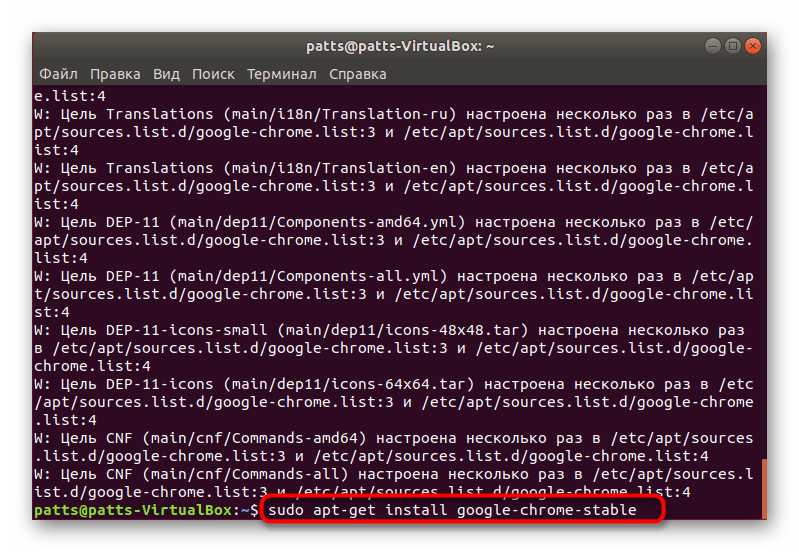
Запустите процесс установки необходимой версии — sudo apt-get install google-chrome-stable , где google-chrome-stable может быть заменено на google-chrome-beta или google-chrome-unstable .
В Гугл Хром уже встроена свежая версия Adobe Flash Player, но не у всех пользователей Linux она работает корректно. Мы предлагаем вам ознакомиться с другой статьей на нашем сайте, где вы найдете детальное руководство по добавлению плагина в саму систему и браузер.
Как видите, приведенные выше способы разные и позволяют выполнить установку Google Chrome в Linux, основываясь на своих предпочтениях и возможностях дистрибутива. Мы настоятельно советуем ознакомиться с каждым вариантом, а потом уже выбрать наиболее подходящий для себя и следовать инструкциям.
Помимо этой статьи, на сайте еще 12315 инструкций.
Добавьте сайт Lumpics.ru в закладки (CTRL+D) и мы точно еще пригодимся вам.
Отблагодарите автора, поделитесь статьей в социальных сетях.
Источник


