Google maps + 1С с поиском адресов v 2.0
По мотивам действующих здесь публикаций на данную тему вывешиваю результат, отражающий карту и позволяющий ставить метки по адресам из таблицы
Код открытый.
V 2.0 добавлено:
Дополненный и улучшенный код поля HTML объекта 1С.
Данный код может использоваться для замены кода поля HTML документа обработки текущей публикации.
Google maps на управляемых формах. Позволяет отмечать на карте список адресов. Код открытый. Для любых конфигурация.
Особенностью данного кода является формирование массива адресов в момент события поля HTML «ДокументСформирован» посредством выполнения команды:
//Формирвоание массива объектов для добавления меток на карту
// AdressName — наименование адресного объекта
// TextHTML — HTML-описание объекта
// IconID — номер картинки метки
function putMarkerFromMassivStruktur(AdressName, TextHTML, IconID) <
var ObjAdress = <
AdressName: AdressName,
TextHTML: TextHTML,
IconID: IconID
>;
adressObjectsArray.push(ObjAdress);
>
Отображение массива меток можно запустить командой:
//Вывод массива адресных объектов
function showAdressObjects() <
for (var i = 0; i
Здесь код «window.setTimeout(» выполняет запрос к API Google Maps с временной задержкой ( i * 1000) млСек. Это позволяет отобразить больше меток адресов при помощи бесплатного ключа. В некоторых случаях (при наличии платного ключа или отсутствия встроенной функции временной задержки в браузере или малого числа точек) рекомендуется заменить данную функцию на аналог без задержки:
//Вывод массива адресных объектов
function showAdressObjects() <
for (var i = 0; i
Также можно вывести отражение массива точек посредством команды, отображаемой в поле HTML документа. Для этого стоит дополнить тело HTML документа новой командой в группе команд «panel_findAdress». Например, так:
Приятным дополнением является возможность отображения при клике на метке описания метки, поддерживающего формат HTML:
//Добавления описания HTML к метке
// marker — объект, представляющий собой метку
// TextHTML — HTML-описание метки
function bindInfoWindow(marker, TextHTML) <
if (map != null) <
var infoWindow = new google.maps.InfoWindow;
google.maps.event.addListener(marker, ‘click’, function () <
infoWindow.setContent(TextHTML);
infoWindow.open(map, marker);
>);
> else alert(‘Карта не инициализирована’);
>
Код снабжен примерами дополнительного пользовательского интерактива: включение динамического движения установленных маркеров (LetsRock_StopRock()) и выбора картинки метки при установке на карту (getImageAdress(IconID))
Дополнительно были устранены ошибки установки новых маркеров — при постановке нового маркера, уже установленные на карту метки теперь очищаются. Для этого в коде HTML используется массив для хранения установленных меток «markersArray». При установке нового маркера происходит очистка уже установленных маркеров из указанного массива а также очистка массива:
//Удаление все установленных меток на карте и чистка массива маркеров
function clearMarkerOnMap() <
if (markersArray) <
for (i in markersArray) <
markersArray[i].setMap(null);
>
markersArray.length = 0;
>
>
Отказ от использования данной функции позволит добавлять метки на карту без очистки ранее установленных меток с карты.
Полный текст поля HTML документа можно скачать за стартмани или скопировать ниже безвозмездно:
Info Windows
Introduction
An InfoWindow displays content (usually text or images) in a popup window above the map, at a given location. The info window has a content area and a tapered stem. The tip of the stem is attached to a specified location on the map.
Typically you will attach an info window to a marker, but you can also attach an info window to a specific latitude/longitude, as described in the section on adding an info window below.
Broadly speaking, info windows are a type of overlay. For information on other types of overlay, see Drawing on the map.
Add an info window
The InfoWindow constructor takes an InfoWindowOptions object literal, which specifies the initial parameters for displaying the info window.
The InfoWindowOptions object literal contains the following fields:
- content contains either a string of text or a DOM node to display in the info window.
- pixelOffset contains an offset from the tip of the info window to the location on which the info window is anchored. In practice, you should not need to specify this field. You can leave it at the default value.
- position contains the LatLng at which this info window is anchored. Note: An InfoWindow may be attached either to a Marker object (in which case its position is based on the marker’s location) or on the map itself at a specified LatLng . One way of retrieving a LatLng is by using the Geocoding service. Opening an info window on a marker will automatically update the position .
- maxWidth specifies the maximum width of the info window in pixels. By default, an info window expands to fit its content, and auto-wraps text if the info window fills the map. If you add a maxWidth the info window will auto-wrap to enforce the specified width. If it reaches the maximum width and there is vertical room on the screen, the info window may expand vertically.
The content of the InfoWindow may contain a string of text, a snippet of HTML, or a DOM element. To set the content, either specify it within the InfoWindowOptions or call setContent() on the InfoWindow explicitly.
If you wish to explicitly size the content, you can put it in a
Open an info window
When you create an info window, it is not displayed automatically on the map. To make the info window visible, you need to call the open() method on the InfoWindow , passing it the Map on which to open, and optionally, the Marker with which to anchor it. If no marker is provided, the info window will open at its position property.
TypeScript
JavaScript
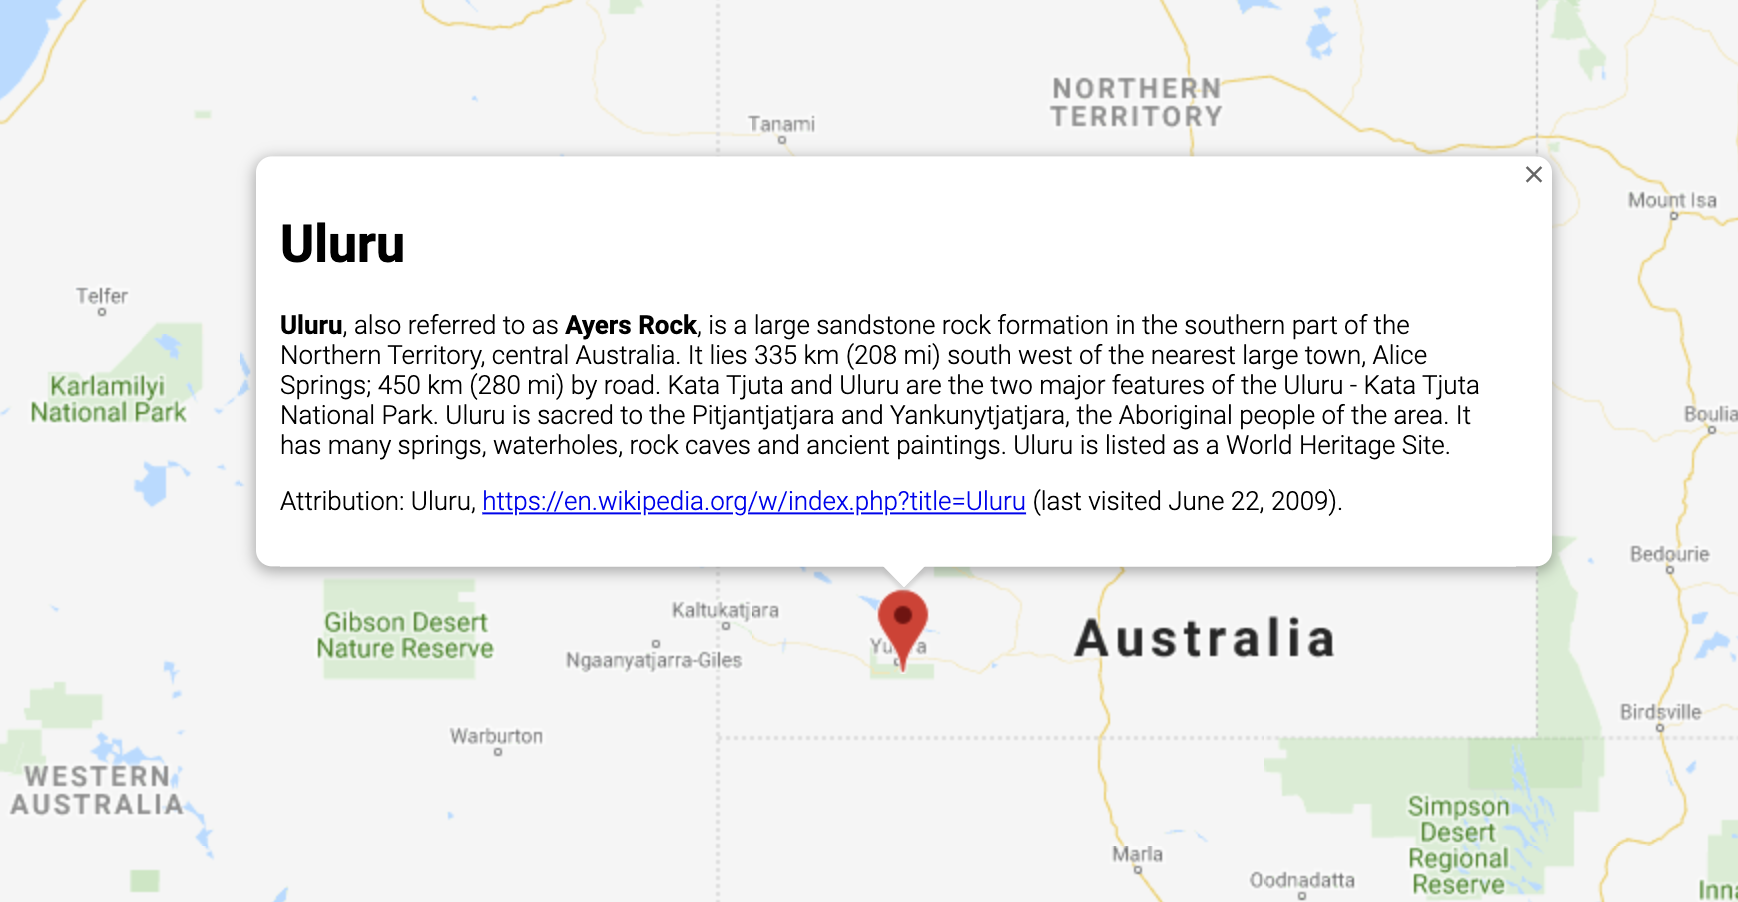
Uluru
Uluru, also referred to as Ayers Rock, is a large » + «sandstone rock formation in the southern part of the » + «Northern Territory, central Australia. It lies 335 km (208 mi) » + «south west of the nearest large town, Alice Springs; 450 km » + «(280 mi) by road. Kata Tjuta and Uluru are the two major » + «features of the Uluru — Kata Tjuta National Park. Uluru is » + «sacred to the Pitjantjatjara and Yankunytjatjara, the » + «Aboriginal people of the area. It has many springs, waterholes, » + «rock caves and ancient paintings. Uluru is listed as a World » + «Heritage Site.
Google maps open info window by default?
The following example shows a simple Marker (standard icon) on Google maps for the location and when clicking the icon, it opens the info window. Can I show the info window open by default so that I don’t need to click the icon to open?
4 Answers 4
If you want to show the info window opened by default without click, just add a new code like bellow:
So we have a new code like this:
As you can see, we just add a little line code with infowindow.open(map,marker);
You can run «open» directly on page load should open the window automatically, without a click.
However, this might not autopan the map properly in some cases, leaving the top of the overlay off the edge of the map.
A way that worked for me is to wrap it in a listener to the «tilesloaded» event on the map
The code above works perfectly. However, the my map didnt shift around so that the infowindow was being fully shown. Instead, the pushpin stayed in the middle.
So how do you make the map adjust itself so the info window is fully viewable? Read this: Google Maps : auto center map on marker click
If you want the pushpin to stay where it is and not shift the map, read this: Google Maps: How to prevent InfoWindow from shifting the map
Hope that helps people take the next step
Below Code Is working fine for me:
Change latitude, longitude, Content and mapid (with your custom div id):
Custom Google Maps Info Windows
Building off of our last tutorial where we added custom markers to the map: https://serversideup.net/custom-markers-google-map/, the next step is to add an info window to these markers when clicked. This should be a pretty quick tutorial since we will just be binding an info window to a marker on click.
Step 1: Open CafeMap.vue
The /resources/assets/js/components/cafes/CafeMap.vue is where all of our map logic will be located. In the buildMarkers() method, we create all of the markers. Well we need to bind the info windows to the marker, so this is where our coding will take place.
First, we will need to add an infoWindows array to the data for the CafeMap.vue component. We will store all of our info windows in that array so we can call methods on those when needed. Our data should now look like:
Next, navigate to the buildMarkers() method in the for loop. In there, find the marker declaration. Below that, we will add the following code:
What this does is declare an info window object that declares the name of the cafe. If you look at the Google Docs: Info Windows | Google Maps JavaScript API | Google Developers for info windows, you can add HTML mark up and really customize the look and feel of the info window. We will be doing this in a style update update, but for now, we are just getting an info window to display.
Now, we just need to bind a click to the marker to open the info window. To do that, right below the last code added add:
What this does is when the user clicks on the marker, it opens the info window on the map, above this which is referencing the marker.
When you click on one of the markers on the map, you should see an info window with the name of the cafe it represents like below:
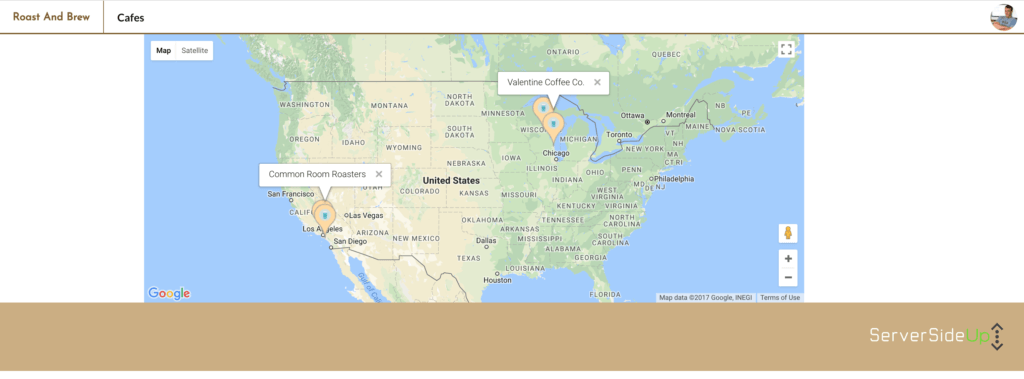
Conclusion
To add an info window is pretty simple, making them look good isn’t hard either since we will be using HTML. The next part of the tutorial, we will be doing a design overhaul and any tweaks I’ll document in that tutorial. For now, enjoy the Google Maps Info Windows on your map and make sure to check out the code here: GitHub – serversideup/roastandbrew
Styling Google Maps InfoWindow
I’ve been attempting to style my Google Maps InfoWindow , but the documentation is very limited on this topic. How do you style an InfoWindow ?

7 Answers 7
Google wrote some code to assist with this. Here are some examples: Example using InfoBubble, Styled markers and Info Window Custom (using OverlayView).
The code in the links above take different routes to achieve similar results. The gist of it is that it is not easy to style InfoWindows directly, and it might be easier to use the additional InfoBubble class instead of InfoWindow, or to override GOverlay. Another option would be to modify the elements of the InfoWindow using javascript (or jQuery), like later ATOzTOA suggested.
Possibly the simplest of these examples is using InfoBubble instead of InfoWindow. InfoBubble is available by importing this file (which you should host yourself): http://google-maps-utility-library-v3.googlecode.com/svn/trunk/infobubble/src/infobubble.js
InfoBubble is very stylable, compared to InfoWindow:
You can also call it with a given map and marker to open on:
As another example, the Info Window Custom example extends the GOverlay class from the Google Maps API and uses this as a base for creating a more flexible info window. It first creates the class:
after which it proceeds to override GOverlay:
You should then override the methods you need: createElement , draw , remove and panMap . It gets rather involved, but in theory you are just drawing a div on the map yourself now, instead of using a normal Info Window.


