- Downloads
- Download Links
- GParted Live on USB
- USB setup with Windows
- Windows Method A: Unetbootin
- Windows Method B: Manual
- Windows Method C: LinuxLive USB Creator
- Windows Method D: Tuxboot
- USB setup with GNU/Linux
- GNU/Linux Method A: Unetbootin
- GNU/Linux Method B: Manual
- GNU/Linux Method C: Manual — Overwrite
- GNU/Linux Method D: Tuxboot
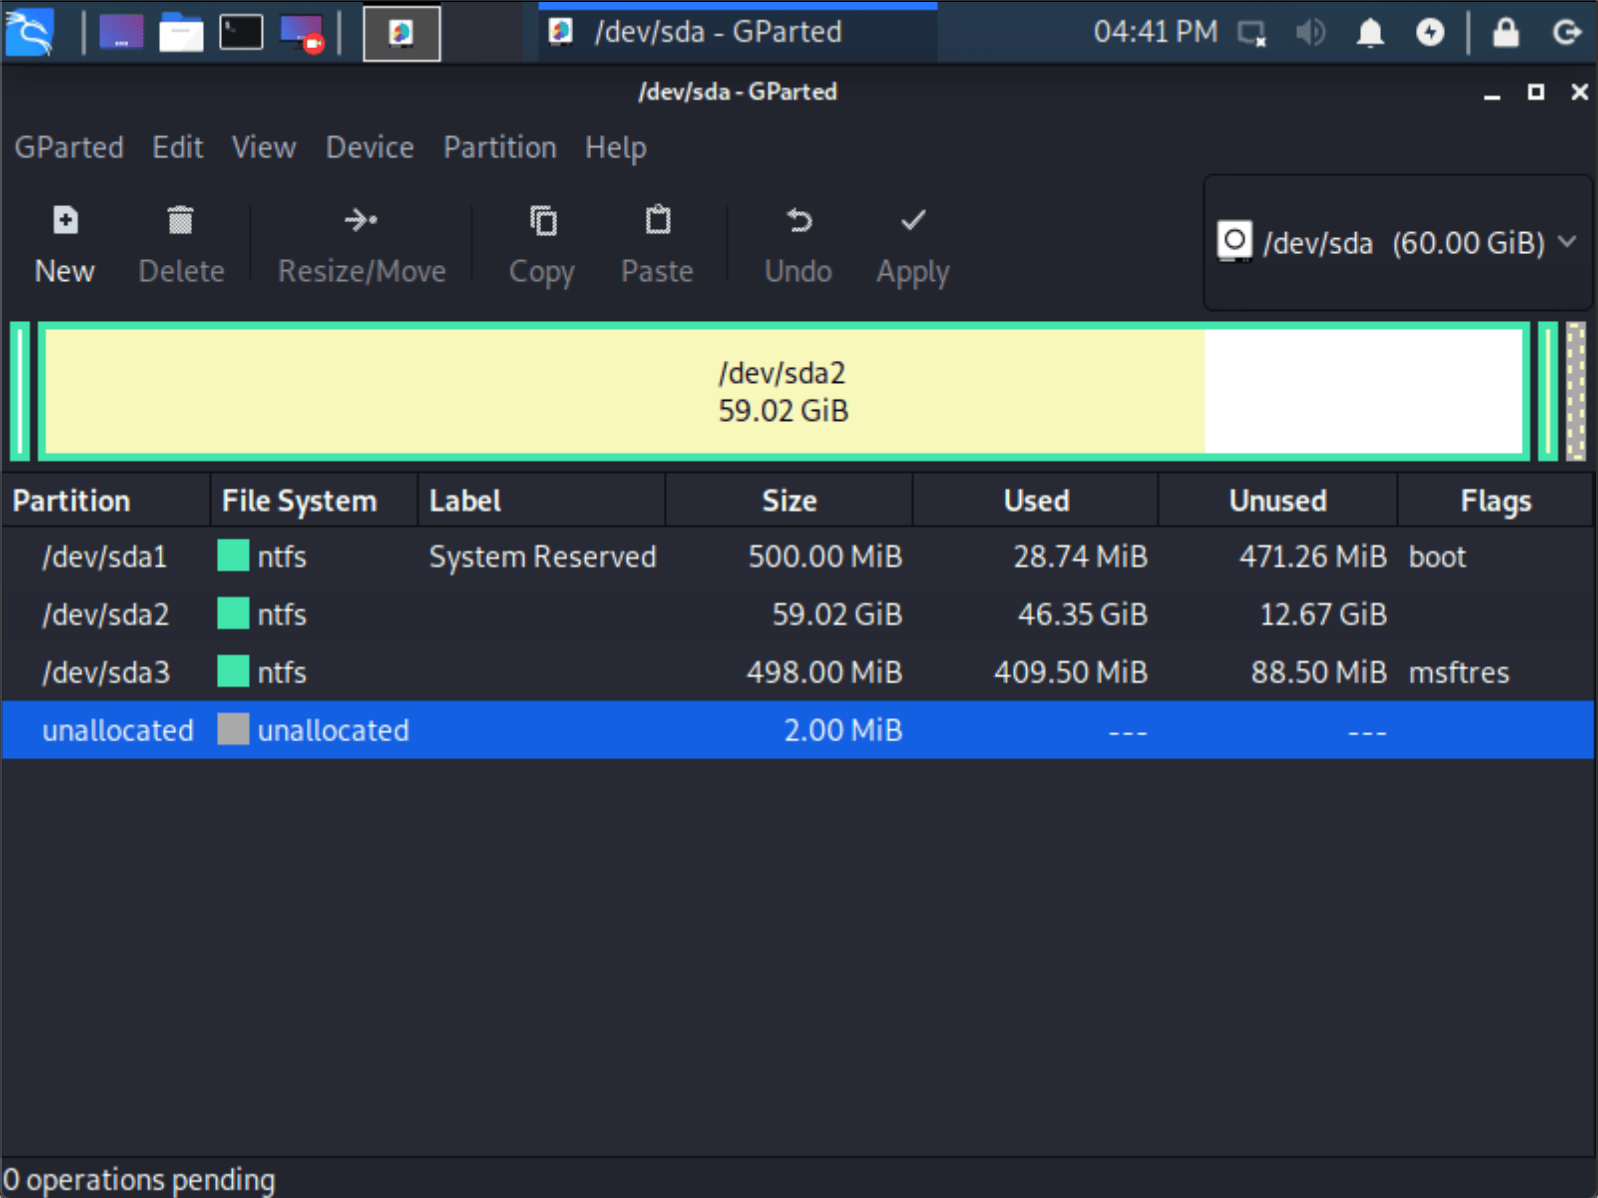
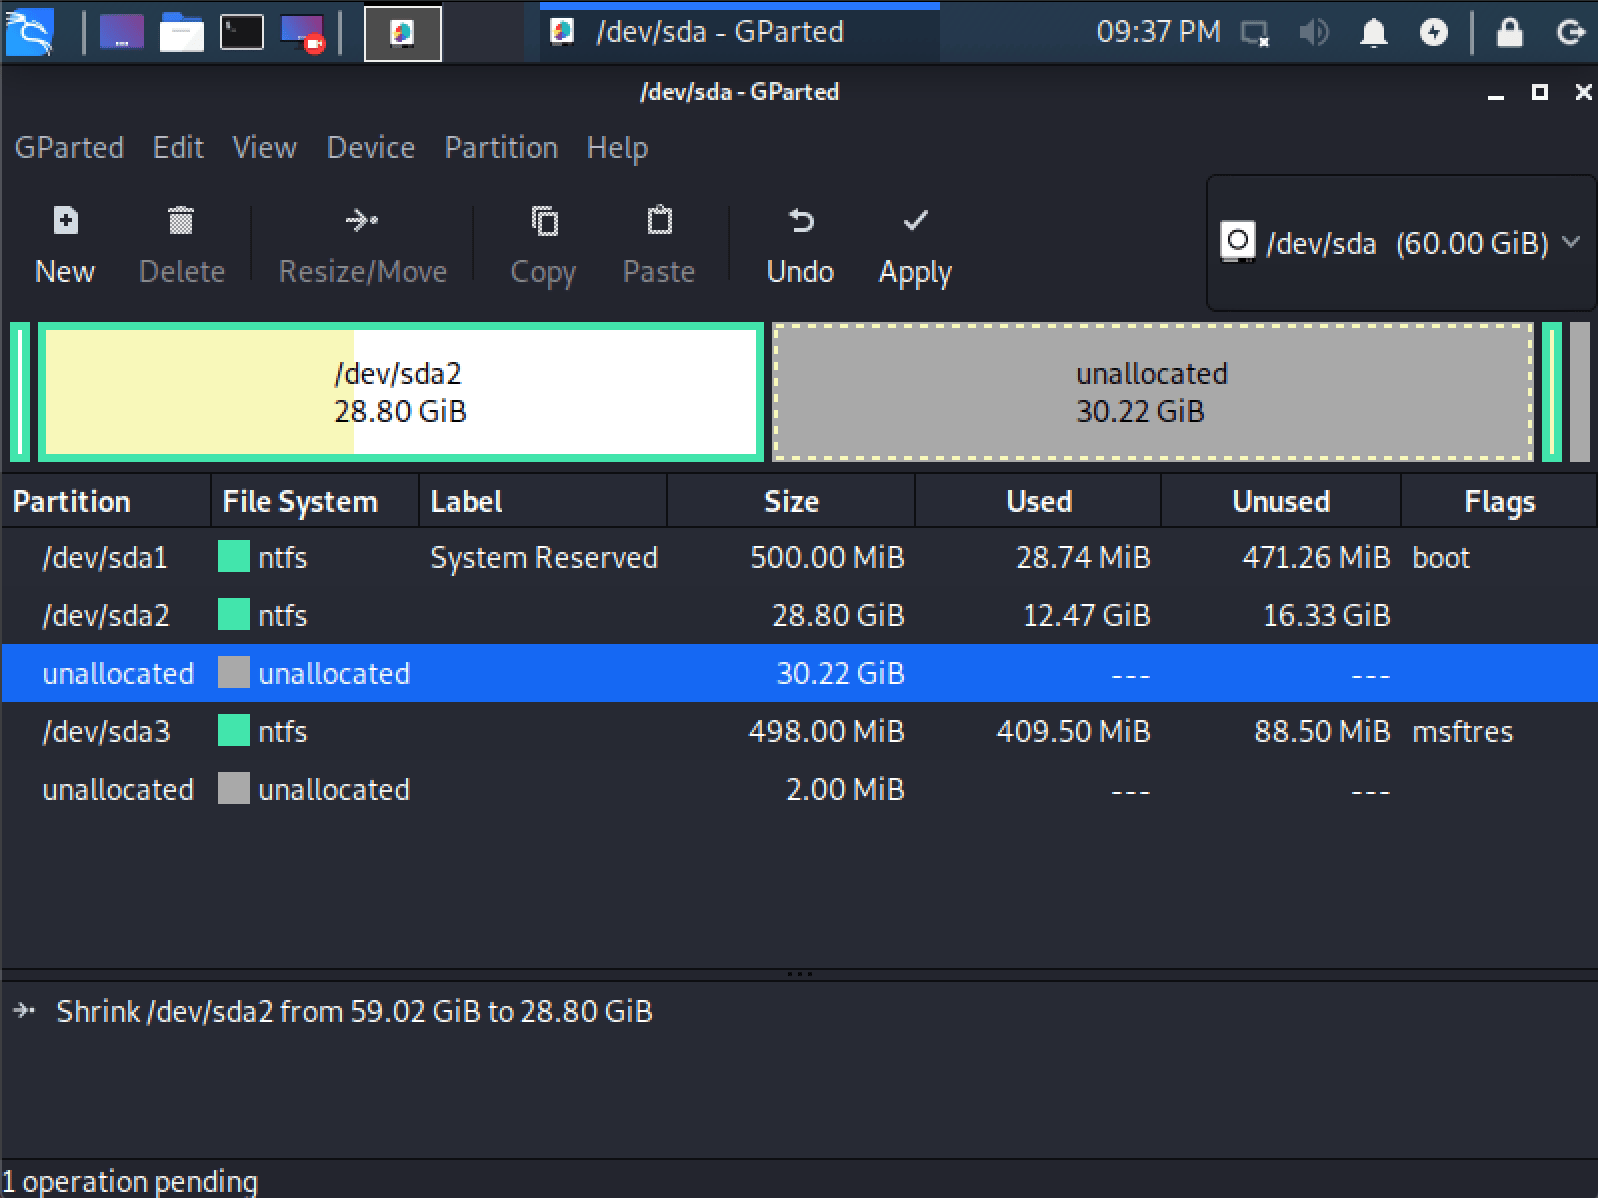
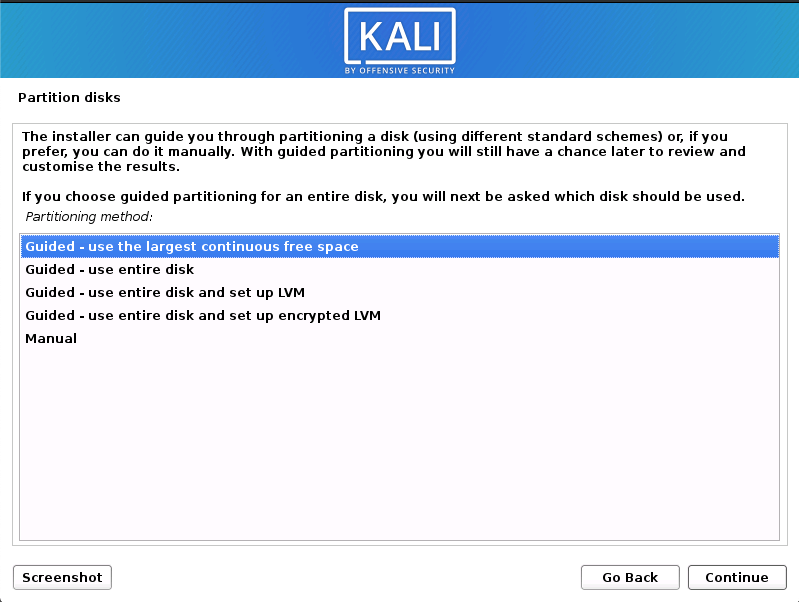
- Gparted kali linux install
- Installation Prerequisites
- Resize Windows Procedure
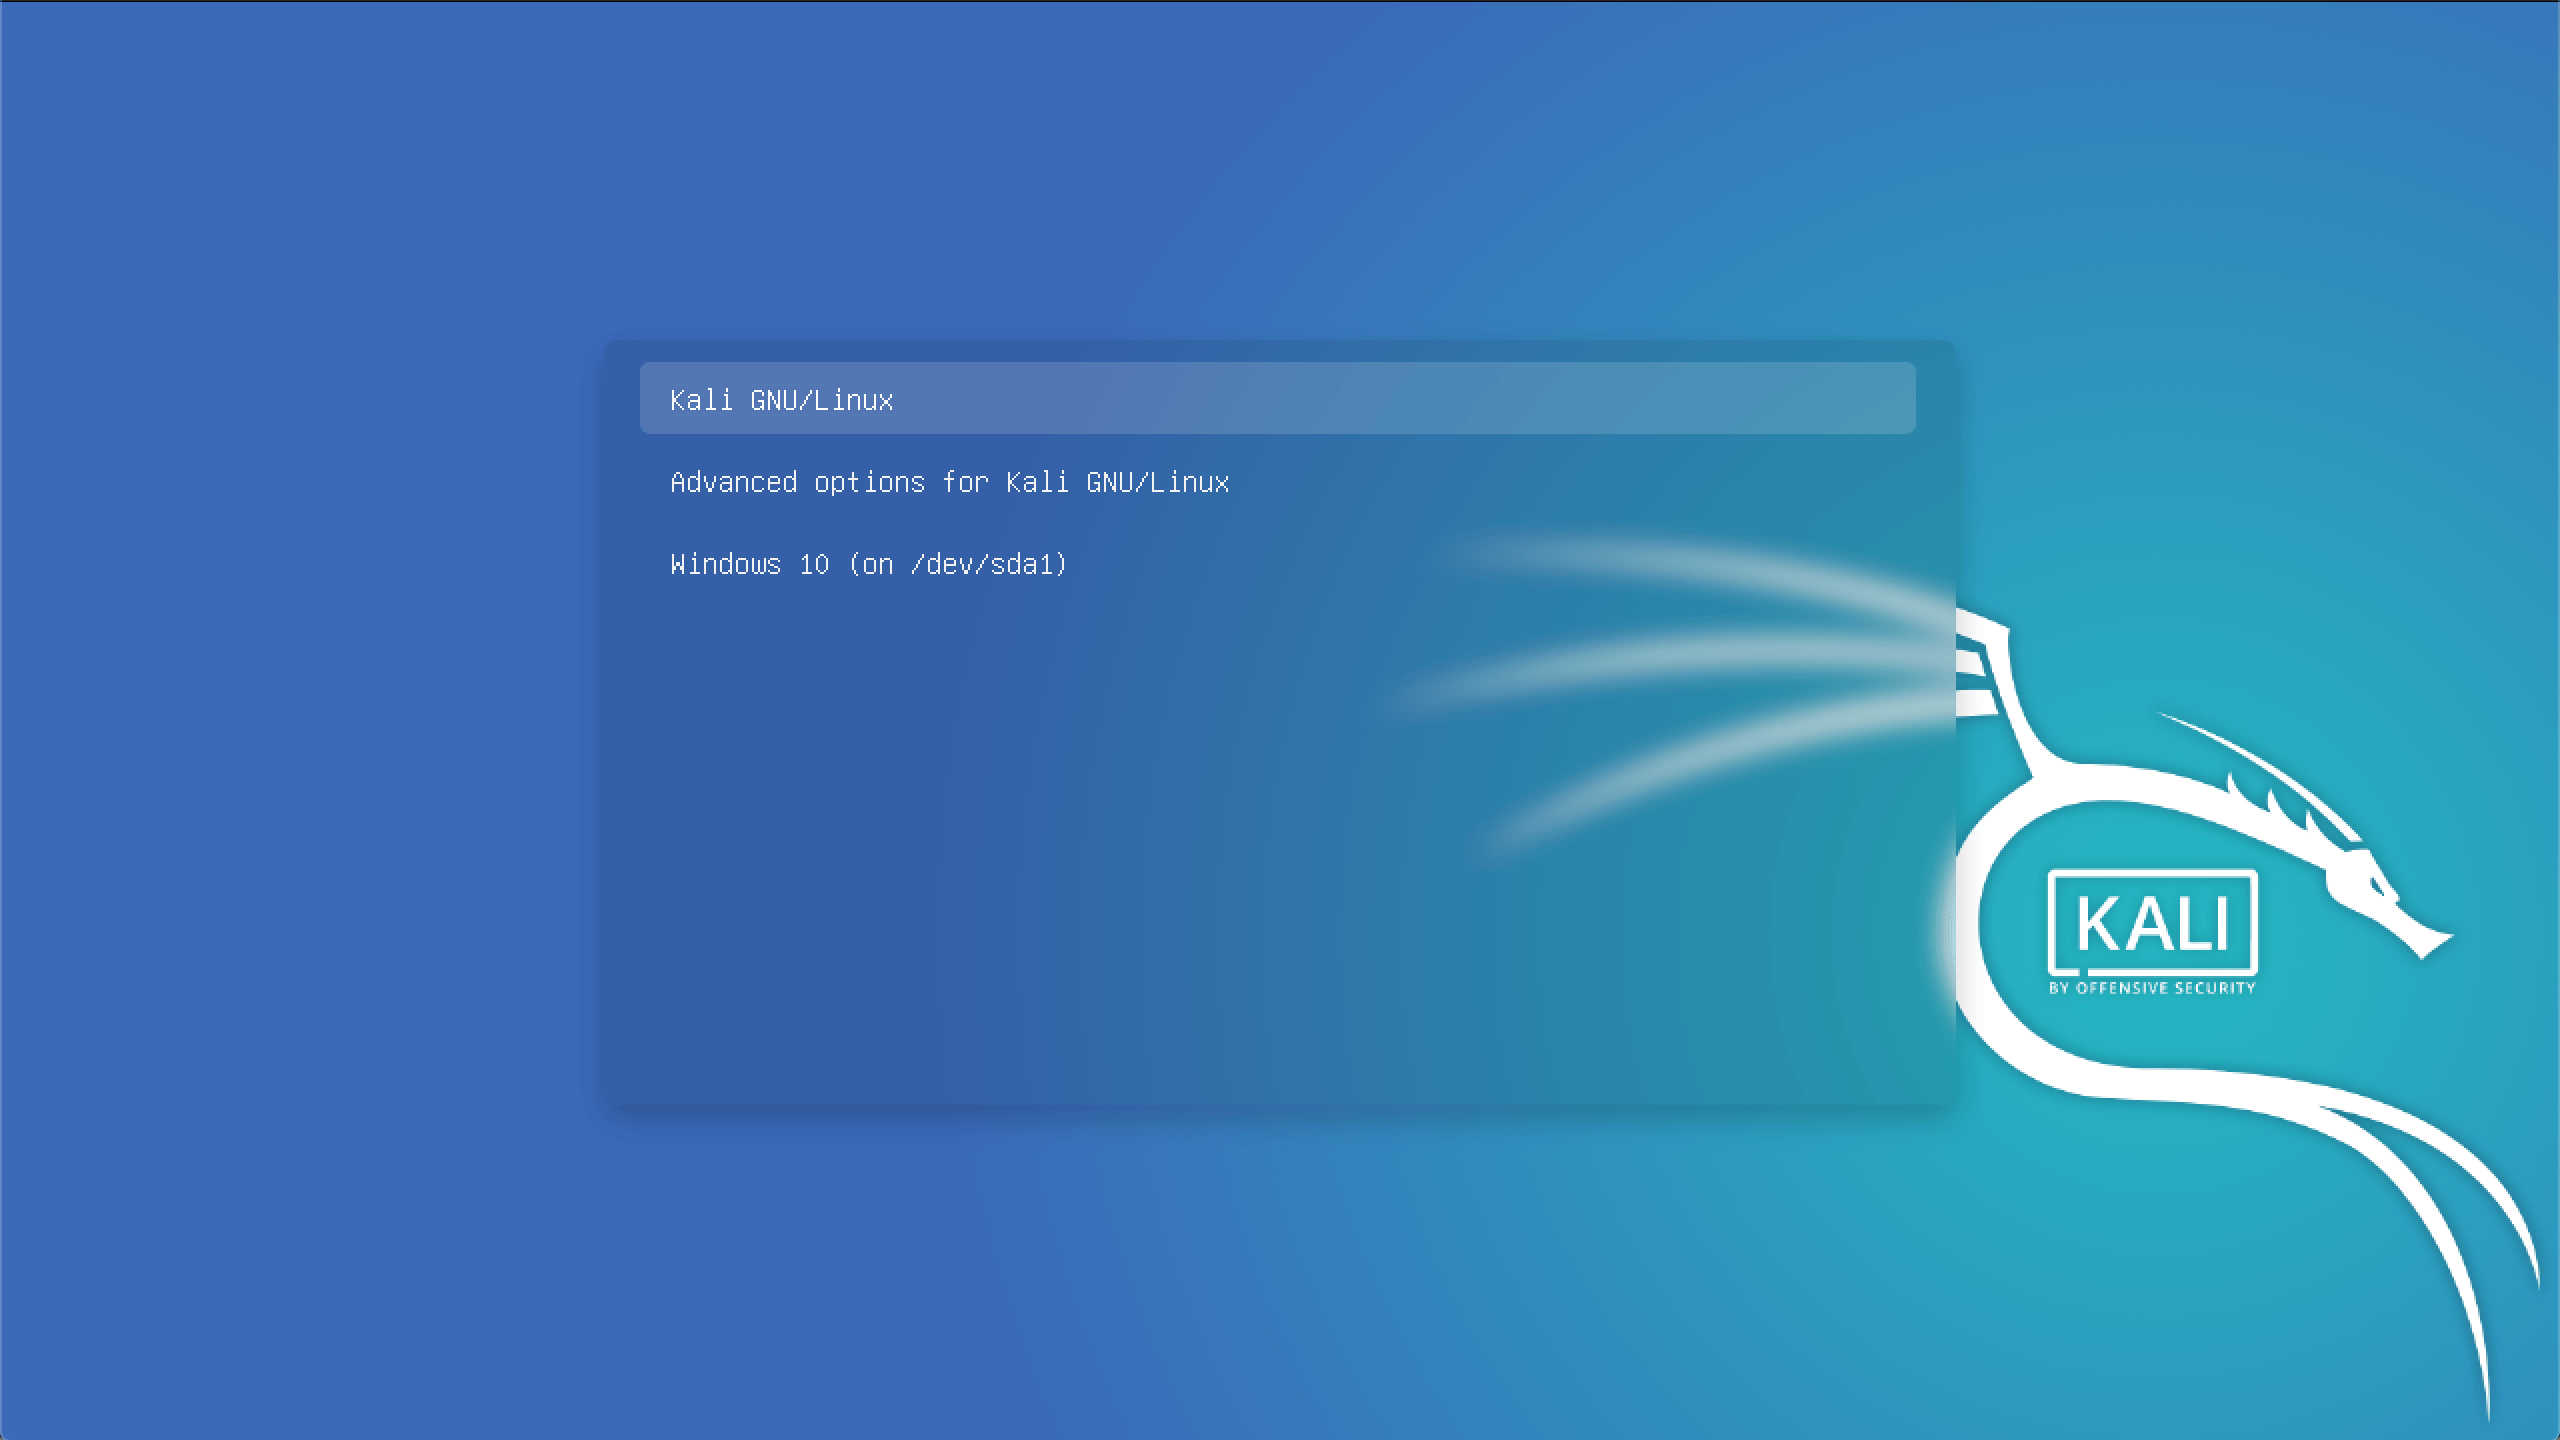
- Kali Linux Installation Procedure
- Post Installation
- Time/System Clock
Downloads
GParted is a free partition manager that enables you to resize, copy, and move partitions without data loss.
The best way to access all of the features of the GParted application is by using the GParted Live bootable image. GParted Live enables you to use GParted on GNU/Linux as well as other operating systems, such as Windows or Mac OS X.
CAUTION: Editing partitions has the potential to cause LOSS of DATA.
You are advised to BACKUP your DATA before using gparted.
Download Links
 If you use GParted and it helps you with your task, then please consider making a donation to help us make GParted better.
NOTE: GParted Live is available in three different architectures
| Architecture | Description |
| amd64 | 64-bit version runs on x86-64 based computers, with ability to access more than 4 gigabytes of memory, and supports use of multiple processor cores. Works with UEFI secure boot. |
| i686 | 32-bit version runs on x86 and x86-64 based computers, limited to physical address space of 4 gigabytes, and uses one processor only. |
| i686-PAE | 32-bit version runs on x86 (i686 and higher) and x86-64 based computers, with Physical Address Extension to access more than 4 gigabytes of memory, and supports use of multiple processor cores. |
| GParted Live CD/USB/HD/PXE Bootable Image Stable Releases | |||
|---|---|---|---|
| Download gparted-live-1.3.1-1-amd64.iso Stable directory (.iso/.zip) | Release notes | Changelog | Checksums Checksums.gpg (Signed by GParted live maintainer Steven Shiau, updated on Sep/18/2017), or available on the 2nd key server. See steps to verify checksums. |
| Testing Releases | |||
| Testing directory (.iso/.zip) (for i686, i686-pae and amd64 architectures) | Release notes and checksums in same directory. See steps to verify checksums. | ||
| GParted Application Source Code | |
|---|---|
| Source code directory (.tar.gz) | Release notes and checksums in same directory. |
| Linux Distribution * | Package | Command Prompt Install |
|---|---|---|
| Debian | gparted | |
| Fedora | gparted | |
| Mageia | gparted | |
| OpenSUSE | gparted | |
| Ubuntu | gparted |
* NOTE: Distribution packages might not contain the most recent versions of GParted.
Источник
GParted Live on USB
The bootable GParted Live image can also be installed on a USB flash drive.
Following are instructions on how to setup GParted Live on your USB flash drive using either MS Windows or GNU/Linux.
NOTE: These installation methods only work when the USB flash drive is formatted with a FAT file system. Some users have reported that only the FAT16 file system worked for them. For other file systems you might try to use grub or some other boot loader.
USB setup with Windows
Choose one of the following methods to setup GParted Live on your USB flash drive using MS Windows:
Windows Method A: Unetbootin
- If you already have Unetbootin installed on your computer then skip to the next step (2).
Otherwise download and install Unetbootin on your MS Windows computer. - Download the GParted Live iso file.
- From Windows, run the Unetbootin program and follow the instructions in the GUI to install GParted Live on your USB flash drive.
Windows Method B: Manual
WARNING! DO NOT RUN makeboot.bat from your local hard drive!
Doing so could cause your MS windows not to boot.
- Download the GParted Live zip file.
- If you already have a partition of at least 300 MB in size on your USB flash drive formatted with a FAT file system then skip to the next step (3).
Otherwise create at least a 300 MB partition on your USB flash drive and format it with a FAT16 or FAT32 file system.
The partition must be large enough to hold the extracted contents of the GParted Live zip file.
(PS: The above description is modified from: http://www.pendrivelinux.com/2007/01/02/all-in-one-usb-dsl. Thanks to PDLA from http://pendrivelinux.com)
Windows Method C: LinuxLive USB Creator
- If you already have LinuxLive USB Creator installed on your computer then skip to the next step (2).
Otherwise download and install LinuxLive USB Creator on your MS Windows computer. - Download the GParted Live iso file.
- From Windows, install then run the LinuxLive USB Creator program and follow the instructions in the GUI to install GParted Live on your USB flash drive.
Windows Method D: Tuxboot
- Download Tuxboot on your MS Windows computer.
- Follow the USB setup with MS Windows instructions to install GParted Live on your USB flash drive.
USB setup with GNU/Linux
Choose one of the following methods to setup GParted Live on your USB flash drive using GNU/Linux:
GNU/Linux Method A: Unetbootin
- If you already have Unetbootin installed on your computer then skip to step 2.
Otherwise install Unetbootin on your GNU/Linux computer. - Download the GParted Live iso file.
- From GNU/Linux, run the Unetbootin program and follow the instructions in the GUI to install GParted Live on your USB flash drive.
GNU/Linux Method B: Manual
WARNING! Confirm you have the correct path name before executing commands!
Failure to do so could cause loss of data or your GNU/Linux not to boot.
/dev/sde is a device path name
/dev/sde1 is a partition path name
- Download the GParted Live zip file.
- If you already have a FAT16 or FAT32 partition on your USB flash drive then skip to the next step (3).
Otherwise prepare at least a 300 MB partition formatted with either a FAT16 or FAT32 file system.
The partition must be large enough to hold the extracted contents of the GParted Live zip file.
If the USB flash drive or USB hard drive does not have any partition, you can use a partitioning tool (e.g. gparted, parted, fdisk, cfdisk or sfdisk) to create a partition with a size of 300 MB or more.
Here we assume your USB flash drive or USB hard drive is /dev/sdd ( You have to confirm your device name, since it’s _NOT_ always /dev/sdd ) on your GNU/Linux, so the partition table is like: Then format the partition as FAT with a command such as «mkfs.vfat -F 32 /dev/sdd1»
WARNING! Executing the mkfs.vfat command on the wrong partition or device could cause your GNU/Linux not to boot. Be sure to confirm the command before you run it.
WARNING! Executing makeboot.sh with the wrong device name could cause your GNU/Linux not to boot. Be sure to confirm the command before you run it.
NOTE: There is a known problem if you run makeboot.sh on Debian Etch, since the program utils/linux/syslinux does not work properly. Make sure you run it on newer GNU/Linux, such as Debian Lenny, Ubuntu 8.04, or Fedora 9.