- Gpu test для linux
- Тестирование производительности и стресс-тестирование графических ускорителей в Linux
- 1. GLXGears из пакета mesa-utils
- 2. GLMark2 от команды разработчиков проекта Linaro
- 3. Тест Furmark утилиты GPUTest от команды ресурса geeks3d
- Benchmark Your GPU on Linux with Unigine Benchmarks
- System requirements
- Benchmark features
- Getting Unigine Benchmarks
- The Benchmarking Tool
- Conclusion
Gpu test для linux
GpuTest is a cross-platform (Windows, Linux and Max OS X) GPU stress test and OpenGL benchmark. GpuTest comes with several GPU tests including some popular ones from Windows’world (FurMark or TessMark).
GpuTest can be downloaded from THIS PAGE.

The number of GPU tests grows with the new versions of the tool. The foolowing tests are available in the latest version:
- FurMark based stress test (OpenGL 2.1 or 3.2).
- TessMark based tessellation test (OpenGL 4.0).
- GiMark: geometry instancing test (OpenGL 3.3).
- PixMark Piano pixel shader test (OpenGL 2.1 or 3.2).
- PixMark Volplosion pixel shader test (OpenGL 2.1 or 3.2).
- Plot3D vertex shader test (OpenGL 2.1 or 3.2).
- Triangle one of the most simple 3D scene ever made. (OpenGL 2.1 or 3.2).
A simple graphical user interface (GUI) allows to set options and launch GpuTest. The GUI is available for all platforms. 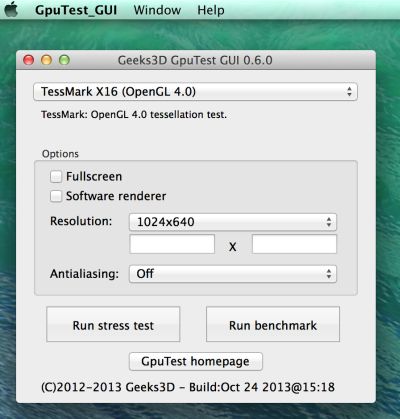
The GUI under Mac OS X
GpuTest can also be launched from the command line under every operating systems. Scores are saved in a convenient CSV file. A sample file with all command line parameters is provided in the zip file.
GpuTest is available for the following operating systems:
- Windows 7 and 8, 64-bit
- Linux 64-bit (Ubuntu-based, openSUSE)
- OSX 10.7, 10.8 and 10.9

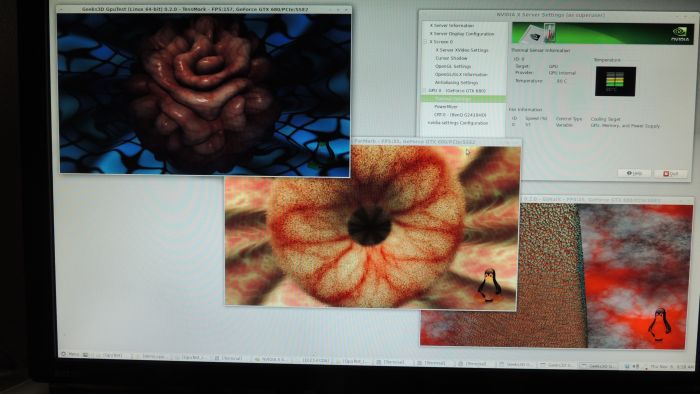
GpuTest under Linux Mint 13
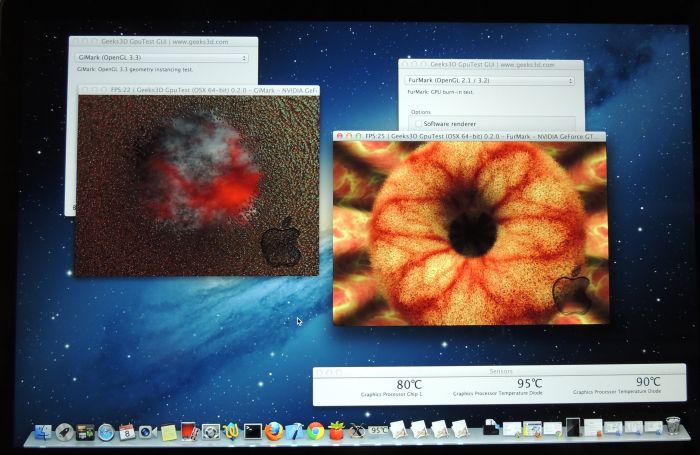
GpuTest under OSX 10.8
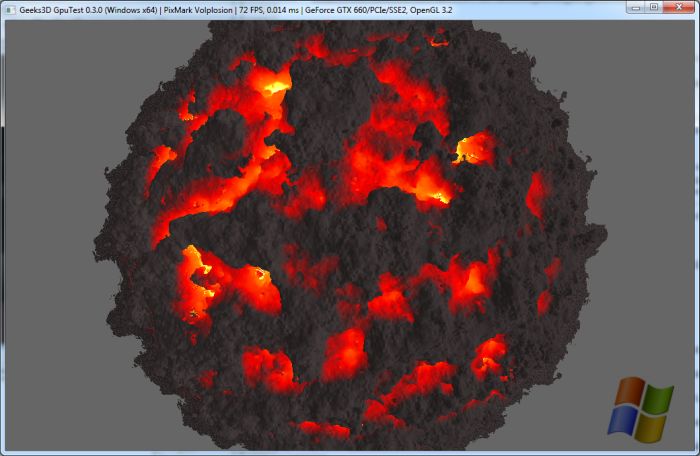
The Volplosion pixel shader test of GpuTest 0.3.0+
Источник
Тестирование производительности и стресс-тестирование графических ускорителей в Linux
Оригинал: GPU benchmarking and stress testing in Linux
Автор: Arnab Satapathi
Дата публикации: 29 марта 2017 г.
Перевод: А.Панин
Дата перевода: 26 апреля 2017 г.
Хотите измерить пиковую производительность своего графического ускорителя? Задумываетесь о корректности работы своего графического ускорителя под максимальной нагрузкой?
Вы можете без-каких либо проблем развеять все свои сомнения благодаря существованию нескольких инструментов для тестирования производительности графических ускорителей; мы будем рассматривать три отличных инструмента, а именно:
1. GLXGears из пакета mesa-utils
Утилита GLXGears с открытым исходным кодом является частью пакета утилит Mesa для тестирования поддержки технологии OpenGL и доступна в составе пакета программного обеспечения mesa-utils в дистрибутивах Debian/Ubuntu. Она может использоваться в качестве самодостаточного инструмента для тестирования производительности графического ускорителя и выводит число кадров в секунду (FPS) сразу же после запуска с помощью следующей команды:
Число кадров в секунду не будет превышать 60, но производительность любого приложения, работающего с трехмерной графикой, может быть значительно улучшена в случае его запуска с переменной окружения vblank_mode=0 ; в моем случае удалось получить значение, равное 6000 кадрам в секунду при использовании графического ускорителя Intel HD 3000.
2. GLMark2 от команды разработчиков проекта Linaro
Это еще одна популярная утилита с открытым исходным кодом, предназначенная для стресс-тестирования и тестирования производительности графических ускорителей, которая была создана на основе исходного кода утилиты GLMark . Она доступна на платформах Linux и Android.
В официальных репозиториях дистрибутива Ubuntu размещены бинарные пакеты программного обеспечения с компонентами утилиты GLMark2, поэтому при ее установке в Ubuntu или любом производном дистрибутиве не должно возникнуть никаких проблем. Достаточно выполнить следующую команду для установки ее новейшей версии:
К сожалению, бинарные пакеты с компонентами GLMark2 не добавлены в репозитории дистрибутива Debian, но вы в любом случае можете скомпилировать новейшую версию GLMark2 для дистрибутива Debian самостоятельно , после чего просто установить ее в систему.
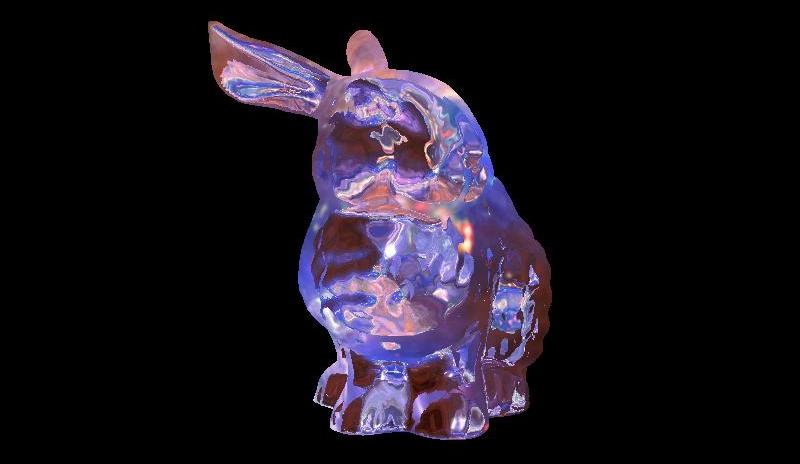
Тестирование: теперь нужно просто выполнить команду glmark2 с помощью терминала, в результате чего откроется окно со стандартным разрешением 800×600 пикселей, в котором будут отображаться различные трехмерные объекты, такие, как фигурка лошади, кота, кролика и так далее. Процесс тестирования может растянуться на 8 минут, после чего будут выведены результаты тестирования. В моем случае графический ускоритель Intel HD 3000 набрал около 1000 баллов.
Стресс тестирование графического ускорителя: для работы GLMark2 требуется достаточное количество ресурсов графического процессора, поэтому зацикливание процесса может рассматриваться в качестве своеобразного режима стресс-тестирвоания графического ускорителя.
Тестирование производительности графического ускорителя производства NVIDIA с помощью GLMark2: я пользуюсь ноутбуком с дискретным графическим ускорителем NVIDIA Optimus (GeForce GT 540M), поэтому просто не мог не попытаться протестировать производительность этого ускорителя с помощью GLMark2. Я пытался проводить тесты со всеми известными параметрами, но результаты были неизменно-ужасными. Графический ускоритель ни разу не набирал больше 446 баллов, хотя я провел 4 теста; возможно, утилита GLMark2 просто не совместима с аппаратным обеспечением производства NVIDIA.
Команды, которые я использовал для тестирования производительности дискретного графического ускорителя производства NVIDIA с помощью утилиты GLMark2:
3. Тест Furmark утилиты GPUTest от команды ресурса geeks3d
Перейдем к рассмотрению инструмента для достоверного тестирования производительности графического ускорителя. Тест Furmark является одним из тестов утилиты с закрытым исходным кодом GPUTest от команды ресурса geek3d, которая может быть бесплатно загружена по ссылке www.geeks3d.com/gputest/download . Следует выибрать версию для Linux, которая распространяется в форме обычного ZIP-архива. В том случае, если вы загрузили этот архив в директорию Загрузки , вам придется выполнить следующую последовательность команд для его распаковки и запуска утилиты:
В результате откроется окно разрешением в 800×600 пикселей, с помощью которого будет выводиться сложный трехмерный объект, подобный представленному ниже.

При тестировании производительности графического ускорителя Intel 3000 HD я получил изменяющуюся рывками картинку с 9-10 кадрами в секунду.
И снова я попытался протестировать производительность дискретного графического ускорителя производства компании NVIDIA:
В этот раз были получены удовлетворительные результаты, выражающиеся в плавно изменяющейся картинке с 18-20 кадрами в секунду.
Стресс-тестирование графического ускорителя с помощью теста Furmark: в результате использования теста Furmark генерируется значительная нагрузка на графический процессор, а с помощью приведенной ниже команды программа может быть запущена в режиме непрерывного тестирования с окном разрешением в 1024×640 пикселей.
Программа GPUTest содержит реализации большого количества других тестов для тестирования производительности графических ускорителей, полный список которых размещен в файле README.txt. Попробуйте протестировать производительность вашего графического ускорителя с другими параметрами утилиты, пользуясь следующим правилом: чем меньше размер окна, тем больше производительность.
Существуют и другие более функциональные и сложные инструменты для тестирования производительности графических ускорителей от Unigine corp., такие, как Unigine Heaven , Unigine Vally и другие. Я не затрагивал их в данной статье, но вы можете самостоятельно загрузить их по данной ссылке и протестировать производительность своего графического ускорителя.
Если у вас остались вопросы, вы можете задать их и не забудьте поделиться ссылкой на данную статью с друзьями.
Источник
Benchmark Your GPU on Linux with Unigine Benchmarks

If you are a gamer, use your setup for video editing, or otherwise rely on heavy GPU usage, you might be interested in how well your Graphics Processing Unit would perform under extreme stress.
The creators of the Unigine gaming engine has made a set of beautiful tools for the purpose. The basic version is totally free, and it is available for Windows, Linux and Mac. It features powerful testing, stunning visuals, and a user-controlled setup.
System requirements
The benchmarks run on all three major Desktop OSes. Windows will be compatible from XP upwards until Windows 8 (no support for Windows 10 yet), and Macs will need OS X 10.8 or above. While Linux does not have a minimum kernel version requirement, it will need proprietary video drivers to be installed.
According to the Unigine website, the hardware requirements are as follows:
- GPU:
- ATI Radeon HD 4xxx and higher
- NVIDIA GeForce 8xxx and higher
- Intel HD 3000 and higher
- video memory: 512 Mb
- disk space: 1.5 Gb
This certainly does not look like a lot, and the tests would not run on lower-end graphic cards. If the sole purpose of your graphic card is to display your desktop, this might not be your area of interest at all. The two available versions offer slightly different functionality.
Benchmark features
According to the website, the benchmark named “Valley” features
- extreme hardware stability testing
- per-frame GPU temperature and clock monitoring
- advanced visual technologies: dynamic sky, volumetric clouds, sun shafts, DOF, ambient occlusion
- multi-platform support for Windows, Linux and Mac OS X
- 64,000,000 square meters of extremely-detailed, seamless terrain
- procedural object placement of vegetation and rocks
- entire valley free to be explored in interactive fly-by or hike-through modes
- user-controlled dynamic weather
- support for stereo 3D and multi-monitor configurations
while the one called “Heaven” offers
- extreme hardware stability testing
- accurate results due to 100% GPU-bound benchmarking
- benchmarking presets for convenient comparison of results
- support for DirectX 9, DirectX 11 and OpenGL 4.0
- multi-platform support for Windows, Linux and Mac OS X
- comprehensive use of hardware tessellation with adjustable settings
- dynamic sky with volumetric clouds and tweakable day-night cycle
- real-time global illumination and screen-space ambient occlusion
- cinematic and interactive fly/walk-through camera modes
- support for multi-monitor configurations
- various stereo 3D modes
- GPU temperature and clock monitoring
- support for software rendering mode in DirectX 11 for reference purposes
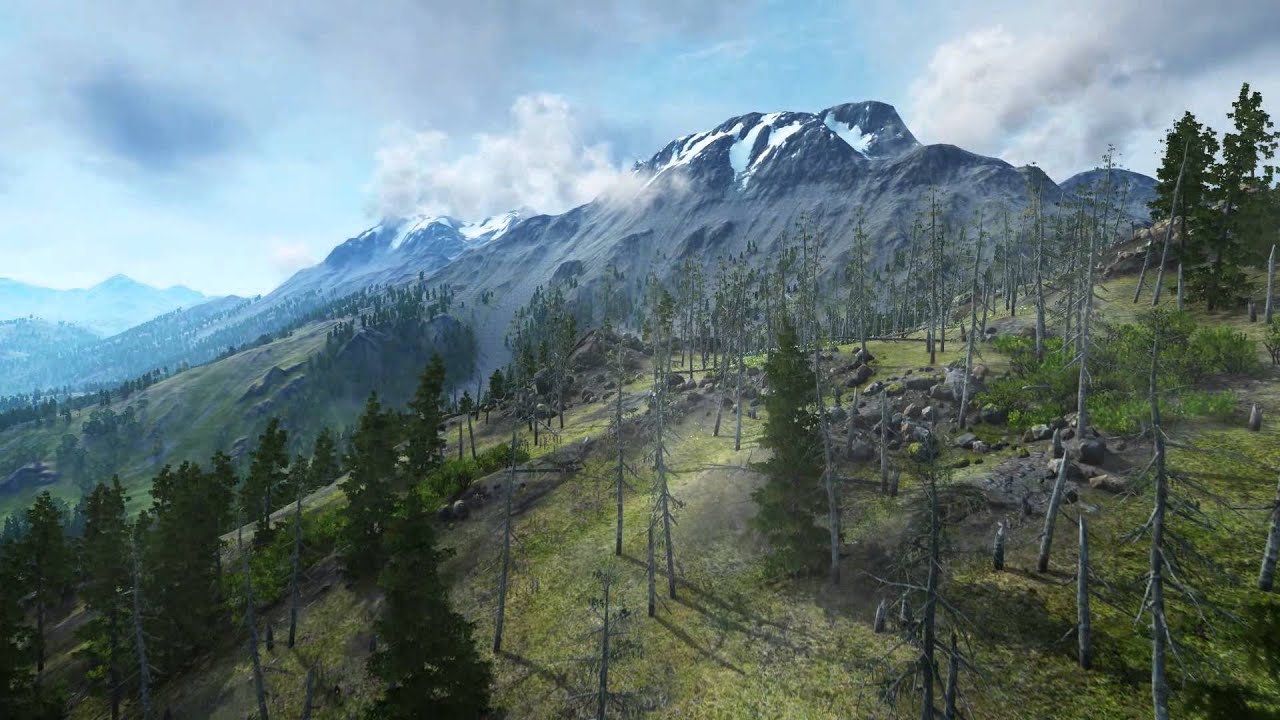
The most obvious difference is the setting. Valley would allow you to explore a beautiful, high definition valley,
whereas “Heaven” will take you into an imaginary village, up in the skies.

Of course there is more to them than pretty graphics. Both of the tests are designed to put your GPU under various stress conditions, not only providing visual feedback of their efficiency, but taking measurements and creating reports for you to analyze after the testing has been finished.
UNIGINE benchmarks provide completely unbiased results and generates true in-game rendering workloads across all PC platforms: Windows, Linux and Mac OS X. There is also an interactive experience with fly-by and walk-through modes allowing for exploring all corners of these virtual worlds powered by the cutting-edge UNIGINE Engine.
Getting Unigine Benchmarks
On the Unigine website, benchmarks are displayed to choose from: “Valley,” “Heaven,” “Tropics” and “Sanctuary,” although the latter two are marked legacy and are no longer available for download. You can download “Valley” from here or “Heaven” from here.
Downloading “Valley” on Linux, you will get a file named “Unigine_Valley-1.0.run.” This must be enabled for execution with
You can then run the installer with
It will extract itself into a new directory. To run the benchmark tool, enter it as
Instructions for “Heaven are similar with different filenames.
The Benchmarking Tool
After running the program, you will find yourself on the main screen which will allow you to select from “Basic,” Extreme, or “Extreme HD” presets or manually customize each setting and run the benchmarks.

When you press “Run,” you will find yourself in an auto-pilot overview of the valley itself. The interface is simple enough: you have a top row of buttons where you can choose different settings. Most quality settings can be changed on the fly, and you are able to change cameras to “Free” or “Walking” modes, both of which will allow you to control the action. “Free” mode lets you fly, while “Walk” mode makes you stick to the ground.

Pressing the “Benchmark” button will start the process. It will take a few minutes, and at the end you will be presented with your scores. You can then save them in a handy HTML format for future reference. The test would run on free graphics drivers but will not be able to make good use of the GPU. The test machine, running Debian 8.1 Jessie with a (not exactly powerful) Radeon 5400HD graphics card, was struggling through even with the lowest settings, and in the summary the graphics card was listed as unidentified.

Conclusion
If you want to know how good or bad your GPU performs, want to benchmark your system, or even just compare different OSes, Unigine benchmark tools offer a simple and enjoyable way to collect performance data while enjoying stunning graphics in two different modes. In Linux, non-free graphics drivers are essential, while higher end graphics cards are recommended for an optimal experience.
Attila is a writer, blogger and author with a background in IT management. Using GNU/Linux systems both personally and professionally, his advice stems from 10+ years of hands on experience. In his free time he also runs the popular Meditation for Beginners blog.
Источник


