- Виртуализация операционных систем с помощью QEMU. Основы работы с эмулятором
- Как установить QEMU в Windows
- Виртуализация операционных систем в QEMU
- How to Set up Virtual machines with QEMU GUI on Windows 10
- Qemu installation on Windows 10 with Qtemu GUI
- Step 1: Download Qemu for Windows
- Step 2: Install Qemu
- Step 3: Install GUI for QEMU on Windows 10
- Step 4: Setup QEMU manager Qtemu GUI
- Step 5: Create a Virtual machine
- Step 6: Set bootable medium CD/DVD
- Step 7: Insert ISO file in QEMU via Qtemu GUI
- Step 8: Boot Qemu Virtual Machine via GUI
Виртуализация операционных систем с помощью QEMU. Основы работы с эмулятором

Виртуализация — наиболее доступный способ запустить на одном ПК вторую операционную систему, не устанавливая ее непосредственно на жесткий диск. Вместо этого вторая ОС устанавливается на диск виртуальный, представленный специальным файлом-контейнером, созданным в гипервизоре — программе, позволяющей эмулировать работу гостевой системы в системе хостовой. Наибольшей популярностью среди домашних юзеров пользуются гипервизоры VirtualBox и VMware с мощным функционалом и наглядным GUI .
Но есть и другие, в чём-то даже более гибкие и продуктивные решения хотя и куда менее удобные в использовании. Например, QEMU — бесплатная программа с открытым исходным кодом, предназначенная для эмуляции программного обеспечения и операционных систем. Инструмент использует аппаратную виртуализацию, поддерживая два режима работы:
• Полная эмуляция — данный режим применяется для запуска операционных систем, в его рамках QEMU эмулирует физическое устройство со всеми его компонентами, встроенными и периферийными.
• Эмуляция пользовательского режима — дает возможность запускать программы, созданные для конкретной архитектуры на другой архитектуре, например, приложения ARM в x86 . Режим доступен только в хостовой системе Linux.
QEMU поддерживается эмуляция архитектуры x86 , ARM , MIPS , PowerPC , m68k , Alpha , SPARC , SH-4 , CRISv2 , MicroBlaze и это более солидный список, чем у того же Виртуалбокс.
Как установить QEMU в Windows
Скачать установочный файл эмулятора можно с официального сайта www.qemu.org/download/#windows,
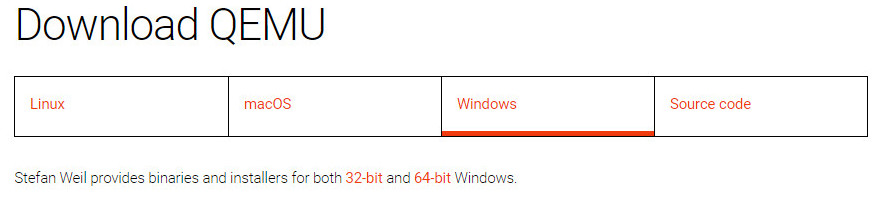
есть редакции 32-битные и 64-битные, версию выбираем последнюю.

Устанавливается QEMU как обычная программа в папку Program Files\qemu , но можно выбрать и другое расположение.
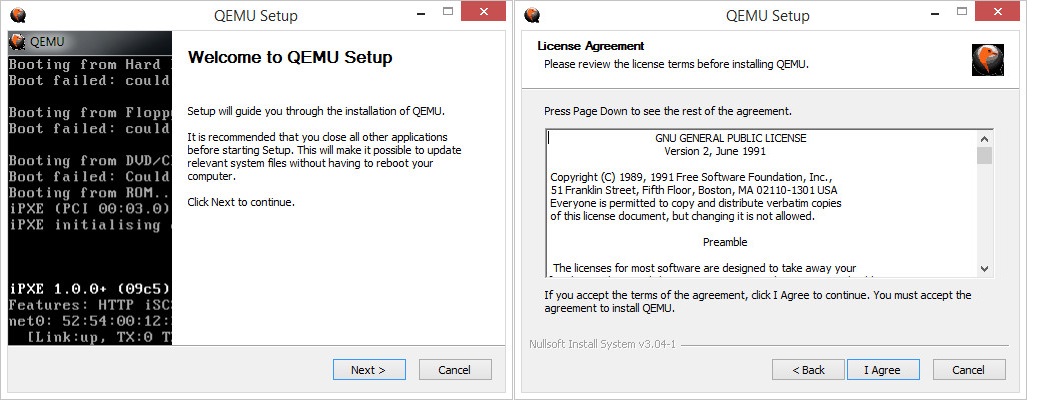
Установку выполняем с параметрами по умолчанию, ничего менять не нужно, просто жмем в окне мастера «Next».
Виртуализация операционных систем в QEMU
В отличие от VirtualBox и подобных гипервизоров, QEMU не имеет графического интерфейса, работа с ней ведется через командную строку. Команд и параметров для создания и управления виртуальными машинами много, но для начала вам нужно знать хотя бы эти шесть.
• qemu-system — задает архитектуру виртуальной машины.
• qemu-img create — создает файл виртуального IMG -диска, на который будет устанавливаться операционная система.
• -m — выделяет виртуальной ОС указанный объем оперативной памяти.
• -hda — подключает созданный виртуальный диск.
• -boot IMG — указывает, что загрузка должна производиться с виртуального диска, вместо IMG следует указать имя IMG -файла.
• cdrom — содержит путь к установочному образу ISO , эмулирует дисковод.
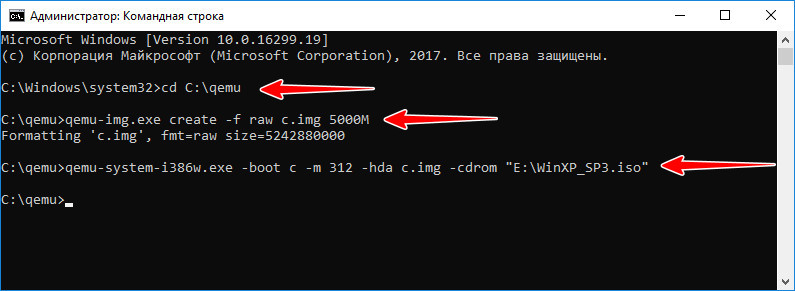
Чтобы вам стало всё немного понятнее, установим и запустим с помощью QEMU какую-нибудь операционную систему. Для примера мы выбрали Windows XP, так как она легкая и занимает на диске мало места. QEMU у нас уже установлен, открываем командную строку, переходим в каталог установки и создаем виртуальный жесткий диск следующей командой:
qemu-img.exe create -f raw c.img 5000M
Файл qemu-img.exe в эмуляторе отвечает за создание IMG -образов, с — это название образа, 5000 — размер виртуального диска в мегабайтах. По умолчанию образ будет создан в папке QEMU .
Теперь сформируем следующую команду:
qemu-system-i386w.exe -boot c -m 350 -hda c.img -cdrom «E:\WinXP_SP3.iso»
Исполняемый файл в начале команды отвечает за создание виртуальной машины с архитектурой х86 , -boot с ключом -с сообщает, что грузиться она будет с диска, в значение параметра -hda подставляем созданный образ, а в качестве значения параметра –cdrom указываем путь к дистрибутиву Windows.
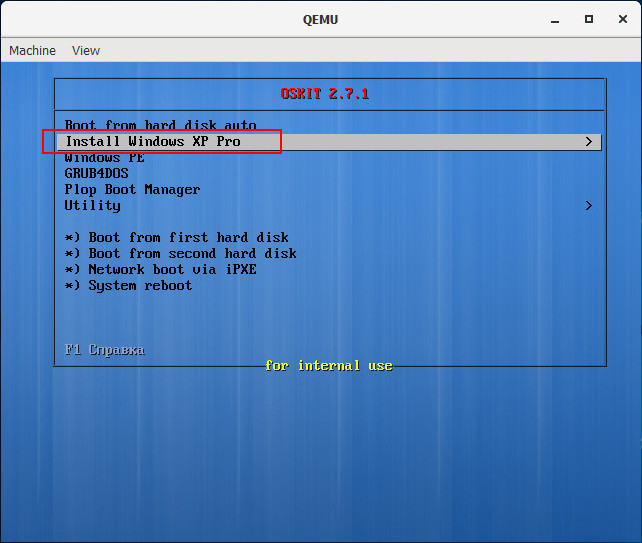
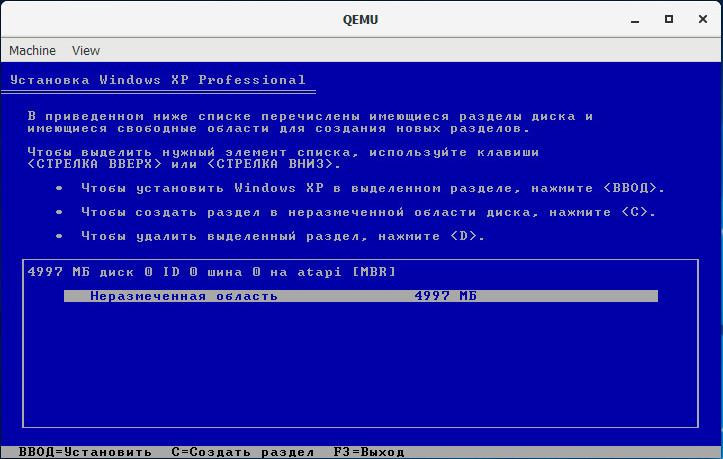
После выполнения команды появляется окошко QEMU с загрузочным меню, в котором мы выбираем установку на диск.
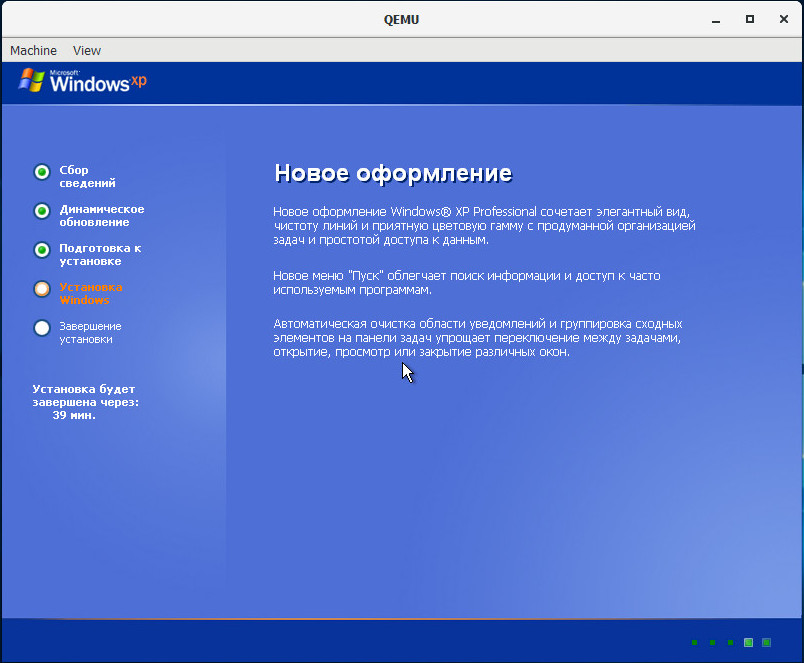
Далее проходим все этапы установки операционной системы вплоть до локальных настроек и загрузки рабочего стола.

Чтобы запустить закрытую виртуальную машину, выполните команду qemu-system-i386w.exe -hda name.img , где name — название вашего виртуального диска, чтобы удалить ставшую ненужной VM, просто удалите из каталога установки QEMU созданный IMG -образ.
Управлять QEMU можно с помощью клавиатуры и мыши, для переключения между эмулятором и хостовой машиной используйте комбинацию Ctrl + Alt + G . Запущенная с минимальными настройками ОС не будет иметь доступа к аудио- и сетевой карте, не будет также возможности обмена файлами между виртуальной и хостовой системами.
Нельзя сказать, что QEMU лучше или хуже VirtualBox либо VMware, это альтернативное средство виртуализации, имеющие как свои плюсы, так и минусы. QEMU менее удобен, требует знания документации и демонстрирует весьма небольшую производительность. Для ускорения работы в Windows требуется установка и настройка Диспетчера аппаратного ускорения HAXM, в Linux – подключение загружаемого модуля ядра KVM . С другой стороны, инструмент позволяет эмулировать работу устройств на базе разных архитектур, не поддерживаемые популярными гипервизорами.
How to Set up Virtual machines with QEMU GUI on Windows 10
Qemu is an open source software for virtualization on Windows 10/8/7, Linux and macOS but with a command-line interface, lightweight and low hardware requirements.
QEMU stands for “Quick Emulator” and is the standard tool for virtualization and CPU emulation under Linux, Windows and macOS. On Linux systems, QEMU uses the functions of the Linux kernel for virtualization (KVM- Kernel Virtual Machine), which are not available under Windows.
Thus, the binaries of Qemu’s ported version for Windows by Stefan Weil couldn’t provide the performance as it gives on Linux OS with KVM. Thus VirtualBox or Vmware player will be the best alternative options; still, if you want to try then here in this Qemu tutorial, we will let know the way to download, install and use Qemu on Windows 10 or 7 using its GUI VM manager Qtemu, an open-source software.
Qemu installation on Windows 10 with Qtemu GUI
Step 1: Download Qemu for Windows
From the official website of the Qemu, we can download it easily even the source code. Visit it and click on the Windows tab, it will take you to another page https://qemu.weilnetz.de to download 32 bit or 64 bit of this virtualization platform. Here we are getting the 64 bit.
Step 2: Install Qemu
Now, like any other Windows 10/7 software, just double click on the downloaded setup of Qemu and follow the installation wizard.
- Accept the suggested language setting, by default it will be English. Select the “OK” button.
- Press the NEXT button.
- Confirm the usual license terms (GNU General Public License) with “Accept“.
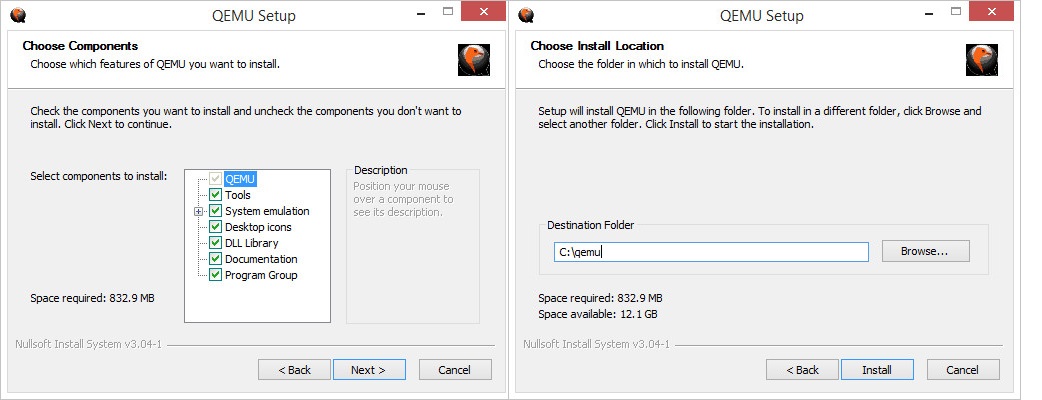
- All modules required for QEMU have already been selected in the “Select components” dialogue. Confirm with “Next”.
- Check the suggested destination folder and go to “Install“.
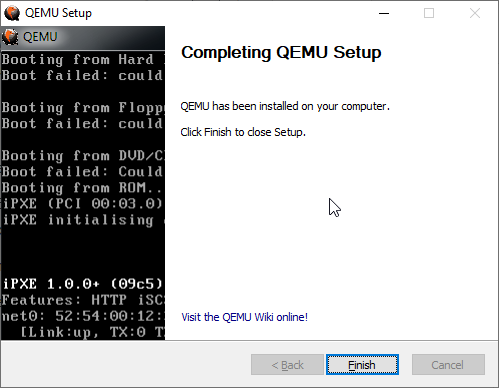
- Click on “Finish” to complete the setup of QEMU.
Qemu install & setup on windows
Step 3: Install GUI for QEMU on Windows 10
As we know the QEMU uses the command line to create virtual machines by default. But it would be not feasible for standard computer users using CLI to manage virtual machines, thus we install another open source application to provide Graphical user interface (GUI) to QEMU. This program is known as Qtemu which is a fork of a dead project available at https://qtemu.org.
Here are the links to download an active Qtemu project for Windows 10/8/7 available on Gitlab.
If you don’t want to install it, go for the portable version.
Gitlab Page Link of the project.
Step 4: Setup QEMU manager Qtemu GUI
After the installation of Qtemu run it from the Windows Start menu.
- In the first column “QEMU binaries path” copy-paste this: C:\Program Files\qemu\ Or enter the path where you have installed the QEMU.
- For the second column enter the path of Qemu-img file that is: C:\Program Files\qemu\qemu-img.exe
- Now create a folder anywhere on your computer where you want to save the virtual machines created by QEMU. And click on the folder icon given in the front of the third column to select that particular folder.
Note: You can change this configuration any time from the Qtemu Settings.

QTEMU GUI for QEMU on Windows 10 configuration
After that click on the Finish button.
Step 5: Create a Virtual machine
Now, from Qemu GUI manager Qtemu, simply click on Machine and select New Machine.
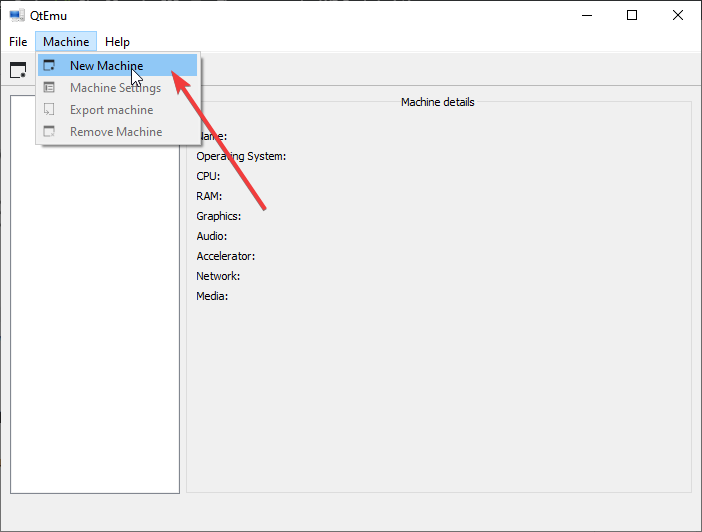
Create New Virtual machine
Leave the Machine which is meant to select some particular motherboard chipset.
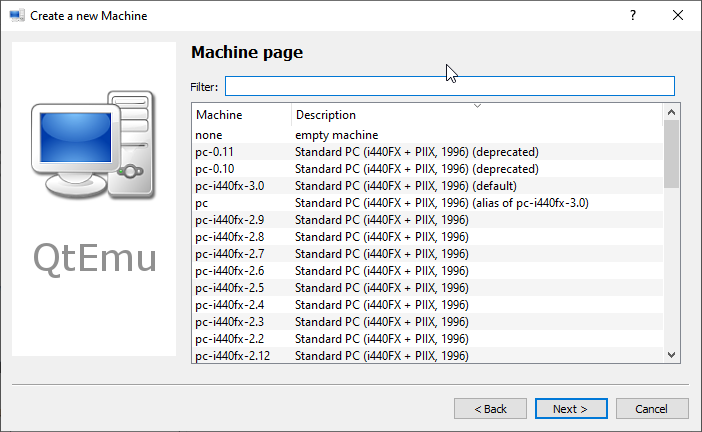
QTEMU Machine page
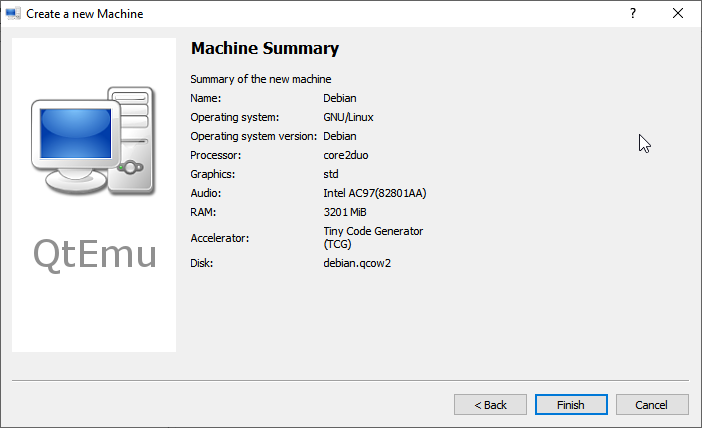
Configure the Virtual Machine hardware, select the CPU type such as Core 2 Duo, Base or any CPU that Qemu would be able to emulate on your system whereas set the CPU count, cores, Thread as shown in below screenshot.
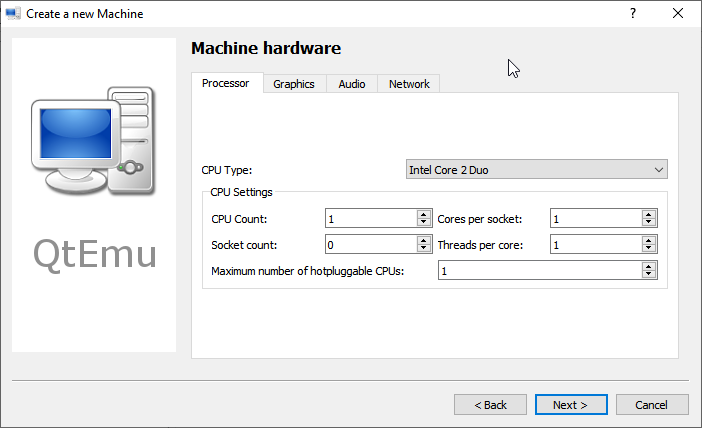
Set CPU in QTemu
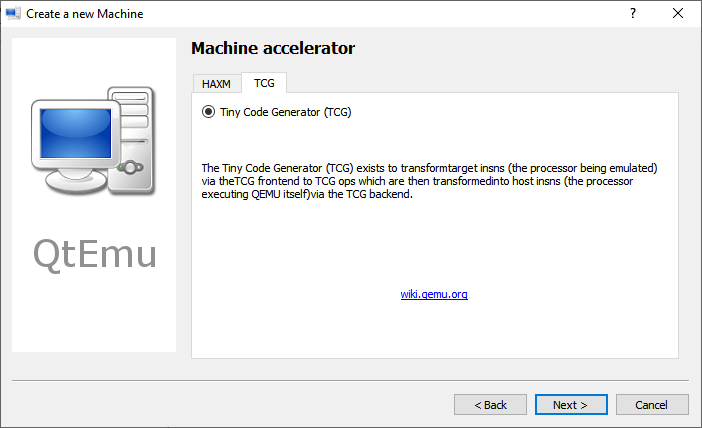
Accelerator Tiny code generator
Set the amount of RAM you want to assign to your VM.
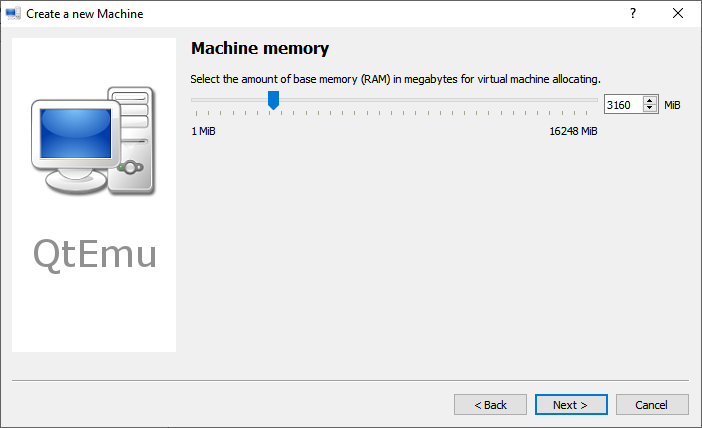
Set Qemu GUI RAM Memory
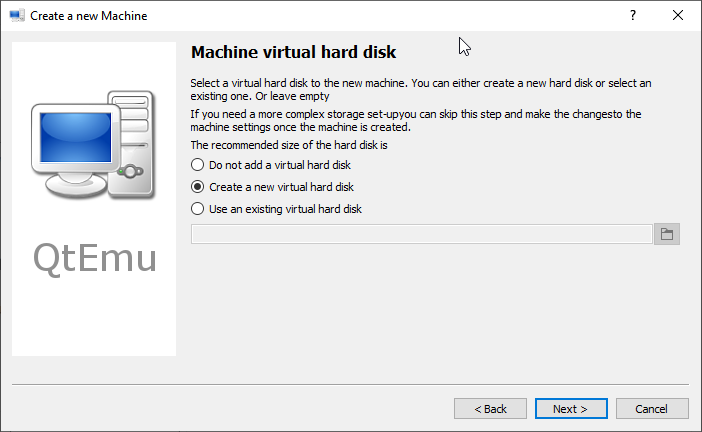
Create new hard disk on Qemu

Set Qemu hard disk
Step 6: Set bootable medium CD/DVD
Now, everything is ready, we have created a Virtual machine, its time to set a bootable medium to CD; so that our ISO file could be used while booting the QEMU VM.
For that right-click on the created VM on the QTEMU interface and select Machine Settings.
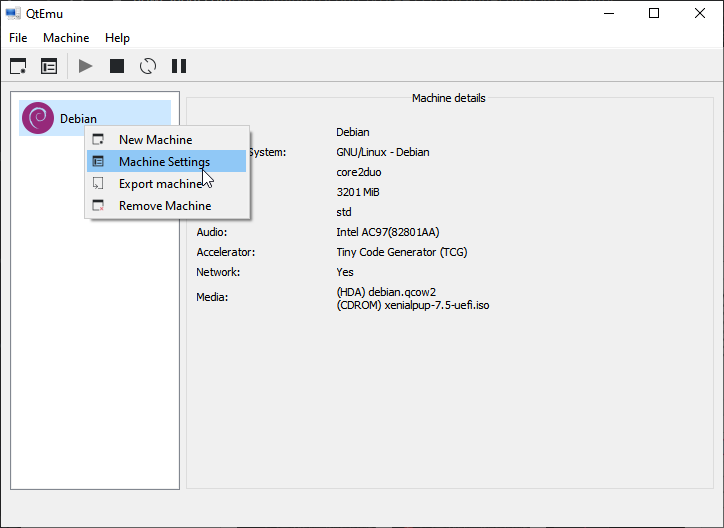
VM machine Settings
There select the Boot options from the right-side panel and after that check the “Enable boot menu” and then CD ROM option following the Save button.
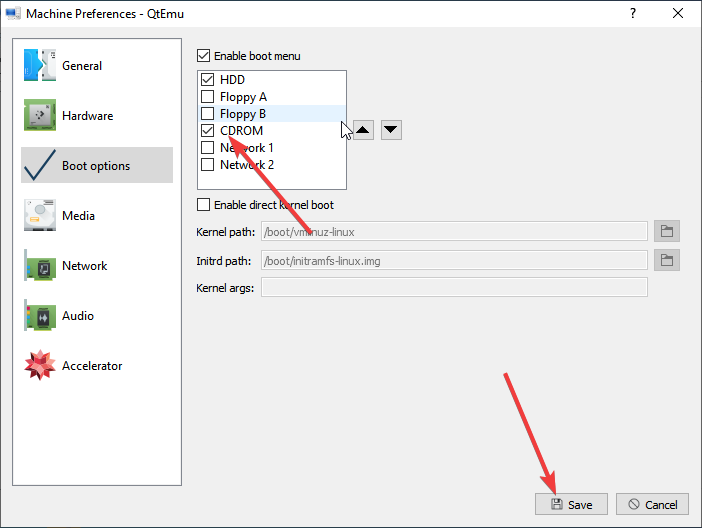
Set bootable medium in Qtemu
Step 7: Insert ISO file in QEMU via Qtemu GUI
Under the Machine settings, go to Media menu and click on the CD icon. This will open the Windows file explorer, navigate to ISO file of the OS which you want to boot with-in QEMU and click on the Save button.

Select ISO file as a bootable medium
Step 8: Boot Qemu Virtual Machine via GUI
Now, on the main interface of the Qtemu GUI, select the created VM and click on the start button. This will open the boot screen.
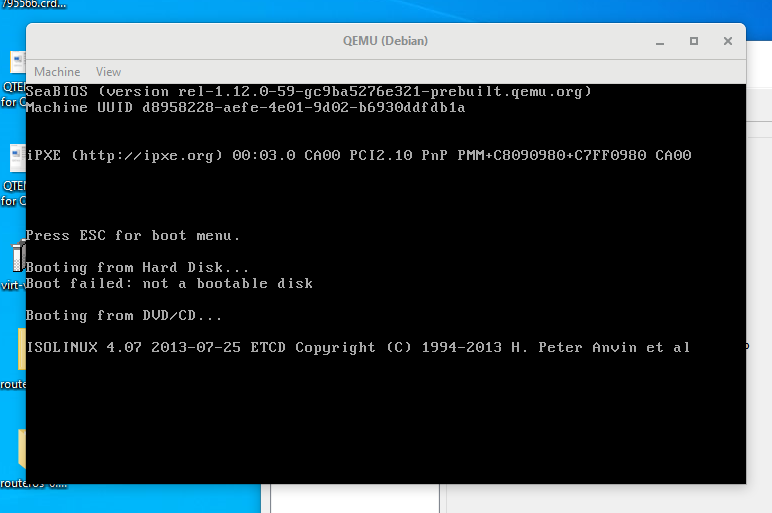
Boot QEMU virtual machine
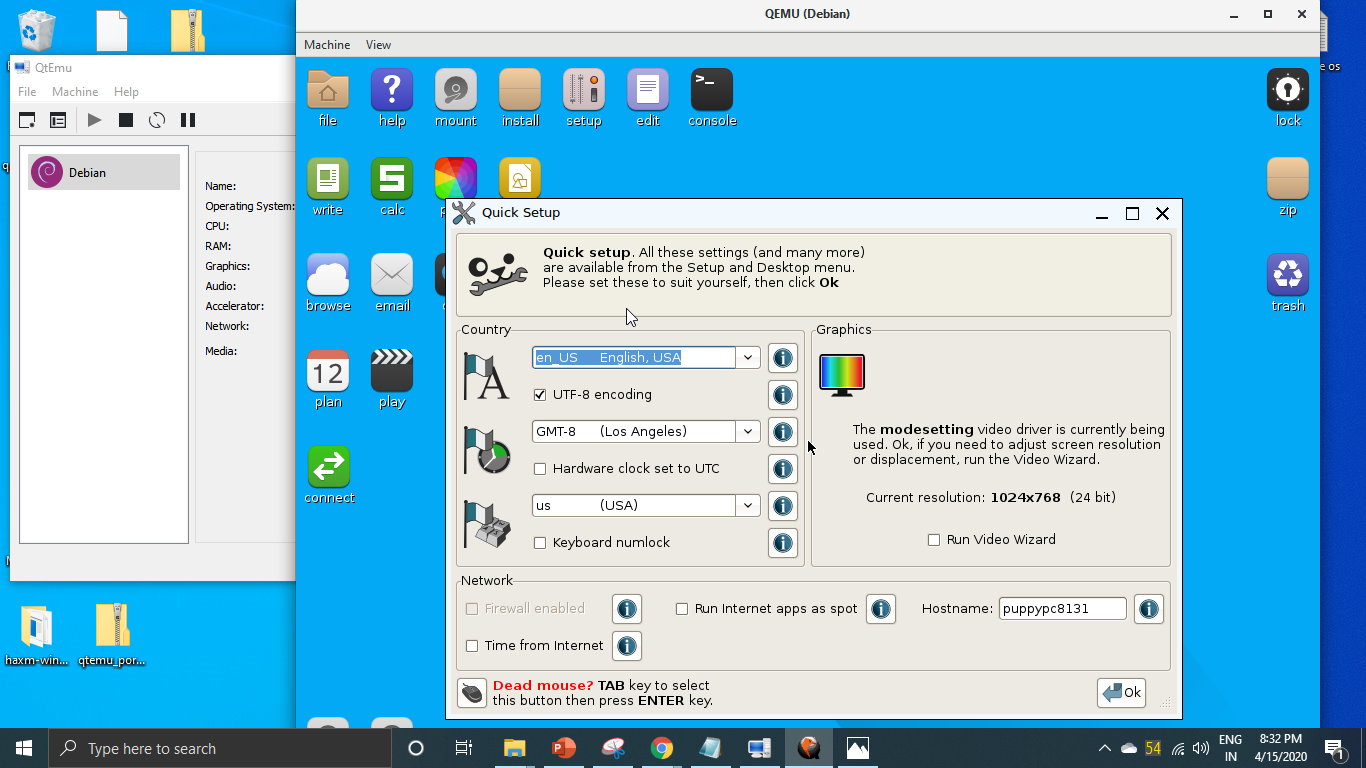
Wait for a few minutes depending upon the OS distribution you are using, it will show the LIVE screen of the same. However, I tried to boot and install Windows 10 on Qemu using the GUI but it was quite sluggish and slow.
Qemu installation on Windows 10 with Qtemu GUI
Verdict:
Although the CLI can be used to create and manage Virtual machine on Windows 10 using the QEMU, with Qtemu GUI tool it becomes quite easy, however, in my case it worked well with Lightweight Linux Distros but for Windows guest VMs quite slow and low performance. I recommend using VirtualBox instead. Yet, if someone wants to experience Qemu on Windows 10 this is the easiest possible way. Still, be cautious with Qtemu hardware configuration because slight here and there will not let you boot the VM.


