- How to extract hashes and crack Mac OS X Passwords
- Extract’em all
- Basics
- OS X 10.0 (Cheetah)
- OS X 10.1 (Puma)
- OS X 10.2 (Jaguar)
- OS X 10.3 (Panther)
- OS X 10.4 (Tiger)
- OS X 10.5 (Leopard) + OS X 10.6 (Snow Leopard)
- OS X 10.7 (Lion)
- OS X 10.8 (Mountain) & 10.9 (Mavericks) & 10.10 (Yosemite)
- OS X 10.11 (El Capitan)
- Tool to automate these steps
- Credits
- Статья Как украсть sudo пароль Ubuntu и macOS без каких-либо эксплойтов/кряка
- Here’s How to Hack Windows/Mac OS X Login Password (When Locked)
- How does the Attack Work?
- Hacking. Wi-Fi Penetration on MacOS
- installation requirements
- identify the target access point
- capturing a traffic
- brute forcing
- my results
- conclusion
- additional information
- You May Also Enjoy
- DELL. Configure Dell 10 gigabit switch with Ansible
- DELL. Upgrade firmware on Dell S4048 switch (S-series, OS9)
- DELL. Disabling SupportAssist on switch
- DELL. Setup SSH server on OS9 switch (S4048 10G switch)
How to extract hashes and crack Mac OS X Passwords
Extract’em all
Basics
/!\ This is for educational purposes only, and should not be used for unauthorized access, tampering or accessed illegally without owner permission.
This page will help you to retrieve/extract the hash associated to an OSX account. We tried to enumerate all the OS X flavors available, but this article is still «in beta» depending on the new OS X versions.
Once the hash is extracted, you can send it here and we will try to recover it.
OS X 10.0 (Cheetah)
The same as in 10.2 (Jaguar). See below.
OS X 10.1 (Puma)
The same as in 10.2 (Jaguar). See below.
OS X 10.2 (Jaguar)
Dump the hash :
This hash is created using the Unix DES Crypt(3) function, where the password is first truncated to 8 characters.
OS X 10.3 (Panther)
First find out a users’ GUID:
Next take that GUID and dump the hash file
The first 64 characters are the NTLM hash (first 32 NT, next 32 LM) and the last 40 characters are the SHA1 hash.
OS X 10.4 (Tiger)
You can obtain the GUID just as in 10.3 (Panther). See above.
After obtaining the GUID, you can dump the passwords just as in 10.5 (Leopard). See below.
OS X 10.5 (Leopard) + OS X 10.6 (Snow Leopard)
First find a users’ GUID:
After getting the GUID you can dump various hashes. By default the only hash stored is the salted SHA1. If the user has turned on SMB file sharing then the NTLM hash will also be stored.
If you upgraded from 10.3->10.4->10.5 then the zero salted SHA1 is also stored.
Salted SHA1 (first 8 characters are the salt)
Zero-Salted SHA1 (first 8 characters are the salt and will always be all zeros)
NTLM (first 32 characters are NT, next 32 are LM)
OS X 10.7 (Lion)
OS X 10.8 (Mountain) & 10.9 (Mavericks) & 10.10 (Yosemite)
The shadow files are stored on the filesystem at /var/db/dslocal/nodes/Default/users/%user%.plist.
They are in plist format so you’ll need to use the plutil command to view them or use the defaults command to extract/write specific keys if desired.
Only the root user has access to the files.
To view the contents of a shadow file for a user: To get the hash: Where %username% in the above example is the user you’re looking for the hash for.
Finally the wanted hash starts with «$ml$» and length is 203 characters.
OS X 10.11 (El Capitan)
The hashes of the users are stored in: To get the hash: or directly through directory services:
Tool to automate these steps
Davegrohl tool created in early 2011 is a password hash extractor & companion tool to John the Ripper.
Sadly the development of this tool has been stopped (but could be forked..), the current status is :
Dave compiles fine on Yosemite and will happily (but very slowly) crack user passwords. Out of the box, OS X uses PBKDF2 to encrypt its user passwords which is very slow to crack for one machine. Turning on Windows (SMB) file sharing will disable this feature.
Github project page readme
Credits
You can then post the hashes to our cracking system in order to get the plain text.
Источник
Статья Как украсть sudo пароль Ubuntu и macOS без каких-либо эксплойтов/кряка
С помощью простого трюка социальной инженерии, пароли sudo могут быть захвачены в считанные секунды без ведома цели. Пароли могут быть сохранены в файл или будут отправляться к другому компьютеру.
После эксплуатирования системы, пентестеры и хакеры часто начинают атаки эскалации привилегий (privesc). Такие атаки включают эксплуатацию ядра и фишинг паролей. Рекомендуемая здесь атака использует подход социальной инженерии, используя функции Bash для эмуляции функциональности команды sudo.
Как Sudo должен работать
Давайте используем следующие команды whoami и id в качестве примера. Если мы введем whoami в терминал, он вернет текущее имя пользователя.
Как Работают Функции Bash
Способ интерпретации sudo (или любой команды) может быть изменен таким образом, чтобы он был прозрачным для пользователя. Как и псевдонимы Bash, сложные функции можно импортировать в оболочку. Возьмите приведенный ниже GIF в качестве примера.
Мы видим, что выполнение обычной команды apt-get update завершается неудачей, потому что «sudo» больше не интерпретируется как прямая ссылка на реальный двоичный файл sudo. Теперь это функция, которая печатает произвольный текст. Этим очень легко злоупотребить. Функция «sudo» может вести себя точно так же, как настоящий sudo, при записи и эксфильтрации пароля цели.
У Вас Уже Должен Быть Удаленный Доступ
В данной статье предполагается, что удаленный доступ к целевой системе установлен. С macOS target, это может быть достигнуто с необнаруживаемой полезной нагрузкой, USB drop attack или USB Rubber Ducky. Серверы Ubuntu и Debian также могут использоваться с использованием различных SSH и серверных уязвимостей.
Создание вредоносной функции Bash
Этот вид злоупотребления лучше демонстрируется в нижеследующей функции.
Давайте посмотрим, как эта функция выглядит для цели.
Как мы видим, цель по-прежнему запрашивается с запросом пароля при попытке установить программное обеспечение.
Захваченный пароль сохраняется в файле /tmp/hackedPasswd.txt
Целевые Системы Debian И Ubuntu
В системах Debian и Ubuntu, когда открывается новый терминал или оболочка, выполняется файл
/.bashrc . Этот файл (который может быть изменен пользователями без root) обычно определяет полезные атрибуты, такие как псевдонимы, ограничение истории и переменные цвета. Он также может быть использован для импорта вредоносных функций Bash. Это будет работать для серверов Debian, Ubuntu и систем macOS.
Для удобства я загрузил вредоносную функцию sudo на свою страницуGitHub. Его можно загрузить в систему цели, используя следующую команду.
Целевые системы macOS
Этот вид атаки менее эффективен против пользователей mac OS. Просто потому, что они не так часто открывают терминал и выполняют команды с повышенными правами. Пользователям MacOS команда sudo не нужна так часто, как пользователям VPS или Ubuntu desktop. Тем не менее, я покажу, как настроить это против цели macOS, поскольку это может быть полезно для некоторых пентестеров, исследующих каждый возможный маршрут, чтобы повысить их бэкдор.
/.bashrc , macOS выполняют
/.bash__profile file при открытии терминала. В этом файле могут храниться вредоносные хэш-функции. Используйте приведенную ниже команду wget для импорта функции в профиль bash цели.
Когда цель открывает терминал и выполняет команды с sudo, пароль будет сохранен в каталоге /tmp. Это показано на скриншоте ниже.

Как Вытащить пароль
В дополнение к сохранению пароля в каталоге / tmp желательно чтобы пароль был отправлен на другой компьютер или сервер. Правильный прослушиватель PHP может быть настроен для перехвата данных, содержащих пароль.
Источник
Here’s How to Hack Windows/Mac OS X Login Password (When Locked)
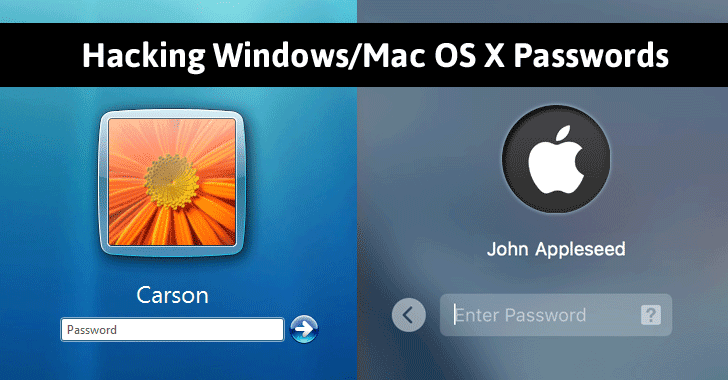
A Security researcher has discovered a unique attack method that can be used to steal credentials from a locked computer (but, logged-in) and works on both Windows as well as Mac OS X systems.
In his blog post published today, security expert Rob Fuller demonstrated and explained how to exploit a USB SoC-based device to turn it into a credential-sniffer that works even on a locked computer or laptop.
Fuller modified the firmware code of USB dongle in such a way that when it is plugged into an Ethernet adapter, the plug-and-play USB device installs and acts itself as the network gateway, DNS server, and Web Proxy Auto-discovery Protocol (WPAD) server for the victim’s machine.

«Now, I believe there are restrictions on what types of devices are allowed to install at a locked out state on newer operating systems (Win10/El Capitan), but Ethernet/LAN is definitely on the white list.»
How does the Attack Work?
You might be wondering: Why your computer automatically share Windows credentials with any connected device?
That is because of the default behavior of Microsoft Window’s name resolution services, which can be abused to steal authentication credentials.

The modified plug-and-play USB Ethernet adapter includes a piece of software, i.e. Responder, which spoofs the network to intercept hashed credentials and then stored them in an SQLite database.
The hashed credentials collected by the network exploitation tool can later be easily brute-forced to get clear text passwords.
Apparently, to conduct this attack, attackers would require physical access to a target computer, so that they can plug in the evil USB Ethernet adapter. However, Fuller says the average time required for a successful attack is just 13 seconds.
You can watch the video demonstration below that shows Fuller’s attack in action.
Fuller successfully tested his attack against Windows 98 SE, Windows 2000 SP4, Windows XP SP3, Windows 7 SP1, Windows 10 Enterprise and Home (but not Windows 8), as well as OS X El Capitan and OS X Mavericks. He’s also planning to test it against several Linux distros.
Fuller tested the attack with two USB Ethernet dongles: the USB Armory and the Hak5 Turtle. For more detailed explanation, you can head on to his blog post.
Источник
Hacking. Wi-Fi Penetration on MacOS
Disclaimer: this post for education purposes only.
A wireless network with WPA/WPA security not guarantee a total safety. WiFi packets could be sniffed by an attacker that can stole a WiFi passwords, then he connects to your secured network. But he is need to decode a hash of password. The complexity and time to get a password phrase completely depends on the password. Passwords consists only digits cracks minutes or hours, the password “HasGUS%f@$SAfga63efSA%$S(SACSASj)” require a hundred years to crack it.
MacOS isn’t known as an ideal operating system for hacking without customization, but it includes native tools that allow easy control of the Wi-Fi radio for packet sniffing. Changing channels, scanning for access points, and even capturing packets all can be done from the command line.
This manual show a manual to crack WiFi password from my MacBook Pro with MacOS 10.13 (HighSierra). I want to save the instruction to the future. If you want to repeat it you should familiar with console terminal.
Let’s start cracking 😉
installation requirements
Install [JamWifi][https://github.com/0x0XDev/JamWiFi] app. It is a deauthenticating application in which unwanted clients from a Wi-Fi network have to keep off, jamming and especially their connection will be departed like dust in a second. Download and unzip by this link.
Test that all tools installed and available. The commands below should success return some help page about itself:
identify the target access point
- Basic Service Set Identifier (BSSID).
- Service Set Identifier (SSID).
- Radio Frequency (Channel).
- Access Point (AP).
Now, this command will be scanning the available Wi-Fi.
Wait till the installation is done. 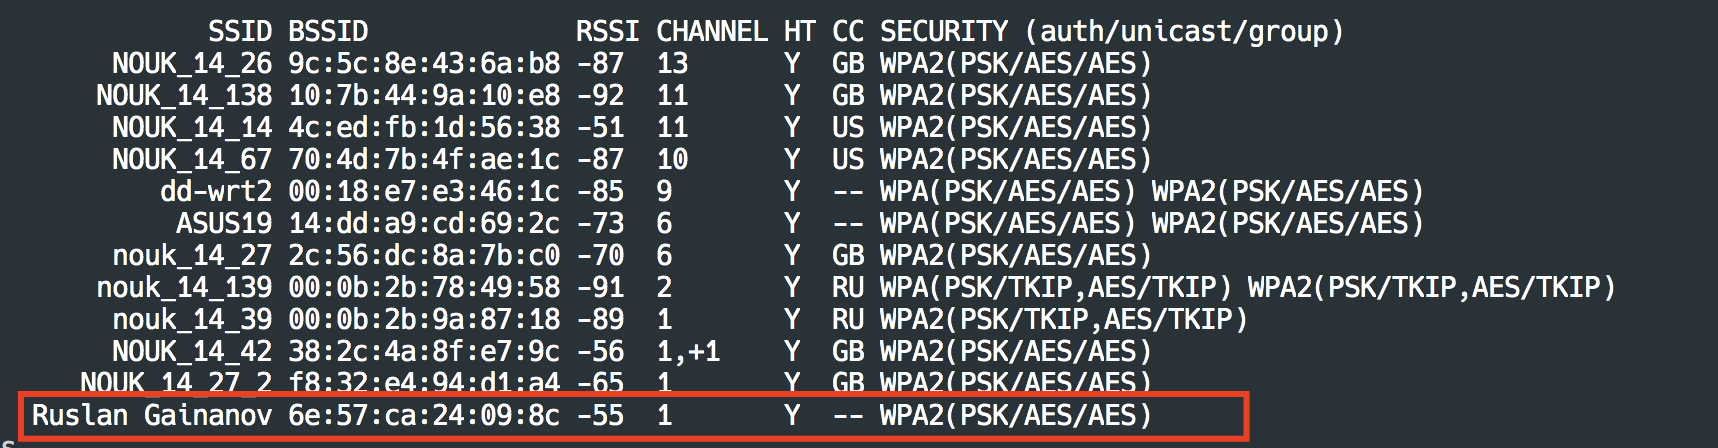 I want to hack my network named Ruslan Gainanov and BSSID 6e:57:ca:24:09:8c and channel 1 .
Copy the BSSID (my BSSID= 6e:57:ca:24:09:8c ) of the target Access Point.
capturing a traffic
- Run a command to help find a wireless interface ( en0 )
Deauth connected devices with Jam Wi-Fi app. Open the app. Press Scan, chose the target network and press Monitor, then press Do It! to restart all connections. Wait 15 seconds and press Done 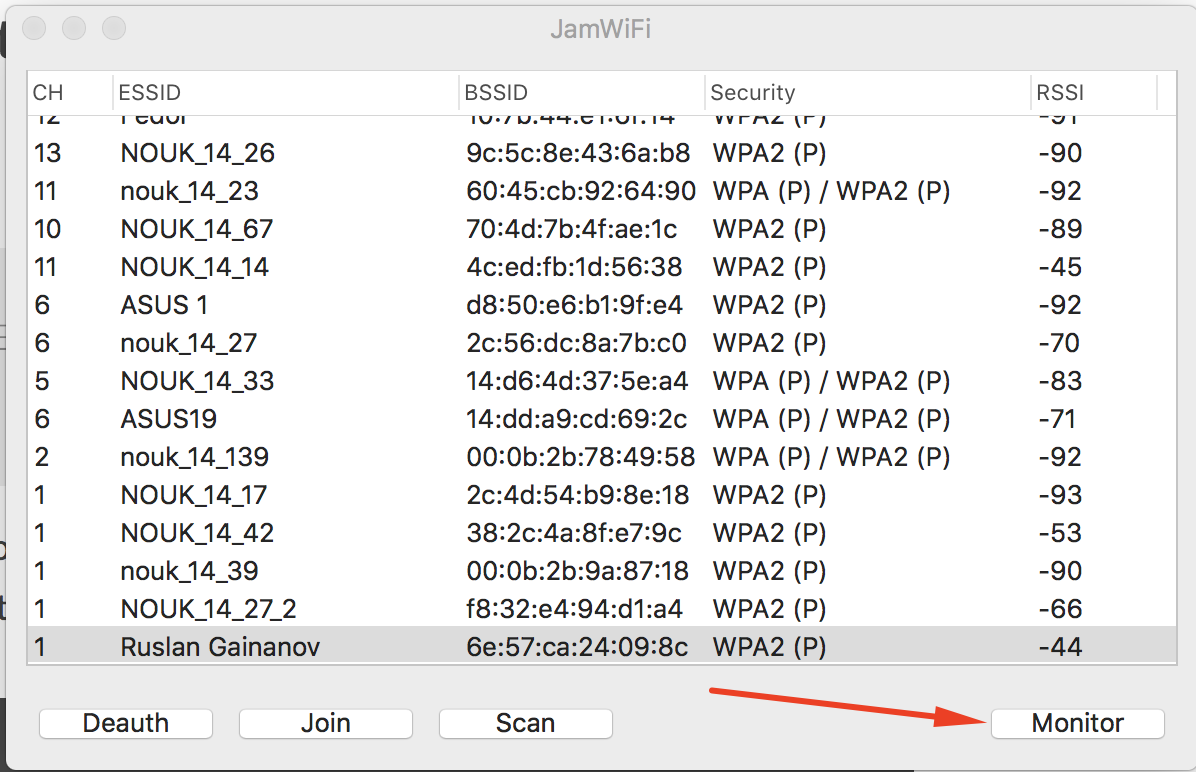
When you “Done” with death, run quickly next command. You have to capture a handshake in time
Wait until you see some gotten frames, like this
After you have it press «Control + C» to stop capturing.
Merge the Beacon and Handshake
brute forcing
- Brute Force — A brute-force attack consists of an attacker submitting many passwords or passphrases with the hope of eventually guessing correctly.
- Wordlist — A written collection of all words derived from a particular source.
.1. Generating HCCPAX File
Hashcat doesn’t take cap files, only hccapx files. So we need convert this files. Other way to made it is use a online tool.
Review the result. You should see the phrase Networks detected: X. Written X WPA Handshakes . The example of success result is:
.2. Now, everything are right to execute the hashcat. We can use a wordlist or a pattern to broke a password. Using a wordlist (example of wordlists — https://github.com/kennyn510/wpa2-wordlists.git):
Using a pattern — 8 digits:
For more examples press here. For more patterns, see the documentation.
my results
I use the hashcat with pattern, that works on GPU. On my MacBook Pro, it yields a performance of 41kH/s: it tests 41000 passwords in a second.

The cracking a WiFi password consists 8 digits took me twenty minutes (20 mins, 17 secs).
Is true that my network named Ruslan Gainanov has a password — 12345670 .
conclusion
Please be aware that attacking Wi-Fi Protected Access (WPA) is illegal unless you have permission from the owner’s access point or affiliation involved. This post should be used as Educational Purposes, to help the public understand how hackers take advantage of your access.
additional information
- Youtube Video — video example of hacking WiFi password
- Hacking: Aircrack-ng on Mac OsX — Cracking wi-fi without kali in parallels — the blog article that I based
- Hacking: Wi-Fi Penetration on MacOS — another good article on Medium
- Cracking WPA/WPA2 with hashcat — brief manual of hashcat using
- New attack on WPA/WPA2 using PMKID — a new technique to crack WPA PSK without capturing a full EAPOL 4-way handshake
Updated: July 17, 2020
You May Also Enjoy
DELL. Configure Dell 10 gigabit switch with Ansible
Use Ansible playbooks to easy configure Dell Networking OS9 system. The post contains many practical examples of using dellos9 modules
DELL. Upgrade firmware on Dell S4048 switch (S-series, OS9)
Instructions for upgrading the last firmware of Dell Networking system.
DELL. Disabling SupportAssist on switch
SupportAssist is a daemon for sending technical reports to Dell servers. It enables by default. Here we disable this unwanted feature (and may be unsecured).
DELL. Setup SSH server on OS9 switch (S4048 10G switch)
Setup and configure ssh server on Dell Networking system with RSA and password authentication.
Источник


