- Добываем Wi-Fi соседа стандартными средствами MacOS
- Принципы добычи паролей соседского Wi-Fi
- Добываем пароли. Соседи вешайтесь 😉
- Hackaday
- 195 Articles
- Controlling External Monitors On M1 Macs With Undocumented APIs
- A Single SSD’s Journey From System 7 To High Sierra
- Handheld Hackintosh Runs Mac OS On LattePanda
- 30-Year-Old Macintosh SE/30 Gets A Brand New Logic Board
- Get Apple To Track Your Bluetooth Devices For You
- Recreating The Mac SE Logic Board
- FTDI VCP Chips With Custom PIDs Not Working On MacOS 11 Big Sur
Добываем Wi-Fi соседа стандартными средствами MacOS
Я всегда был фанатом багов и уязвимостей «на поверхности», всегда завидовал чувакам, которые пишут эксплойты для самых защищённых ОС, а сам умел только скрипткиддить (термин из нулевых). Однако мой пост про уязвимости в системах контроля версий набрал более 1000 лайков на Хабре и остаётся топ1 постом за всю историю Хабра, несмотря на то, что был написан 9(!) лет назад.
И сегодня я хотел бы на пальцах показать и рассказать про такую штуку, как вардрайвинг. А точнее, как стандартными средствами MacOS можно добыть пароли от Wi-Fi соседей. Нелёгкая забросила меня на очередную квартиру. Как-то исторически сложилось, что я ленивый. Пару лет назад я уже писал, что моя лень, новая квартира и провод Beeline (бывшая Corbina) помогли мне найти багу у Билайна и иметь бесплатно интернет в их сети. «Сегодня» происходит «подобное», я на новой квартире, нет даже провода, но есть много сетей у соседей.
Заколебавшись расходовать мобильный трафик, я решил, что «соседям надо помогать», и под «соседями» я имел введу себя…
Когда-то давно я увлекался вардрайвингом, как раз именно до того момента, пока не обнаружил в старой квартире провод Билайна ) Там тоже было много сетей рядом и первое, что пришло в голову — мне нужен wi-fi. С тех пор прошло много лет. Обновляя свои данные про вардрайвинг, я нашёл в сети упоминание, что 90% работы спец.утилит «сегодня» можно сделать стандартными сервисами MacOS. Забегая вперёд, я хотел бы отметить, что не являюсь автором данного метода, я сам нашёл его в забугорном инете, просто, скажем, это вольный перевод и подробное, художественное описание способа добыть wi-fi пароли стандартными методами макоси, не более.
Принципы добычи паролей соседского Wi-Fi
Надо понимать, что имея Wi-Fi-приёмник, который есть сегодня в любом ноутбуке, ты можешь «снифать» весь беспроводной трафик около себя. Раньше, когда сети были открыты, достаточно было прийти в макдак и за вечер можно было получить 100-200 акков к одноклассникам. Открытая сеть + отсутсвие https делали своё дело.
Сейчас всё интереснее, все переходят на https (пользуясь случаем, хочу передать привет Lets Encypt. Любимый Lets Encypt, я в телевизоре и передаю вам привет, спасибо, что вы есть) и даже про WEP уже все забыли, все роутеры юзают WPA2. Но, как известно, меч был придуман раньше щита, и никакой WPA2 не помеха человеку, голодного до интернета и видящего около себя кучу Wi-Fi.
Продолжим. Имея Wi-Fi карту, т.е. любой современный ноутбук, мы можем снифать трафик возле себя. Но он бесполезен, ибо зашифрован. Единственное, что можно разобрать из него — метаданные, типа название сетей итп и «рукопожатия», handshake, т.е. авторизации пользователей в сети. Они происходят каждый раз, когда пользователь подключается к wi-fi-сети. Например, когда сосед приходит домой и его смартфон в кармане цепляется к домашнему wi-fi.
Если совсем грубо, рукопожатия представляют собой обычный хэш типа md5.
Это правда совсем грубо. Ключ там получается путем 4096 раундов SHA1. Если быть точным, то формула такая: Key = PBKDF2(HMAC−SHA1, passphrase, ssid, 4096, 256)
Кстати, можно заметить, что замешивается название точки, поэтому при уникальном названии предвычисления не помогают. И это аргумент за то, чтобы менять название точки на свое.
И да, я солгал в своём первом абзаце про «дешифрацию», это техническая ошибка и подмена понятий. Конечно, дешифровать хэш невозможно. Это как говорить «лицензия такси», зная, что деятельность такси в РФ не лицензируется. Но просто так удобней )
Так вот. Всё, что нам надо — это найти среди траффика радиосети вокруг себя рукопожатия и «дешифровать» их. И раньше была куча софта для всего это. Кто-то умел грамотно сканировать радиоканал, кто-то отлично его сниффал в дампы, кто-то находил хэши в дампах, кто-то умел их ломать. Сейчас всё стало проще, благодаря Тиму Куку. 90% работы за стороннее ПО делает стандартное приложение «Беспроводная диагностика». Многие его видели — когда проблемы с Wi-Fi, мак предлагает проверить сеть. Бесполезная утилита, которая даёт советы типа «перезагрузите роутер». Ну, т.е. мне так казалось )
Добываем пароли. Соседи вешайтесь 😉
Итак, погнали. Зажимаем Alt и кликаем по логотипу Wi-Fi в верхней панели. Вообще Alt и клик всегда открывает дополнительные опции в MacOS, но это тема отдельного топика.
Помимо прочей доп.инфы, которая порой очень полезная, мы можем запустить программу «Беспроводная диагностика». Думаю, все кто пользуются маком, помнят это окно.
Но нас интересует другое. Кликаем по пункту меню «Окно» и видим набор дополнительных утилит.
И тут прям есть всё, что надо, даже больше ) Конкретно нас интересуют 2 пункта. Сканирование и Анализатор. Первый покажет нам все сети вокруг с доп.инфой, типа на каком канале и на какой частоте работает сеть. Второй пункт позволит сниффать трафик на конкретном канале и частоте.
Нажимая на кнопку «Начать» в Анализаторе, Wi-Fi-карточка переключится в режим приёма и начнёт сканировать радиочастоту вокруг себя, дамп будет писаться в /var/tmp.
Файлы *.wcap это наши дампы, которые содержат бесполезный для нас траффик и нужные нам рукопожатия.
Надо понимать, что нам необходимо поймать именно рукопожатия. Т.е. нам надо поймать и сниффать траффик, когда сосед приходит домой вечером. Либо, если у вас есть ещё одно устройство на макоси, либо любой другой оси, вам помогут нюкеры. Программки, рассылающие поддельные команды деаунтефикации. Например, JamWiFi. Но это если прям совсем не терпится ) На моём опыте, достаточно просто запустить Анализатор в 6 вечера на часок.
«Стоп» скажите вы, «ты же обещал взлом сетей соседа стандартными методами?» ) Ха! И вы мне поверили?! На самом деле мы стандартными методами сделали 90% работы через GUI. У нас уже есть хэши, всё что нам надо — разбить их. Уверен, можно всё сделать и стандартными утилитами, но проще юзать hashcat. Собираем софт через brew или из сорцов. Первым делом нам надо конвертировать наш дамп, оставив в нём только наши хэши. Этим занимается бинарник cap2hccapx из пакета.

…
Мы видим, что успели перехватить 2 рукопожатия, попробуем «сломать их». Для этого нам нужен naive-hashcat:
Кошка пошла работать. В среднем у меня на маке я имею скорость в 2000 хешей в секунду, на скрине 7к, но это только старт. Судя по этому документу, на 1080gtx можно получить скорость в 400к хешей в секунду. Однако у меня всего 2 рукопожатия и не такой уж и большой словарь, поэтому пробежаться по нему не составило проблем. Смотрим файл home-wifi.txt, вуаля:
Вот и всё. К сожалению, эта сеть через несколько квартир от меня и на другом этаже, пинг 7 секунд ) Надо ловить соседа снизу или брать внешнюю wi-fi-карту с нормальной антенной. Но принцип, думаю, понятен.
Удачных сканирований вам, юные подованы вардрайверы. И большое спасибо разработчикам Kali Linux MacOS за такие подарки.
Источник
Hackaday
195 Articles
Controlling External Monitors On M1 Macs With Undocumented APIs
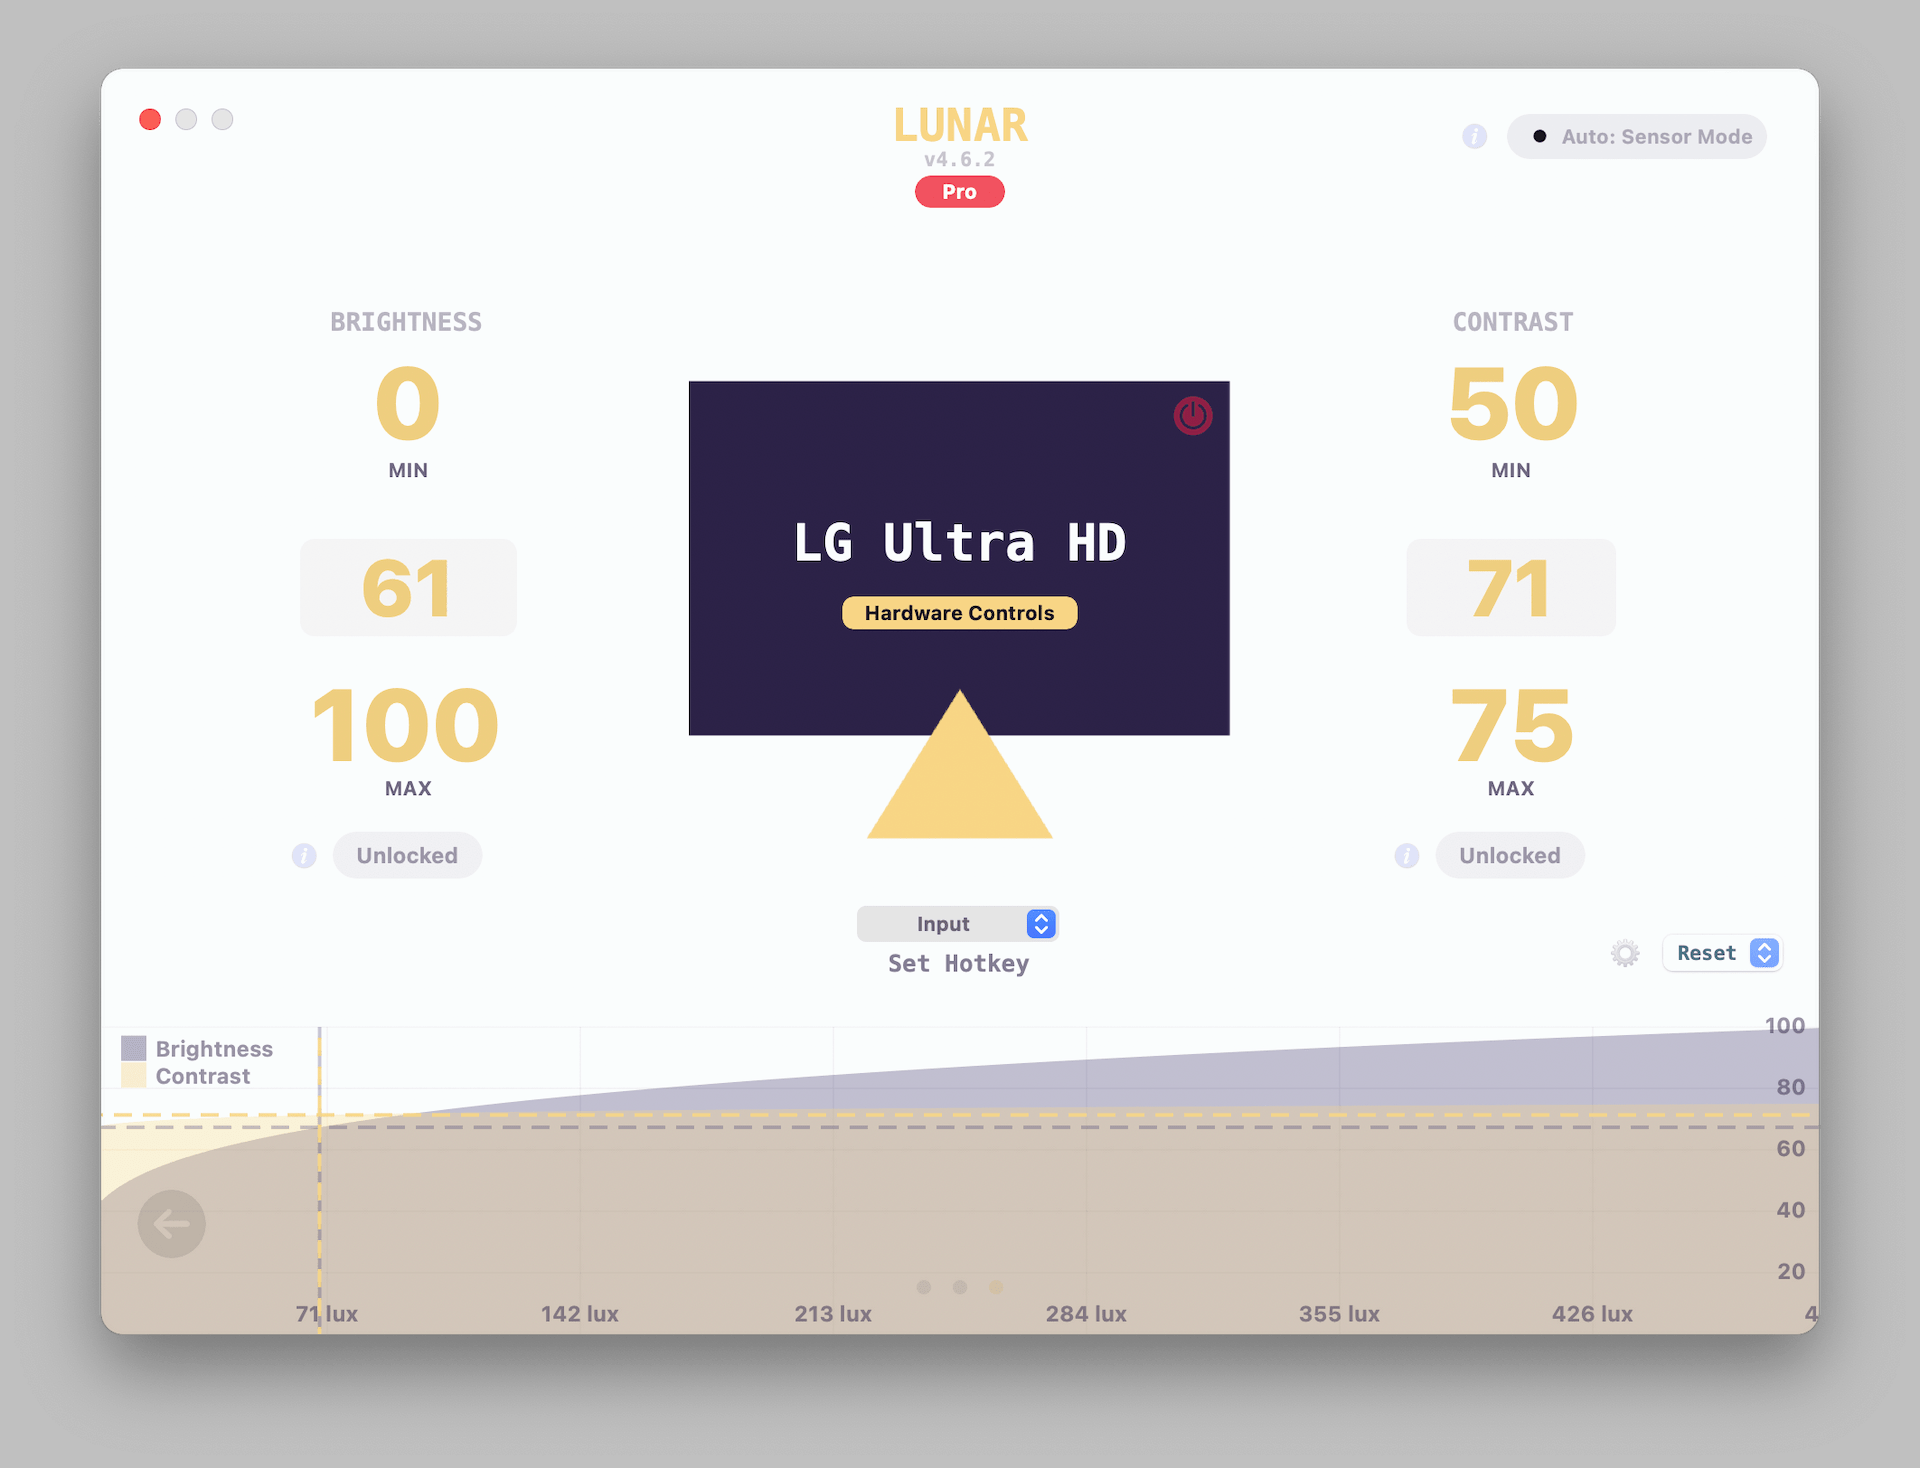
Display Data Channel (DDC) is a very useful feature of modern digital displays, as it allows the graphics card (and thus the OS) to communicate with a display and control features such as brightness and contrast. The biggest negative aspect here is the relatively poor access to this feature within an operating system like MacOS, which can change on a whim, as [Alin Panaitiu] found out recently.
Current displays implement DDC2, which is based around an I 2 C bus. Despite this, few OSes offer DDC-based control of features such as brightness which is where [Alin] developed a popular utility for MacOS that used undocumented APIs to talk DDC2 with external monitors via I2C. Until the new Arm-based Mac systems got released and these undocumented APIs got changed, that is.
Even though there are some ways around this, with some utilities using a simple software-based overlay to ‘dim’ the display, or using an external gamma adjustment via an external Raspberry Pi system hooked up to HDMI and using ddcutil, the best way is still via DDC2. Ultimately the new (undocumented) APIs that provide access were discovered, with another user going by the name [zhuowei] notifying [Alin] of the new IOAVServiceReadI2C and IOAVServiceWriteI2C methods with Arm-based MacOS.
After this it took some more sleuthing to figure out which of the devices on the I2C bus were which monitor in the case of multiple external monitors, but in the end it all worked again, adding hardware-based brightness controls back in the hands of MacOS users. Minus a few apparent hardware issues with HDMI on the M1 Mac Mini and some displays, but who is counting?
[Heading image: Screenshot of the Lunar app on MacOS. Credit: Alin Panaitiu]
A Single SSD’s Journey From System 7 To High Sierra
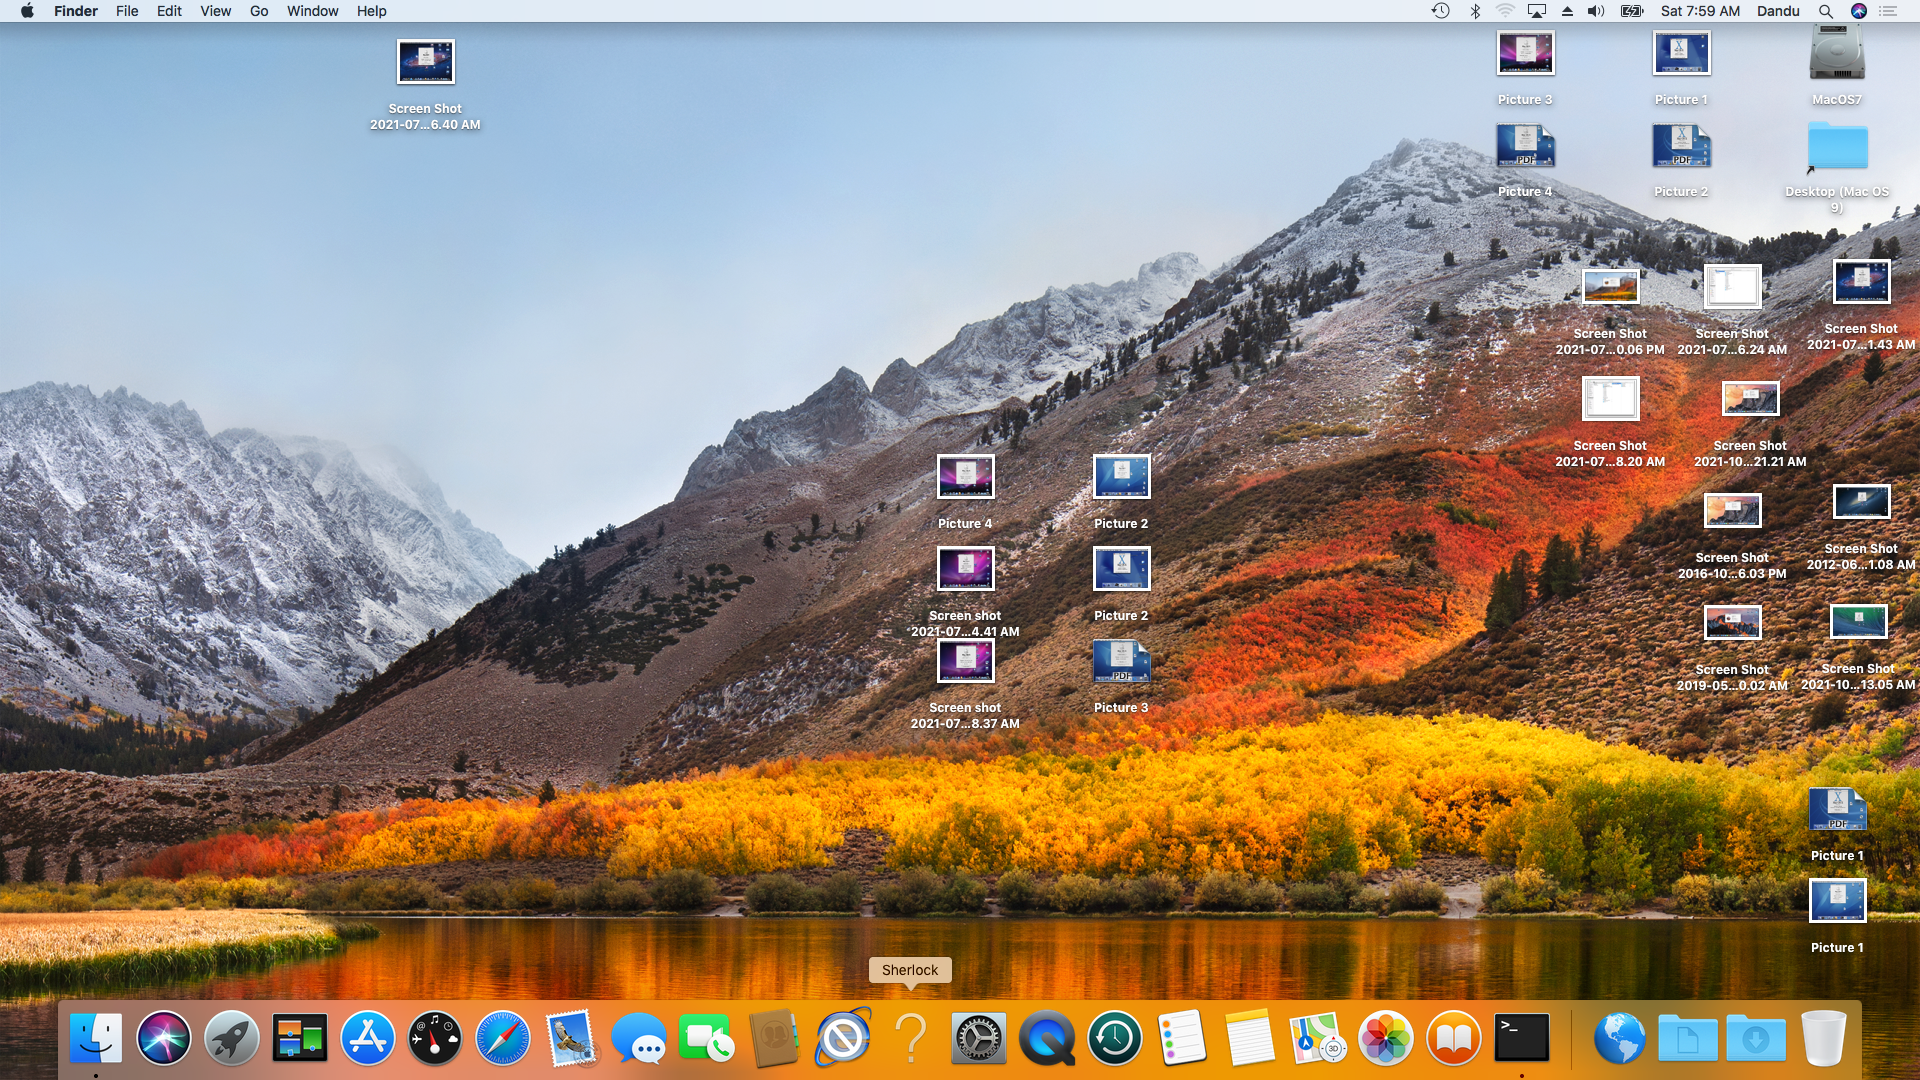
With some time to kill and an array of old Apple computers on hand, [Pierre Dandumont] wondered if he could continuously upgrade a single OS drive from the oldest system he had, System 7.1 on a Performa 630, to the latest version of MacOS on a MacBook Air. He recalled watching an old video which demonstrated a continuous upgrade from DOS to Windows 10 (we think this video from 2016 may be the one), which gave him the inspiration for this journey. [Pierre] documents his efforts on his blog (in French; English translated link is here).
Along the way, he installed 24 different operating systems
- System 7.1.2, 7.5
- Mac OS 7.6
- Mac OS 8.0, 8.1, 8.5, 8.6
- Mac OS 9.0, 9.1, 9.2
- Mac OS X 10.0 – 10.11
- macOS 10.12, 10.13
on seven Mac computers
- Performa 630 (ca. 1994, Motorola 68040)
- Power Mac G3 Beige (ca. 1997, Motorola PowerPC 730)
- Power Mac G3 Blue (ca. 1999, Motorola PowerPC 730)
- Power Mac G4 Digital Audio (ca. 2001, Motorola PowerPC 7400)
- Mac mini G4 (ca. 2005, Motorola PowerPC 7447)
- Mac mini 2009 (Intel Core 2 Duo Penryn)
- MacBook Air 2012 (Intel Core i5/i7)
across three of the four processor families spanned by the Macintosh line of computers since their introduction in 1984. You can see in the lead photo the success, where the Mac OS 8 search tool Sherlock is shown in the dock of a MacBook Air running High Sierra.
Handheld Hackintosh Runs Mac OS On LattePanda
We’ve seen a huge influx of bespoke portable computers over the last couple of years thanks to availability of increasingly powerful single-board computers. The vast majority of these have been ARM powered using something like the Raspberry Pi 4, and naturally, run Linux. Only a handful have run on x86 hardware, usually because whoever built it wanted to be able to run Windows.
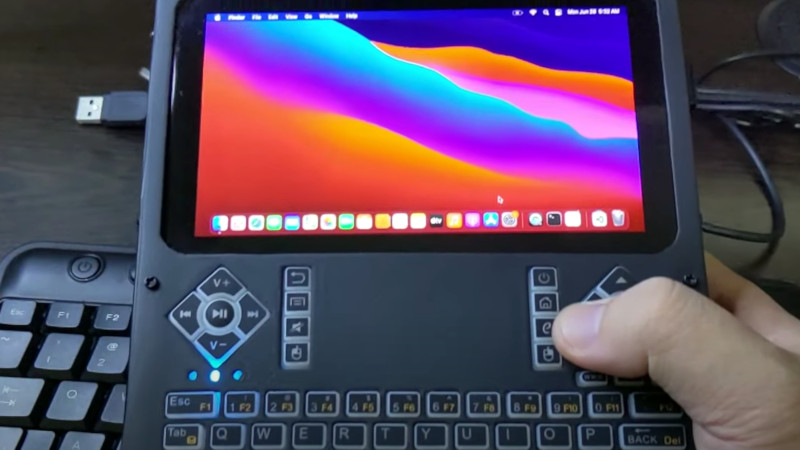
But this handheld x86 Hackintosh running the latest Mac OS on the LattePanda Alpha is truly something unique. Creator [iketsj] claims it to be a world’s first, and after a bit of searching, we’re inclined to agree. While others have installed Mac OS on the LattePanda to create Hackintosh laptops, this would indeed appear to be the first handheld computer to utilize this particular hardware and software blend.
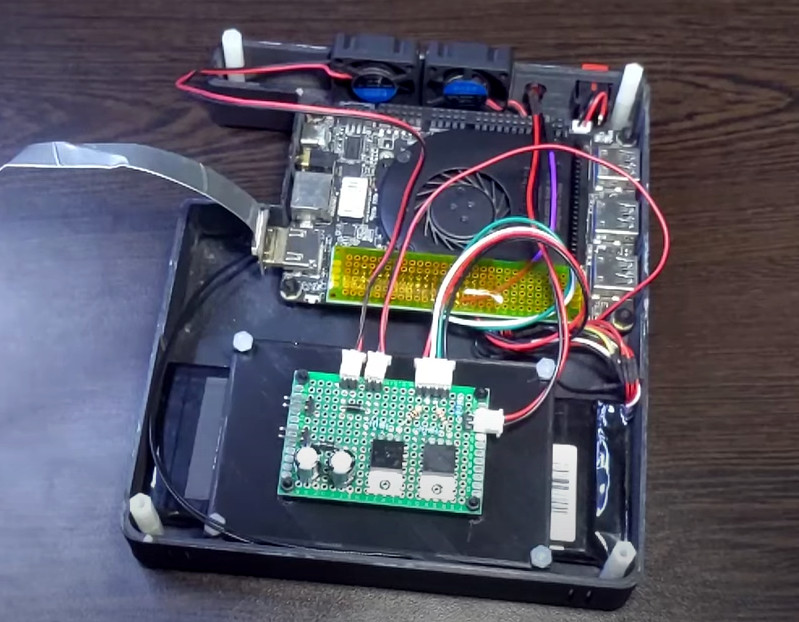
We especially like how the integrated Arduino on the LattePanda is being used in conjunction with some MOSFETs to control power to the handheld’s LCD, keyboard, and fans. While it sounds like the fans are currently running at full throttle, [iketsj] mentions he does intend on adding automatic speed control in the future. A dedicated “chassis controller” like this makes a lot of sense, and is something we imagine will only become more common as these portable builds become increasingly complex.
Now that we’ve seen a custom portable computer running Mac OS, are we due to see a whole new wave of cyberdecks sporting Cupertino’s software in the future? Maybe not. As [iketsj] points out at the end of this video, Apple’s switch from x86 to their own in-house silicon will almost certainly mean the death of the Hackintosh project within the next few years, bringing a fascinating era of computer hacking to a close.
30-Year-Old Macintosh SE/30 Gets A Brand New Logic Board
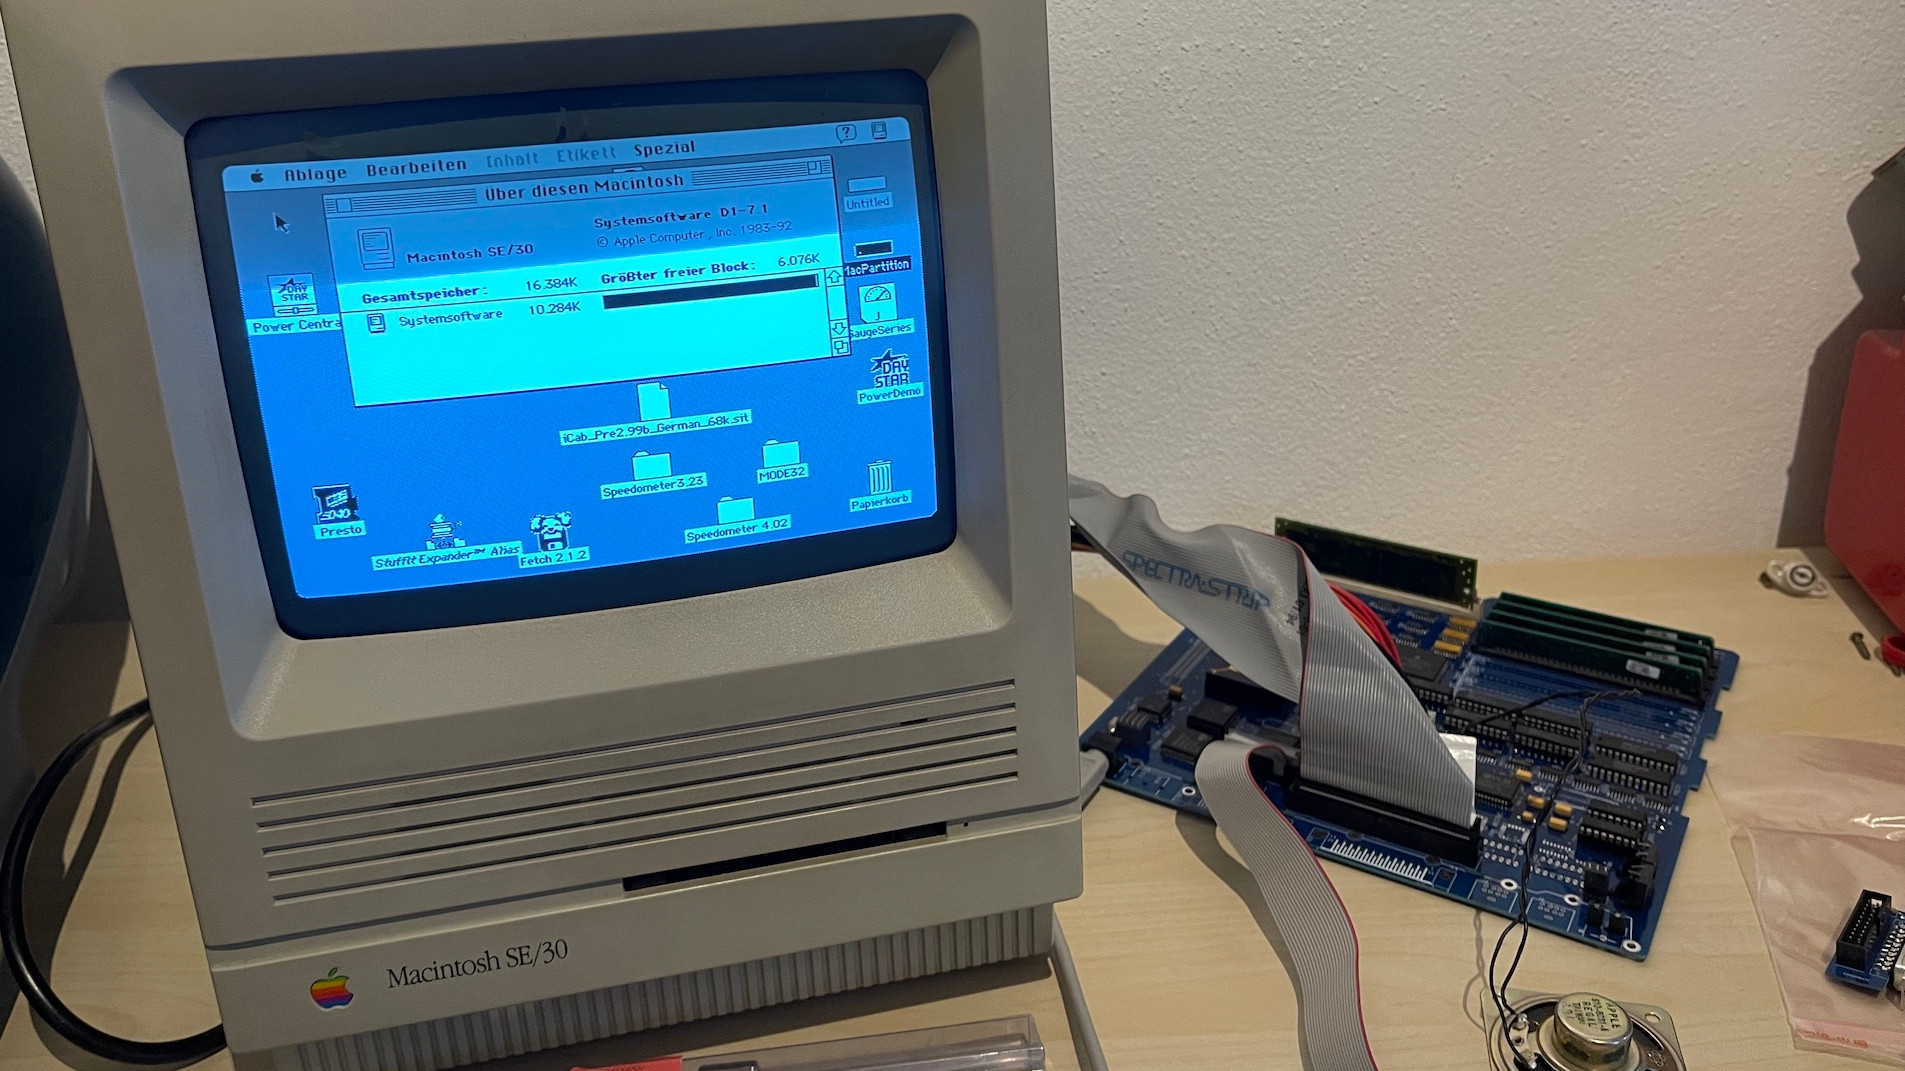
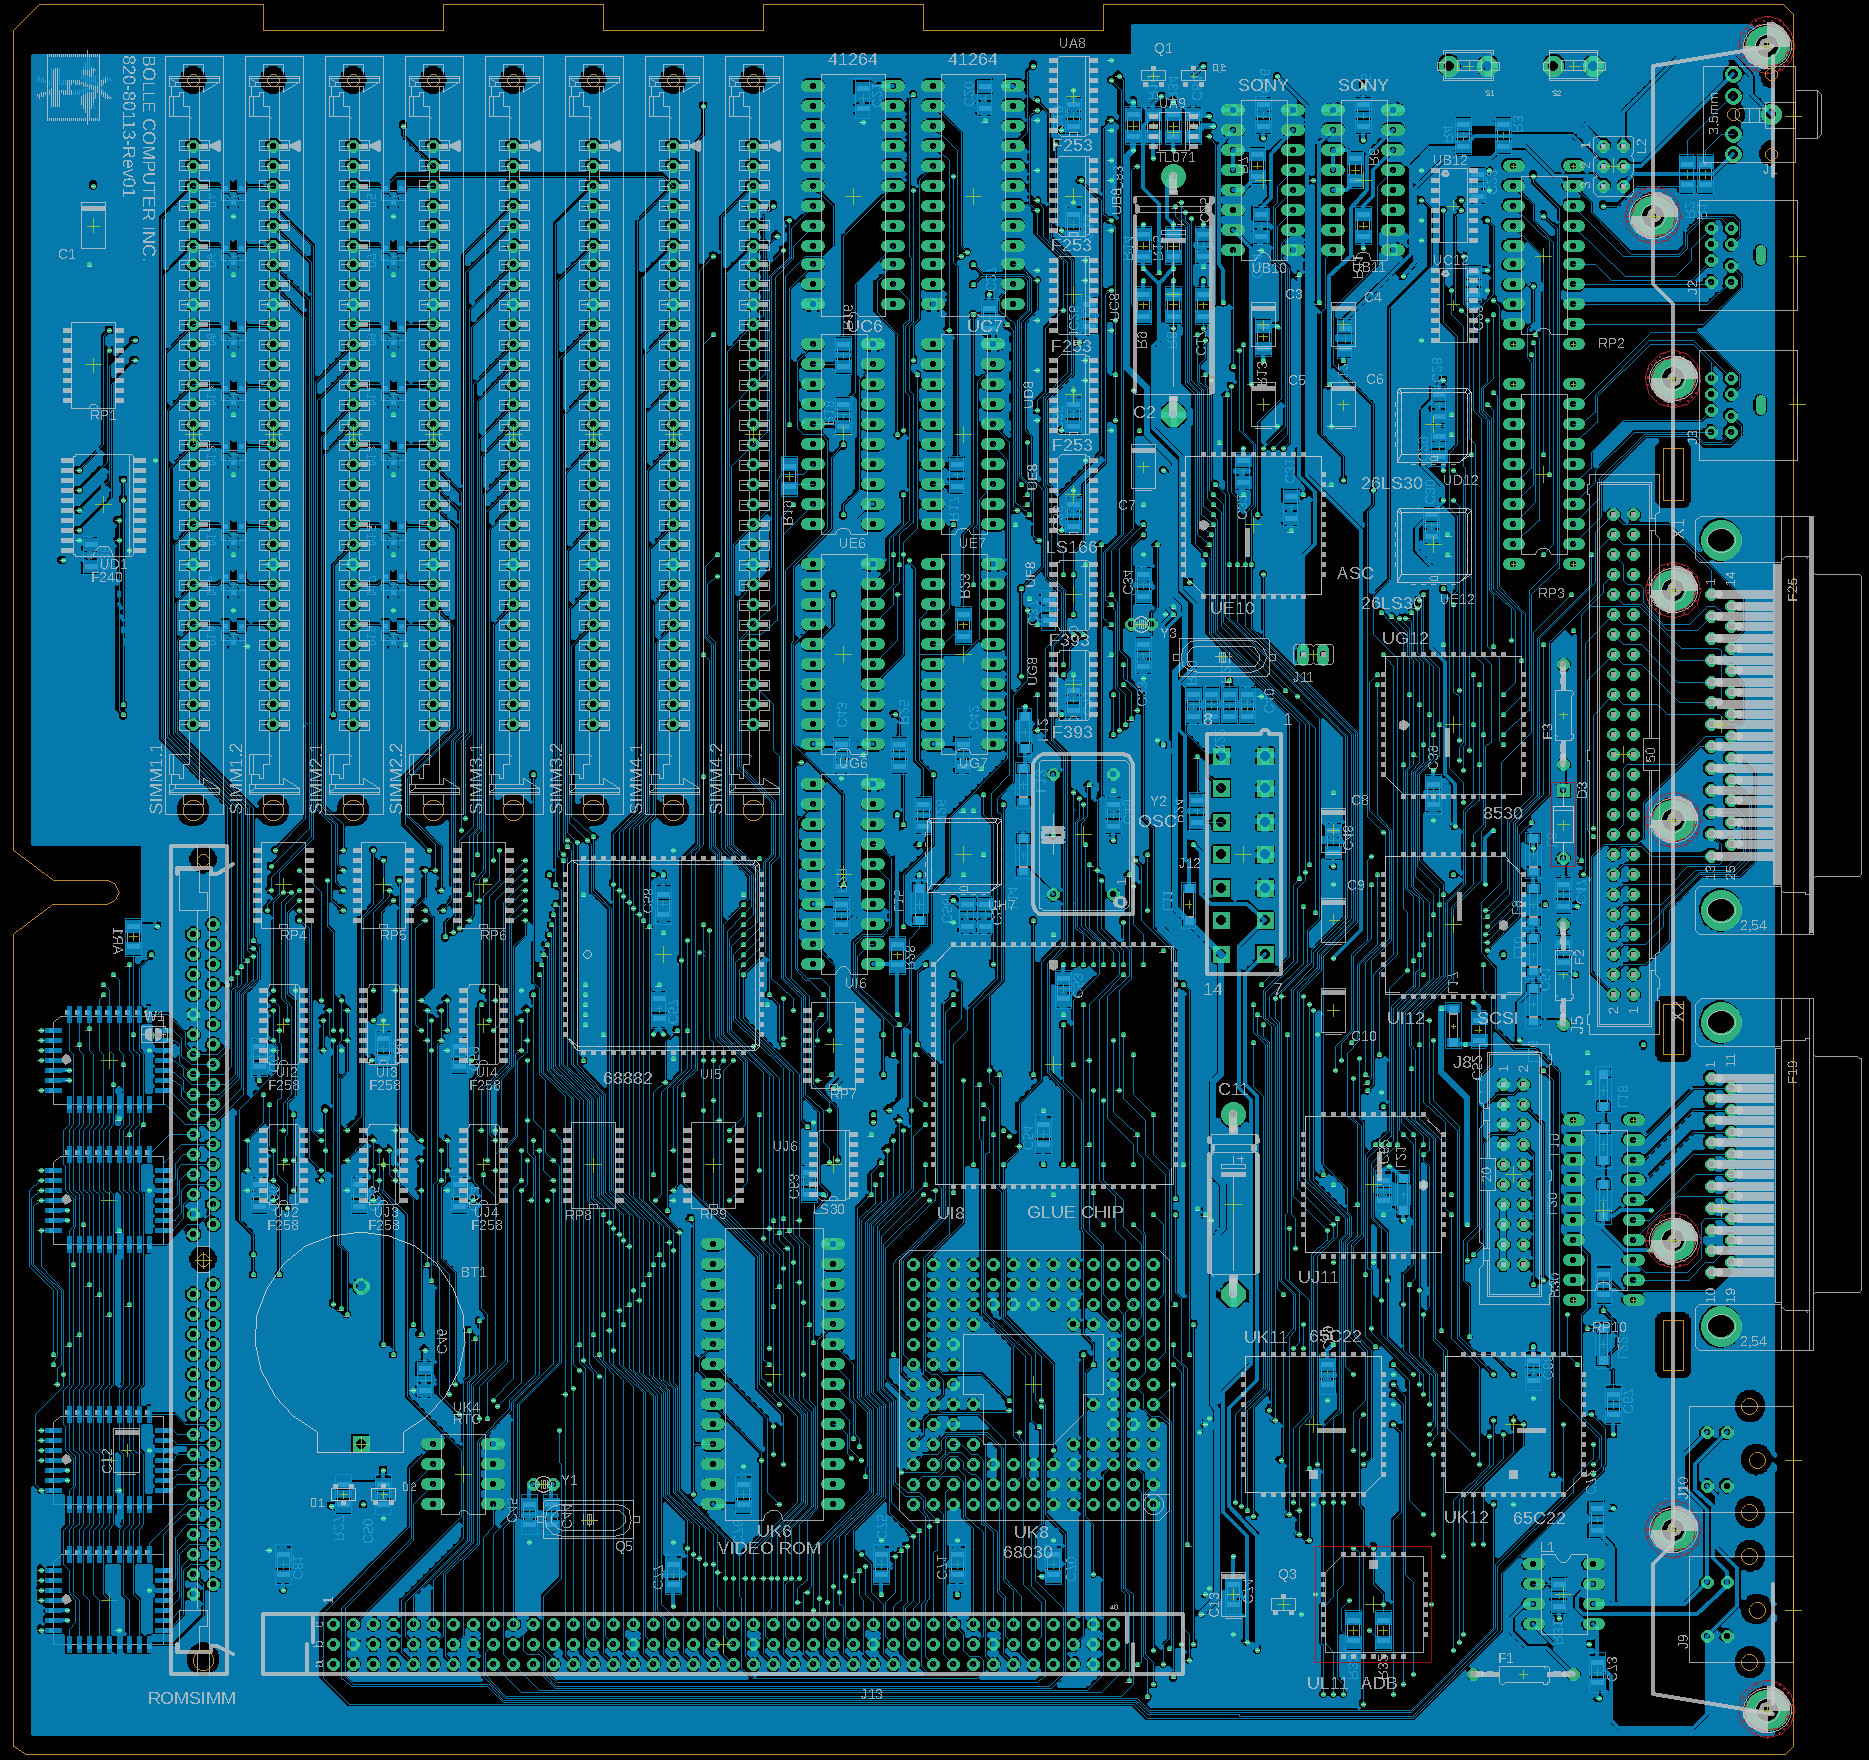
Some time ago, [Bolle] got the idea to redraw the Macintosh SE/30 schematics in Eagle. Progress was initially slow, but over the past month (and with some prodding and assistance from fellow forum frequenter [GeekDot]), he’s taken things a step further by creating a fully functional replacement Macintosh SE/30 logic board PCB.
By using the available schematics, the project didn’t even require much reverse engineering. Though he plans for more modernization in later iterations, this design is largely faithful to the original components and layout, ensuring that it is at least basically functional. He did update the real time clock battery to a CR2032 and, as a benefit of redrawing all the traces, he was able to use a 4-layer PCB in place of the costly 6-layer from Apple’s design.
The board came back from fabrication looking beautiful in blue; and, once he had it soldered up and plugged in, the old Mac booted on the very first try! A copy-paste mistake with the SCSI footprints led to some jumper wire bodging in order to get the hard drive working, but that problem has already been fixed in the next revision. And, otherwise, he’s seen no differences from the original after a few hours of runtime.
Recreating old Macintosh logic boards almost seems like its own hobby these days. With the design and fabrication capabilities now accessible to hobbyists, even projects that were once considered professional work are in reach. If you’re interested in making your own PCB designs, there are many resources available to help you get started. Alternatively, we have seen other ways to modernize your classic Macs.
[Thanks to techknight for the tip!]
Get Apple To Track Your Bluetooth Devices For You
Apple’s “Find My” service allows users to track their missing devices by leveraging a worldwide network of location-aware iGadgets. With millions of iPhones and Macs out in the wild listening for the missing device’s Bluetooth advertisements and relaying their findings to the Cupertino Mothership, it’s a highly effective way of tracking hardware so long as it stays in relatively urban areas. Unfortunately, the system is completely proprietary and non-Apple devices aren’t invited to play.
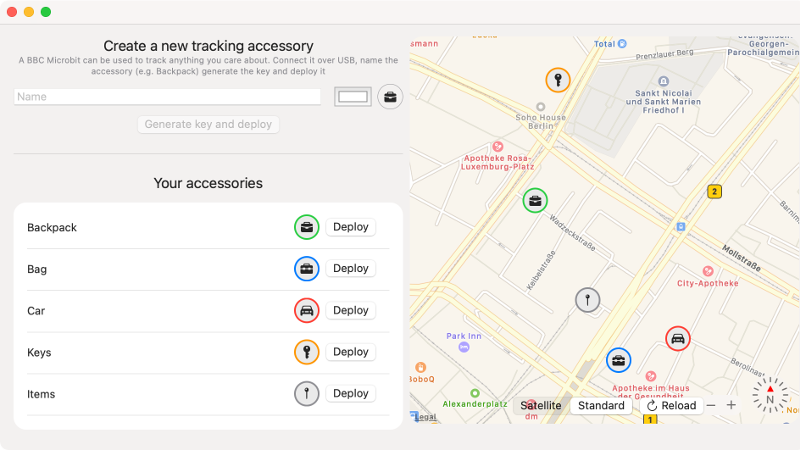
Or at least, that used to be the case. A project recently released by the [Secure Mobile Networking Lab] called OpenHaystack demonstrates how generic devices can utilize Apple’s Find My network by mimicking the appropriate Bluetooth Low Energy (BLE) broadcasts. Currently they have a firmware image for the BBC micro:bit, as well as a Python script for Linux, that will allow you to spin up an impromptu Find My target. But the team has also published all the information required to implement similar functionality on other BLE-capable devices and microcontrollers, so expect the list of supported hardware to grow shortly.
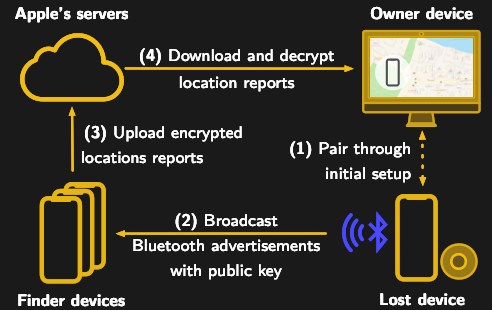
It’s not immediately clear how difficult it will be for Apple to close this loophole, but the talk of utilizing a private API makes us think there might be a built-in time limit on how long this project will be viable. After all, Big Tech doesn’t generally approve of us peons poking around inside their machinations for long. Though even if Apple finds a way to block OpenHaystack, it’s expected the company will be releasing “AirTags” sometime this year which will allow users to track whatever objects they like through the system.
Recreating The Mac SE Logic Board
When [Kai Robinson] found himself faced with the difficult task of saving as many Mac SE’s as he possibly could, the logical but daunting answer was to recreate the Mac SE logic board for machines that would otherwise be scrapped. These machines are over 30 years old and the PRAM battery often leaks, destroying parts and traces. Given that the logic board is a simple through-hole two four-layer board, how hard could it be?
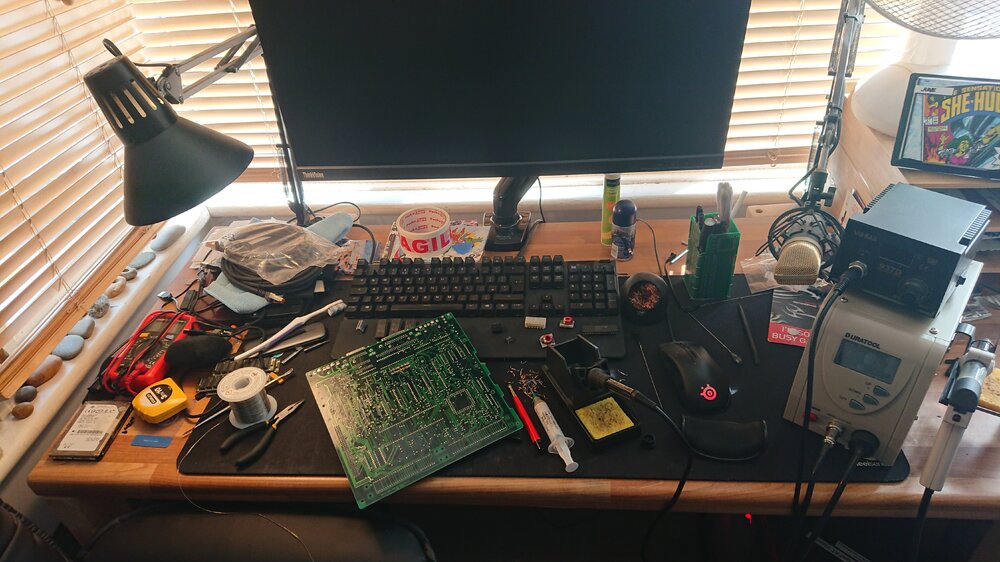
The first step was to get some reference photos so [Kai] set to desoldering everything on the board. The list of components and the age of solder made this an arduous task. Then a composite image was produced by merging images together using a scanner and some Inkscape magic. in graphics software.
Rather than simply putting the pins in the right place and re-routing all the netlists, [Kai] elected instead to do a copy, trace for trace of the original SE board. [Kai] and several others on the forum have been testing the boards and tracking down the last few bugs and kinks in the design. An unconnected pin here and an improperly impedance matched resistor there. Hopefully, soon they’ll have Gerbers and design files ready for anyone should they need a new logic board PCB.
It’s no secret that we love the Macintosh SE here at Hackaday. We’ve seen new custom cases for it and now new PCBs for it. It does cause the mind to ponder though and wonder, what’s next?
Thanks [Toru173] for sending this one in!
FTDI VCP Chips With Custom PIDs Not Working On MacOS 11 Big Sur
An anonymous reader pinged us about an issue that affects people who jumped onto the latest-and-greatest OS from the Apple gardens: USB devices that stop working due to the FTDI-based USB solution. At its core appears to be that the built-in FTDI driver provided by Apple (AppleUSBFTDI.dext) only supports FTDI chips which provide the standard FTDI vendor and product ID (e.g. 0x0403 and 0x6001 respectively for the FT232R). Many products however set a custom product ID (PID) to differentiate their device, though in the thread some mention that there are driver issues even with the default VID/PID combination.
Over the past years, Apple has been restricting and changing the way kernel extensions (KExt) and driver extensions (DExt) are handled. As these FTDI chips are often used for virtual com port (VCP) purposes, such as with Arduino boards and USB-TTL adapters, this is a rather cumbersome issue that would affect anyone using Big Sur in combination with such a hardware device.
So far only the FTDI team has been somewhat responsive based on the support forum thread, with Apple seemingly rather silent on the issue.
Источник
