- Hackintosh sierra from windows
- Как установить macOS Sierra на обычный Windows-компьютер (Хакинтош)
- Что понадобится?
- Подготовка загрузочной флешки
- Установка macOS Sierra на PC
- Hackintosh sierra from windows
- How to Install Hackintosh Sierra on PC: Step by Step Guide
- 1 Why Use Hackintosh Sierra Installer
- 2 Features of Sierra Installer
- 3 Ready to Hackintosh Sierra? Here are the requirements
- 4 Create your Sierra Installer USB drive from Windows
- 5 Create your Sierra Installer USB drive from Mac
- 6 Create your Sierra Installer USB drive from Linux
- Create a hard drive partition for macOS with Windows
- 7 Make PC Ready for Hackintosh Installation
- 8 Set up your motherboard’s BIOS
- 9 Boot Into macOS Sierra Installer
- 10 Hackintosh Sierra Help & Support
- 11 Fixing “No packages were eligible for install” in Sierra Installation
- 12 Install Hackintosh Sierra
- 13 Boot into macOS Sierra
Hackintosh sierra from windows

- UEFI bios:
- Скидываем все настройки в default.
- AHCI — enable;
- Vt-d: Disable (+ в Clover дропнуть DMAR таблицу)
- Vt-x: Enable (только для 10.13 и если используете виртуальные машины)
- Intel Virtualization Technology — Enable
- Serial-port: Disable
- XHCI Hand-off: Disable (рекомендуеться)
- XHCI Hand-off: Enabled (только если что то не работает в режиме Disable )
- IOAPIC 24-119 Entries: Enabled (подмечено что у многих с этим пунктом паникует, поэтому тестируйте)
- CSM: Disable (по возможности)
- Fasboot: Disable
- Secure boot: Disable or Other OS
Legacy bios:
. .
[i]Примечание:
- HDD должен быть подключен к SATA-0, контролер Intel.
- . [/i]
Для установки потребуется флешка не менее 8Гб.
- ПК на ОС Windows XP/7/8.
- Скачать утилиту Boot Disk Utility с страницы разработчика cvad или с форума applelife.ru со страницы посвящённой данной утилите.
- Установить по инструкции
- Зайти на флешку в папку EFI\CLOVER\ и удалить папку OEM и файл config-sample (не путать с config.plist).
- Зайти на https://github.com/aci…pleSupportPkg/releases скачать ApfsDriverLoader.efi и скопировать его в папку EFI\CLOVER\drivers64UEFI (необходимо для macOs 10.13 и выше!)
- Добавить в EFI\CLOVER\Kext\Other https://github.com/acidanthera/Lilu/releases
- Добавить в EFI\CLOVER\Kext\Other https://github.com/aci…WhateverGreen/releases
- Скачать образ Mac OS X по указанным ссылкам:
Нажми и качай! - Развернуть скаченный образ на подготовленную флешку.
- Инструкция с applelife.ru пункт «Заливка дистрибутива macOS на второй том загрузочного USB Flash drive:«:
- Перед распаковкой образа необходимо нажать кнопку ^Format disk^.
- В основном окне программы -> Destination Disk — выбираем наш USB Flash Drive -> Part2.
- Нажимаем кнопку «Restore Partition».
- В открывшемся окне проводника выбираем распакованный файл с расширением *.hfs.
- Тем, кто устанавливает на ноутбук (или имеет PS/2 мышь или клавиатуру) , обязательно скачать
 VoodooPS2Controller.kext.zip ( 97,46 КБ )
, новая версия:VoodooPS2Controller.kext.zip ( 93,86 КБ )
положить в папку EFI/CLOVER/KEXT/10.X или Other - Всё, установочная флешка готова, можно приступать к установке.
 VoodooPS2Controller.kext.zip ( 97,46 КБ )
За данный споcоб установки благодарим cvad и Skvo
Данная инструкция написана по материалам с applelife.ru
Установить один из загрузчиков на диск (если он не входит в состав сборки) :
— Загрузчик №1 — Clover (рекомендуется для большинства пользователей);
Как это сделать: UEFI, Legacy BIOS.
— Загрузчик №2 — OpenCore (для опытных пользователей)
— Загрузчик №3 — Chameleon (на данный момент существует для очень старых систем и особых случаев);
*загрузчик устанавливаем только один, на ваш выбор
После входа в macOS первое, что делаем:
- Устанавливаем кекст для сетевой карты;
- Настраиваем SMbios;
- «Заводим» видео-карту (разрешение должно быть правильным, и верхняя строка прозрачная);
- Поднимаем «нативное управление питанием» процессора;
- Поднимаем звук через AppleALC или VoodooHDA
.
21. Ставим програмулинки и «рюшечки».
Как установить macOS Sierra на обычный Windows-компьютер (Хакинтош)
Если вы решили поэкспериментировать и установить последнюю версию macOS Sierra 10.12 на свой Windows-PC, то в этом материале мы расскажем, что нужно для установки чужеродной ОС на PC, как поэтапно подготовить загрузочную USB-флешку и накатить хакинтош.
Пока процесс установки хакинтоша далек от совершенства ввиду того, что необходимо получить доступ к Mac. Не исключено что в ближайшем будущем появятся специализированные утилиты для Windows, позволяющие избежать этого пункта. А пока как есть, так есть.
Что понадобится?
- любой Mac для того чтобы скачать установочный файл из Mac App Store и правильно установить его на загрузочную USB-флешку;
- USB-накопитель с минимальным объёмом в 16 ГБ. Не забудьте переместить все важные данные с флешки, потому как она подвергнется процессу полного форматирования;
- PC с процессором на базе Intel и ещё целой кучей macOS-совместимого железа, которое не будет конфликтовать с яблочной настольной системой. Это, пожалуй, самый важный и сложный пункт, требующей вылазки на технические форумы. Если отнестись к этому пункту безответственно, то есть вероятность получить нефункционирующие Wi-Fi, Bluetooth, звуковую и сетевую карты или ещё какие-нибудь компоненты системы;
- сделайте резервные копии важных данных на диске, абы чего не вышло и не пришлось держаться за голову с криками «Всё пропало!».
Подготовка загрузочной флешки
1. Для начала скачайте дистрибутив macOS Sierra.
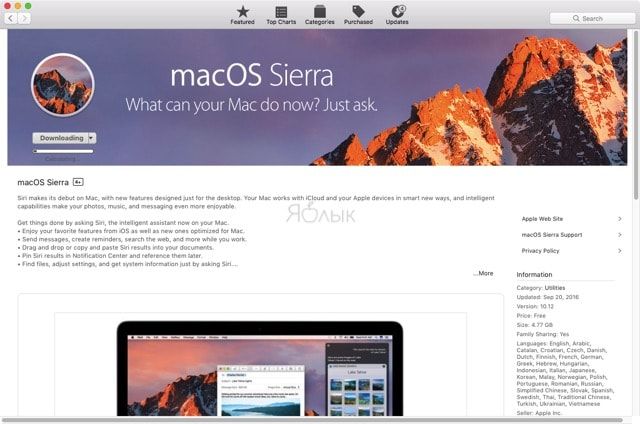
Загрузить инсталлятор можно и со сторонних файлообменников.
2. Скачайте последние версии утилит MultiBeast и UniBeast при помощи которой возможно создать загрузочную флешку. Для скачивания придётся пройти бесплатный процесс регистрации.
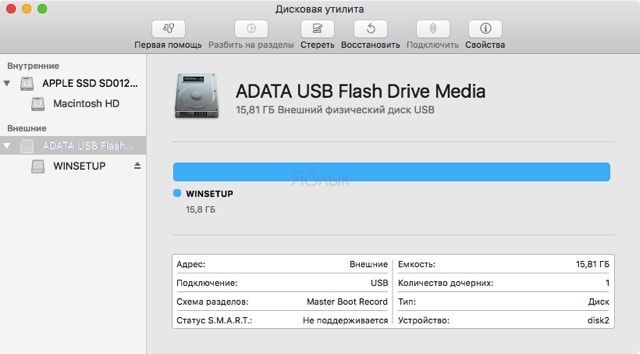
3. Запустите Дисковую утилиту (Finder → Программы → Утилиты или через поиск Spotlight (сочетание клавиш Control + Пробел)), подключите USB-накопитель и убедитесь в том, что он отобразится в левом боков меню окна.

4. Выделите флешку в левом боковом меню и нажмите кнопку «Стереть».
5. Введите следующие параметры форматирования:
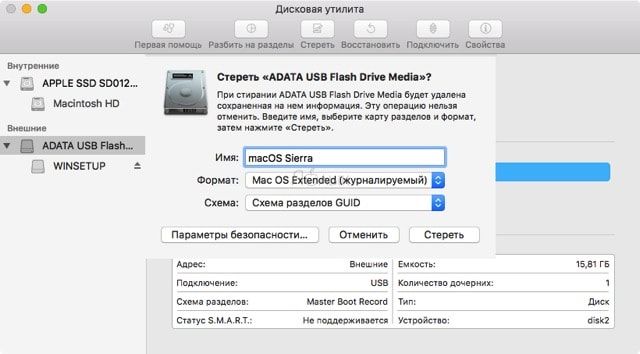
- имя: любое;
- формат: Mac OS Extended (журналируемый);
- схема: Схема разделов GUID.
и нажмите кнопку «Стереть».
Внимание! Все данные на флешке будут отформатированы! Предварительно сделайте бэкап.
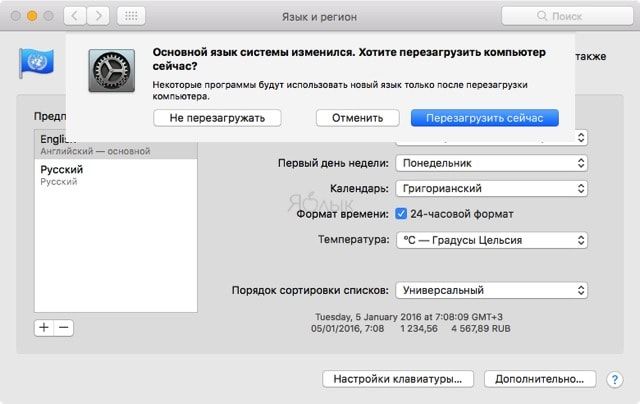
6. Установите и запустите приложение UniBeast. Тут есть небольшой нюанс — приложение не имеет русской локализации, а для запуска понадобится установить английский в качестве системного языка macOS. Для этого:

- откройте меню → Системные настройки… → Язык и регион;
- в левой колонке с языками перетащите English на первое место;
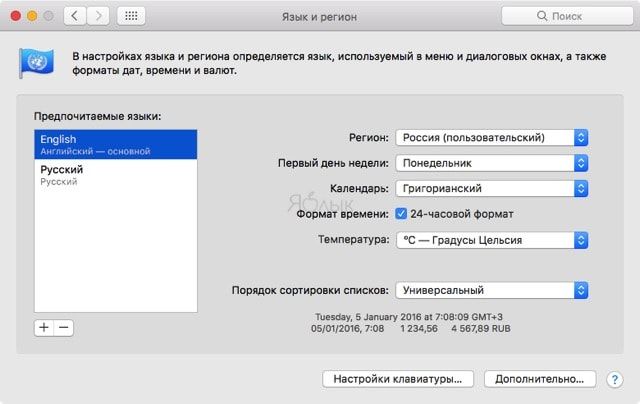
- нажмите кнопку назад для возврата в предыдущее меню и примените новый язык нажатием кнопки «Перезагрузить сейчас».
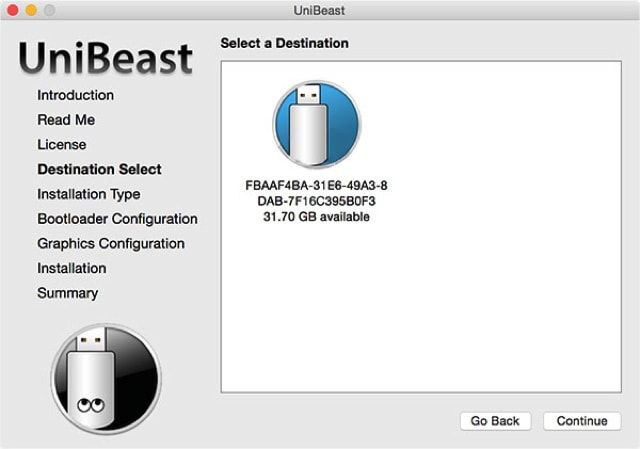
7. После запуска приложения нажмите кнопку «Continue» пока не перейдёте во вкладку «Destination Select». Обратите внимание на то, что на Mac необходимо иметь 7 ГБ свободного дискового пространства, а дистрибутив macOS Sierra уже должен быть скачан и располагаться в папке «Программы».
8. На вкладке «Destination Select» укажите путь к USB-накопителю и нажмите «Continue».
9. В разделе с выбором операционной системы («Installation Type») укажите «macOS Sierra» и щёлкните «Continue».
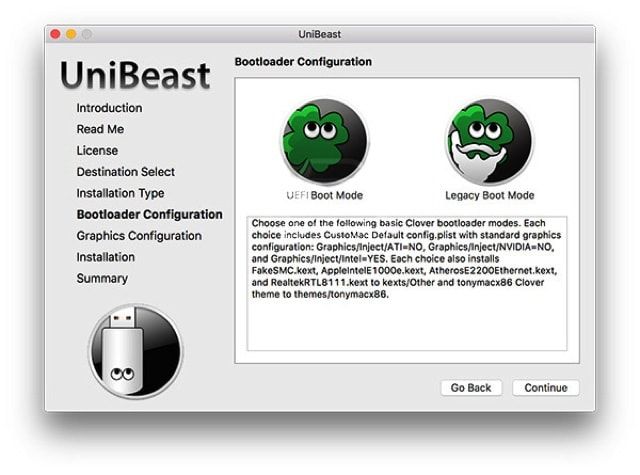
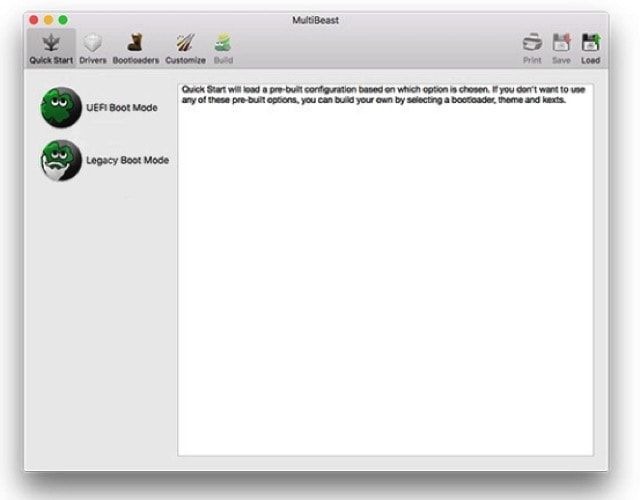
10. Оказавшись на экране «Bootloader Configuration» выберите режим загрузки в зависимости от модели компьютера. Владельцы систем со старым сокетом (Socket 1156) нажимают на «Legacy USB Support», остальные на «UEFI Boot Mode».
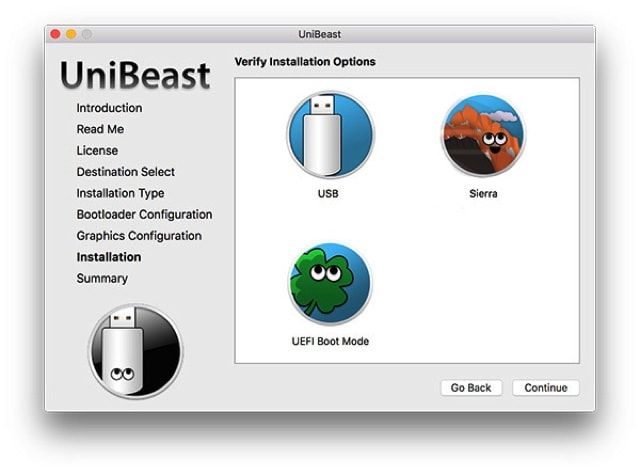
11. Настройки во вкладке «Graphics Configuration» носят сугубо индивидуальный характер. Хотите — настройте графику для улучшения производительности, а если нет — оставьте всё по дефолту.
12. В завершении останется ввести пароль от учётной записи администратора Mac и нажать кнопку «Install». Процедура записи на USB-флешку в среднем занимает 10-20 минут.
13. Переместите файл MultiBeast скачанный в пункте 2 этой инструкции в корневую папку накопителя.
Установка macOS Sierra на PC
После завершения процесса создания загрузочной флешки останется самый главный этап — установка macOS на PC.
1. Вставьте загрузочную флешку в USB.
2. Запустите компьютер и пройдите в BIOS (для этого необходимо зажать и удерживать специальную клавишу. На разных PC она может отличаться, но в основном это F2, F8, F10, F11, F12 или Delete. Внимательно читайте сообщения на экране).
3. Когда вы попадёте в BIOS установите приоритет загрузки с USB, а уже затем с HDD и так далее.
4. После перезагрузки на стартовом экране выберите USB-накопитель и нажмите Enter для того чтобы продолжить процесс установки.
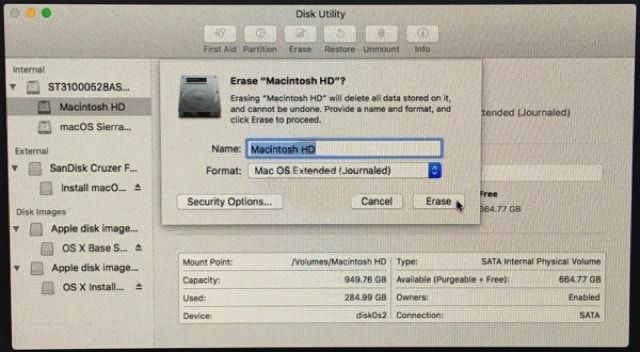
5. Пройдите в меню Утилиты → Дисковая утилита и отформатируйтедиск, для чего:
- в левом боковом меню выберите свой диск;
- сверху нажмите кнопку «Стереть» (Erase) и повторите пункт 5 предыдущей инструкции.
6. Закройте Дисковую утилиту, вернитесь к инсталлеру и выберите новый диск для установки macOS Sierra.

7. После выполнения первого этапа установки система автоматически перезагрузится.
8. Снова войдите в загрузочное меню, выберите USB, после чего завершится процесс установки.
9. Как только вы попадёте на рабочий стол macOS Sierra, запустите утилиту MultiBeast и установите необходимые драйвера для нормального функционирования сети, звука, графики и прочей периферии.
10. По завершении всех процедур в BIOS установите приоритет на HDD.

Хакинтош готов! Но не стоит забывать о том, что даже грамотно настроенный хакинтош всё равно на 100% не передаст ощущения общения с реальным Mac.
Hackintosh sierra from windows
Краткая поэтапная инструкция по установке 10.12 Sierra.
Установка принципиально не отличается от установки El Capitan.
Обязательно добавляйте в загрузочные аргументы(бутарги, Boot Arguments) -v debug=0x100 для отлова паники.
Если этого сделано не было, вопросы и просьбы о помощи типа:» у меня идет установка, а потом перечеркнутый круг что мне делать?» или «идет установка, а потом перезагрузка, помогите», будут игнорироваться. Помогайте себе сами.
Конфиг (config.plist) Clover в большинстве случаев годится от El Capitan.
2. Копируем FakeSMC.kext и др. в /EFI/EFI/CLOVER/kexts/10.12(создать папку 10.12) или в /EFI/EFI/CLOVER/kexts/Other
Install.APP в программы
Очень рекомендуется, при первой установке, никаких других кекстов в папки 10.12 и Other не копировать.
FakeSMC.kext копируем чистый, без датчиков.
Можно добавить кекст на сеть, хотя из-за него тоже можно словить панику, к тому же это можно сделать после установки.
2.1. Установка поверх или на другой диск — запустить Install.APP
2.2. Для новой установки изготовить флэшку команндой от Apple:
sudo /Applications/Install\ 10.12\ Developer\ Preview.app/Contents/Resources/createinstallmedia —volume /Volumes/ИМЯФЛЕШКИ —applicationpath /Applications/Install\ 10.12\ Developer\ Preview.app
3. Видео
3.1. Nvidia:
а) Либо пользуемся официальным драйвером, если поддерживает видеокарта.
б) Либо добавляем в бутаргументы nv_disable=1, ставим в VESA режиме, первый запуск так же с ключем и установка вебдрайверов, в аргументы nvda_drv=1 и перезагрузка в штатном режиме.
3.2. AMD77xx — легась verge паникует. Пропишите изменения прямо в плист AMDRadeonX4000.kext
ati-personality.pl
4. Звук
4.1. В большинстве случаев достаточно VoodooHDA.kext
5. Настройки
Установка прог со сторонних источников —
sudo spctl —master-disable
6. Клавиатура PS2 (непроверенно)
Нет решений:
Прекращена поддержка процессоров не имеющих инструкции SSE4.
Проверить наличие инструкций ( в другой макоси) в терминале вот так: sysctl -a machdep.cpu.features
===========================================================================
Многие проблемы с установкой и первичной настройкой такие же как в осях 10.8—10.11
Установка по методу ГЫКа с правками xite666 (видео):
How to Install Hackintosh Sierra on PC: Step by Step Guide
If you’re interested in running macOS Sierra, but you don’t want to pay ridiculous prices for a normal Mac, then a Hackintosh just might be for you. Right now (2016), the newest iteration of OS X is 10.11, known as macOS Sierra. In this guide, we’ll show you how to install macOS Sierra on your PC with the newly released Hackintosh Sierra Installer.
Read this article completely once before beginning any procedures. Most of the troubleshooting information is included in this article. There are few ways of installing a Hackintosh, but Hackintosh Sierra Installer is the most convenient way to set up your Hackintosh
1 Why Use Hackintosh Sierra Installer
- You do not need a real Mac: All other methods of Installing Sierra require extensive knowledge + a Real mac because those guides are based on macs, but Sierra Installer never require a mac, you can setup a Hackintosh without the need of a real mac. You can set up everything from a Windows / Linux computer.
- You can install it on a hard drive that already has Windows installed: By default, the macOS installer will not work with hard drives that were initially formatted in Windows. Therefore, if your computer’s hard drive already has Windows installed on it, you will not be able to install macOS on there, but Sierra Installer automatically patches this so you can bypass this limitation. The patch is called MBR Patch.
- macOS Sierra Installer Support More Hardware (Including AMD): Sierra Installer Supports a far range of Hardware including limited AMD Support, most audio, wireless and ethernet drivers will be installed automatically.
- Post Installation is Easier: Just like windows you have to install drivers to make macOS perfect, which is pretty hard for beginners but Sierra Installer automatically do this for you by installing most drivers automatically, and Sierra Installer also installs the Bootloader for you, but you may have to install additional drivers manually in case Sierra Installer couldn’t install the driver for you.
2 Features of Sierra Installer
- Supports AMD Processors
- Auto Installs Ethernet Drivers
- Auto Installs WiFi Drivers
- Auto Installs Audio Drivers
- macOS Sierra USB Fixes
- NVME Patch for non-Apple NVMe SSDs
3 Ready to Hackintosh Sierra? Here are the requirements
- A CPU (AMD / INTEL) with SSE4.1 Support: Without SSE4.1 Instruction set Sierra will not run.
4 Create your Sierra Installer USB drive from Windows

Plug your USB drive into your computer, and open TransMac. Find your USB drive in the left-hand column of the TransMac window. Right-click on the USB drive, and click “Format Disk for Mac.” This will delete all of the files on your drive and prepare it for macOS.
Once your USB drive is done formatting, right-click it again and click “Restore with Disk Image.” A file selection window will pop up; choose your Sierra Installer disk image file, and proceed. Now, TransMac will write Sierra Installer onto your USB drive.

This will probably take 20-40 minutes, though it may take longer, depending on the speed of your USB drive. Once TransMac finishes, your USB drive will contain a fully bootable version of the macOS Sierra installer.
5 Create your Sierra Installer USB drive from Mac

Follow this step if you are setting up Sierra Installer on a Mac or existing Hackintosh (How to Create your Sierra Installer USB drive from Windows). Plug your USB drive into macOS, and open Disk Utility (located in Applications -> Utilities in your main hard drive). Select your USB drive in the sidebar of Disk Utility and erase the drive, with the “Format” set to “Mac OS Extended (Journaled)” and “Scheme” set to “GUID Partition Map.” You can rename the drive any way you want (Mine is named “KingMaker” in the image below).
Next, make sure that your Hackintosh Sierra Installer disk image file is in the same folder as “Restore Sierra.pkg.” If “Restore Sierra.pkg” is still in a ZIP file, double-click that file to unzip it.

Double click on “Restore Sierra.pkg” to start the app. By default, the app will be aimed at your computer’s main hard drive (mine is named “Mac” in the image above). You do not want this– instead, click through the installer until you reach the page with the “Change Install Location” button. Select the drive that you format (It is named “KingMaker” in the example below)

Press the enter / return key. The app will ask for your system password. After you enter your password, it will begin writing the macOS Sierra Installer disk image onto the USB drive. This will probably take 20-40 minutes, though it may take longer, depending on the speed of your USB drive. Once it finishes, your USB drive will contain a fully bootable version of the macOS Sierra.
NOTE: “Restore Sierra.pkg” is very glitchy. If you cannot find the “Change Install Location” button on the first time that you run the package, restart your computer and re-run the package.
6 Create your Sierra Installer USB drive from Linux

You have to install dmg2img; use apt-get or yum to install dmg2img
Uncompress Sierra DMG with dmg2img, then restore the uncompressed image to USB, Change the variables below as you need (Warning: The following is just an example do not copy and paste)
Create a hard drive partition for macOS with Windows
Boot into Windows Vista or Windows 7, and type “partition” into your Start Menu search bar. Choose “Create and Format hard drive partitions” to open the Disk Management utility in Windows.
You will see a bar displaying the partitions on your hard drive. Right-click on the emptiest partition in the hard drive that you want to install OS X on, and click “Shrink.” This will allow you to shrink the size of that partition so that you have extra space on your hard drive to create a new partition for Mac OS X.
Once the shrinking process is complete, you should now have some unallocated on your hard drive. Right-click the Unallocated section of your hard drive’s bar, and choose “New Simple Volume.”

A helper will pop up. From here, format the Unallocated space as an NTFS volume (or an exFAT volume; it should not matter since you will be wiping this partition in macOS Installer anyways).
7 Make PC Ready for Hackintosh Installation
- Disconnect USB Devices: Unplug all USB-connected devices from your computer before you begin the setup (except your keyboard and mouse). A faulty external USB hard drive can cause your Hackintosh bootloader to give you EBIOS errors on startup.
- Unplug any Extra Hard disks: Open up your computer and unplug any extra internal hard drives that your computer has, besides the hard drive that you are installing OS X on. (Just unplug the hard drive SATA & Power cables from your motherboard.)
- Backup Your Data: You should always take care of your data, Sierra Installer will not damage your data but always be safe.
8 Set up your motherboard’s BIOS
Essentially, the BIOS (or UEFI) is the settings page for your computer’s motherboard. From here, you can fiddle with how your computer hardware works it is often necessary to change a few basic settings in the BIOS or UEFI to get macOS up and running.
The BIOS standard is used by motherboards from before 2012, while the UEFI standard is used by motherboards made after that.
To access BIOS / UEFI Setup, press and hold Delete on a USB Keyboard while the system is booting up
- Load Optimized Defaults
- If your CPU supports VT-d, disable it
- If your system has CFG-Lock, disable it
- If your system has Secure Boot Mode, disable it
- Set OS Type to Other OS
- If your system has IO SerialPort, disable it
- Set XHCI Handoff to Enabled
- If you have a 6 series or x58 system with AWARD BIOS, disable USB 3.0
Save and exit.
For more information view Hackintosh UEFI Settings article. The above settings are for UEFI Based Motherboards If you’re setting up #Hackintosh on a legacy Motherboard follow Hackintosh Legacy BIOS Settings.
9 Boot Into macOS Sierra Installer

Restart your Hackintosh, and plug in your macOS Sierra Installer USB drive. Press the key to change boot device (F8 / F1 / F10); the key varies with motherboard If things go well, your computer will boot from the USB drive instead of booting from your normal hard disk. You will then be able to view the Sierra Installer boot menu.
This is the Clover Boot loader of macOS Sierra Installer (UEFI / EFI), Hackintosh Sierra Installer also can be boot from Chameleon by pressing number 2 in legacy mode (How to boot Hackintosh Sierra Installer with Chameleon).
If you do not manage to reach the Hackintosh Sierra Installer menu, check your motherboard’s BIOS settings to make sure that the changes you made in Make PC Ready for Hackintosh Installation and Set up your motherboard’s BIOS were properly applied. If they were, but you still cannot boot from the Sierra Installer USB drive, try changing the USB Port to another switch between (USB 3.0 & USB 2.0) If all else fails, try using a different USB drive for Hackintosh Sierra Installer.
If you are trying to Install on PC with AMD Processor with Clover Boot-loader, you must use (you will have to type the boot-flag)
As the boot flag. Which flag you need depends on your specific processor, so test one flag at a time. For Chameleon Boot-loader you have to type
At the Sierra, Installer Menu select “Hackintosh Sierra” from the menu (Sometimes the name will not be visible) and press the key enter (return key). The installer screen will take several minutes to load. Usually, you will end up in Language Chooser Menu like the following picture

In the worst case scenarios, instead of loading the macOS Sierra installer, you may end up with a dark gray screen that tells you to restart your computer (a kernel panic), or you may end up with a small crossed-out sign (a loading error). If you get a kernel panic / loading error (or if the Mac OS X installer just won’t start within 10 minutes), you will need to enter some boot flags.
To enter boot flags, manually restart your computer by pressing your computer’s power button. Then, once you have booted back into the Sierra Installer menu, try typing any necessary boot flags before pressing the enter / return key. Check out our list of common boot flags and our guide to fixing boot problems with the verbose mode for reference.
10 Hackintosh Sierra Help & Support
When you have issues while installing Hackintosh Sierra, Please post in the forum for Support. Your question must Include the following details.
Example For Desktops:
- Processor model: Intel 6th Gen 6700K
- Motherboard model: Maximus Ranger VIII
- Graphics Card Model: Asus ROG STRIX 580 8GB
- If required Ethernet/Wifi model: T9E Archer
Example For Laptops:
11 Fixing “No packages were eligible for install” in Sierra Installation
Before installing open Terminal (Utilities > Terminal)
run the following command. It will fix No packages were eligible for install problem, this must be done before clicking Install.
12 Install Hackintosh Sierra

You need to use Disk Utility to erase a hard drive partition so that macOS Sierra can install itself on it. In the sidebar of Disk Utility, choose the hard drive partition where you want Sierra installed, and erase it by using the “Erase” tab. You can also just erase the entire hard drive (this is the preferred solution if you do not plan to dual-boot Windows and Sierra from the same hard drive).
In the Image of Disk Utility above Entire Hard disk Named “Apple SSD macOS-0 SSD Media” is being erased into a Single Partition with Volume name Mac. You can also erase separate volumes. When erasing, the format should be set to “Mac OS Extended (Journaled).” You can also partition the hard disk by using Disk Utility’s Partition tab.

On the installation page for macOS, the hard disk / disk partition should now be showing up. Select it, and then click the “Customize” button on the bottom left. This is where using a distro becomes useful: Sierra Installer allows you to install extra Hackintosh drivers and kexts, straight from the Sierra installer.

However, choosing the right options from this page can be tricky, so unless you are certain about which drivers and kexts you need to install for your computer, I do not recommend installing too much stuff from here.
The default selection will enable Mac OS X to boot from the hard drive without any assistance, and automatically enable audio and ethernet. For most computers, that will be enough.

If you have a compatible Graphics card, unselect “Backup Graphic Kexts.” (If you are using nVidia Maxwell or Pascal card you may need nVidia Webdriver)
When your computer already has Mac OS X installed, and you are simply updating it to Sierra, you can uncheck all of these options. macOS treats Sierra as just another update– there’s no need to reinstall all of your kexts and drivers.

Once you are done with the “Customize” page, install Sierra. This will take at least 30 minutes.
13 Boot into macOS Sierra

Once the installation finishes, remove your macOS Sierra Installer USB drive and restart your computer. At the boot screen, you will see an icon with the name of the volume for the hard drive where you installed Sierra. Select it (use the arrow keys on your computer) and press “Enter.” Sierra will boot.
Once again, if you get a kernel panic / loading error when you try to boot your new Sierra installation (or if the installation simply won’t start within 10 minutes), you will need to enter some boot flags. To enter boot flags, manually restart your computer by pressing your computer’s power button. Then, once you have booted back into the Sierra Installer menu, try to type any necessary boot flags before pressing the enter / return key. Check out our list of common boot flags for Hackintosh and our guide to fixing boot problems in verbose mode for reference.
Once Sierra has booted successfully, click through the Sierra setup screens until you reach the desktop. From here, Sierra Installer will work its magic, and automatically install the rest of the Hackintosh-specific kexts and drivers.

Wait several minutes, while this process works in the background. Once you receive a notification saying that the installation has been completed, You may have to tweak and install some kexts to make your Hackintosh work properly try Googling.
Once that is done with, you should be running a fully functional copy of Hackintosh macOS Sierra on your PC.


