- Hardware and Devices Troubleshooter missing in Windows 10
- Hardware and Devices Troubleshooter missing
- Issues with hardware troubleshooter in Windows 10.
- Replies (9)
- Fix Windows Hardware and Devices problems with Troubleshooter
- Hardware and Devices Troubleshooter
- Hardware and Devices Troubleshooter missing
- FIX: Windows 10 restarts randomly
- How do I fix random restarts in Windows 10?
- 1. Change Advanced Power Settings
- 2. Make sure the Sleep mode is enabled
- 3. Uninstall your antivirus
- 4. Update / uninstall your graphics card drivers
- 5. Change your power plan to High performance
- 6. Update your BIOS
Hardware and Devices Troubleshooter missing in Windows 10
In today’s post, we will show you how to access and run the Hardware and Devices troubleshooter, which seems to have been deprecated from Windows 10. Technically, the Hardware and Devices troubleshooter hasn’t been removed entirely from the Windows 10 operating system per se. Rather, it has been “buried” or hidden within the Windows 10 v1809 or later.
The reason has been that, Microsoft after careful deliberation over observation via telemetry, determined the Hardware & Devices troubleshooter had the lowest daily usage and was usually run in tandem with other troubleshooters, therefore it was no longer needed and specific troubleshooters were to be used instead.
Listed below, are the main hardware and the most common ones that require a troubleshooter:
- Keyboard.
- Bluetooth.
- Video playback.
- Audio.
- Printer.
- Internet connection.
- Battery.
Nevertheless, people across Windows online forums have been asking where it is as it had helped then in solving certain hardware issues.
A typical Windows 10 user complaint about this missing troubleshooter is highlighted below.
A user complained:
Without the hardware detection troubleshooting my SD CARD port doesn’t work! I have to always run the find my hardware/device troubleshooter to be able to open my SD card port!
Another user complained:
Previously the Hardware/Devices troubleshooter was useful when the brightness keys F2 and F3 stopped working temporarily. So, is there an alternative option now?
Hardware and Devices Troubleshooter missing
For Windows 10 users that still need to run this, apparently useful tool, do not despair, for there’s a possible way to access this troubleshooter.
You will have to run the Troubleshooter using the command line. To invoke the troubleshooter, all you need do is to launch the command prompt, then type or copy and paste the command below and hit Enter.
Once the troubleshooter displays, you can now proceed to run the tool as usual.
You can also download and use our useful freeware FixWin to open the troubleshooter with a click.
You will find the button in the Troubleshooters tab.
Date: November 29, 2019 Tags: Troubleshoot
Issues with hardware troubleshooter in Windows 10.
Troubleshooting hardware and devices prompts me to restart my PC to finish installing drivers and updates but nothing happens after that, big the message keeps on flashing whenever i troubleshoot.
Original title: Windows troubleshooting
Replies (9)
![]()
Please provide the following information to assist you better:
1. Does it prompt only for specific device?
5. Did you make any changes to the pc prior to this issue?
2 people found this reply helpful
Was this reply helpful?
Sorry this didn’t help.
Great! Thanks for your feedback.
How satisfied are you with this reply?
Thanks for your feedback, it helps us improve the site.
How satisfied are you with this reply?
Thanks for your feedback.
1. It prompts whenever I troubleshoot my hardware and not randomly.
2. Yup, keep a check on my installed updates. As on dates everything has been installed.
3. No clue about local account. I use Microsoft account.
4. I can’t say if it’s just for asus t100 or for all devices.
5. No, I install updates that are offered by the windows update service only.
2 people found this reply helpful
Was this reply helpful?
Sorry this didn’t help.
Great! Thanks for your feedback.
How satisfied are you with this reply?
Thanks for your feedback, it helps us improve the site.
How satisfied are you with this reply?
Thanks for your feedback.
Was this reply helpful?
Sorry this didn’t help.
Great! Thanks for your feedback.
How satisfied are you with this reply?
Thanks for your feedback, it helps us improve the site.
How satisfied are you with this reply?
Thanks for your feedback.
Your screenshots look just like mine. I have a ASUS F551CA notebook. Here is a screenshot of my dev mgr that has NO BLUETOOTH options
Was this reply helpful?
Sorry this didn’t help.
Great! Thanks for your feedback.
How satisfied are you with this reply?
Thanks for your feedback, it helps us improve the site.
Fix Windows Hardware and Devices problems with Troubleshooter
If you find that your Windows 10/8/7 computer is facing some hardware or device issues or problems, you can run the Hardware and Devices Troubleshooter. This automated troubleshooter will try to identify and then resolve the issues that it finds.
Hardware and Devices Troubleshooter
Windows 10/8/7 comes with this troubleshooter in-built. If you recently installed a new driver or some hardware and find some things are not working as you’d like them to, use this troubleshooter.
On Windows 10, you can also open Settings > Update & Security > Troubleshoot and click on Hardware and Devices.
On Windows 8/7, open Control Panel > Hardware and Sound > Configure a device.
The Hardware Troubleshooter will open. You can set it to fix the detected problems automatically or select and opt to fix only the ones you want.
Click on Next to run the Hardware and Devices Troubleshooter. Once the scan is completed, it will present you with a report.
Choose the ones you want to fix and click on Next.
The Hardware and Devices Troubleshooter will try to fix the problems for you.
Hardware and Devices Troubleshooter missing
If the Hardware and Devices Troubleshooter is missing then you can also run the Troubleshooter using the command line. To invoke the troubleshooter, all you need do is to launch the command prompt, then type or copy and paste the command below and hit Enter.
You can also download and use our useful freeware FixWin to open the troubleshooter with a click.
FIX: Windows 10 restarts randomly

- Restarting your PC can be an ideal solution for when you need to finalize software installations, or when you simply need to perform a clean boot of your system.
- Various software and hardware issues can cause your PC to restart on its own, which can severely hinder work productivity and gameplay experiences.
- Most restarts are caused by a failing hard drive, so maybe it is time that you upgrade yours to a better model that offers a lot of storage space.
- Since you’re using Windows 10 on a daily basis, don’t forget to check out our in-depth Windows 10 errors page.

- Download Restoro PC Repair Tool that comes with Patented Technologies (patent available here).
- Click Start Scan to find Windows issues that could be causing PC problems.
- Click Repair All to fix issues affecting your computer’s security and performance
- Restoro has been downloaded by 0 readers this month.
Windows 10 is a stable operating system, but some users are having a different experience with it. According to them, the random restart occurs in Windows 10, and that can be quite inconvenient, so let’s see how to fix this issue.
Here are some more examples of this or similar issues:
- PC randomly restarts when playing games
- Windows 10 restarts automatically
- My Windows 10 random restart no BSOD
- Windows 10 restarts when idle
- Windows 10 random restart update
How do I fix random restarts in Windows 10?
Table of contents:
1. Change Advanced Power Settings
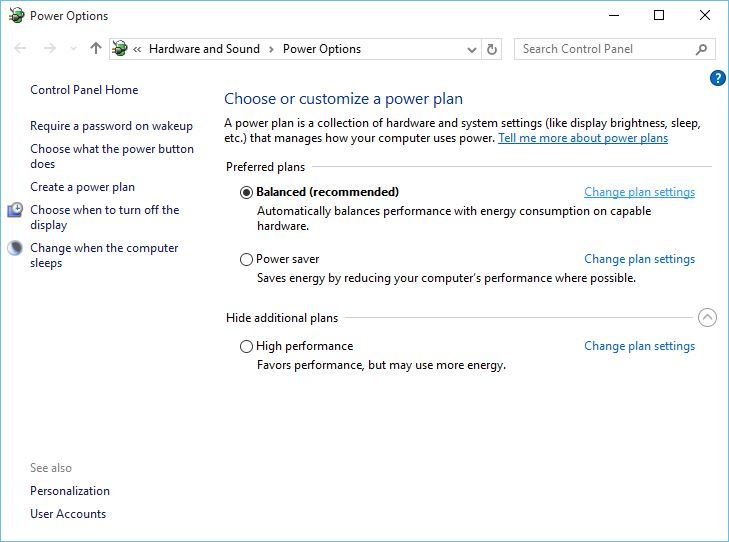
- Press Windows Key + S and type Power Options.
- From the list of results choose Power Options.

- When Power Options window opens, find your plan and click on Change plan settings.
- Now click on Change advanced power settings.
- Scroll down and locate Processor Power Management.
- You should see the Minimum Processor State value that is set to 100%.
- Change Minimum Processor State to some other value, such as 0.
- Save changes.


If you are having random restarts on Windows 10, you might want to try changing the power settings.
2. Make sure the Sleep mode is enabled
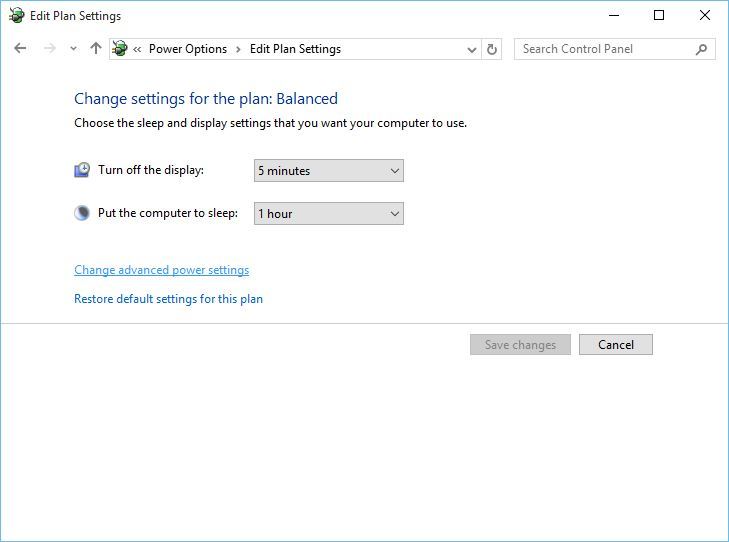
- Open Power Options, find your current plan and click on Change plan settings.
- After you’ve done that, find Put the computer to sleep option and choose any value except Never.
- Click Save changes and your problem should be fixed.
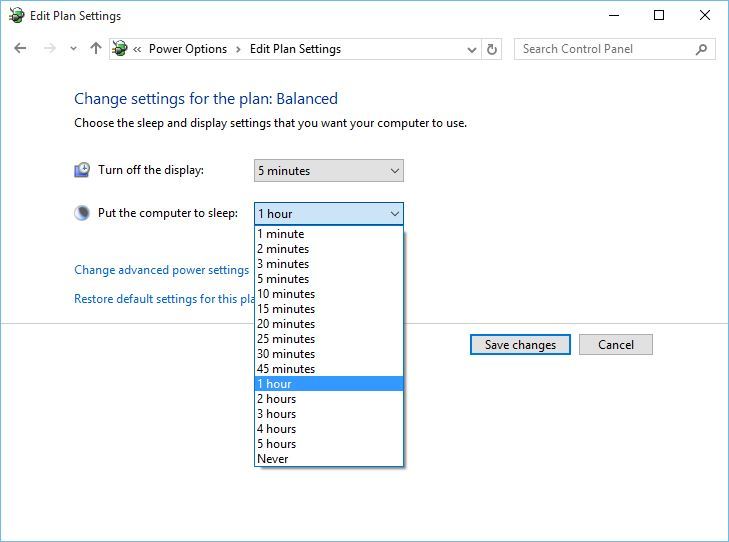
Sometimes random restart on Windows 10 can be triggered if Sleep mode timer is set to Never. In order to fix this issue, you need to set Sleep mode timer to any other different value.
3. Uninstall your antivirus
If you’re having random restarts, this can be caused by your antivirus software.
Users have reported that Kaspersky antivirus is sometimes the cause for a random restart on Windows 10, so if you’re using Kaspersky antivirus, you might want to temporarily uninstall it or upgrade it to a newer version.
If that doesn’t work, you might want to consider switching to different antivirus software.
We strongly recommend you Bitdefender as the world’s No. 1 Antivirus. It has a bunch of useful features that will keep your computer safe and optimized.
4. Update / uninstall your graphics card drivers
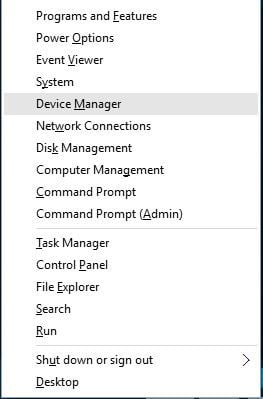
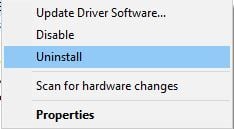
- Press Windows Key + X and choose Device Manager from the list.
- When Device Manager opens, locate your graphics card, right-click and choose Uninstall.
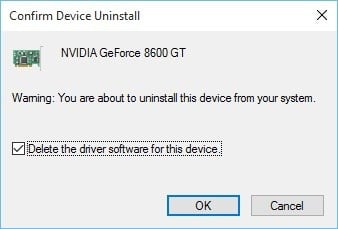
- Check Delete the driver software for this device and click OK.
- After the driver has been uninstalled, restart your computer.
- Download the latest driver from your graphics card manufacturer’s website and install it.
As you know, Windows 10 automatically installs its drivers, and if you install graphics card drivers from your graphics card manufacturer, you can sometimes cause conflicts and random restarts.
To fix this issue, you need to install additional drivers after Windows 10 performs its update and installs the necessary drivers first.
If you have already installed your graphics card drivers, you might need to uninstall them and install them again in order to fix this issue.
4.1 Update drivers automatically
If you try to install the drivers manually you risk to damage your system by downloading and installing the wrong version, thus we recommend using a dedicated tool.
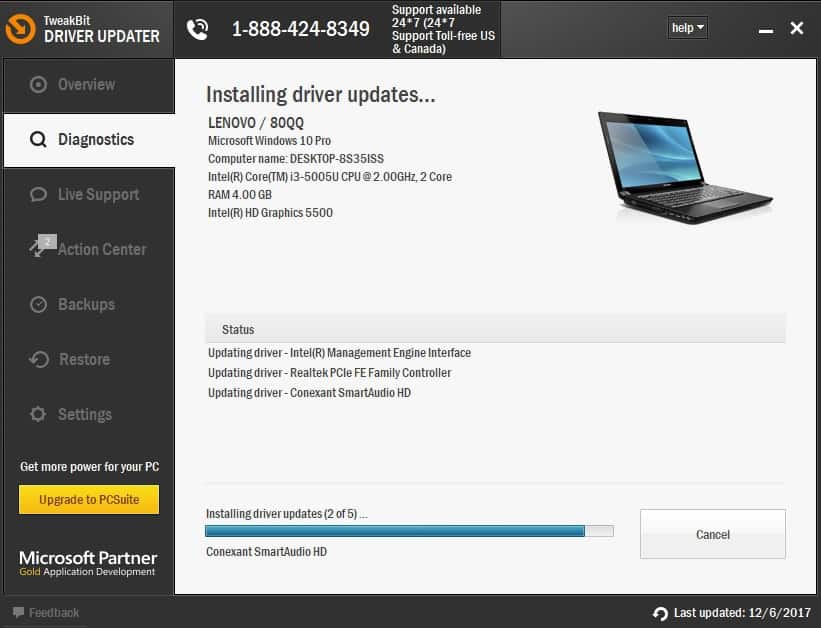
This is a tedious process and we suggest to do it automatically by using Tweakbit’s Driver Updater tool.
This tool is approved by Microsoft and Norton Antivirus and uses an advanced updating technology. After several tests, our team concluded that this is the best-automatized solution.
Below you can find a quick guide on how to do it.
-
- Download and install TweakBit Driver Updater
- Once installed, the program will start scanning your PC for outdated drivers automatically. Driver Updater will check your installed driver versions against its cloud database of the latest versions and recommend proper updates. All you need to do is wait for the scan to complete.
- Upon scan completion, you get a report on all problem drivers found on your PC. Review the list and see if you want to update each driver individually or all at once. To update one driver at a time, click the ‘Update driver’ link next to the driver name. Or simply click the ‘Update all’ button at the bottom to automatically install all recommended updates.
Note:Some drivers need to be installed in multiple steps so you will have to hit the ‘Update’ button several times until all of its components are installed.
- Download and install TweakBit Driver Updater


Disclaimer: some features of this tool are not free.
5. Change your power plan to High performance
- Open Power Options.
- When Power Options window opens, choose High performance.
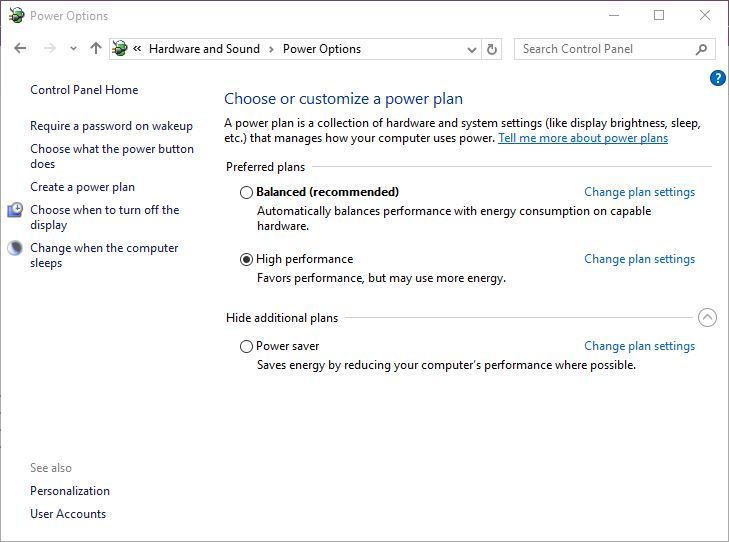
If you’re having random restarts on Windows 10, sometimes the best solution is to change your power plan to High performance.
We have to mention that by changing your mode to High performance your PC or laptop will consume more power, so keep that in mind.
This is especially important for laptop users because your battery will drain faster and you’ll have to recharge it more often.
6. Update your BIOS
Sometimes you can fix random restarts on Windows 10 by updating your BIOS. To update your BIOS, you need to visit your motherboard manufacturer’s website and download the latest version of BIOS.
Before you update BIOS, make sure that you check your motherboard’s manual in order to update BIOS properly.
If you’re not careful, you can cause permanent damage to your computer, so be careful if you decide to update your BIOS. If you don’t know how to do it properly, please contact an expert.


