- System Error Codes
- More ways to find an error code
- Third party error codes
- System Error Codes
- Fix Windows Update errors by using the DISM or System Update Readiness tool
- Symptom
- Resolution for Windows 8.1, Windows 10 and Windows Server 2012 R2
- Resolution for Windows 7 Service Pack 1 (SP1) and Windows Server 2008 R2 SP1
- Resolution — Download the package from Microsoft Update Catalog directly
- Description of the common corruption errors
- What does the System Update Readiness tool do
- Verify the integrity of resources
- Logging
- How to fix errors that are found in the CheckSUR log file
- Использование средства проверки системных файлов для восстановления отсутствующих или поврежденных системных файлов
- Запуск средства проверки системных файлов (SFC.exe)
- Дополнительная информация
System Error Codes
This section is intended for developers who are debugging system errors. If you reached this page while searching for other errors, here are some links that might help:
- Windows Update errors — For help resolving issues with Windows Update.
- Windows activation errors — For help verifying your copy of Windows.
- Troubleshooting blue screen errors — For help discovering what caused a stop error.
- Microsoft Support — For support with a Microsoft product.
More ways to find an error code
We’ve listed the system error codes in this section, organized by number. If you need more help tracking down a specific error, here are some more recommendations:
- Use the Microsoft Error Lookup Tool.
- Install the Debugging Tools for Windows, load a memory dump file, and then run the !err command.
- Search the Microsoft Protocols site for the raw text or error code. For more information, see [MS-ERREF]: Windows Error Codes.
Third party error codes
Other error codes may be generated by third party services or apps (for example, Error Code: -118 may be displayed by the Steam game service) and in those situations you would contact the third party’s support line.
System Error Codes
System Error Codes are very broad: each one can occur in one of many hundreds of locations in the system. Consequently, the descriptions of these codes cannot be very specific. Use of these codes requires some amount of investigation and analysis. You need to note both the programmatic and the runtime context in which these errors occur.
Because these codes are defined in WinError.h for anyone to use, sometimes the codes are returned by non-system software. And sometimes the code is returned by a function deep in the stack and far removed from code that is handling the error.
The following topics provide lists of system error codes. These values are defined in the WinError.h header file.
Fix Windows Update errors by using the DISM or System Update Readiness tool
Original product version: В Windows 10, version 1809 and later versions, Windows 8.1, Windows Server 2012 R2, Windows 7 Service Pack 1, Windows Server 2008 R2 Service Pack 1
Original KB number: В 947821
Symptom
Windows updates and service packs may fail to install if there are corruption errors. For example, an update might not install if a system file is damaged. The DISM or System Update Readiness tool may help you to fix some Windows corruption errors.
This article is intended for Support agents and IT professionals. If you are home users and looking for more information about fixing Windows update errors, see Fix Windows Update errors.
Resolution for Windows 8.1, Windows 10 and Windows Server 2012 R2
To resolve this problem, use the inbox Deployment Image Servicing and Management (DISM) tool. Then, install the Windows update or service pack again.
Open an elevated command prompt. To do this, open Start menu or Start screen, type Command Prompt, right-select Command Prompt, and then select Run as administrator. If you are prompted for an administrator password or for a confirmation, type the password, or select Allow.
Type the following command, and then press Enter. It may take several minutes for the command operation to be completed.
When you run this command, DISM uses Windows Update to provide the files that are required to fix corruptions. However, if your Windows Update client is already broken, use a running Windows installation as the repair source, or use a Windows side-by-side folder from a network share or from a removable media, such as the Windows DVD, as the source of the files. To do this, run the following command instead:
Replace the C:\RepairSource\Windows placeholder with the location of your repair source. For more information about using the DISM tool to repair Windows, reference Repair a Windows Image.
Type the sfc /scannow command and press Enter. It may take several minutes for the command operation to be completed.
Close the command prompt, and then run Windows Update again.
DISM creates a log file (%windir%/Logs/CBS/CBS.log) that captures any issues that the tool found or fixed. %windir% is the folder in which Windows is installed. For example, the %windir% folder is C:\Windows.
Resolution for Windows 7 Service Pack 1 (SP1) and Windows Server 2008 R2 SP1
To resolve this problem, use the System Update Readiness tool. Then, install the Windows update or service pack again.
Download the System Update Readiness tool.
select the download link in the following table that corresponds to the version of Windows that is running on your computer. For more information about how to find the version of Windows that you installed, see Find out if your computer is running the 32-bit or 64-bit version of Windows.
This tool is updated regularly, we recommend that you always download the latest version. This tool is not available in every supported language. Check the link below to see if it is available in your language.
| Operating system | Download link |
|---|---|
| x86-based (32-bit) versions of Windows 7 SP1 | Download the package now. |
| x64-based (64-bit) versions of Windows 7 SP1 | Download the package now. |
| x64-based (64-bit) versions of Windows Server 2008 R2 SP1 | Download the package now. |
| Itanium-based versions of Windows Server 2008 R2 SP1 | Download the package now. |
Install and run the tool.
Select Download on the Download Center webpage, then do one of the following:
- To install the tool immediately, select Open or Run, and then follow the instructions on your screen.
- To install the tool later, select Save, and then download the installation file to your computer. When you’re ready to install the tool, double-select the file.
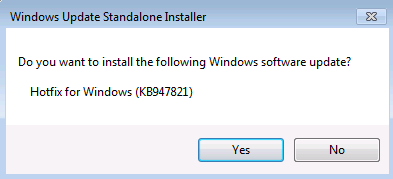
In the Windows Update Standalone Installer dialog box, select Yes.
When the tool is being installed, it automatically runs. Although it typically takes less than 15 minutes to run, it might take much longer on some computers. Even if the progress bar seems to stop, the scan is still running, so don’t select Cancel.
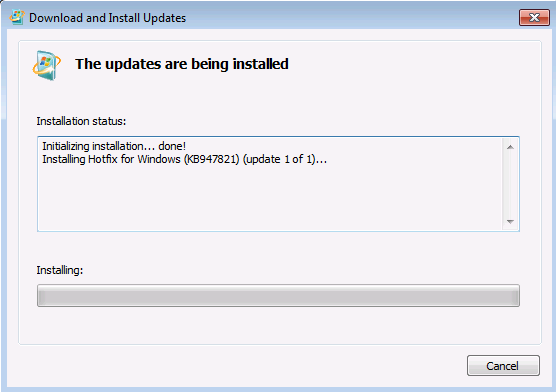
When you see Installation complete, select Close.

Reinstall the update or service pack you were trying to install previously.
To manually fix corruption errors that the tool detects but can’t be fixed, see How to fix errors that are found in the CheckSUR log file.
Resolution — Download the package from Microsoft Update Catalog directly
You can also try to directly download the update package from Microsoft Update Catalog, and then install the update package manually.
For example, you may have problems when you try to install updates from Windows Update. In this situation, you can download the update package and try to install the update manually. To do this, follow these steps:
Open Microsoft Update Catalog in Internet Explorer.
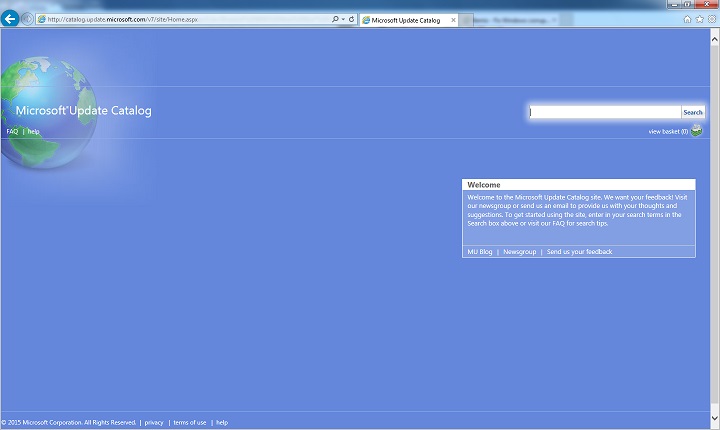
In the search box, input the update number that you want to download. In this example, input 3006137. Then, select Search.

Find the update that applies to your operating system appropriately in the search results, and then select Add to add the update to your basket.

Select view basket to open your basket.

Select Download to download the update in your basket.

Select Browse to choose a location for the update you are downloading, and then select Continue.

Select Close after the download process is done. Then, you can find a folder that contains the update package in the location that you specified.
Open the folder, and then double-select the update package to install the update.
If the Windows update or service pack installed successfully, you are finished. If the problem is not fixed, or if System Update Readiness Tool cannot find the cause, contact us for more help.
Description of the common corruption errors
The following table lists the possible error code with Windows Update for your reference:
| Code | Error | Description |
|---|---|---|
| 0x80070002 | ERROR_FILE_NOT_FOUND | The system cannot find the file specified. |
| 0x8007000D | ERROR_INVALID_DATA | The data is invalid. |
| 0x800F081F | CBS_E_SOURCE_MISSING | The source for the package or file not found. |
| 0x80073712 | ERROR_SXS_COMPONENT_STORE_CORRUPT | The component store is in an inconsistent state. |
| 0x800736CC | ERROR_SXS_FILE_HASH_MISMATCH | A component’s file does not match the verification information present in the component manifest. |
| 0x800705B9 | ERROR_XML_PARSE_ERROR | Unable to parse the requested XML data. |
| 0x80070246 | ERROR_ILLEGAL_CHARACTER | An invalid character was encountered. |
| 0x8007370D | ERROR_SXS_IDENTITY_PARSE_ERROR | An identity string is malformed. |
| 0x8007370B | ERROR_SXS_INVALID_IDENTITY_ATTRIBUTE_NAME | The name of an attribute in an identity is not within the valid range. |
| 0x8007370A | ERROR_SXS_INVALID_IDENTITY_ATTRIBUTE_VALUE | The value of an attribute in an identity is not within the valid range. |
| 0x80070057 | ERROR_INVALID_PARAMETER | The parameter is incorrect. |
| 0x800B0100 | TRUST_E_NOSIGNATURE | No signature was present in the subject. |
| 0x80092003 | CRYPT_E_FILE_ERROR | An error occurred while Windows Update reads or writes to a file. |
| 0x800B0101 | CERT_E_EXPIRED | A required certificate is not within its validity period when verifying against the current system clock or the time stamp in the signed file. |
| 0x8007371B | ERROR_SXS_TRANSACTION_CLOSURE_INCOMPLETE | One or more required members of the transaction are not present. |
| 0x80070490 | ERROR_NOT_FOUND | Windows could not search for new updates. |
| 0x800f0984 | PSFX_E_MATCHING_BINARY_MISSING | Matching component directory exist but binary missing |
| 0x800f0986 | PSFX_E_APPLY_FORWARD_DELTA_FAILED | Applying forward delta failed |
| 0x800f0982 | PSFX_E_MATCHING_COMPONENT_NOT_FOUND | Can’t identify matching component for hydration |
What does the System Update Readiness tool do
Verify the integrity of resources
The System Update Readiness tool verifies the integrity of the following resources:
- Files that are located in the following directories:
- %SYSTEMROOT%\Servicing\Packages
- %SYSTEMROOT%\WinSxS\Manifests
- Registry data that is located under the following registry subkeys:
- HKEY_LOCAL_MACHINE\Components
- HKEY_LOCAL_MACHINE\Schema
- HKEY_LOCAL_MACHINE\Software\Microsoft\Windows\CurrentVersion\Component Based Servicing
This list may be updated at any time.
When the System Update Readiness tool detects incorrect manifests, Cabinets, or registry data, it may replace the incorrect data with a corrected version.
Logging
The System Update Readiness tool creates a log file that captures any issues that the tool found or fixed. The log file is located here:
How to fix errors that are found in the CheckSUR log file
To manually fix corruption errors that the System Update Readiness tool detects but can’t fix, follow these steps:
%SYSTEMROOT% is an environment variable that saves the folder in which Windows is installed. For example, generally the %SYSTEMROOT% folder is C:\Windows.
Identify the packages that the tool can’t fix. For example, you may find the following in the log file:
In this case, the package that is corrupted is KB958690.
Copy the package (.msu) to the %SYSTEMROOT%\CheckSUR\packages directory. By default, this directory doesn’t exist and you need to create the directory.
Использование средства проверки системных файлов для восстановления отсутствующих или поврежденных системных файлов
Если некоторые функции Windows не работают или Windows завершает работу, используйте средство проверки системных файлов для сканирования Windows и восстановления файлов.
Несмотря на то, что приведенные ниже шаги могут показаться сложными на первом этапе, просто выполните их по порядку, и мы попробуем помочь вам.
Запуск средства проверки системных файлов (SFC.exe)
выполнив указанные ниже действия.
Откройте командную строку с повышенными привилегиями. Для этого выполните указанные ниже действия, в зависимости от версии операционной системы:
Пользователям Windows 10, Windows 8.1 или Windows 8 перед запуском средства проверки системных файлов нужно запустить систему обслуживания образов развертывания и управления ими (DISM). (Если на вашем компьютере установлена система Windows 7 или Windows Vista, перейдите сразу к шагу 3.)
Введите следующую команду и нажмите клавишу ВВОД. Выполнение команды может занять несколько минут.
DISM.exe /Online /Cleanup-image /Restorehealth
Важно! При запуске этой команды DISM обращается к Центру обновления Windows, чтобы получить файлы для устранения повреждений. Но если поврежден клиент Центра обновления Windows, используйте работающий экземпляр Windows в качестве источника восстановления либо параллельную папку Windows из сетевого расположения или со съемного носителя, например DVD-диска Windows, в качестве источника файлов. Для этого введите в командной строке такую команду:
DISM.exe /Online /Cleanup-Image /RestoreHealth /Source: C:\RepairSource\Windows /LimitAccess
Примечание. Вместо заполнителя C:\RepairSource\Windows укажите расположение вашего источника восстановления. Дополнительные сведения об использовании средства DISM для восстановления Windows см. в статье Восстановление образа Windows.
Введите в командной строке приведенную ниже команду и нажмите клавишу ВВОД:

Команда sfc /scannow проверит все защищенные системные файлы и заменит поврежденные файлы их кэшированной копией, расположенной в сжатой папке по адресу %WinDir%\System32\dllcache.
Заполнитель %WinDir% представляет собой папку операционной системы Windows. Например, C:\Windows.
Примечание. Не закрывайте это окно командной строки, пока проверка не завершится на 100 %. Результаты проверки будут показаны после завершения данного процесса.
После завершения процесса проверки на экране может появиться одно из приведенных ниже сообщений:
Защита ресурсов Windows не обнаружила нарушений целостности.
Это значит, что отсутствующие и поврежденные системные файлы не обнаружены.
Защита ресурсов Windows не может выполнить запрошенную операцию.
Для устранения этой проблемы выполните сканирование с помощью средства проверки системных файлов в безопасном режиме, убедитесь, что папки PendingDeletes и PendingRenames находятся в папке %WinDir%\WinSxS\Temp.
Защита ресурсов Windows обнаружила поврежденные файлы и успешно их восстановила. Сведения см. в журнале CBS.Log %WinDir%\Logs\CBS\CBS.log.
Для просмотра подробных сведений о сканировании и восстановлении системных файлов перейдите к разделу Как просмотреть подробные сведения процесса работы средства проверки системных файлов.
Защита ресурсов Windows обнаружила поврежденные файлы, но не может восстановить некоторые из них. Сведения см. в журнале CBS.Log %WinDir%\Logs\CBS\CBS.log.
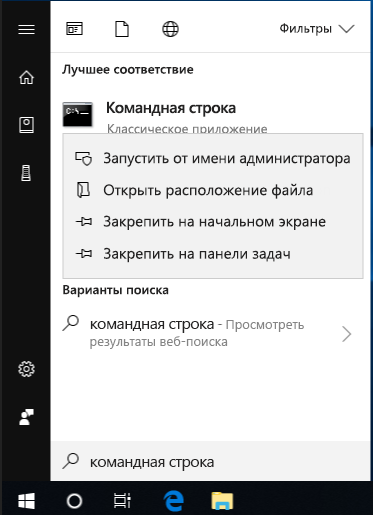
Проведите пальцем от правого края экрана к центру и коснитесь кнопки Поиск. Либо, если вы используете мышь, переместите указатель в правый нижний угол экрана и щелкните кнопку Поиск. Введите запрос Командная строка в поле Поиск, щелкните правой кнопкой мыши элемент Командная строка, затем выберите команду Запуск от имени администратора. Если система запросит пароль администратора или подтверждение, введите пароль или нажмите кнопку Разрешить.

Для этого нажмите кнопку Пуск, введите запрос Командная строка или cmd в поле Поиск, щелкните правой кнопкой мыши элемент Командная строка, а затем выберите команду Запуск от имени администратора. При получении запроса на ввод пароля администратора или подтверждения введите пароль или нажмите кнопку Разрешить.
Дополнительная информация
Чтобы ознакомиться с подробными сведениями, включенными в файл CBS.Log, вы можете скопировать сведения в файл Sfcdetails.txt с помощью команды Findstr, а затем просмотреть их в этом файле. Для этого выполните указанные ниже действия.
Откройте командную строку с повышенными привилегиями, как это описано на шаге 1.
Введите в командной строке приведенную ниже команду и нажмите клавишу ВВОД:
Примечание. В файле Sfcdetails.txt содержатся сведения о каждом запуске средства проверки системных файлов на компьютере. Он также содержит информацию о файлах, которые не были исправлены средством проверки системных файлов. Проверьте дату и время записей, чтобы определить проблемные файлы, обнаруженные при последнем запуске средства проверки системных файлов.
Откройте файл Sfcdetails.txt на рабочем столе.
В файле Sfcdetails.txt используется следующий формат:
Сведения о дате и времени SFC В следующем примере файла журнала содержится запись для одного файла, который не удалось исправить: 2007-01-12 12:10:42, Info CSI 00000008 [SR] Cannot repair member file [l:34<17>]»Accessibility.dll» of Accessibility, Version = 6.0.6000.16386, pA = PROCESSOR_ARCHITECTURE_MSIL (8), Culture neutral, VersionScope neutral, PublicKeyToken =
Как вручную заменить поврежденный системный файл гарантированно работоспособной копией файла.
После определения, какой системный файл поврежден и не может быть восстановлен, с помощью подробных сведений в файле Sfcdetails.txt, выясните расположение поврежденного файла, затем вручную замените поврежденный файл его гарантировано работоспособной копией. Для этого выполните указанные ниже действия.
Примечание. Гарантировано работоспособную копию системного файла можно взять с другого компьютера, на котором установлена такая же, как на вашем компьютере версия Windows. Чтобы убедиться в работоспособности системного файла, который вы планируете скопировать на другом компьютере, можно провести процесс проверки средством проверки системных файлов.
Распространите на поврежденный системный файл права собственности администратора. Для этого скопируйте, а затем вставьте (или введите) в командную строку с повышенными привилегиями приведенную ниже команду, затем нажмите клавишу ВВОД:
takeown /f Путь_и_имя_файла Примечание. Заполнитель Путь_и_имя_файла представляет собой путь и имя файла для поврежденного файла. Например, введите takeown /f C:\windows\system32\jscript.dll. 
Предоставьте администраторам полный доступ к поврежденному системному файлу. Для этого скопируйте и вставьте (или введите) приведенную ниже команду и нажмите клавишу ВВОД:
icacls Путь_и_имя_файла /GRANT ADMINISTRATORS:F Примечание. Заполнитель Путь_и_имя_файла представляет собой путь и имя файла для поврежденного файла. Например, введите icacls C:\windows\system32\jscript.dll /grant administrators:F.
Замените поврежденный системный файл гарантировано работоспособной копией файла. Для этого скопируйте и вставьте (или введите) приведенную ниже команду и нажмите клавишу ВВОД:
Copy Исходный_файл Расположение Примечание. Заполнитель Исходный_файл представляет собой путь и имя гарантировано работоспособной копии файла на вашем компьютере, а заполнитель Расположение представляет собой путь и имя поврежденного файла. Например, введите copy E:\temp\jscript.dll C:\windows\system32\jscript.dll.
Если описанные выше действия не помогли, возможно, потребуется переустановить Windows. Дополнительные сведения см . в разделе Варианты восстановления Windows10.


