- Data Recovery from LVM Volumes in Linux
- What is LVM?
- How to add LVM to the operating system?
- How to format a physical disk
- Create a volume group
- Create a logical volume to use LVM
- How to format and mount a logical volume?
- How to change the volume size?
- How to add a new hard disk to a volume group
- How to display detailed information about LVM
- How to remove a logical volume
- How to recover deleted data from an LVM volume
- Conclusion
- Как восстановить данные в Linux после переустановки ОС или форматирования диска
- Как установить программу «VMware» в операционной системе «Linux»
- Создаем виртуальную машину с «Windows 10» на «Ubuntu»
- Как добавить физический диск к виртуальной машине
- Как восстановить данные с «Linux» диска
Data Recovery from LVM Volumes in Linux
Would you like to know how to use the LVM technology in Linux? How to create an LVM volume, how to configure and mount it in your operating system, how to add and remove disks, and how to recover the information you have accidentally deleted? In today’s article, you will find all of that – and even more.

What is LVM?
LVM (Logical Volume Manager) is a standard disk management feature available in every version of Linux. The volume manager provides a new level of interaction between your operating system and disks or volumes which this system is using. In a conventional disk management pattern, Linux looks for available drives first, and then checks what volumes are available on these devices.
With the help of LVM, disks or volumes can be united into a single space. If the disk space is treated like that, the operating system will see no difference between them and the volume manager will show the operating system only the necessary volume groups or physical disks.
In fact, LVM has several considerable advantages to offer:
It can create a logical volume based on any number of physical disks which will be represented in the operating system as a single disk space.
The number of disks included and the size of such volume can be modified without interrupting your work.
Also, the LVM technology lets you do many things on the fly, like copying certain volumes, or configuring the mirroring feature the way it works in RAID 1 systems.
How to add LVM to the operating system?
If you are going to use LVM options for the first time, you have to install it. Here is the command you need for installation: sudo apt install lvm2
After that, type the administrator’s password, and click Yes to confirm your intention.
Some Linux versions have this feature installed by default.
This can be checked easily, by typing the command lvm in the terminal window.
Now you can move on to dealing with disks.
How to format a physical disk
Here we are, with three empty hard disks 320 GB each, which are unformatted and without any partitions.
The easiest way to format a disk is by using a disk management utility. Click on a disk – open advanced settings – then format it.
Specify the name and file system – Next– and click Format again to confirm your action
Now you’ll need the password to your administrator account.
Now that this disk is formatted, repeat the operation for every other disk which is not.
Also, a disk can be formatted with the terminal, using the command fdisk.
Sign in with a superuser account – sudo –i – type the password.
Now run the following command: fdisk /dev/sdb – where sdb is the unformatted disk.
Before you continue, make sure you have selected the right disk, because this operation erases all data from there.
Type n – new volume, p – primary, 1 – first partition, then press Enter twice.
Now let’s get the volume ready to be used with LVM. Type t to change the volume type, and then 8e to assign LVM type.
Check the volume properties by pressing p – you can see everything is OK, a new formatted volume with the name sdb1 appeared; press w to record the changes. Similarly, format all the disks which are not formatted yet.
Now create an LVM volume on the partition you have just created, by entering the command: pvcreate /dev/sdb1.
Repeat the command for every disk: pvcreate /dev/sdс1, pvcreate /dev/sdd1.
Create a volume group
Combine the three disks you have just prepared into an LVM volume. Here’s the command to use:
vgcreate vg1 /dev/sdb1 dev/sdc1 dev/sdd1
where vg1 is the name of the new group. Actually, you can use any name you prefer, but it’s recommended to put the vg letter combination before the name so that you know it is a volume group.
Create a logical volume to use LVM
When the disks are combined into the group, you need to create a new logical volume, so that you can use this group. For this purpose, type the command:
lvcreate -L 10G -n lv1 vg1
Where the -L stands for the size of the logical volume – it is 10 GB in this case, and the -n assigns a name to the volume, and the vg1 indicates from which volume the space should be taken.
If there is any data on the disk, the operating system will warn you about it: type yes to confirm your decision to erase the information.
How to format and mount a logical volume?
The last step you still have to take is to format the volume in the disk management utility and mount it. Click on it to open advanced settings and then format it; specify the name and file system – Next– and click Format again.
Type the root (superuser) account password, and click here to start mounting. Now you can use the new volume.
If you need to format it with the terminal, type the following command:
mkfs -t ext4 /dev/vg1/lv1
Specify the file system as Ext4, the group name, and the volume name.
For mounting, type the following: mkdir /mnt/lv1, and then – mount -t ext4 /dev/vg1/lv1 /mnt/lv1.
The volume is mounted.
How to change the volume size?
One of the advantages offered by logical volumes is the opportunity to add a new hard disk on the fly and expand the volume group. And on the contrary, if there is a hard disk in the volume group which is not in use, you can remove it.
There are three main tools to make physical volumes, volume groups and logical volumes larger or smaller.
- Resize – this command shrinks or extends physical and logical volumes, but can’t handle volume groups;
- Extend – use it to increase logical volumes or volume groups;
- Reduce – it can make logical volumes or volume groups smaller.
How to add a new hard disk to a volume group
The first step when you want to add a hard disk to a group is to format it. Scroll up to find a detailed explanation of this step.
After that, run the following command: vgextend vg1 /dev/sde1
where vg1 is the group name, and sde1 is the new (formatted) disk.
How to display detailed information about LVM
To display detailed information on the composition of an LVM group, run the command pvdisplay.
It displays the path to a physical disk, the name of the virtual group where it belongs, the information on the free and used disk space, disk ID and many other things.
How to remove a logical volume
To remove a logical volume, make sure that i’s disconnected (unmounted), then run the lvremove command, and the volume will be removed.
This command will help you to remove a volume group, but before that, you need to unmount the logical volume, so use another command first: umount /mnt/lv1
To proceed with removal, type this command: lvremove /dev/vg1/lv1, and type Yes to confirm this operation.
When the removal operation is successful, you’ll see this message.
Now the group can be removed, with this command: sudo vgremove vg1
Now it is time to remove all the disks that used to constitute the group; this command will do it: sudo pvremove /dev/sdb1 /dev/sdc1 /dev/sdd1
All the formatting of the physical disk is removed, and now the disk is back to its original condition.
How to recover deleted data from an LVM volume
If you accidentally removed important information from an LVM logical volume, you can still restore it with the help of Hetman Partition Recovery.
This utility supports LVM partitions and guarantees data recovery from there. It can handle most popular file systems used in Windows, Linux, Unix, and MacOS. It can ignore errors of the logical structure, scan the hard disk and restore the files you are looking for.
At the moment, there is no version of Hetman Partition Recovery for Linux. However, you can still run it with the help of a virtual machine based on Windows, install it as the secondary operating system on your PC, or connect the hard disk to another computer.
Start the program: after initialization, it recognized the logical volume without effort and now it displays all the data available on this volume.
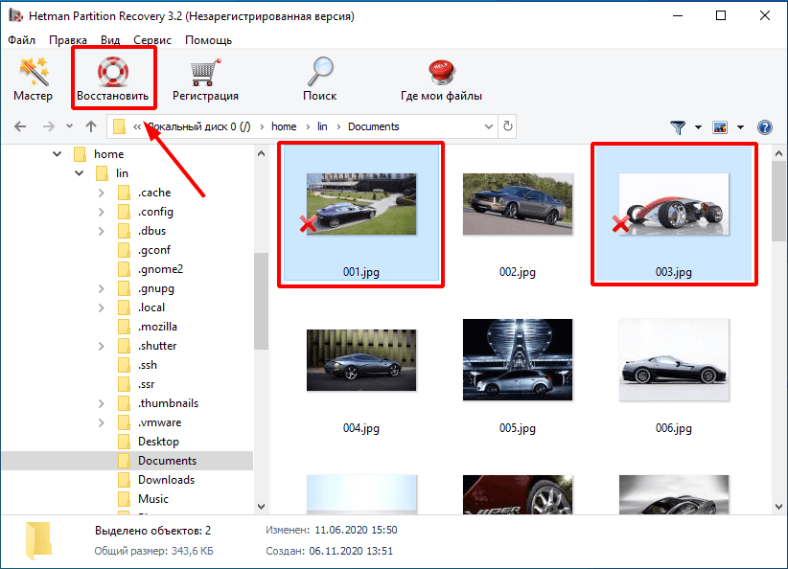
Start with running Fast scan – right-click on the disk, Open, Fast scan – and when the scan is over, the program will display the results in the right side of the window. Removed elements are marked with a red cross.
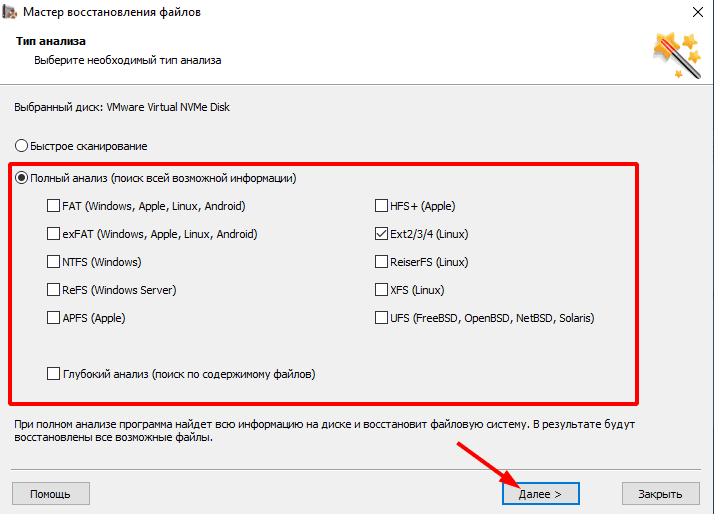
If the Fast scan doesn’t find the data you need, then use Full analysis.
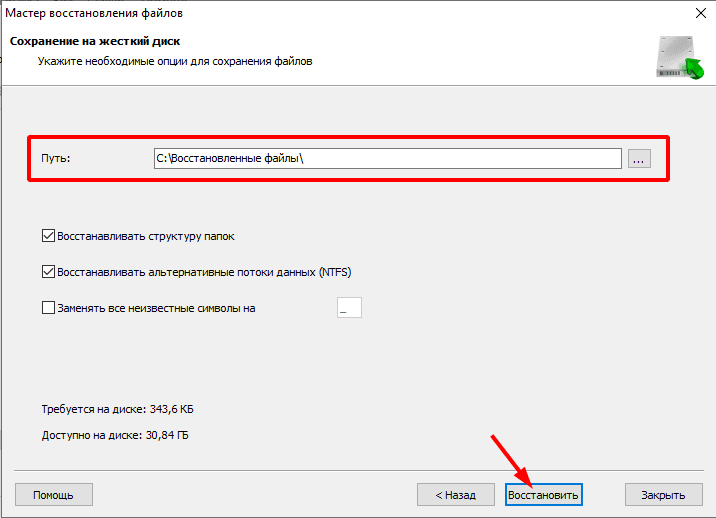
Select the files to be restored, click Recovery, choose where to save them, then click Recovery again.
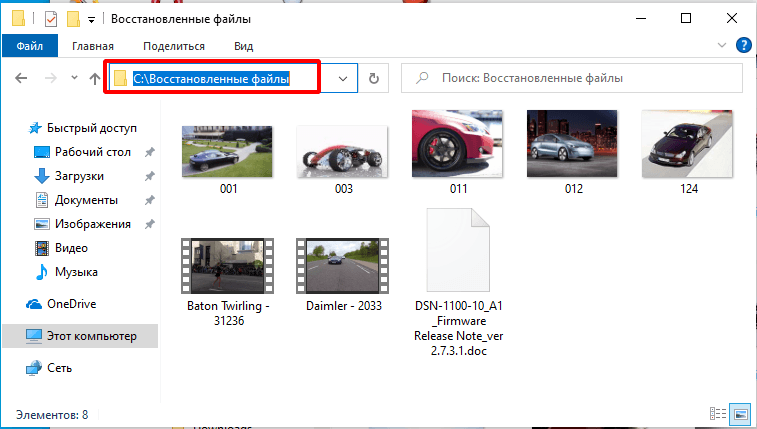
When the process is over, you will find all the files in the folder you have selected.
Conclusion
In this article, we did our best to explain how to use Logical Volume Management – an integrated feature of Linux. We have reviewed all important stages: creating and configuring an LVM partition, adding and mounting new hard disks, shrinking and removing volumes. The LVM feature has been developed with servers in mind, but now you can enjoy all of its benefits on a desktop PC at home.
See the full article with all additional video tutorials.
Источник
Как восстановить данные в Linux после переустановки ОС или форматирования диска
Мы расскажем как установить «VMware», как ее настроить и создать виртуальную машину с «Windows 10».
Каждый начинающий пользователь сталкивался с потерей данных после переустановки ОС. Перед началом переустановки операционной системы не была сохранена важная информация с системного диска, и соответственно все данные были удалены. Каждому знакомо это чувство, потери чего-нибудь важного, когда вы пытаетесь найти нужный файл на старом месте, но его там нет. Сейчас есть целое множество программ, которые помогут вернуть удаленные файлы и папки. Одна из них — «Hetman Partition Recovery», проверенная утилита, которая гарантирует восстановление удаленных данных.
Программа «Hetman Partition Recovery» работает в ОС «Windows», поэтому, чтобы запустить ее под «Linux» и просканировать диски, нужно создать и запустить виртуальную машину «VMware». Далее, я представлю пошаговую инструкцию как это выполнить на практике.
Как установить программу «VMware» в операционной системе «Linux»
Для запуска «Hetman Partition Recovery» понадобиться виртуальная машина с ОС «Windows 10». Версия под «Windows» поддерживает восстановление со всех известных файловых систем, в том числе и файловые системы ОС «Linux». На данный момент это файловые системы: «FAT/exFAT», «NTFS/ReFS», «APFS/HFS+», «Ext2/3/4/», «ReiserFS» и «XFS/UFS».
«VMware» одна из самых популярных программ для работы с виртуальными машинами, с ее установкой у вас не должно возникнуть никаких затруднений. Утилита не распространяется с открытым исходным кодом, но имеет две версии — платную «Pro-версию» и бесплатную «Lite-версию». В «Pro-версии» есть ознакомительный период на 30 дней, этого вполне достаточно чтобы восстановить удаленные файлы и папки.
В этой инструкции я опишу как именно установить программу «VMware», создать виртуальную машину с «Windows 10» и восстановить утерянные данные на «Ubuntu» версии 18.04.
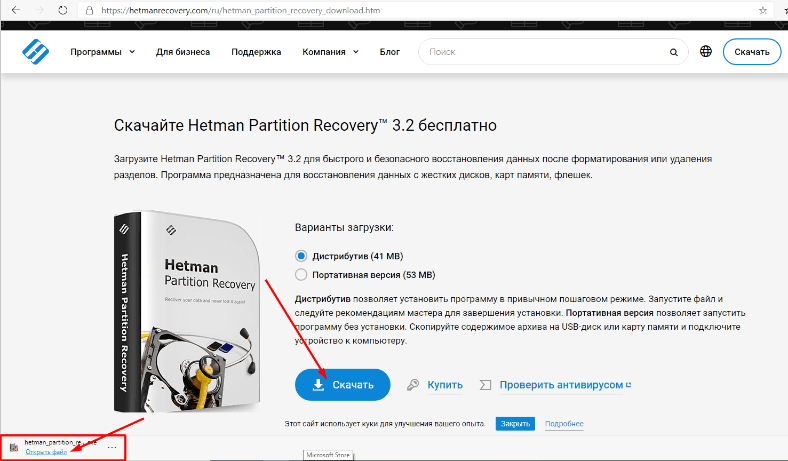
Сначала скачиваем установочный файл «VMware workstation 16 Pro». Последнюю стабильную версию можно найти на официальном сайте. Нам нужна версия под ОС «Linux».
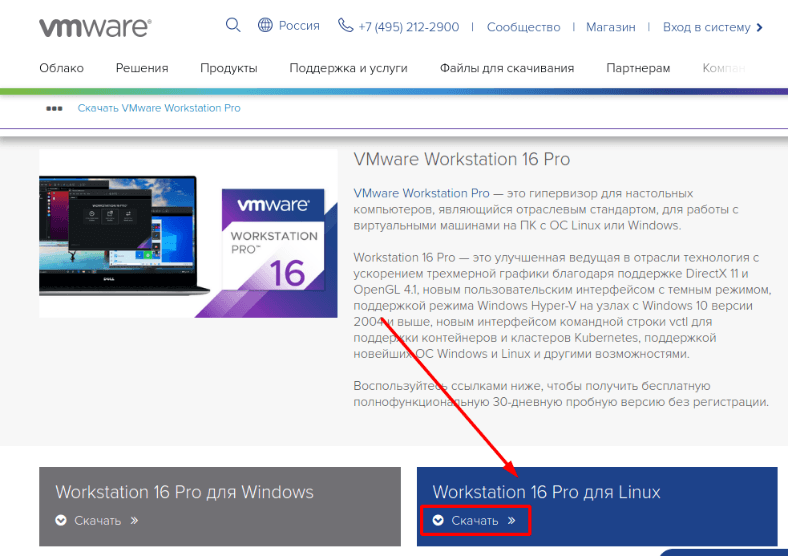
Выбираем «Сохранить файл» и ждем завершения загрузки.

Также, понадобиться скачать и установить компоненты «GNU Compiler Collection» и «Build Essential», они необходимы для нормальной работы программы.
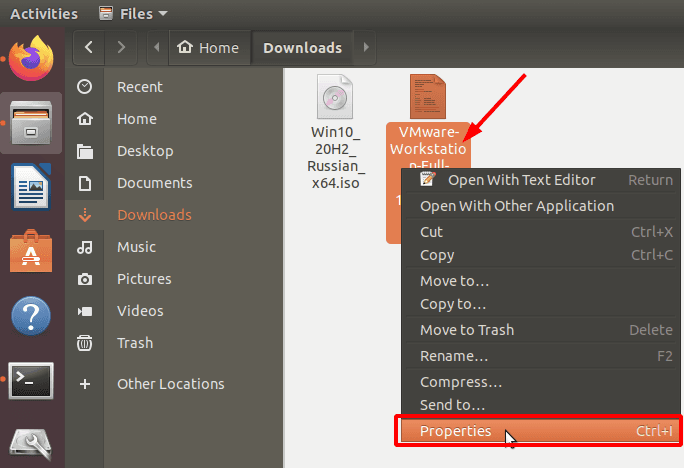
Для файла-установщика нужно настроить разрешения. Кликните по нему правой кнопкой мыши и откройте «Свойства» (Properties).
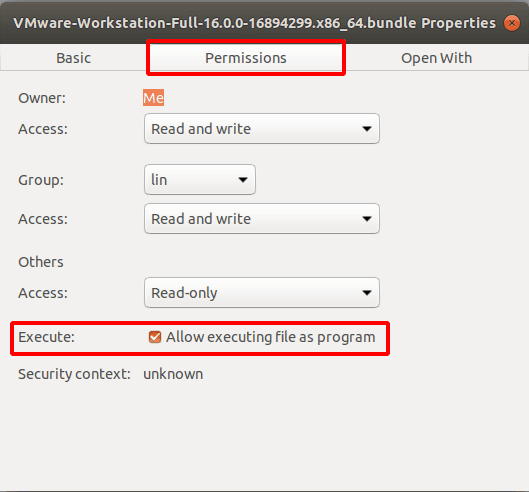
Перейдите во вкладку «Разрешения» (Permissions) и поставьте отметку напротив «Разрешить выполнение файла как программы» (Allow executing file as program).
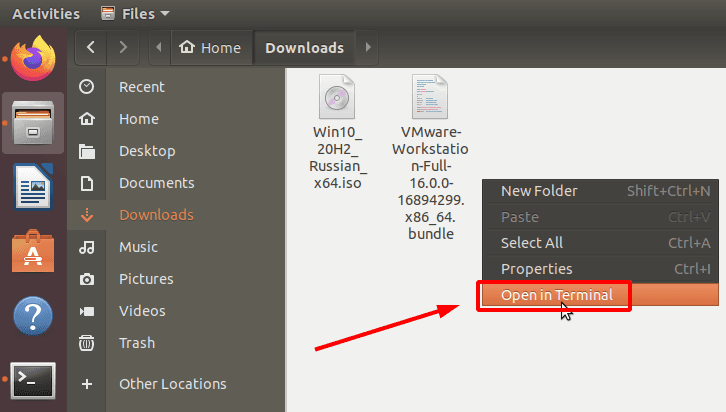
Перейдите в папку «Загрузки» и запустите ее, для этого кликните правой кнопкой мыши по свободному месту, выберите «Открыть в терминале».
Перед установкой любого программного обеспечения необходимо обновить репозиторий пакетов с помощью следующей команды.
sudo apt update

Затем установить компоненты «GNU Compiler Collection» и «Build Essential», которые будут использоваться в процессе установки. Для этого выполните такую команду:
sudo apt install gcc build-essential

«Yes» — для подтверждения — и «Enter».

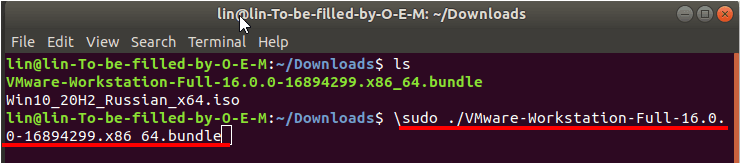
Дальше нужно полное имя файла загруженного пакета «VMware». Для этого перечислим файлы, которые лежат в загрузках, выполнив следующую команду:

Копируем полное имя скачанного файла, оно понадобиться для извлечения файлов из пакета.
В терминале вводим
и вставляем имя пакета.
Команда должна выглядеть так.
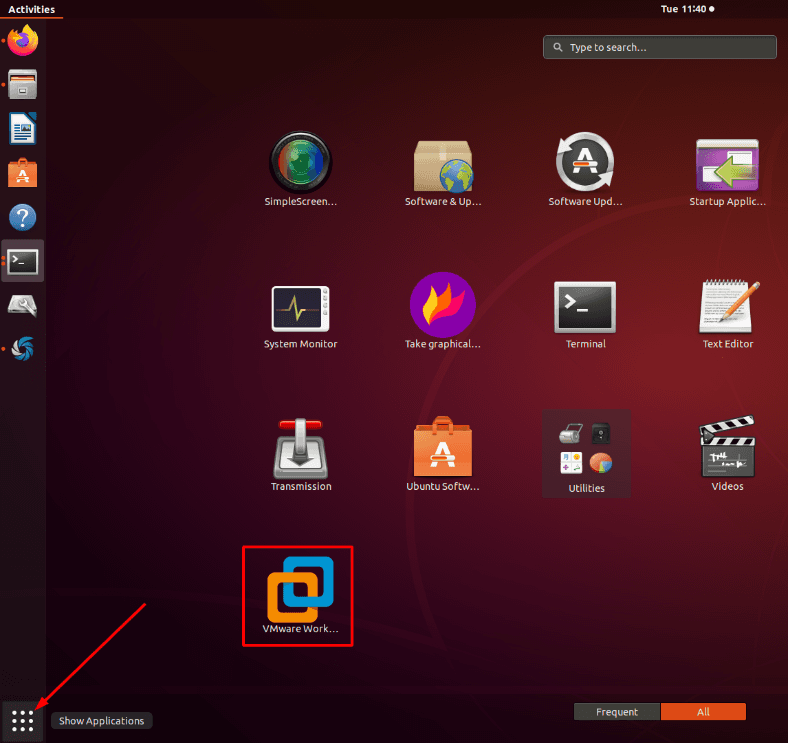
По завершении извлечения файлов откроется окно программы установки «VMware». Если нет — переходим к списку установленных приложений и запускаем ее.
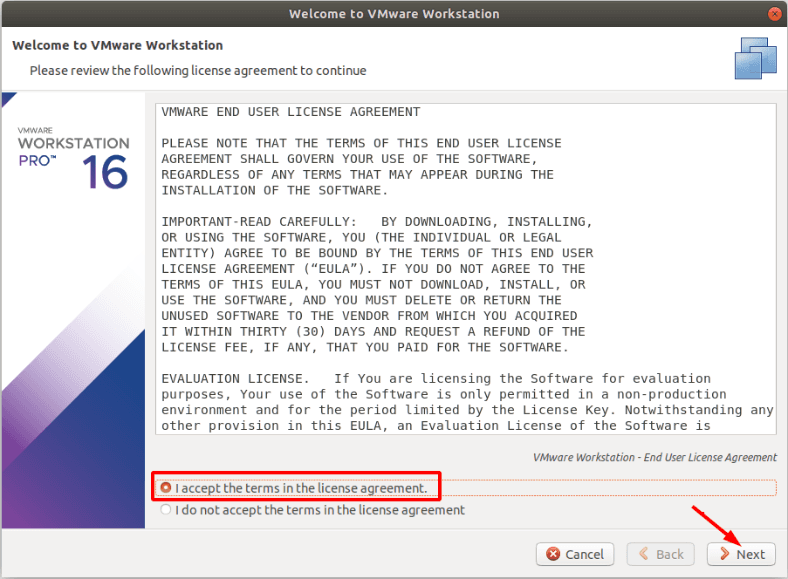
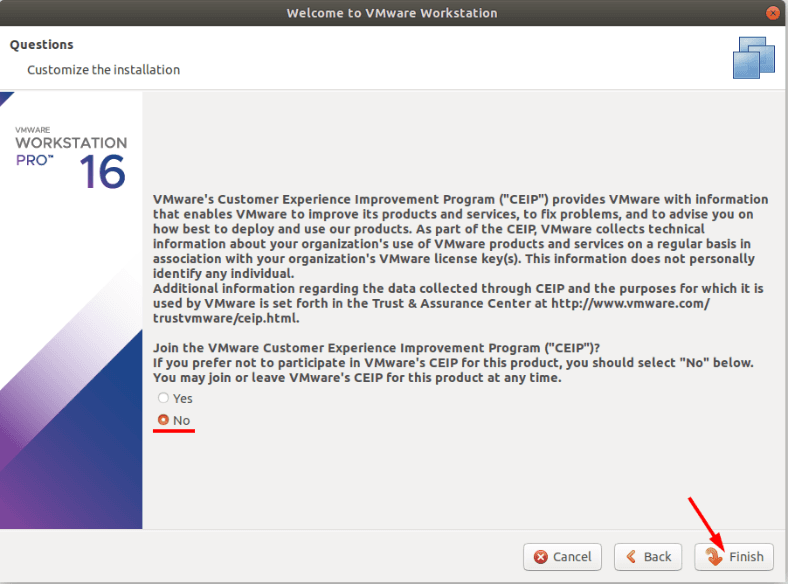
После запуска, выберите настройки конфигурации приложения и пройдите процесс инсталляции. Не забудьте принять условия лицензионного соглашения.
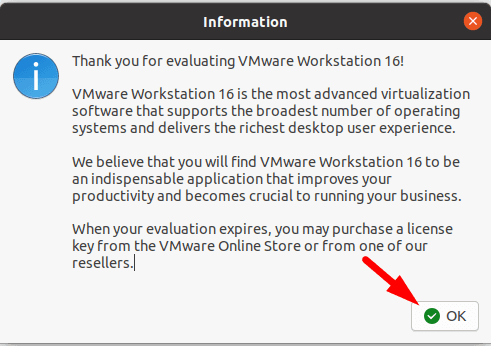
По завершении инсталляции отобразится уведомление об успешной установке.
При первом запуске «VMware» попросит ввести лицензионный ключ, выбираем бесплатную ознакомительную версию на 30 дней.
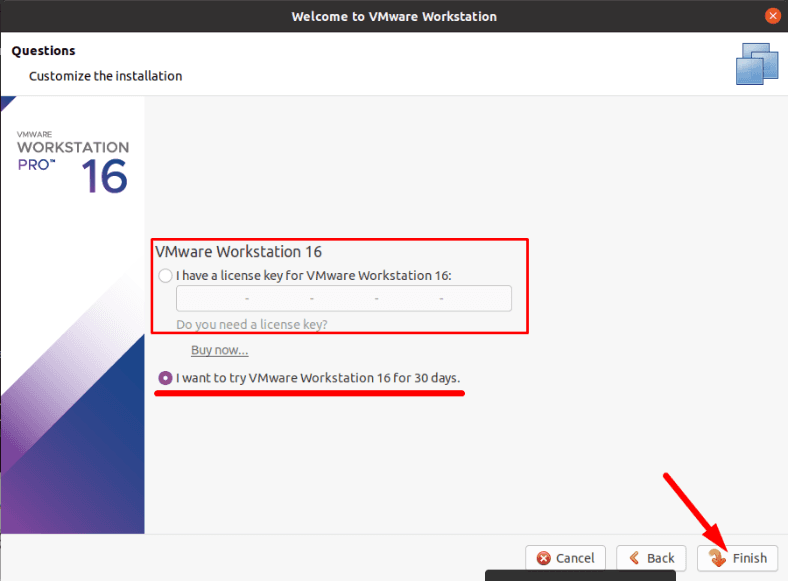
Утилита установлена, пора создавать виртуальную машину.
Создаем виртуальную машину с «Windows 10» на «Ubuntu»
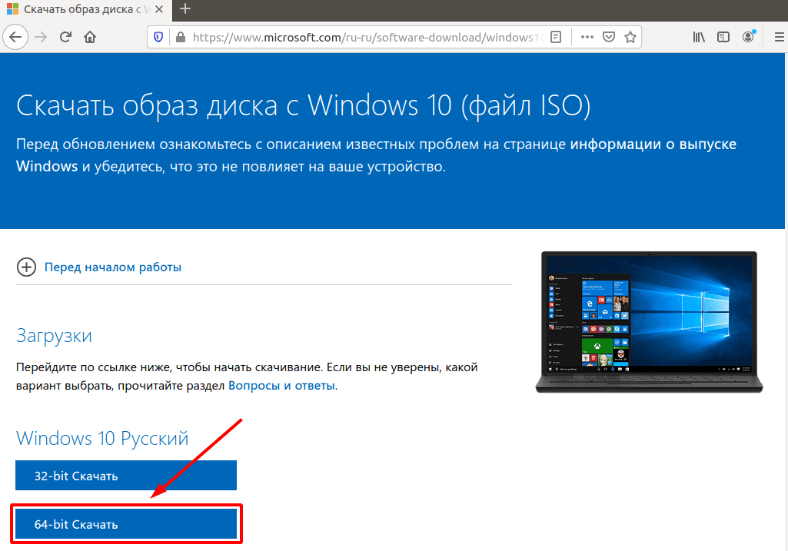
Первое что делаем, это скачиваем нужный образ операционной системы, в данном случае «Windows 10». Переходим на веб-сайт «Microsoft», скачиваем «ISO» файл нужной нам версии ОС.
После загрузки образа, программу «VMware» необходимо запустить от «root» (супер-пользователя). Для этого в терминале вводим следующую команду.

Таким образом удастся исключить проблемы при подключении физического диска в будущем.
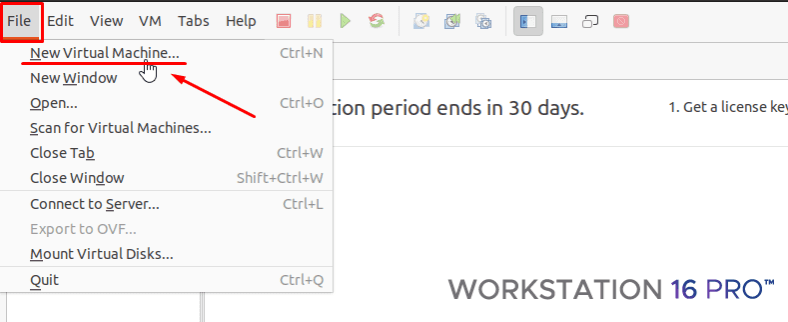
В открывшемся окне жмем по вкладке «Файл» (File) — «Новая виртуальная машина» (New Virtual Machine).
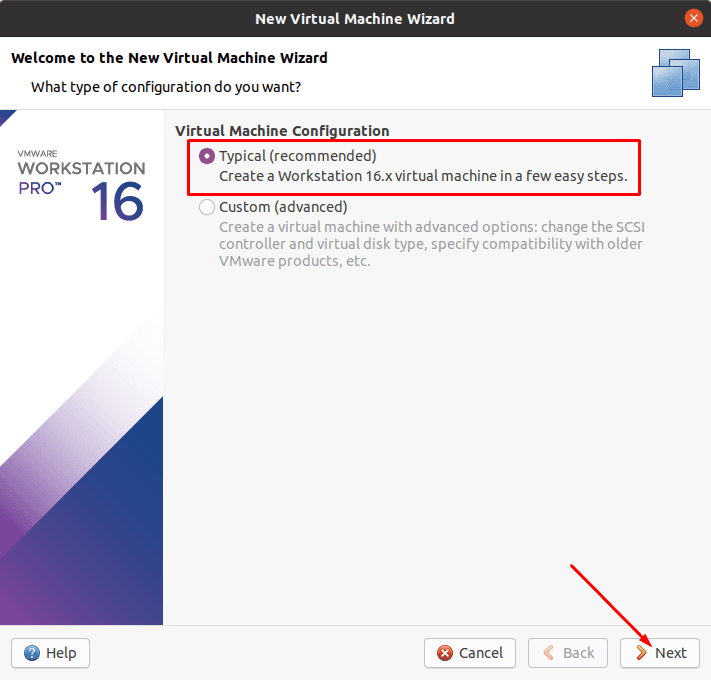
Выберите «Обычный тип конфигурации» — «Далее».
Отмечаем пункт «Использовать ISO образ».
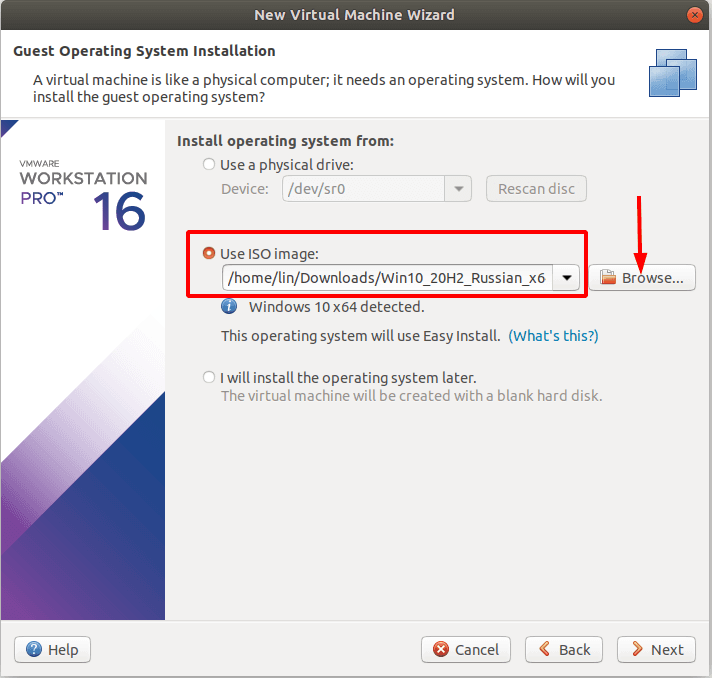
Указываем путь к скачанному образу операционной системы «Windows 10».

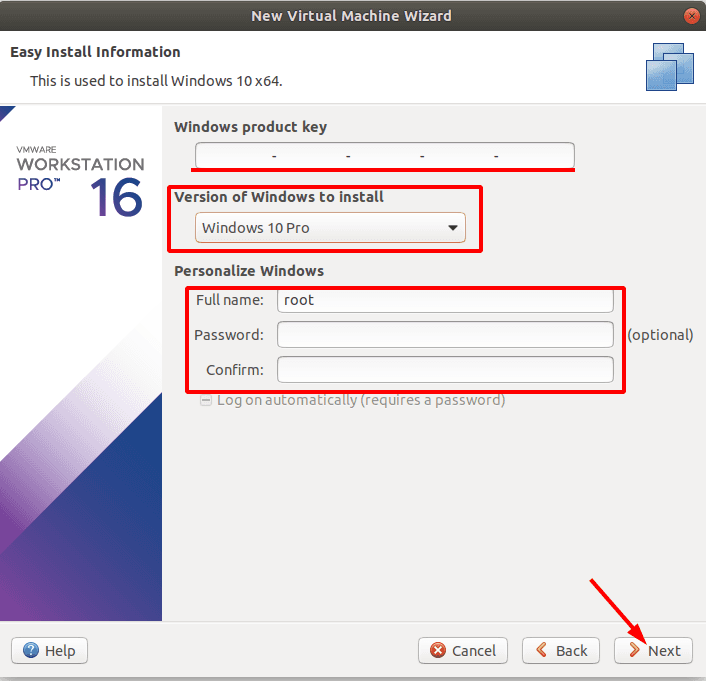
Если у вас есть регистрационный ключ, то вводим его, указываем версию «Windows», задаем имя и пароль пользователя. Если ключа нет, то оставляем поле пустым, жмем «Далее».
Задаем имя виртуальной машины, если нужно меняем ее расположение.
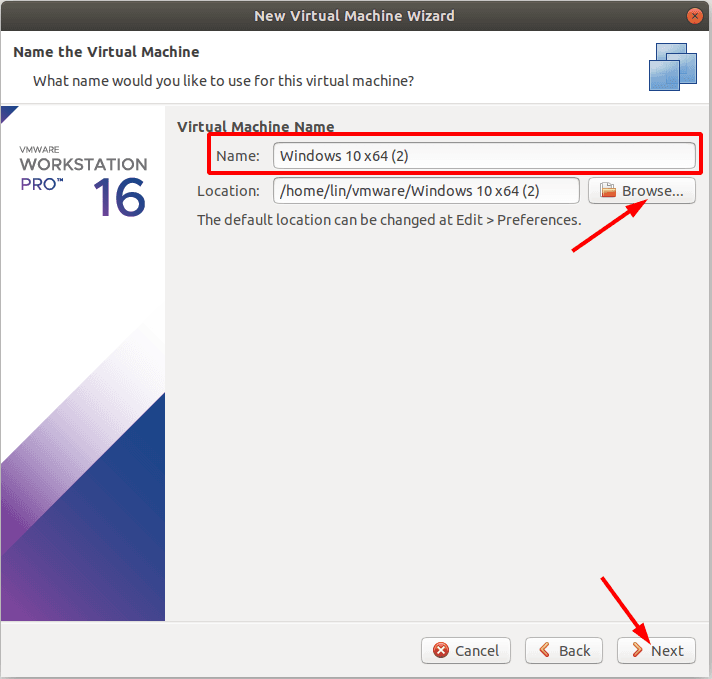
Примечание: Если нужно восстановить данные с системного диска, то для установки виртуальной машины укажите другой. Так как, в процессе установки, удаленные данные будут затерты и вы не сможете их восстановить.
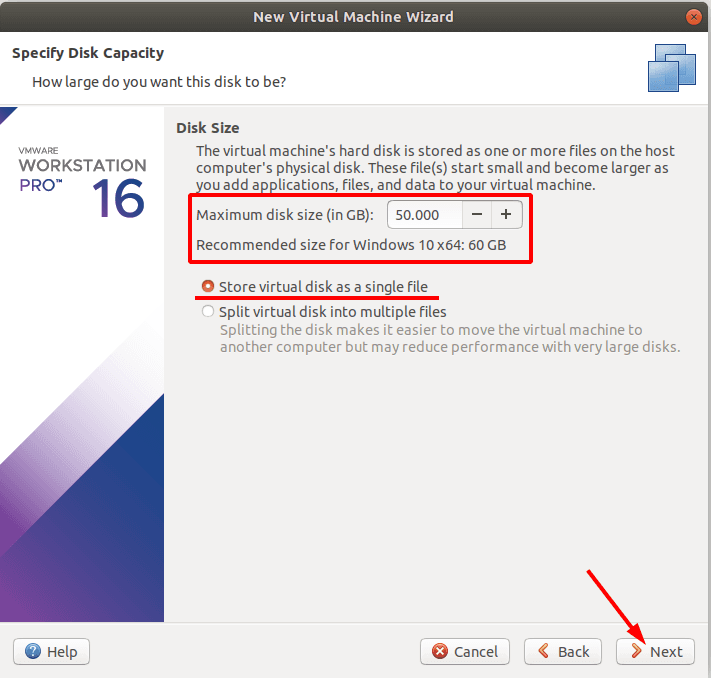
В следующем окне меняем размер дискового пространства для виртуальной машины. Ставим отметку напротив «Сохранение виртуального диска в виде одного файла», жмем «Далее».
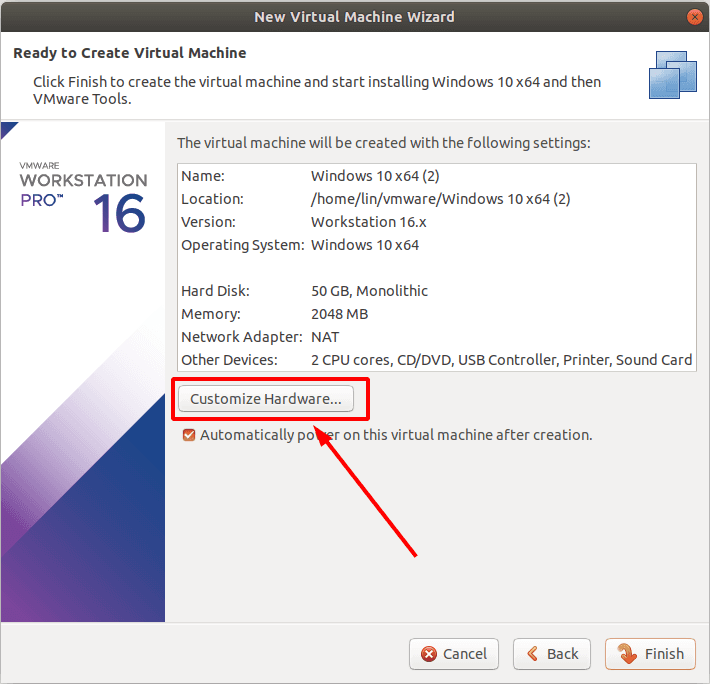
После чего откроются настройки виртуальной машины.
В первом пункте выбираем размер оперативной памяти, которая будет выделена для работы. Чем больше, тем лучше, но указывайте ее исходя из реального объема ОЗУ вашего компьютера так, чтобы оставить достаточно оперативной памяти для работы самой ОС «Linux».
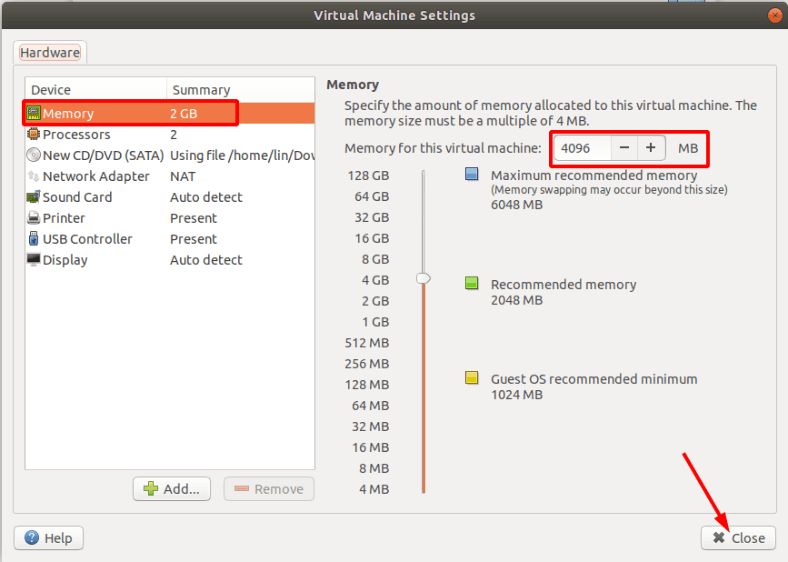
Остальные настройки на этом этапе не важны, жмем «Закрыть» и «Финиш» для завершения.
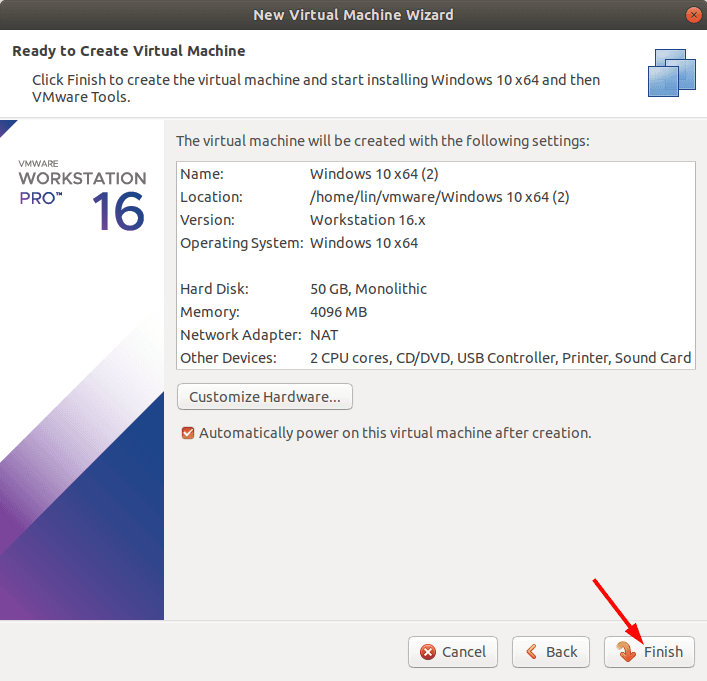
Виртуальная машина создана, осталось ее запустить и установить «Windows 10».
После запуска начнется установка «Windows», она ничем не отличается от обычной. Здесь следуйте указаниям инсталлятора.
Как добавить физический диск к виртуальной машине
Теперь в настройках нужно добавить физический диск, с которого нужно восстановить данные. Для того чтобы виртуальная машина грузилась из виртуального жесткого диска, а не запускалась установка ОС при каждом старте нужно снять отметку в пункте «CD/DVD».
Жмем правой кнопкой мыши по иконке виртуальной машины, открываем «Параметры» (Settings).
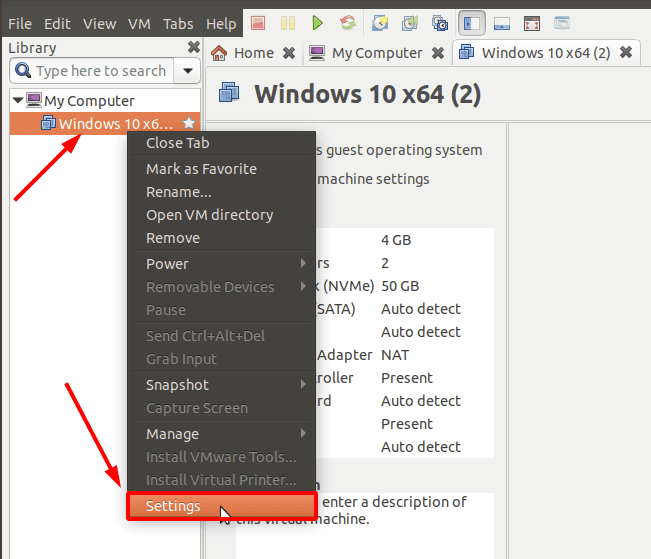
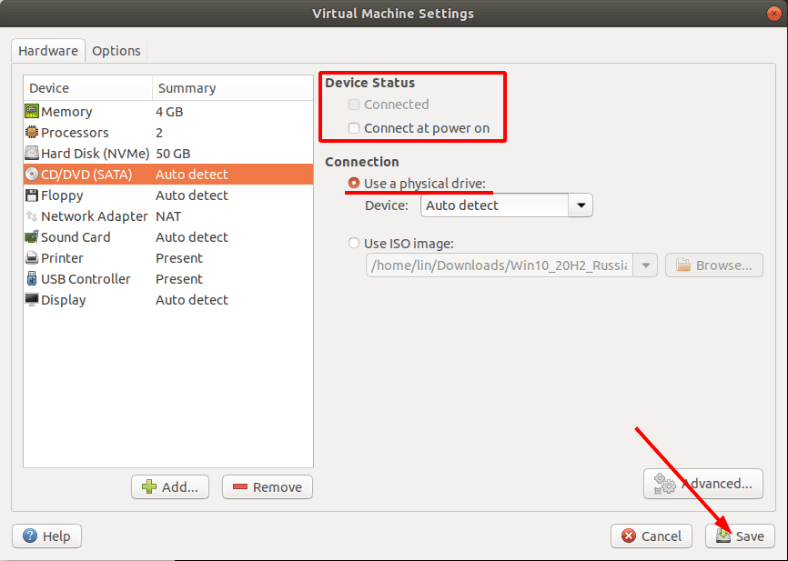
В пункте «CD/DVD» снимаем галочку.
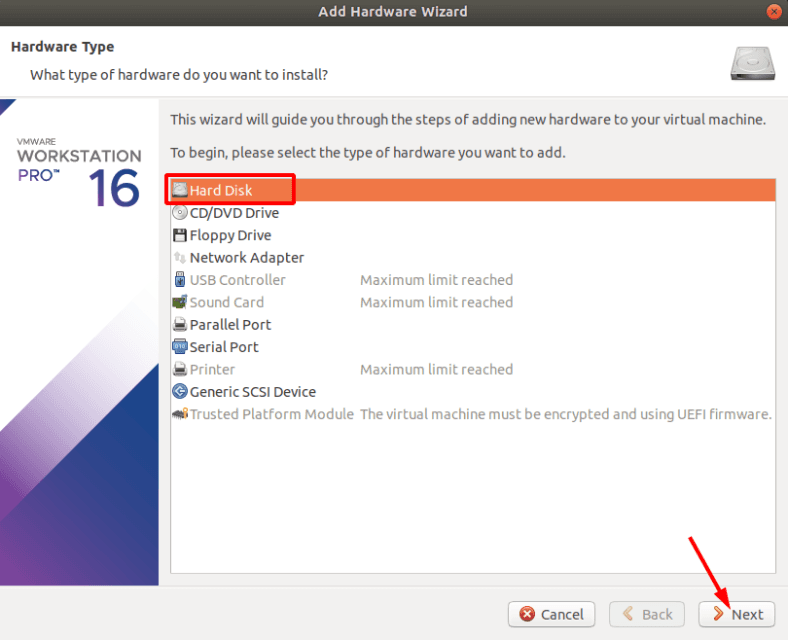
Затем внизу жмем «Добавить»
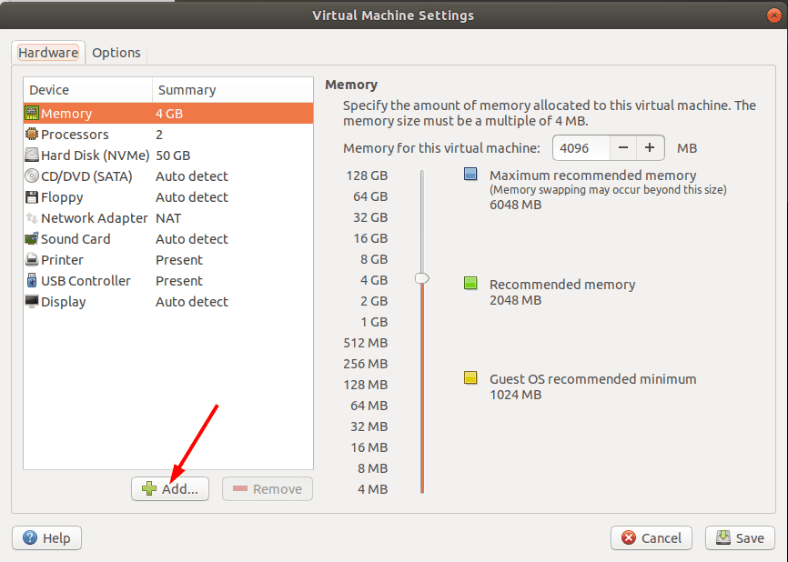
Выбираем жесткий диск, жмем «Далее».
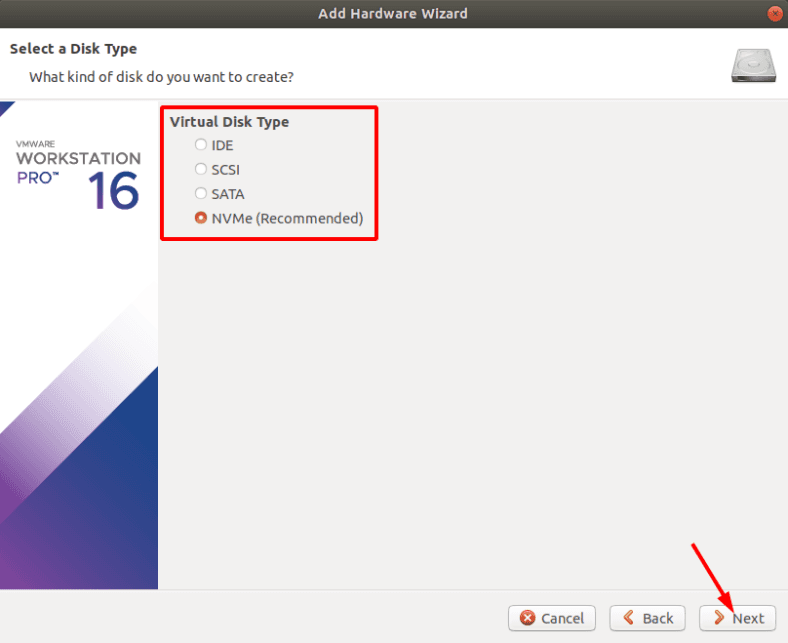
Указываем тип диска — рекомендованный.
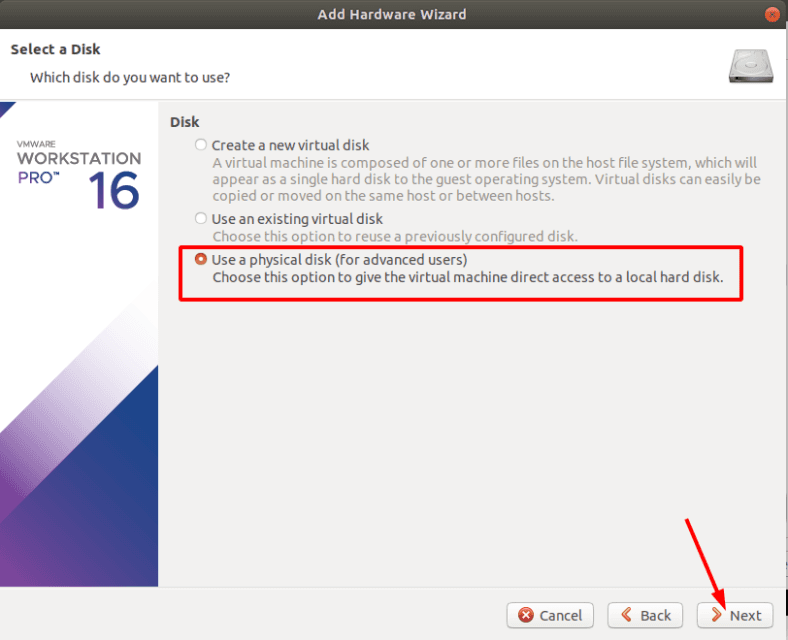
В окне выбора устанавливаем отметку «Использовать физический диск», жмем «Далее».
Из выпадающего списка отмечаем устройство на котором были утеряны данные.
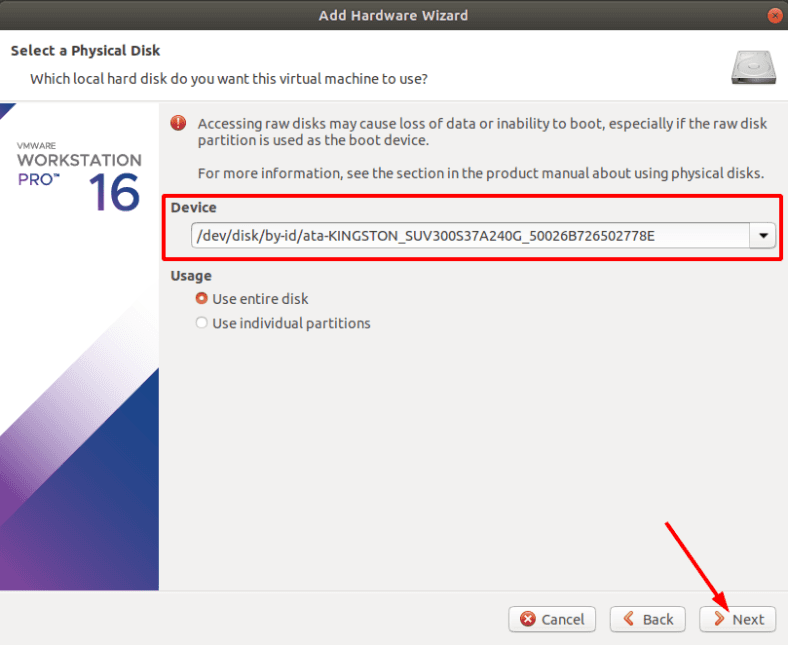
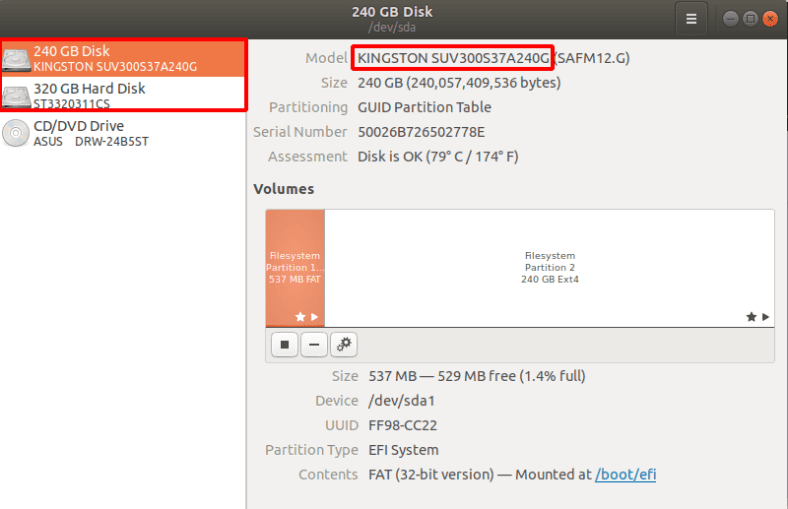
Если вам трудно определить нужный диск откройте «Дисковую утилиту». Здесь по размеру или по имени вы сможете его определить.
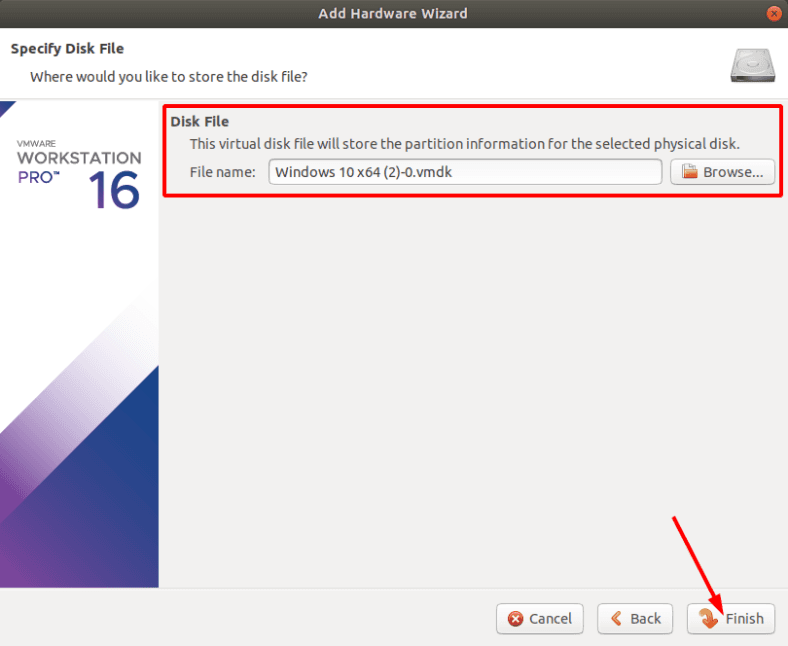
Указываем, жмем «Далее», а затем «Финиш» для завершения.
Теперь запускаем виртуальную машину.
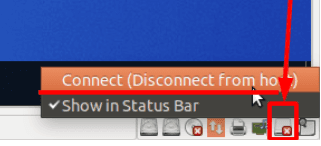
Для подключения «USB-флешки», подключите ее к компьютеру, в программе «VMware», справа внизу, включите ее кликнув по иконке устройства и выбрав пункт «Подключить к узлу».
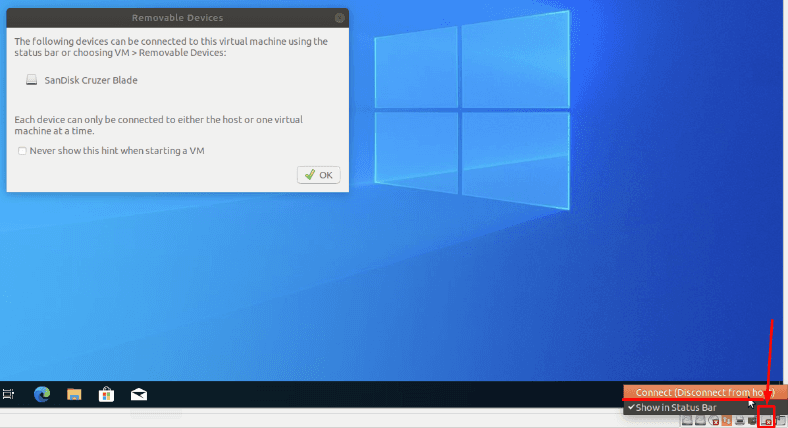
После этого, она тоже будет отображаться в менеджере дисков для восстановления данных.
Как восстановить данные с «Linux» диска
Сначала скачайте программу «Hetman Partition Recovery» с официального сайта.
С установкой на виртуальной машине не должно возникнуть никаких проблем, просто следуйте подсказкам на экране.
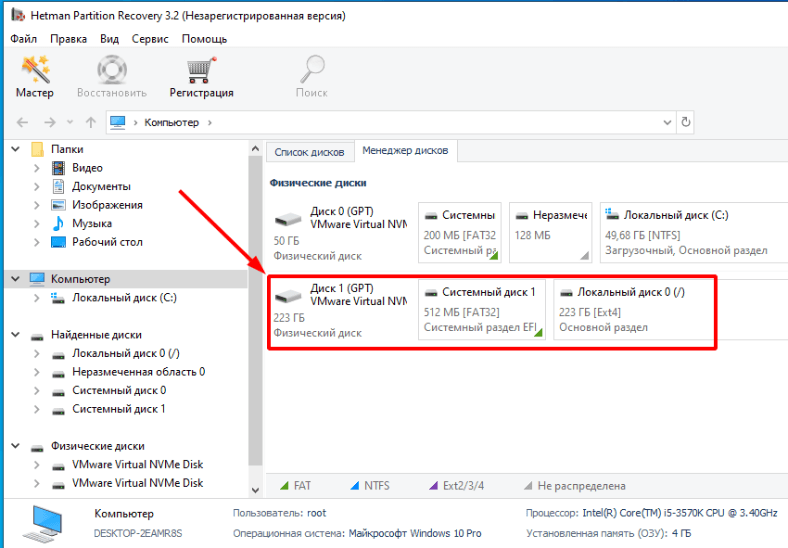
Если все сделано правильно, то в менеджере дисков программы вы увидите нужный диск. Теперь только осталось его просканировать.
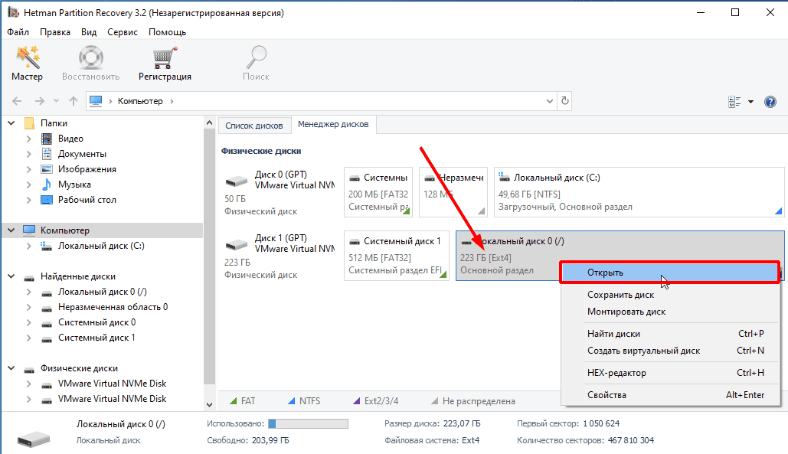
Жмем по нему правой кнопкой мыши — «Открыть».
Сначала, выполните «Быстрое сканирование», утилита просканирует диск, отобразит найденную информацию в правой части окна. Этот тип сканирования занимает мало времени, и быстро выведет результат.
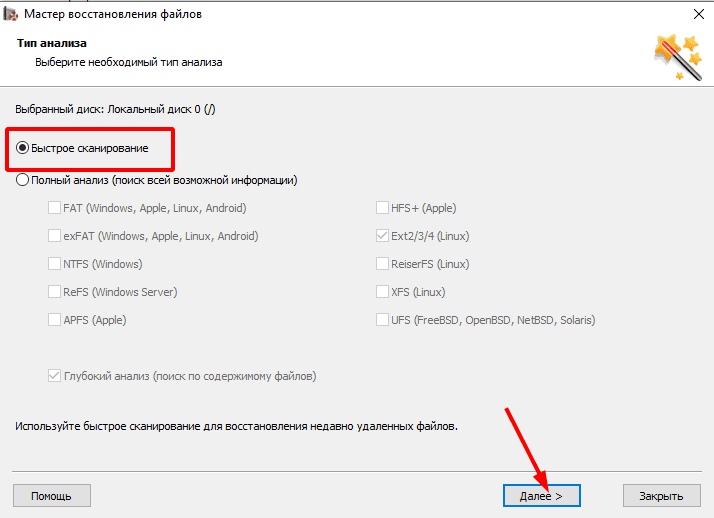
Если в результате быстрого сканирования вы не нашли нужные файлы и папки, необходимо выполнить «Полный анализ», который может занимать до нескольких часов. «Полный анализ» сможет найти данные после форматирования диска, или после ошибки структуры файловой системы.
По завершении сканирования откройте папку где находились нужные файлы, отмечайте файлы по одному, просматривайте превью файлов, и если вам нравиться то, что вы видите — нажмите «Восстановить».
Укажите путь куда сохранить утерянные данные и нажмите кнопку «Восстановить».
По завершении процесса восстановления все файлы будут находиться в указанной папке.
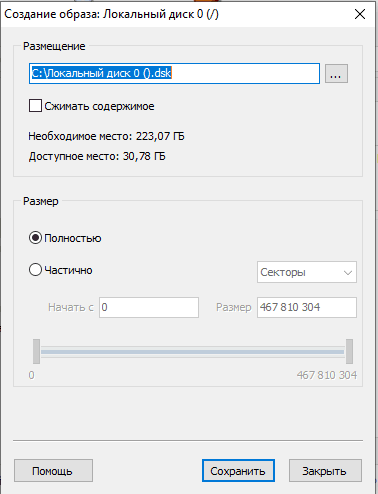
«Hetman Partition Recovery» может создать образ диска, если проводить процесс восстановление данных с образа, то это повышает шансы вернуть утерянную информацию.
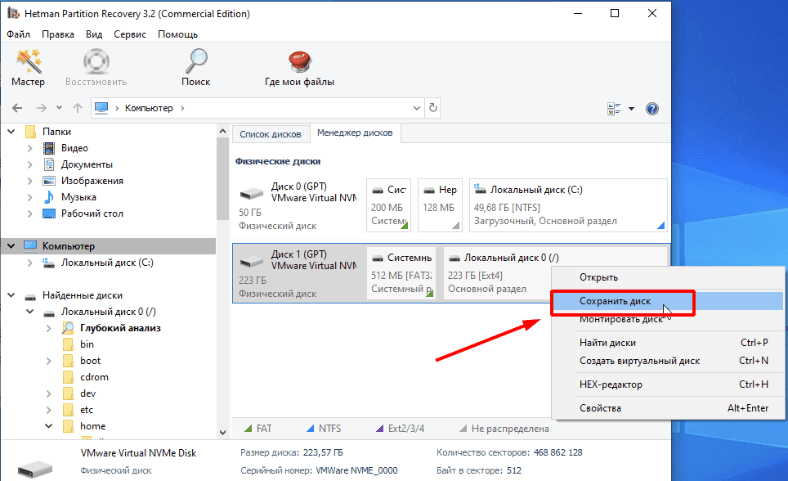
Так как при многократном сканировании раздела некоторые важные данные будут перезаписаны другой информацией.
«Hetman Partition Recovery» восстановит удаленные файлы и папки, после форматирования диска, после сбоя ОС или ошибки файловой системы, после вирусной атаки и других неполадках.
С помощью нашей программы можно восстановить данные с внутреннего или внешнего жестких дисков, «USB накопителей», «SD-карты памяти», внутренней памяти фото и видео камер.
Надеюсь, наша статья окажется полезной для вас. теперь вы умеете создать и настроить виртуальную машину «VMware» на ОС «Linux», подключить физические диски, сможете найти и вернуть удаленные файлы. Процесс может показаться довольно сложным, но в итоге следуя нашей инструкции вы справитесь с поставленной задачей.
Полную версию статьи со всеми дополнительными видео уроками смотрите в источнике.
Источник


