Can’t find Recycle Bin! Where is the Recycle Bin in Windows 10?
Missing Recycle Bin issue at times plagues users of Windows 10/8/7. At times you may find it missing from your desktop and are left wondering where the Recycle Bin icon has gone and how to get it back. Whatever the case may be, we will show you how to get it back on your desktop.
Can’t find Recycle Bin on desktop
The Recycle Bin is one important place to make items ready for deletion. So, it assumes some importance but sometimes it displays erratic behavior. For example, it just disappears. Even Cortana fails to find it. The good part is you can get it back via the following methods.
1] Restoring Recycle Bin
If you’ve accidentally disabled the Recycle Bin, Windows will fail to show it on your Desktop screen. So, before you try anything odd, make sure it hasn’t been disabled accidentally. If it is, do this to fix the issue.
Click the Start button, choose Settings. Select ‘Personalization’ setting and from the left pane choose Themes.
Then under ‘Related Settings’ heading, click on the ‘Desktop icon settings’ link. A list of icons will appear in the ‘Desktop Icons’ window.
Make sure if the box against ‘Recycle Bin’ is checked or not. If not, check the box to make it appear on your Desktop screen again.
2] Recreate Recycle Bin
If the above steps fail to restore the Recycle Bin icon, it may have been deleted. So, you’ll need to recreate it. Here’s what you should do.
Launch Windows File Explorer, select the ‘View’ tab and choose ‘Options’ on the right. Click the drop-down arrow and select ‘Change folder and search option’.
Next, when the ‘Folder Options’ window appears on your computer screen, switch to ‘View’ tab ‘Show hidden files, folders and drives’ and turn off the box next to ‘Hide protected operating system files (Recommended)’ before hitting the Apply and O.K. buttons.
Now, return to File Explorer and click on ‘This PC’ on the left of the bar, then go to “C:” drive. Here, You’ll find right at the top a file named ‘$Recycle.Bin’.
Access the contents of this folder and you should see the Recycle Bin icon right there at the top.
When seen, right-click the Recycle Bin, hover over ‘Send To’ and click ‘Desktop (create shortcut)’.
The action when confirmed will recreate the Recycle Bin icon on your Desktop screen. Although this icon appears quite similar to the original one, it differs from its predecessor. How? you won’t see it fill up when you add items to it, and you can’t empty it by right-clicking the shortcut. However, you can still drag items into it like the normal bin.
When you are ready to empty the contents in the folder, simply double-click the shortcut, right-click the recycle bin in the window that pops up, choose ‘Empty Recycle Bin’ option.
Once you have your shortcut set up, go ahead and re-activate ‘Hide protected operating system files’ to keep the important files and folders hidden away.
3] Repair Recycle Bin
You should try this method if the above 2 methods fail to yield the desired results. Sometimes, Recycle Bin is removed from the Desktop screen due to corrupted Windows system files. So, to fix this Follow the steps below and see if it helps to resolve the issue.
Press ‘Windows + X’ Keys on the keyboard. Right-click on ‘Command Prompt’ and choose ‘Run as administrator’. Click ‘Yes’ if prompted.
When the command prompt window opens, type in the following commands one by one and then press Enter.
This should fix the issue.
4] Ensure that you are not in Table Mode
Go to the Start menu, choose Settings and select System setting. Choose Tablet Mode from the left pane of the box and make sure the buttons next to the options below are set to off position.
- Hide app icons on the taskbar in tablet mode
- Automatically hide the taskbar in tablet mode.
As Windows 10 is designed to work on both desktop and mobile devices, it might be possible that your computer has slipped into Tablet Mode, which does not show desktop icons. This is commonly observed in devices working as both, a PC and a tablet.
Hope this helps – but if you need, then there are more ways to restore accidentally deleted Recycle Bin.
Password Recovery
Recycle Bin icon is missing or disappeared after Windows 10 update? How can I get to the Recycle Bin without the desktop icon in Windows 10? In this tutorial we’ll show you all possible ways to restore or open Recycle Bin in Windows 10.
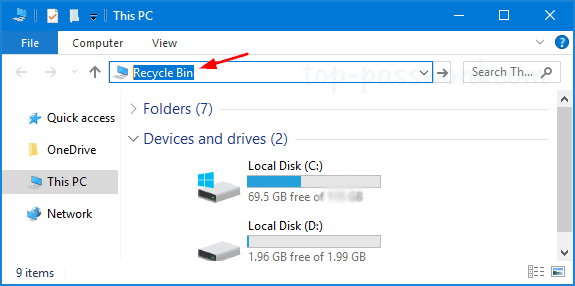
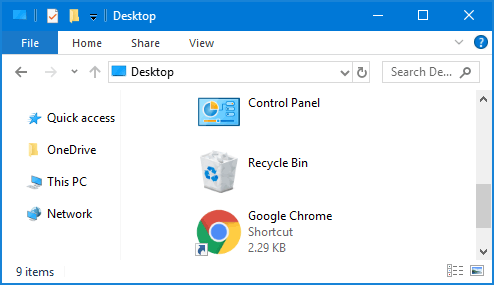
Method 1: Open Recycle Bin from File Explorer’s Address Bar
Open File Explorer then type “recycle bin” in the address bar. Press Enter to open Recycle Bin directly.
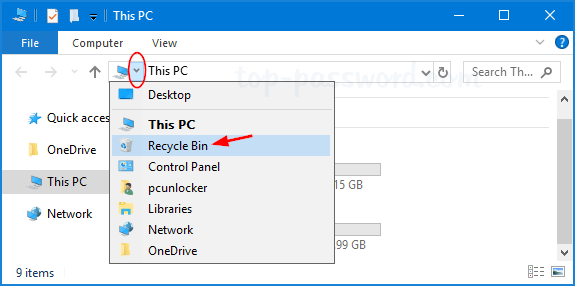
Another way is to click on the first “>” icon in the address bar to open a drop-down menu that contains all of the desktop icons, including Recycle Bin.
Method 2: Open Recycle Bin from Run Command
Use the Windows Key + R shortkey to open the Run prompt, type the following command and press Enter.
explorer.exe shell:RecycleBinFolder
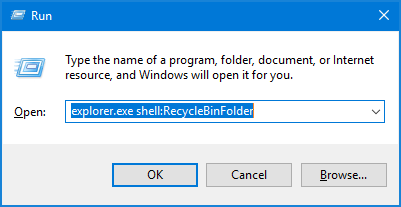
This will launch Recycle Bin immediately.
Method 3: Open Recycle Bin from Desktop Location
Use the Windows Key + R shortkey to open the Run prompt, type shell:desktop and press Enter.
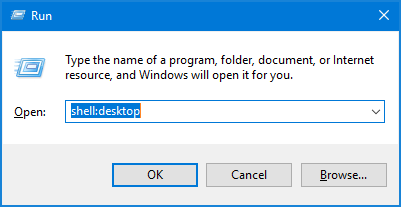
You can then access the Recycle Bin in a File Explorer window.
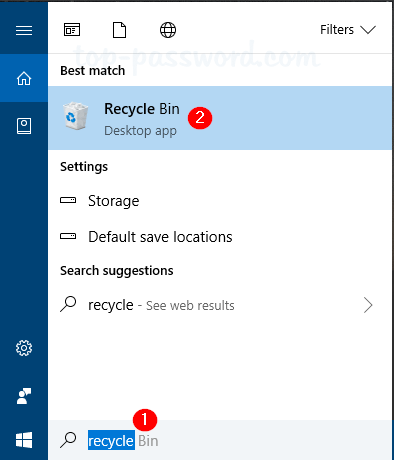
Method 4: Open Recycle Bin from Cortana Search
Click Start, type “recycle” and you can then open the “Recycle Bin” desktop app from the search result.
Method 5: Add Recycle Bin to Windows 10 Desktop
Use the Windows key + I shortkey to open the Settings app. Navigate to Personalization -> Themes. On the right pane, scroll down to the Related Settings section, and click the “Desktop icon settings” link.
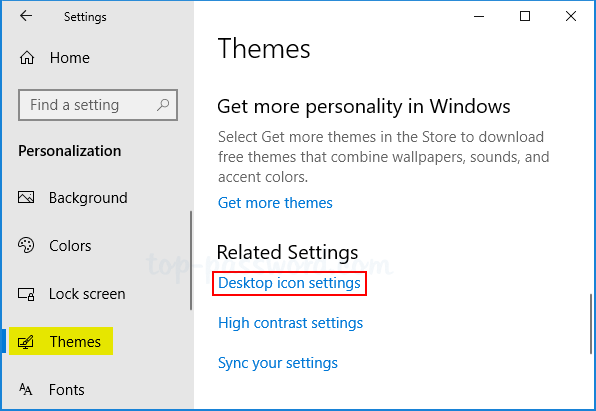
Select the check box for the Recycle Bin icon you want to appear on your desktop, and then click OK.
Method 6: Pin Recycle Bin to Start Menu
If you want to pin Recycle Bin to the Start Menu, just right-click the Recycle Bin icon on the desktop and then choose “Pin to Start“.
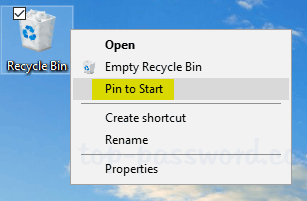
You should see the Recycle Bin icon show up in the Start Menu as a tile.
Method 7: Add Recycle Bin to My Computer
If you need to access Recycle Bin frequently, here is a way to add the Recycle Bin to the “This PC” view in File Explorer. Follow these steps:
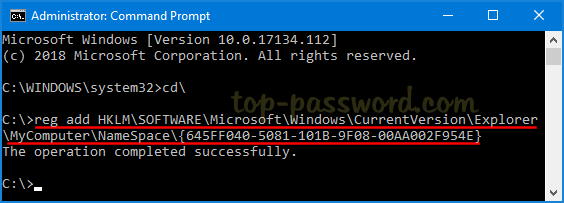
Open the Command Prompt as administrator. Type the following command and press Enter.
reg add HKLM\SOFTWARE\Microsoft\Windows\CurrentVersion\Explorer\MyComputer\NameSpace\
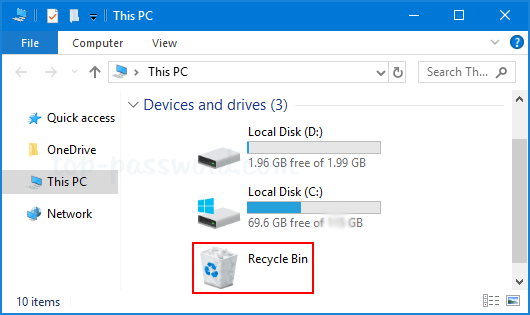
When it’s done, open File Explorer again and go to “This PC” view. You’ll see the Recycle Bin shortcut.
If you want to remove the Recycle Bin from My Computer (“This PC”) later, just open the elevated Command Prompt again and run this command:
reg delete HKLM\SOFTWARE\Microsoft\Windows\CurrentVersion\Explorer\MyComputer\NameSpace\ <645ff040-5081-101b-9f08-00aa002f954e>/f
System Volume Information и RECYCLE.BIN
Сегодня подключил свой портативный жесткий диск к ноутбуку и открыл его по привычки через Total Commander. Зачем я так делаю? Об этом я напишу далее в статье, как дополнение (кстати, очень полезное чтобы повысить безопасность от проникновения вирусов). И увидел там скрытые папки System Volume Information и $RECYCLE.BIN. Для меня они уже знакомы и я не предал вначале этому значение, но потом решил поделиться с теми кто не знает что это за папки и даже (некоторые) боятся их ибо в них антивирусы иногда обнаруживают вирусы.
Давайте разберемся по порядку.
Что за папка System Volume Information ? и почему там очень любят прятаться вирусы? Как получить доступ к содержимому этой папки?
Это скрытая папка встречается на каждом диске, куда система копирует программные файлы, подвергшиеся изменениям, хранит отчеты по процедурам очистки диска от мусора (при запуске менеджера очистки), информацию о сжатии файловых массивов (при формате NTFS), хранит бэкапы (резервные копии) определенных компонентов Windows и пользовательских программ (в подкаталогах «restore») и некоторые другие файлы, назначение которых мне самому иногда интересно. Обычно те данные, которые хранятся в данных подкаталогах, никакого существенного значения не имеют, но при этом количество файлов и занимаемый ими объем постоянно растет. Поэтому, когда Вы видите что места на жестком диске всё меньше и меньше, хотя Вы вроде ничего такого и не делали, нужно периодически очищать их.
При NTFS-формате жесткого диска, доступ к данным папкам заблокирован, и удалить их содержимое стандартным способом не получится. Что же касается вирусов, то не они любят записываться в эти папки, а сама система любит создавать в последних «резервные» копии вирусов, при этом, обратите внимание, что основная масса вирусных файлов, которые Вы обнаруживали в данной папке — это копии Интернет-троянов и файловых вирусов, поскольку первые существенно изменяют настройки системного реестра, устанавливают привилегии своих программных сервисов, а вторые вносят глобальные изменения в оригинальную структуру программных файлов, в результате чего система начинает усиленно бэкапить (сохранять) необходимые (по ее мнению) изменения данных.
Что с ней делать — решать Вам. Можете просто очистить от временных файлов, можете вообще удалить, можете отключить службу восстановления данных.
Как отключить службу восстановления данных и удалить папку System Volume Information ?
Отключать так то не рекомендуется, потому что в случае чего, система может восстановить своё состояние на момент создания этой резервной копии. И Вам не нужно будет прибегать к помощи специалистов или устанавливать систему заново. Да, Вы может потеряете несколько файлов и данных которые были созданы после момента создания резервной копии, но всё так Вы получите привычную систему назад, а не «голую» в случае переустановки.
Но всё же, если эта папка занимает слишком много места (порой там накапливается 20-30 гигабайт или даже больше), можно её всё таки очистить немного.
Лучше Вам об этом почитать на официальном сайте Microsoft, не хочу повторяться Получить доступ к папке на Windows XP . Хочу лишь пояснить что на Windows 7 такая же процедура.
Удалить, если не поучится стандартными способами, можно прочитав статью как удалить файл или папку если они не удаляются.
Для очистки можно просто Отключить данную услугу.
ПКМ на Мой компьютер -> Свойства -> выбираем Защита системы
Откроется окошко в котором выбираем диск на котором нужно её отключить, нажимаем Настроить


Ну или Пуск – Все программы – Стандартные – Служебные – Восстановление системы.
Что за папка $RECYCLE.BIN ?
Эта папка располагается в корне каждого диска, и имеет атрибут скрытый и системный. Следовательно, если у Вас отключена опция отображения скрытых файлов, эту папку Вы так же не увидите как и предыдущую. Как её увидеть — я дал ссылку выше.
$RECYCLE.BIN — это и есть сама корзина в висте и семёрке, в ней ещё содержится файл desktop.ini, отвечает за вид, в котором у Вас показывается данная папка в проводнике.
Причем $RECYCLE.BIN — папка корзины на активном НЕ системном диске, а $Recycle.Bin (в нижнем регистре) — соответственно на системном.
На самом деле при удалении файла или папки в корзину, происходит вовсе не удаление, а перемещение объекта в эту самую папку $Recycle.Bin расположенную на том диске, на котором происходит удаление.
Для каждого диска существует своя корзина (папка $Recycle.Bin есть в корне каждого раздела). Но когда Вы откроете корзину — Вы увидите все удаленные файлы вместе.
Для больше информации, можете почитать сайт корпорации .
Кстати, кликните ПКМ на ярлыке Корзина на рабочем столе и выберите Свойства, возможно Вы никогда такого и не делали. Там как раз и отображаются Ваши диски, где хранится эти файлы Recycle.Bin.
Там всего лишь 3 настройки

Задать размер — какой максимальный размер файлов будет находится в корзине, после чего она не сможет больше хранить их и будет требовать чтобы вы её очистили.
Уничтожать файлы сразу после удаления, не помещая их в корзину — думаю тут и так понятно. Не рекомендую так делать ибо может оказаться что удалили случайно нужный файл или папку, а возвращать потом нужно через сторонний софт.
Так же не рекомендую снимать галочку с Запрашивать подтверждение на удаление по той же самой причине.
Ну и напоследок — если Вы точно уверены что файлы или папки Вам не понадобятся (например мусор какой то) и Вы не будете жалеть об их исчезновении — смело жмите сочетание клавиш shift+del и файл удалиться с компьютера даже не попадая в корзину.


