- How to use Windows Libraries effectively in Windows 10
- Windows 10 Libraries
- Re-order Library Contents
- Hiding Default Libraries
- Change default Save Locations for Libraries
- Folder Redirection
- Library Attributes
- Как в проводнике Windows 10 настроить отображение Библиотек
- 3 ways to enable the Windows 10 libraries
- 1. Enable the libraries in Windows 10 from the Navigation pane
- 2. Enable the Windows 10 libraries from File Explorer’s View tab
- 3. Enable the libraries in Windows 10 from File Explorer Options
- Bonus: Open the Windows 10 libraries from the Run window
- How are you using the libraries in Windows 10?
- Как настроить отображение Библиотек в панели навигации Проводника Windows 10
- Вариант 1
- Вариант 2
- Вариант 3
- Как настроить отображение Библиотек в панели навигации Проводника Windows 10
- Вариант 1
- Вариант 2
- Вариант 3
How to use Windows Libraries effectively in Windows 10
Windows Libraries is a centralized place for bringing together all the related files from the different folder or different PCs. Precisely, Libraries is a collection of shortcuts to the original file or folder locations which can have its locations either on a local computer or on a network drive. This, to an extent also marks the difference between Libraries and User Folders, as User folders are actual folders while Libraries are collections of shortcuts to User folders.
Windows 10 Libraries
The default Windows Libraries are Documents, Music, Pictures, and Videos. Since Libraries have many benefits like quick access and so on, it is necessary to know and understand how to use Libraries effectively in Windows 10/8/7.
Once you add a location to the Library, it’s just one-click away inside of File Explorer. This way you can easily manage your work or daily tasks. The following information might help you to some extent in this regard.
Re-order Library Contents
Including a folder in a library does not physically move or change the storage location of the files or folders; the library is a view into those folders. However, users interacting with files in a library can re-order folders inside a library in Windows 10.
Open File Explorer and click the Libraries item in the Navigation Pane on the left. This action opens up Libraries instantly. Thereafter, select a library, right click it and choose “Properties” from the context menu.
Now, you will see the folders listed in the order in which they are included in the current library. If required, you can simply re-order them by drag and drop! Drag the folders up or down to set the desired order and you are done.
Hiding Default Libraries
Users can hide or delete the default libraries in Windows 10. Although this is possible, it is important to mention here that the libraries node in the Navigation pane cannot be hidden or deleted. Hiding a default library is preferable to deleting it. So, only some default libraries that are not suitable for the business environment, such as Music or Videos libraries, should be hidden.
To hide a default library, run a script on the network to modify the Library Description file, and you need to access a Group Policy setting to hide the link to this library on the Start menu. The script should set the hidden attribute of the Library Description file (*.library-ms). This conceals the library from users in the Windows Explorer navigation pane and Items View. The following example script hides the Pictures library:
You should configure a Group Policy setting for every library that has a link you want to hide in the Start menu. You can find these Group Policy settings under User Configuration\Administrative Templates\Start Menu and Taskbar.
Change default Save Locations for Libraries
Every library has a default Save location. Files are automatically saved or copied to this location when a user chooses to save or copy a file to a library. So, known folders are the default save locations. If required, users can select a different save location. Also, when the user removes the default save location from a library, the next location is automatically selected as the new default save location. So, if the library is empty of locations, the save operation fails.
To change the default save location for libraries, open File Explorer by either left-clicking on the File Explorer icon on the Taskbar or hitting the Start button and then choosing File Explorer.
Next, right-click on the Start button and left-click on File Explorer from the Power User menu.
Then, press the Windows logo key WinKey+E and right-click on the Library you’d like to change. Thereafter, choose Properties, select the Library location that you want as default and left-click on Set save location and then hit Apply button.
Folder Redirection
Folder redirection enables users and administrators to redirect the path of a known folder to a new location, manually or by using Group Policy. The new location can be a folder on the local computer or a directory on a file share. When you redirect a folder, the files in the folder are made available to the user from any computer on the network.
The advantages of using this method are that even if users log on to different computers on the network, their data is always available and if you are using the offline technology then, it gives users access to the folder even when they are not connected to the network. This is especially useful for people who use portable computers. Moreover, the data that is stored in a network folder can be backed up as part of routine system administration. This is safer because it requires no action by the user. And lastly, data that is specific to a user can be redirected to a different hard disk on the user’s local computer from the hard disk that holds the operating system files. All this makes the user’s data quite safe in case there is any event of misfortune and you have no option other than reinstalling the operating system.
Library Attributes
As mentioned earlier, Libraries contain files that are stored in one or more storage locations. They do not actually store these files but only monitor the folders that contain the files, and let users access and arrange the files in different ways.
If required, the following library attributes can be modified within Windows Explorer, the Library Management dialog, or the Library Description file (*.library-ms):
- Name
- Library locations
- Order of library locations
- Default save location
There is some more interesting information about Windows Libraries available here on Technet. You want to also take a look at this Windows Libraries FAQ.
Как в проводнике Windows 10 настроить отображение Библиотек
В операционной системе Windows 10 изначально не отображаются Библиотеки в навигационной панели окна Проводника. Это связанно с тем, что часть Библиотек уже находятся на Панели быстрого доступа и в Microsoft просто решили их лишний раз не дублировать.
Но все же, такая возможность предусмотрена в системе. При необходимости можно добавить к панели навигации в окне Проводника еще и Библиотеки. Существует три основных способа, позволяющих осуществить это.
Способ первый
Сделайте клик правой кнопкой мышки, по любому пустому месту в панели навигации. Затем, в раскрывшемся, меню нужно выбрать «Показать библиотеки».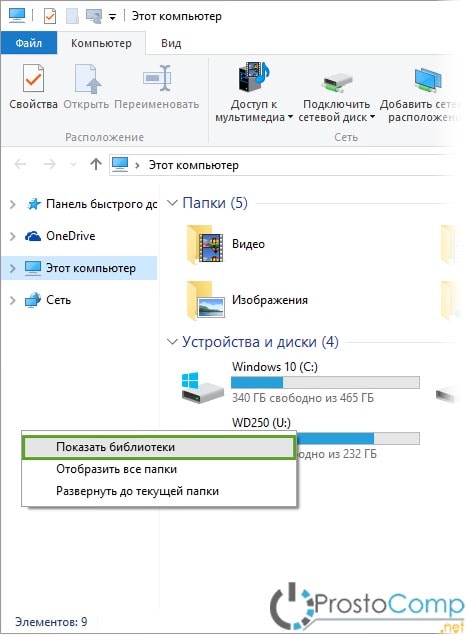
Способ второй
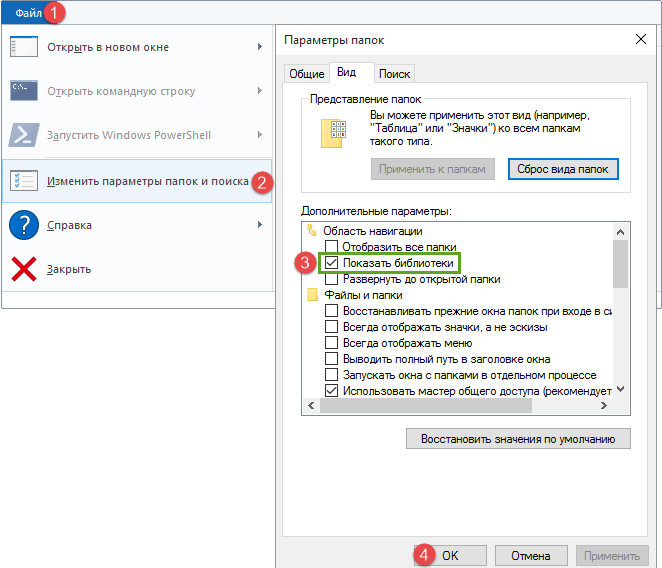
Откройте окно Проводника и в нем, разверните меню «Файл». В этом меню необходимо нажать на «Изменить параметры папок и поиска…».
В следующем окошке нажимаем на вкладку «Вид» и ставим галочку возле надписи: «Показать библиотеки». Что бы сохранить выполненные настройки, внизу экрана нажмите кнопку «Ок».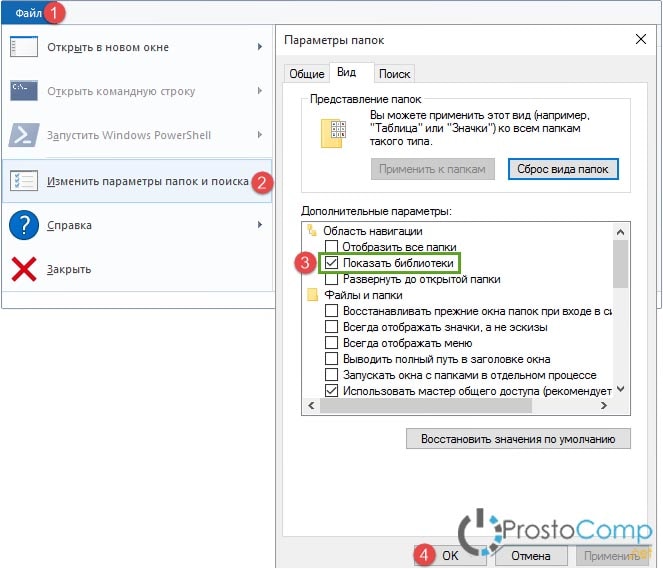
Способ третий
В этом способе можно использовать готовый файл для изменений в реестре, который включит отображение Библиотек в окне Проводника.
3 ways to enable the Windows 10 libraries
The Windows 10 libraries are virtual collections of folders on your system. Microsoft did not enable the libraries in Windows 10 by default, although many users consider them a must-have when it comes to finding and organizing files. This tutorial illustrates three ways to enable the Windows 10 libraries and show them in File Explorer, as well as the Save As and Open dialogues:
1. Enable the libraries in Windows 10 from the Navigation pane
To enable the Windows 10 libraries, opening File Explorer is the first step. The fastest way is by pressing Windows + E on your keyboard. Then, right-click or press-and-hold on an empty area inside the Navigation pane on the left – this works best either on top or under the list of locations displayed in it. From the ensuing contextual menu, click or tap Show libraries.
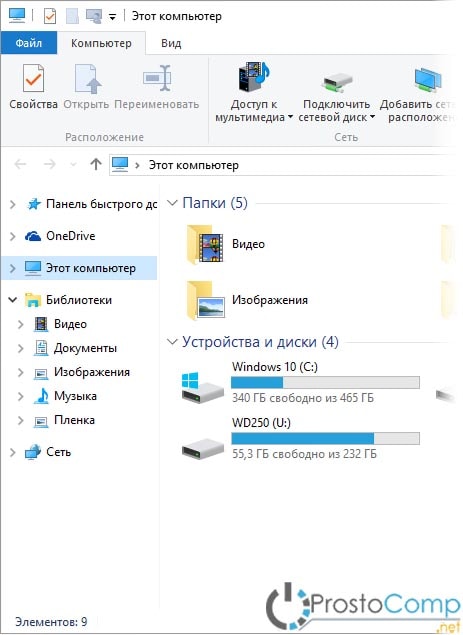
The option is now checked in the contextual menu, and you can instantly see the Libraries entry displayed in the Navigation pane. You can always click or tap on the option again to uncheck it and hide the libraries.
TIP: Checking the “Show all folders” entry listed next in the contextual menu also enables the libraries, together with other locations, like the Control Panel or the Recycle Bin in Windows 10.
2. Enable the Windows 10 libraries from File Explorer’s View tab
You can also show the libraries in Windows 10 from File Explorer’s View tab. To begin, open File Explorer – you can use the keyboard shortcut Windows + E. Access the View tab, and then find the Navigation pane button from the top-left corner, in the Panes section. Click or tap on it.
This opens a dropdown menu. Click or tap on the last entry, Show libraries, to check it.
Your libraries are no longer hidden, and you can see them in the Navigation pane. The Show libraries option is checked, and you can click or tap on it again to disable the libraries.
TIP: The “Show all folders” option, located directly above in the dropdown menu, also enables the libraries, as well as other useful locations.
3. Enable the libraries in Windows 10 from File Explorer Options
There’s another method for enabling the Windows 10 libraries. First, open Folder options – an easy way to do that is to insert “folder options” in the Search bar and access “File Explorer Options.“ In the new window, go to the View tab and scroll the Advanced settings list to the bottom.
In the last section, Navigation pane settings, check the box next to Show libraries and press OK or Apply. You can uncheck the box at any time to hide libraries again.
TIP: You can also click or tap the “Show all folders” option above to enable all the hidden locations, including libraries.
Your setting is applied, and you can access the Libraries from File Explorer’s Navigation pane.
Did you know you can grant other devices access to your libraries? Learn more about it by reading How to share folders, files, and libraries with the network, in Windows.
Bonus: Open the Windows 10 libraries from the Run window
Maybe you don’t feel like having your libraries in the Navigation pane, but you’d like the option to access them easily when you need them. If that’s the case, open the Run command window by pressing Windows + R on your keyboard. Insert the following command: shell:Libraries. Then, press the Enter key or click or tap OK.
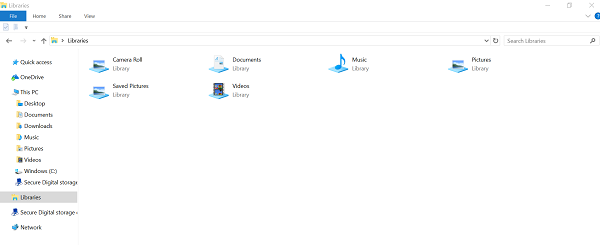
This opens the Libraries location on your Windows 10 computer or device, even if the option is still hidden from the Navigation pane, as seen below.
TIP: If you like libraries and want to make the most of them, you can find out more from our article about libraries and using them to organize your files.
How are you using the libraries in Windows 10?
Libraries have been around since Windows 7, so many people rely on them to access what they need with just a few clicks or taps. We use them to manage and organize our files and folders efficiently. Before closing this tutorial, let us know how you are using the libraries in Windows 10. Do you also feel they help your productivity? Let us know in the comments section.
Как настроить отображение Библиотек в панели навигации Проводника Windows 10


 Посетителей: 13186 | Просмотров: 15185 (сегодня 0)


![]()
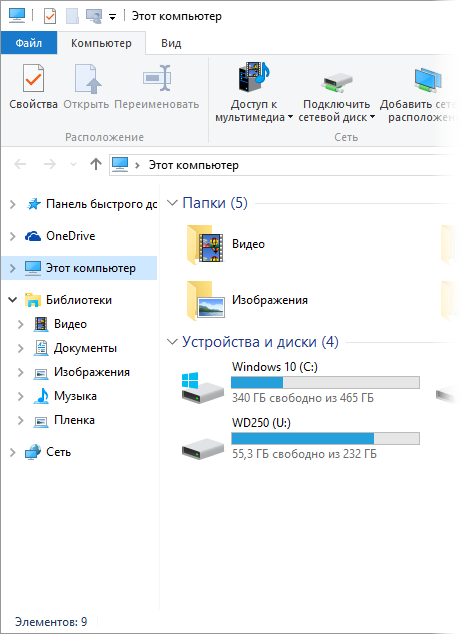
В Windows 10 по умолчанию отключено отображение Библиотек в навигационной панели Проводника. Учитывая что некоторые Библиотеки прикреплены на Панели быстрого доступа, включение отображения Библиотек по умолчанию попросту будет их дублировать.
Для отображения Библиотек в панели навигации Проводника воспользуйтесь одним из вариантов.
Вариант 1
Нажмите правую кнопку мыши на пустом месте панели навигации и выберите в появившемся меню пункт Показать библиотеки

Вариант 2
Откройте Проводник. Перейдите в меню Файл и выберите пункт Изменить параметры папок и поиска
В окне параметров папок перейдите на вкладку Вид и установите флажок на параметре Показать библиотеки и нажмите кнопку OK.
Вариант 3
Воспользуйтесь готовым файлом реестра для отображения Библиотек в панели навигации Проводника
- Show_Libraries_Explorer.reg — для отображения Библиотек
- Hide_Libraries_Explorer.reg — для скрытия Библиотек
![]()
![]()
![]()
 Павел Кравченко занимается развитием компьютерного портала OSzone.net, объединяющего сайт, форум и каталог программного обеспечения. Он отвечает на вопросы участников форума OSZone с 2003 года, а на сайте публикует статьи о клиентских операционных системах Microsoft.
С 2006 года Павел ежегодно становится обладателем награды Наиболее ценный специалист Microsoft (MVP), присуждаемой за вклад в развитие технических сообществ.
Как настроить отображение Библиотек в панели навигации Проводника Windows 10
Посетителей: 13186 | Просмотров: 15185 (сегодня 0)
![]()
В Windows 10 по умолчанию отключено отображение Библиотек в навигационной панели Проводника. Учитывая что некоторые Библиотеки прикреплены на Панели быстрого доступа, включение отображения Библиотек по умолчанию попросту будет их дублировать.
Для отображения Библиотек в панели навигации Проводника воспользуйтесь одним из вариантов.
Вариант 1
Нажмите правую кнопку мыши на пустом месте панели навигации и выберите в появившемся меню пункт Показать библиотеки
Вариант 2
Откройте Проводник. Перейдите в меню Файл и выберите пункт Изменить параметры папок и поиска
В окне параметров папок перейдите на вкладку Вид и установите флажок на параметре Показать библиотеки и нажмите кнопку OK.
Вариант 3
Воспользуйтесь готовым файлом реестра для отображения Библиотек в панели навигации Проводника
- Show_Libraries_Explorer.reg — для отображения Библиотек
- Hide_Libraries_Explorer.reg — для скрытия Библиотек
![]()
![]()
![]()
Павел Кравченко занимается развитием компьютерного портала OSzone.net, объединяющего сайт, форум и каталог программного обеспечения. Он отвечает на вопросы участников форума OSZone с 2003 года, а на сайте публикует статьи о клиентских операционных системах Microsoft.
С 2006 года Павел ежегодно становится обладателем награды Наиболее ценный специалист Microsoft (MVP), присуждаемой за вклад в развитие технических сообществ.


