- How to Hide or Unhide Files and Folders with Command Prompt
- Hide and unhide folders with Command Prompt:
- Hide and unhide files with Command Prompt:
- Hide Document Names on Windows Printers
- Hide document names from other users
- Change document names to [HIDDEN] using PaperCut
- Change document names to [HIDDEN] for a particular print queue
- Change document names to [HIDDEN] for all the print queues on a server
- Prevent PaperCut from logging job names
- Still have questions?
- How to Find Hidden Files and Folders in Windows
- How to Hide Files on Your Computer
- Level 1: Use Hidden Folders
- On Windows
- On Mac
- Level 2: Use Apps to Hide Files from Search and History
- Hide Folders with My Lockbox for Windows
- Use Skedaddle or Obscurity for Mac
How to Hide or Unhide Files and Folders with Command Prompt
Supposing that you hide the important files and folders in your computer by means of downloaded softwares, you can think about hiding them by using the built-in Command Prompt. Moreover, after they are hided through cmd, they can be displayed again. And this text will show you how to hide or unhide files and folders with cmd immediately.
Video guide on how to hide or unhide files and folders with CMD:
Hide and unhide folders with Command Prompt:
1. Hide folders
Example: Hide a folder named «Documents» in Disk C.
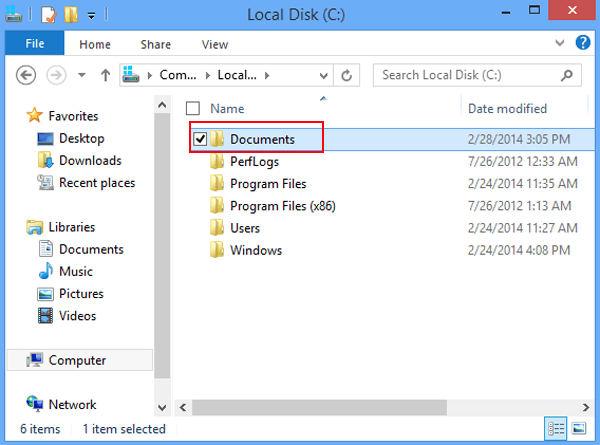
Way 1: Directly use an attrib command to hide the folder.
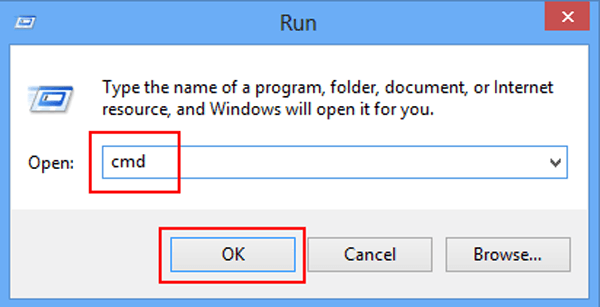
Step 1: Simultaneously press Windows key and R key to open Run dialog box, input cmd and click OK to open Command Prompt.
Step 2: Input «attrib +s +h c:\documents» (without double quotation marks) in the Command Prompt window and click Enter.
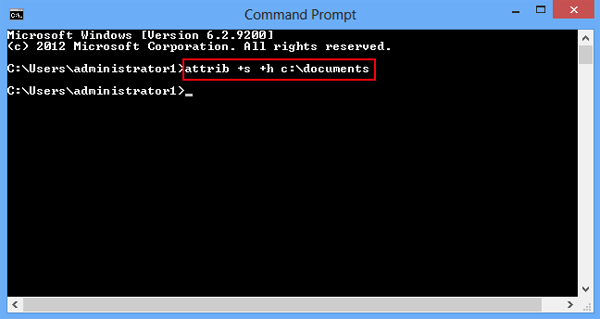
Tips: In this attrib command, «+» stands for setting an attribute, «s» represents system file attribute and «h» means hidden file attribute. Moreover, «c:» is the drive letter and «documents» is the folder name. By analogy, if you want to hide a folder in another hard disk, you can use the attrib command by changing the drive letter and folder name.
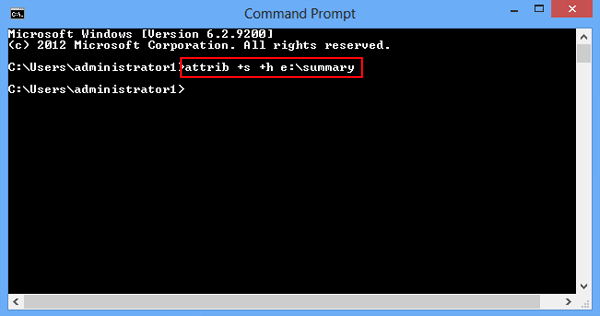
For instance, suppose you would like to hide a folder titled «Summary» in E disk, you can input «attrib +s +h e:\summary» (without double quotation marks) in the Command Prompt and press Enter.
Way 2: Enter the disk directory and then use an attrib command to hide the folder.
Example: Hide a folder called «Summary» in Disk E.
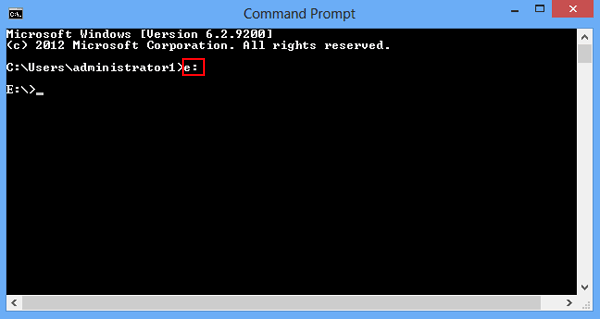
Step 1: Type e: in the cmd and tap Enter to go to Disk E directory, as shown in the following picture.
Step 2: Input attrib +s +h summary and press Enter.
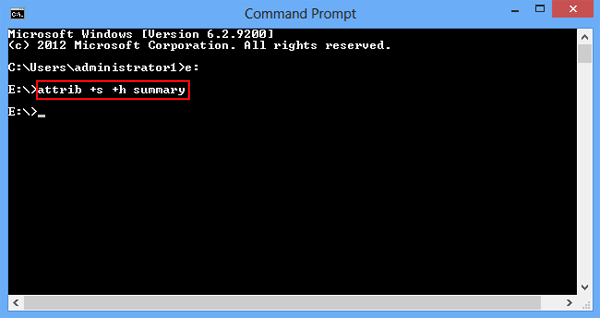
Tips: Use this attrib command through changing the folder name (referred to «summary») to hide another folder.
2. Unhide Folders.
Accordingly, there are two methods to unhide folders.
Method 1: Directly use an attrib command to unhide the folder (referred to «Documents» folder in Disk C).
Input attrib –s –h c:\documents and hit Enter.
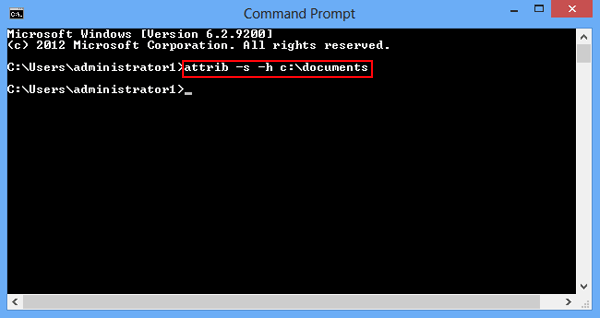
Note: In the attrib command, «-» means clearing an attribute.
Method 2: Go to the disk directory in cmd and then use an attrib command to unhide the folder («Summary» folder in E disk).
Step 1: Enter e: and tap Enter.
Step 2: Input attrib –s –h summary and press Enter.

Hide and unhide files with Command Prompt:
1. Hide files
Example: Hide a txt file named «goals» in Disk E.
Enter attrib +s +h e:\goals.txt and tap Enter.
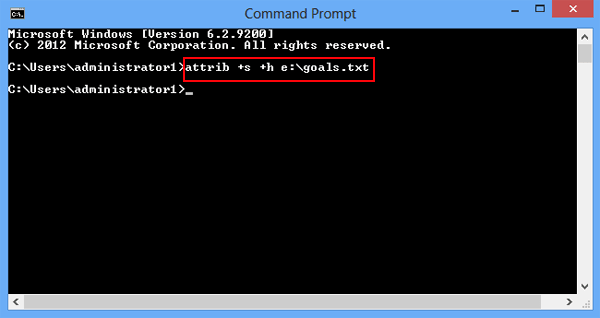
Tips: «goals.txt» refers to the full name of the document (including file extension name). So, you can change the file name and use the attrib command to hide other files.
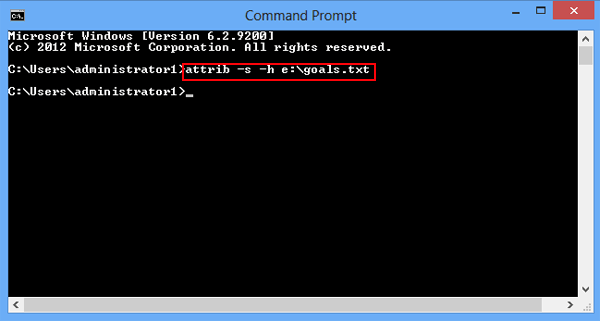
2. Unhide files.
Input attrib –s –h e:\goals.txt and press Enter to unhide the «goals» document.
Now, you can try the above methods and see if they work well in your computer.
Related Articles:

iSunshare is dedicated to providing the best service for Windows, Mac, Android users who are in demand for password recovery and data recovery.
Hide Document Names on Windows Printers
“Our organization is concerned about maintaining our users’ privacy, and we need to find a way to hide document names from other users or administrators. Is there a way to do this?”
Prior to Windows server 2012, it was extremely easy to see what everyone else is printing. You only needed to right click on a printer, choose “See what’s printing…” and then you could see every user’s print job along with their username as the jobs flickered through. Normally these details would only be visible for an instant, but the problem becomes a little more apparent when using PaperCut and with hold and release because users’ print jobs stay in this view for even longer.
Fortunately, there are a few easy ways to ensure your users’ privacy. These methods do work differently though, so read below to figure out what solution is best for your environment.
Hide document names from other users
- This is a Windows feature, available starting with Windows Server 2012 and is enabled by default.
- When this is active, only administrators and job owners can see their document name. Other users will only see the document name listed as “Print Document”.
- The only way to disable this would be to give Everyone admin rights to the print queue.
According to Microsoft : “When printing to a Windows Server 2012 print queue, only users with administrator permissions on the print queue (full system administrator or delegated print administrator, see Assign Delegated Print Administrator and Printer Permission Settings in Windows Server 2012) will see readable document names when viewing the print queue. Users can still view the queue from their client computer and will see their own document name in full, but for other user’s print jobs they will see Print Document for the document name. Additionally, in most cases in the event log on the server, the document name will also appear as Print Document. However, in some job failure cases, the document name will be listed in the failure event.”
Change document names to [HIDDEN] using PaperCut
Note: Using this method should come with a small dose of caution. Because Windows printing clients receive a spooler notification every time a print job is renamed, this can end up causing resource issues on large print server such as when you have thousands of clients sending print jobs to a single queue.
Where possible, use the built-in Windows 2012 method above to hide your document names from other users.
- This is a PaperCut feature available only with Windows Printing
- The way it works is that PaperCut will rename the print job to [HIDDEN], preventing admins and users from being able to see the true document name.
- We have two methods to hide the document names of jobs yet to be printed, depending on whether you just want to set this for one printer or for an entire print server.
Change document names to [HIDDEN] for a particular print queue
Starting with PaperCut version 15.1, each queue can be configured to hide document names, allowing the Administrator to apply the feature selectively.
- Log in to the PaperCut Admin Interface.
- Navigate to the Printers view.
- Search for and select a printer.
- In the Advanced Configuration section, enable Hide document names for jobs in this queue
- Click Apply.
Change document names to [HIDDEN] for all the print queues on a server
System level hiding is applied to an entire Print Server, hiding document names on all queues. Be aware that you will need to edit the print-provider.conf file on each print server where you want to make this change. If enabled, this will override the print queue queue level hiding setting described above.
- Open the print-provider.conf located in [app-path]\providers\print\win\
- Locate HideDocumentNames=off and change to HideDocumentNames=on .
- Optionally locate HideDocumentNamesText=[hidden] and change [hidden] to a value of your choice.
- Save the changes to the print-provider.conf file.
- Restart the PaperCut Print Provider Service.
Prevent PaperCut from logging job names
This change won’t affect how users are able to see the jobs in the Windows print queue as described above, but will prevent PaperCut from logging job names.
To make this change, follow the steps below:
- Log in to the PaperCut Admin Interface.
- Navigate to Options, then Privacy Options.
- Check the box next to Omit document names from the Job Log.
Still have questions?
Let us know! We love chatting about what’s going on under the hood. Feel free to leave a comment below or visit our Support Portal for further assistance.
Keywords: change document name, hide document name, hide doc name, confidential document, security, clear document name, log, hide print jobs
How to Find Hidden Files and Folders in Windows
Last Updated: February 9, 2021
This article was co-authored by Mobile Kangaroo. Mobile Kangaroo is a full service repair shop and Apple Authorized Service Provider headquartered in Mountain View, CA. Mobile Kangaroo has been repairing electronic devices such as computers, phones, and tablets, for over 16 years, with locations in over 20 cities.
This article has been viewed 1,290,650 times.
This wikiHow teaches you how to display and locate hidden files and folders in Windows.


Mobile Kangaroo
Computer & Phone Repair Specialists Expert Interview. 11 September 2019. It should be in the middle of the «Advanced settings» window.
- If you don’t see this option, double-click the Hidden files and folders line of text. If you don’t see that option either, first double-click Files and Folders at the top of the «Advanced settings» window.
How to Hide Files on Your Computer
Sometimes, you need to keep files on your computer that you just don’t want other people to see. Whether it’s a gift list or that porn stash, hiding files is easy. Here’s how to do it.
Level 1: Use Hidden Folders
If you just need to tuck some files away from prying eyes then using your computer’s built-in hidden folders is an easy way to do it. This won’t really hide files from someone who knows what they’re doing, but it will make them invisible so people don’t stumble across them. Think of it as the digital equivalent of hiding things under your mattress.
On Windows
Hiding files in Windows is pretty easy:
- Select the files or folders you want to hide
- Right-click and choose Properties
- Click the General tab
- Click the checkbox next to Hidden in the Attributes section
- Click Apply
Now the files you chose are hidden away and people won’t see them when they’re looking through your folders. When you need to find those files again, just turn Hidden Items on .
Navigate Files Like a Pro with These Windows Explorer Tips and Tricks
Thinking about Windows Explorer may make you yawn, but you spend a lot of time in it every day.…
On Mac
On Mac, you’ll use a quick Terminal command to hide folders. Just type this into Terminal, replacing /path/to/folder with the folder you want to hide:
chflags hidden /path/to/file-or-folder
To unhide it, type in:
chflags nohidden /path/to/file-or-folder
If you don’t know the full path of the folder you want to hide, type the command then drag that file or folder into the Terminal window. Alternately, you can just tuck that folder away inside your Library folder .
Instantly Hide Any File in OS X by Putting It In Your Library Folder
Still trying to find the best way to hide your porn? Uh, I mean. «Sensitive Documents?» Macworld…
Level 2: Use Apps to Hide Files from Search and History
If messing around with hidden folders is too much for you, you can use a third-party app to hide files. Again, these apps don’t really protect your data, but they do make it so nobody casually comes across files you don’t want them to.
Hide Folders with My Lockbox for Windows
My Lockbox tucks your personal files inside the app and requires a password to unlock them. Nothing inside My Lockbox will show up in search, so you don’t need to worry about anyone coming across your files. There’s no encryption here, so while it’s not super secure, it is fast and easy to use.
Use Skedaddle or Obscurity for Mac
On Mac, you have two solid options to hide folders using apps. The first is the previously mentioned Skedaddle ($2.99). With Skedaddle, you get a hidden space on your desktop that you can put folders on. The files here won’t show up in Spotlight searches or in Finder. That said, anyone who figures out the keyboard shortcut that pulls up Skedaddle can access them easily.
Skedaddle Hides a Secret, Password-Protected File Drawer Underneath Your Mac’s Desktop
Mac OS X: There are lots of ways to hide your files, but Skedaddle offers one that both useful and…
Another trick is to use an app like the previously mentioned Obscurity . Although, calling Obscurity an app isn’t exactly right. It’s actually just a dummy app that you can put files inside. Just right-click Obscurity and select «Show Package Contents.» Here, you can dump all your files into the app container. These files won’t show up in searches or in Finder. This isn’t really secure since anyone can access it, but chances are nobody is going to just dig around in your computer’s applications folder right-clicking every single app.
Obscurity Hides Files in OS X in Plain Sight
Mac: If you’re worried less about encrypting your folders, and more about someone accidentally…


