- How to Turn On Mobile or PC Hotspot using Bluetooth on Windows 10
- Step 1: Set up a Hotspot on your Windows10 computer or mobile phone and allow another device to turn on mobile hotspot
- Here is how to set up a hotspot on your windows 10 computer
- Here is how to set up a hotspot on your windows 10 mobile phone
- Step 2: Pair your PC and your phone
- Step 3: Start your mobile hotspot remotely
- Laptop won’t connect to iPhone’s hotspot [Windows 10 Guide]
- What can I do if I can’t connect to the iPhone’s WiFi hotspot?
- 1. Troubleshoot the Personal hotspot problems
- 2. Update network drivers
- DriverFix
- 3. Troubleshoot the WiFi hotspot problems
- Run a System Scan to discover potential errors
- 4. Change the name of your iPhone
- 5. Use the Forget option for the WiFi hotspot
- 6. Change the iPhone’s hotspot password
- 7. Uninstall the Intel Proset wireless software
How to Turn On Mobile or PC Hotspot using Bluetooth on Windows 10
Hosted Networks also known as Virtual networks have been featured since windows 7. You could usually be able to create a hotspot through group policy settings or via command prompt. But now, beginning from Windows 10 build 14316, you can easily set up a hosted wireless network via your settings. What’s more, you can turn on an existing hotspot via Bluetooth using another device. Other than sharing internet, this feature is also used by applications for sharing files and data. They won’t have to prompt uses to manually turn hotspot on and connect.
There are different Windows 10 devices you can allow another device to start your Hotspot via Bluetooth on. Either the hotspot must be set up in your phone or on your computer or any other window 10 device. Most people use laptops and mobile phones and that is what we will cover in this article. If you have set up a hotspot on your laptop you can turn it on using your windows phone. Vis versa, if the hotspot is on your mobile phone, you can turn it on using your laptop. The second device sends a signal via Bluetooth and invokes the APIs of the first device to turn the hotspot on. It then connects to the available network automatically.
Prerequisites: Here are the things you must have in order to turn on hotspots via Bluetooth:
- Both devices must have Bluetooth. The Bluetooth of both devices must be running/turned on and paired
- If you are running the hotspot on your PC, you must at least have Windows 10 build 14316 to set up the hotspot that allows other devices to start it via Bluetooth. Your computer must also support hosted networks in order to set up a hotspot.
- If you are running the hotspot on your mobile phone, you must at least have Windows 10 mobile to set up the hotspot that allows other devices to start it via Bluetooth. You must also have an active data plan on your phone
- Both devices must be running a windows operating system. Other operating systems e.g. android and iOS are not supported yet.
To know which version of Windows 10 you are running on your computer, press Windows Key + R to open Run, type ‘winver’ and hit enter. To tell if your computer supports hosted networks type “netsh wlan show drivers” in the Command prompt window and press the Enter.
If you meet all the prerequisites, here is how to set up a hosted network that can be turned on by other devices via Bluetooth.
Step 1: Set up a Hotspot on your Windows10 computer or mobile phone and allow another device to turn on mobile hotspot
The first step is to set up a Hotspot on your Computer or mobile phone. Choose the device you want to remotely switch and set up a hotspot on it.
Here is how to set up a hotspot on your windows 10 computer
- Open Settings.
- Click Network & internet.
- Click Mobile hotspot.
- Toggle ‘Turn on remotely’ to on. Keep in mind that both devices must have Bluetooth turned on and they have to be paired.
- Click the Edit button if you want to change the Network name and password.
- Under Share my Internet connection from, select the Wi-Fi adapter you want to share so other devices can access the internet.
- Click the switch to turn on Mobile hotspot.
Here is how to set up a hotspot on your windows 10 mobile phone
- First unlock your phone, swipe down the notification center and you will see the option “Mobile Hotspot”. Click on this option and it will take you to the hotspot settings. In case you don’t see the option, open settings > Network and Wireless > Mobile Hotspot.
- Turn on the hotspot option and you can see your phone coming up as a Wi-Fi connection on other devices.
- If you want to change the SSID (the Wi-Fi name) and the password, click the edit button at the bottom. Here you will be able to add your own name and password.
- At the end you have a toggle button which says “Allow another device to turn on mobile hotspot. Both devices must have Bluetooth turned on and be paired.” Turn this toggle button to the on position to allow remote switching.
Step 2: Pair your PC and your phone
To pair, one of your devices must be visible/searchable by the other device.
- On your phone, go to settings > Bluetooth. Turn on Bluetooth. If there is an option ‘make this device visible to other Bluetooth devices’ click on it to allow visibility.
- Then using the Windows key + I keyboard shortcut, open the Settings app.
- Navigate to Devices and go to Bluetooth.
- Make sure the Bluetooth switch is in the on position. (You’ll know it is working because you’ll notice the message that reads “Your PC is searching for and can be discovered by Bluetooth devices.”)
- Select the device you want to connect and click Pair.
- A code will appear on the screen and will also be sent to your phone. If both codes are the same, click on pair/yes/connect to allow the pairing to complete.
You can also connect two computers by making one visible to the other. You can set the visibility from the Bluetooth settings of your PC.
Step 3: Start your mobile hotspot remotely
After pairing both your devices, make sure both their Bluetooth are on. To make sure remote switching via Bluetooth works, turn off the hotspot on both devices first.
- Turn on the Wi-Fi on the device you want to use to turn the other’s hotspot on.
- If your Bluetooth are on, the other device should appear on your Wi-Fi list. e.g. on your phone, go to setting > Wi-Fi > turn Wi-Fi on and look for your device in the list. On your computer, you can click on the Wi-Fi icon on your system tray (right bottom corner of the taskbar) and see the device on your list.
- Click/tap on the hotspot and click ‘Connect.’ This will automatically turn on the hotspot of the other device and connect to it.
- If you are asked for a Wi-Fi password, input the password and connect (you will only have to do this once)
Other than the Bluetooth being on for both devices, your phone must have an internet connection and the cellular data must be switched on otherwise the hotspot won’t turn on. The only caveat with wireless hotspot feature is that you’re limited to share your internet connection with up to 8 devices.
Laptop won’t connect to iPhone’s hotspot [Windows 10 Guide]

- Many owners of iPhone 5 or iPhone 5s complained about the inability to connect their Windows 10 laptops to the WiFi hotspots of their phones.
- There might be several problems producing this issue but this guide is going to help you fix every one of them.
- For any information or solution for online issues, we recommend the Web & Cloud page.
- If you’re facing other software or hardware problems, you will definitely find a solution in our Tech Troubleshooting Hub.
- Download Restoro PC Repair Tool that comes with Patented Technologies (patent available here).
- Click Start Scan to find Windows issues that could be causing PC problems.
- Click Repair All to fix issues affecting your computer’s security and performance
- Restoro has been downloaded by 0 readers this month.
More trouble for Apple as iPhone users, especially those that have iPhone 5 or iPhone 5s, can’t connect their WiFi hotspots to Windows 10 laptops.
Many users have been complaining that they can’t manage to connect their Windows 10 laptops to the WiFi hotspots they have created on their iPhones.
People tend to use their iPhone to create wireless hotspots, but sometimes issues with wireless hotspots can occur. Since this is such a common problem, we’re going to cover the following issues:
- Windows 10 can’t connect to iPhone hotspot – This is a relatively common problem with Windows 10, but you should be able to fix it using one of our solutions.
- Laptop won’t connect to iPhone 6, 7 hotspot – This issue affects both laptop and desktop PCs and both iPhone 6 and 7.
- Windows 10 iPhone hotspot Can’t connect to this network – We already covered how to fix Windows 10 Can’t connect to this network message in one of our older articles, so be sure to check it out.
- Windows 10 iPhone WiFi won’t stay connected, turns off, randomly disconnects – If your Wi-Fi frequently disconnects on Windows you can experience many problems.
- Windows 10 iPhone WiFi yellow triangle, exclamation mark – To fix this problem, check out our article on how to fix Wi-Fi exclamation mark on Windows 10.
- Windows 10 iPhone WiFi hotspot not working – We already wrote a guide on what to do if your mobile hotspot isn’t working on Windows 10.
As you can see, this has happened in Windows Vista as well, and also with an iPhone 4.
First of all, to make sure that the Windows 10 computer is the culprit, try and connect another device to the WiFi hotspot that you created using your iPhone.
If the problem persists, here’s what you can do.
What can I do if I can’t connect to the iPhone’s WiFi hotspot?
1. Troubleshoot the Personal hotspot problems
- Confirm that your iOS device, computer, and wireless plan all meet the system requirements for Personal Hotspot.
- Verify that Personal Hotspot is enabled by tapping Settings > General > Cellular > Personal Hotspot.
- Verify the Internet connection on your iOS device by tapping Safari and loading a new webpage.
- If one connection type doesn’t work, try another (for example, instead of connecting using Wi-Fi, try using USB or Bluetooth).
- Try disabling and reenabling Personal Hotspot from Settings > Personal Hotspot or Settings > General > Cellular > Personal Hotspot.
- Install the latest version of iOS. Tap Settings > General > Software Update.
- Reset network settings by tapping Settings > General > Reset > Reset Network Settings.
- If none of the previous steps resolves your issue, restore the iPhone.
2. Update network drivers
This connection issue with your iPhone’s hotspot might be also caused by old network drivers, so the best solution is to use DriverFix, the perfect third-party updater software for this job.
That’s right, we recommend this software as it’s really easy to use, fast, and reliable.
The most important thing about a driver updater is to have access to 0 days drivers from the manufacturers and DriverFix has an impressive library of drivers on the market.
And even if you don’t need a new driver or no new driver is available, this awesome piece of software detects and repairs broken or missing ones in the process.
You don’t need to believe our words because you can try DriverFix for free.

DriverFix
3. Troubleshoot the WiFi hotspot problems
Run a System Scan to discover potential errors


- Turn the Personal Hotspot off.
- Verify if the Wi-Fi is ON in Settings > Wi-Fi.
- Turn the Personal Hotspot back on.
- If another device is unable to join your Wi-Fi network, ensure that the user enters the Wi-Fi password correctly.
- If the device cannot see your Wi-Fi network, verify your device name (Windows may not properly display a device name that uses non-ASCII characters).
- Verify how many devices are currently using your Personal Hotspot. Depending on your wireless carrier and, the maximum number of Wi-Fi connections may be limited to three at one time.
- If the other device still cannot connect, try turning the Wi-Fi off and on again on the device. Verify that your device can see other Wi-Fi networks.
4. Change the name of your iPhone
- Go to Settings > General > About > Name.
- Now click on X icon to remove your current name.
- Enter a new name and you’re good to go.
Note: A few users reported that removing extra spaces from the hotspot name fixed the problem for them, so be sure to try that as well.
Once you change the hotspot name, your PC will be able to connect to the iPhone WiFi hotspot again.
5. Use the Forget option for the WiFi hotspot
- Click the Wi-Fi icon in the bottom right corner.
- Now locate your Wi-Fi hotspot, right-click it, and choose to Forget from the menu.
If you need more info on how to delete or forget unused Wi-Fi networks on Windows 10, take a look at our dedicated guide.
Try to connect to it again and you’ll be asked to enter a password. After doing that, the Wi-Fi network will start working.
6. Change the iPhone’s hotspot password
 According to users, if Windows doesn’t connect to iPhone WiFi hotspot, the issue might be your hotspot’s password. However, you can fix this problem simply by changing your hotspot’s password.
The problem should be resolved and you’ll be able to connect to the iPhone’s hotspot again.
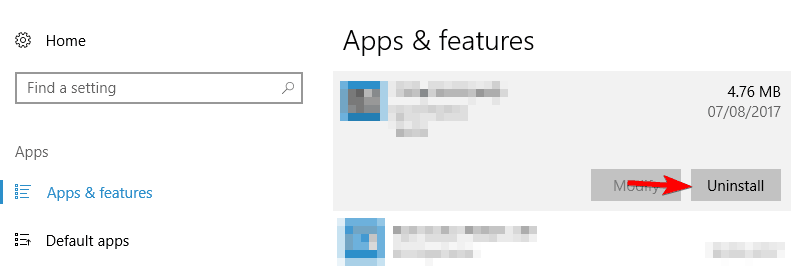
7. Uninstall the Intel Proset wireless software
- Open the Settings app and go to Apps section.

- Select Intel Proset wireless software from the list and click on Uninstall button.
- Follow the instructions on the screen to remove it.

Once you remove the software, restart your PC.
Note: If you don’t use Intel Proset software, be sure to remove your wireless software and check if that helps.
If you need additional info on how to uninstall programs and apps in Windows 10, take a look at this dedicated guide to find out more.
Let us know if this has done the trick for you. If not, maybe you can share with us your detailed problem and we’ll try to find a solution together.
Also, if you did manage to resolve this issue, do share it with us to help those in need.


