- How to Change Your MAC Address in Windows 10 (and Why You Might Want To)
- Edit Your Network Adapters MAC Address to Bypass Network Restrictions in Windows 10
- Изменение MAC-адреса в Windows 7
- Способ 1: Драйвер сетевой карты
- Способ 2: Системный реестр
- Способ 3: Сторонний софт
- Change or Spoof a MAC Address in Windows or OS X
- Change Windows MAC Address
- Change OS X MAC Address
How to Change Your MAC Address in Windows 10 (and Why You Might Want To)

As we’ve explained in our article on how to find your MAC address, a MAC address serves as a permanent, physical identifier for any device that connects to a network. That includes your phone, your router, your computer, your printer, your Apple TV, anything that connects to your internet. If your computer has an Ethernet port and a WiFi adapter, you have two MAC addresses: one for Ethernet and one for wireless.
MAC addresses are useful for identifying devices on a network. For home users, you might use MAC filtering to restrict access to your WiFi network. The reason that a MAC address works better for these administrative tasks is that, unlike IP addresses, the MAC address doesn’t change.
Or at least it’s not supposed to.
The MAC address is “burned-in” to the physical device at the factory. But it’s fairly simple to change your MAC address by “spoofing” it as another MAC address.
Why would you want to do this?
MAC spoofing can be used maliciously to circumvent network controls, but it’s really only effective for blacklists—that is if someone specifically blocked your device from the network. For whitelists, you’d have to know the MAC address of a specific device you’re trying to spoof.
Changing your MAC address has legitimate uses as well. You can use it to test your own MAC filtering settings. Or you can use it to assign specific rules to a set of devices within a certain MAC address range.
At any rate, the fact that you’ve read this far means you probably have a vested interest in changing your MAC address. So, without further ado, here’s how to do it.
Edit Your Network Adapters MAC Address to Bypass Network Restrictions in Windows 10
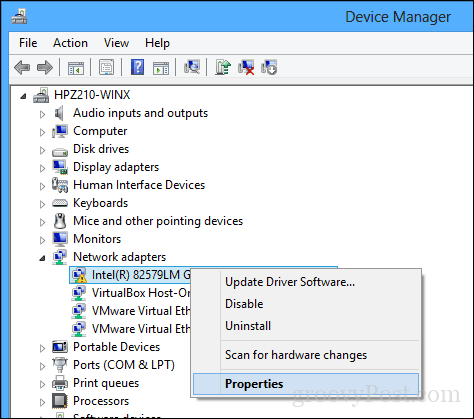
Press Windows key + X on your keyboard then click Device Manager. Expand Network adapters, right-click your Ethernet or Wireless adapter then click Properties.
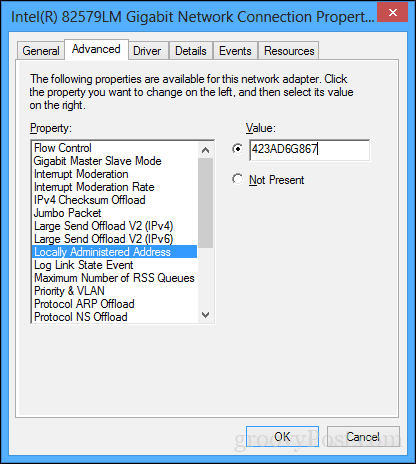
Select the Advanced tab. Within the Property box, scroll down then select Locally Administered Address then select the Value radio box; there you will see your adapters MAC address. To edit the address, click in the value box then clear its contents then enter a new address. A Mac address consists of six pairs of hexadecimal digits. Enter a new set without the hyphens, click OK then restart your computer.
Did it work? Let’s find out.
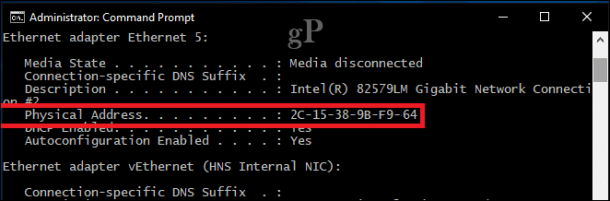
To confirm the change, open Start, type: CMD, right-click CMD then click Run as administrator.
At the command prompt, type: ipconfig/all then hit Enter to check the physical address.
You can also open Start > Settings > Network & Internet, click the connection name then scroll down to view the Physical address (MAC).
It doesn’t get any easier than that. Drop a line in the comments and let us know what you think.
Изменение MAC-адреса в Windows 7

Важно! Дальнейшие манипуляции могут помешать работе сетевого оборудования компьютера и доступу к интернету, поэтому выполняйте их на свой страх и риск!
Способ 1: Драйвер сетевой карты
В системном ПО некоторых решений присутствуют встроенные средства для замены имеющегося МАК-адреса на произвольный. Делается это следующим образом:
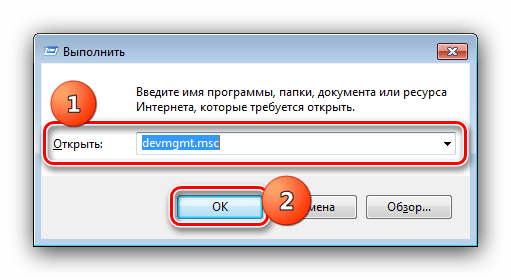
- Понадобится запустить «Диспетчер устройств»: используйте сочетание Win+R для вызова оснастки «Выполнить», затем напишите в текстовом поле devmgmt.msc и щёлкните «ОК».
Разверните категорию «Сетевые адаптеры» – в большинстве случаев карта находится там. Кликните правой кнопкой мыши по записи с именем требуемого адаптера и выберите пункт «Свойства».

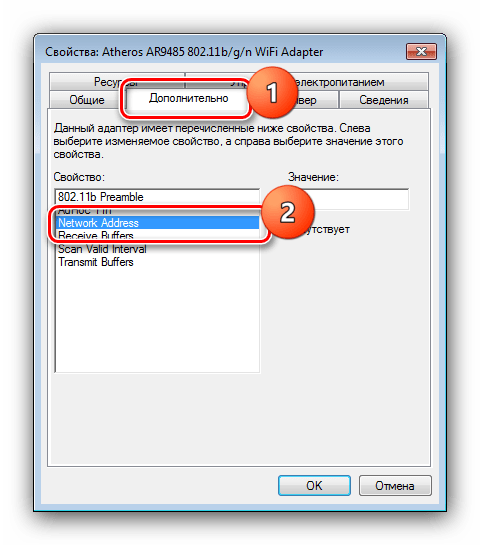
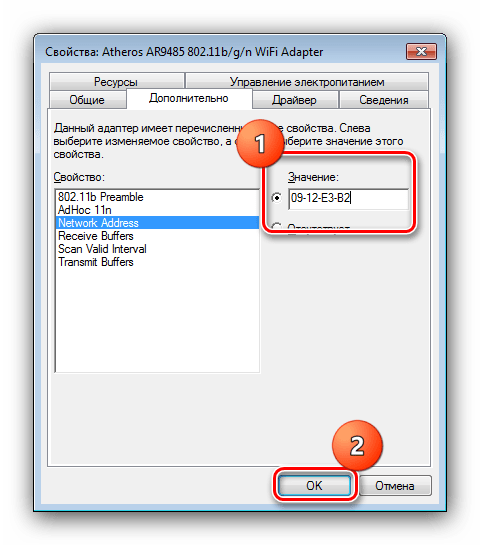
После нахождения требуемой опции выделите её одиночным нажатием левой кнопки мыши. По умолчанию значение у параметра находится в положении «Отсутствует» – для редактирования понадобится переключить его в режим «Значение», затем написать в строке новый идентификатор и нажать «ОК».
Закройте все открытые окна и перезапустите ПК для сохранения настроек.
Этот вариант является наиболее простым из представленных, но сработает только для ограниченного количества устройств.
Способ 2: Системный реестр
Альтернативой вышеприведённому методу будет замена МАК-адреса через реестр.
- Откройте средство «Выполнить», как в шаге 1 предыдущего способа, только теперь запрос будет regedit .

После запуска оснастки перейдите по адресу:
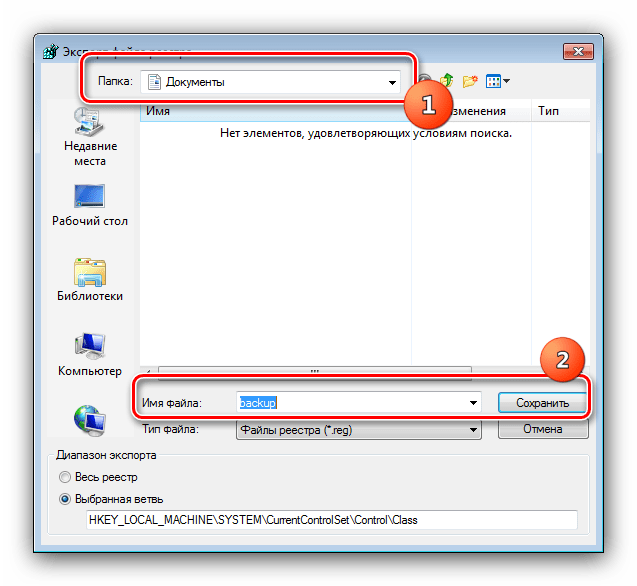
Советуем на всякий случай скопировать часть редактируемой ветки – выделите папку «Class», затем используйте инструменты «Файл» – «Экспорт».

Укажите место сохранения данных и их название, после чего кликните «Сохранить».
Если вы видите несколько каталогов , понадобится открыть каждый и проверить, что написано в пункте «DriverDesk» – нам нужен вариант с именем вашей сетевой карты.

После определения директории поищите в ней запись с названием «Network Address». Откройте её двойным кликом ЛКМ.

Удалите имеющийся идентификатор и впишите новый, после чего нажмите «ОК».

Закройте «Редактор реестра» и перезагрузитесь.
Теперь MAC-адрес должен быть заменён. Если после этой операции наблюдаются проблемы с доступом к интернету, восстановите реестр из сделанной копии по инструкции из статьи далее.
Способ 3: Сторонний софт
Решить поставленную задачу можно и с помощью стороннего программного обеспечения. В качестве такового будем использовать Technitium MAC Address Changer.
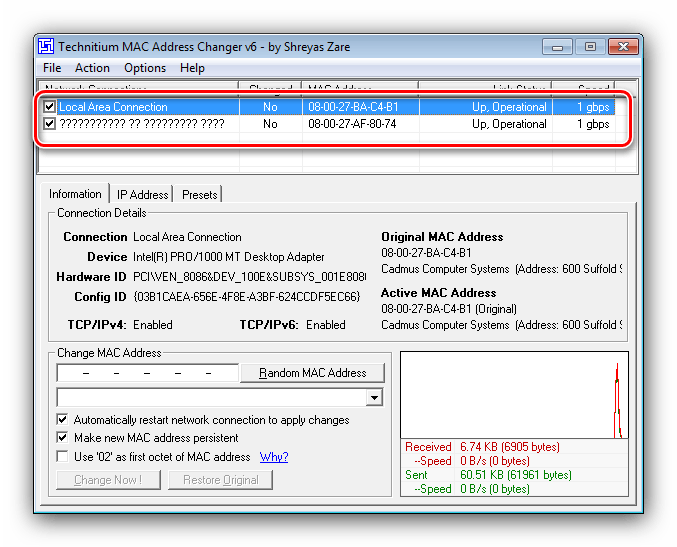
- Запустите программу. Вверху находится список распознанных сетевых карт – выберите в нём требуемую и отметьте галочкой слева от имени.
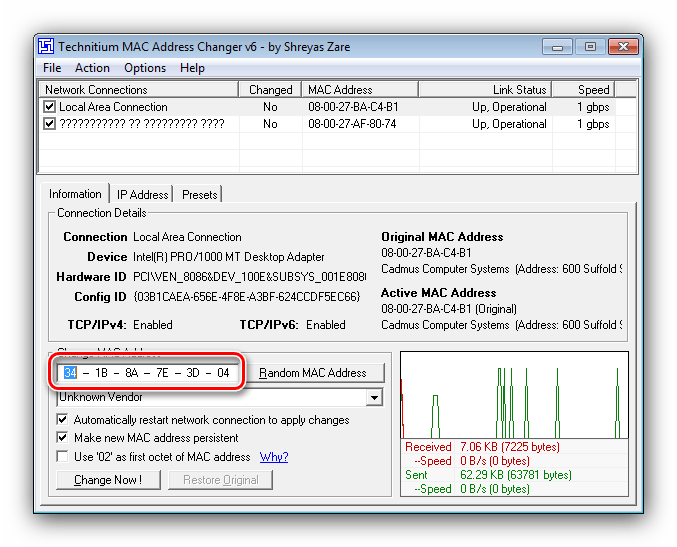
Теперь обратитесь к параметрам «Change MAC Address», они расположены в левом нижнем углу. Есть два метода замены последовательности, первый – сгенерировать и задать случайную, для чего следует использовать кнопку «Random MAC Address».

Второй вариант – ввод адреса вручную: кликните по отмеченной на скриншоте строке и пропишите новое значение.
Для применения изменений воспользуйтесь кнопкой «Change Now».

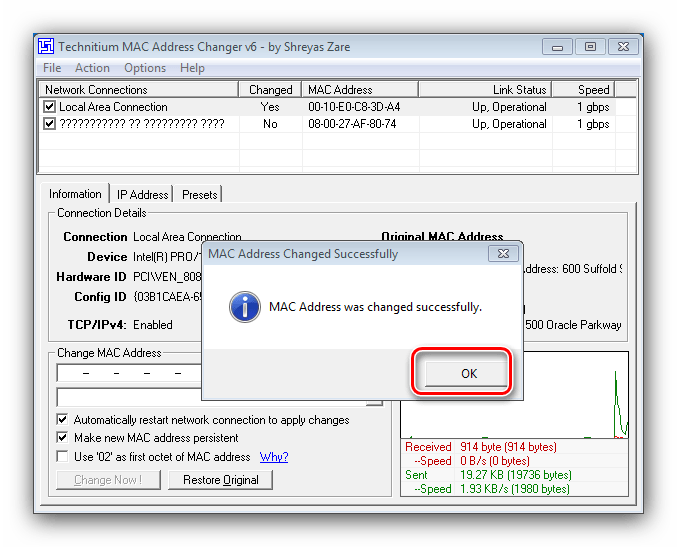
Если потребуется вернуть оригинальный идентификатор, нажмите «Restore Original».

Рассмотренная программа работает безукоризненно, поэтому рекомендуем пользоваться именно ею.
Change or Spoof a MAC Address in Windows or OS X
This can help you bypass certain network restrictions
Every NIC (Network Interface Card) has a unique MAC address (Media Access Control). This applies to all types of network cards, including Ethernet cards and WiFi cards. The MAC Address is a six-byte number or 12-digit hexadecimal number that is used to uniquely identify a host on a network.
An example of a MAC address is 1F-2E-3D-4C-5B-6A and it falls into the Layer 2 networking protocol of the OSI model. In today’s networks, ARP, or Address Resolution Protocol converts a MAC address to a Layer 3 protocol address, such as an IP address. A MAC address can also be called a Physical Address. Read my post on how to find your MAC address if you don’t know it.

All MAC addresses are hard-coded into a network card and can never be changed. However, you can change or spoof the MAC address in the operating system itself using a few simple tricks.
So why would you want to change your MAC address? Well there are many reasons for this, mostly related to bypassing some kind of MAC address filter set on a modem, router or firewall. Changing the MAC Address can help you bypass certain network restrictions by emulating an unrestricted MAC Address or by spoofing a MAC address that is already authorized.
For example, a WiFi network may allow only authorized computers to connect to the network and filters out computers based on the MAC address. If you can sniff out a legitimate MAC address, you can then spoof your MAC address and gain access to the WiFi network.
Another example is if you have an ISP that allows only a certain number of computers to connect to the Internet from your home. If you have more computers that need to connect, you can spoof the MAC address of an authorized computer and connect from a different computer.
Change Windows MAC Address
You can change the MAC address for the network card in Windows pretty easily following the steps below.
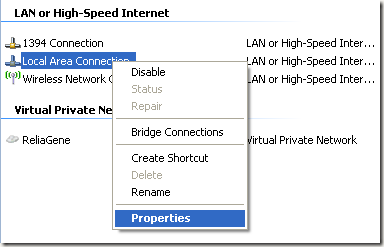
Step 1: Click on Start, then Control Panel, then Network Connections, and right-click on the network connection you want to change the MAC address for and select Properties. It will normally either be Local Area Connection or Wireless Network Connection.
If you are using Windows Vista, Windows 7 or higher, you have to go to Control Panel, then Network and Internet, then Network and Sharing Center, and then click on Manage Network Connections or Change adapter settings.

Then you can right-click on the adapter and choose Properties.
Step 2: On the General or Networking tab, click the Configure button.

Step 3: Now click on the Advanced tab and click on the Locally Administered Address property or the Network Address property.

By default, the Not Present value is selected. Go ahead and click on the Value radio button and enter in a new MAC address. The MAC address is a combination of 6 pairs of numbers and characters, i.e. 40-A2-D9-82-9F-F2. You should enter the MAC address without the dashes.

You can go to the command prompt and type in IPCONFIG /ALL to check that the MAC address has been changed. Go ahead and restart the computer in order for the changes to take effect.
This is the simplest way to change your MAC address in Windows. You can also do so via the registry, but it’s much more technical and probably not required by most people.
Change OS X MAC Address
Changing the MAC address on OS X is definitely not as easy as it is on Windows. Firstly, you have to use Terminal (similar to command prompt in Windows) to actually change the MAC address.
Secondly, you need to manually figure out the technical name of the adapter before you can change the settings. I’ll explain everything below step by step, but it gets a bit complicated at times.
To start, let’s find out the current MAC address for your Mac. You can do this in one of two ways: via System Preferences or via Terminal. Open System Preferences, click on Network and then click on the Advanced button. Make sure to select the appropriate interface first (WiFi, Ethernet, etc) in the listbox on the left.

Click on the Hardware tab and you will see the first line is MAC Address. I thought you could simply choose Manually from the Configure dropdown, but that doesn’t allow you to edit the MAC address.

In Terminal, you can get the MAC address by typing in the following command:
ifconfig en0 | grep ether
This will give you the MAC address for the en0 interface. Depending on how many interfaces you have on your computer, you might need to run this command several times adding 1 to the number each time. For example, I ran the following commands below until I reached an interface that didn’t exist.

Now you can simply compare the MAC addresses listed here with the one you saw via System Preferences. In my case, my WiFi MAC address of f8:1e:df:d8:9d:8a matches with en1, so that is the interface I have to use for the next commands.
Before we change the MAC address, you can use a useful command in Terminal to generate a random MAC address if you need one.
Now that you have a new MAC address, you can change the current one using the following command below. Replace XX with the actual MAC address you want to use.
sudo ifconfig en0 ether xx:xx:xx:xx:xx:xx
In order to do this, you need to be logged in as an Administrator or you have to enable the root account in OS X. By default, root is disabled and it’s better to leave it disabled if you can. Just login as an admin and you should be able to run the command just fine. It will ask you for your password, though, before changing the MAC address.
Also, the address won’t change if you are still connected to a WiFi network. You need to first disconnect from any networks and then run the command. Surprisingly, disconnecting from a wireless network in OS X is not intuitive at all. You have to press and hold the Option key and then click on the WiFi icon to see the disconnect option.

So here is a rundown of all the commands I ran in order to get the current MAC address, generate a random one, update the MAC address and then verify to make sure it had actually changed.

As I mentioned earlier, this is definitely not as straightforward as the process is on Windows, but you should be able to do it if you simply copy and paste the commands above. If you have any questions, feel free to post a comment. Enjoy!
Founder of Online Tech Tips and managing editor. He began blogging in 2007 and quit his job in 2010 to blog full-time. He has over 15 years of industry experience in IT and holds several technical certifications. Read Aseem’s Full Bio


