Manage the input and display language settings in Windows 10
To manage all aspects of the input and display language settings on your Windows 10 device, use the following methods.
To switch the keyboard layout you’re using in Windows 10, press and hold the Windows key and then repeatedly press the Spacebar to cycle through all your installed keyboards. (If this doesn’t do anything, it means you have only one installed.)
You can also select the language abbreviation on the far right of the taskbar and then choose the language or input method you want to use.
Note: In the input field, press Windows +period (.) to access the emoji keyboard, if your language supports this.
If you can’t find the keyboard layout you want, you may have to add a new keyboard.
Adding an input language lets you set a language-preference order for websites and apps, as well as change your keyboard language.
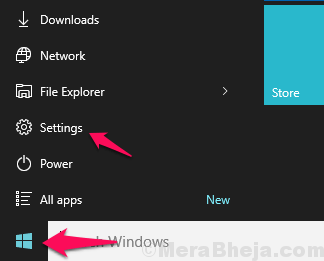
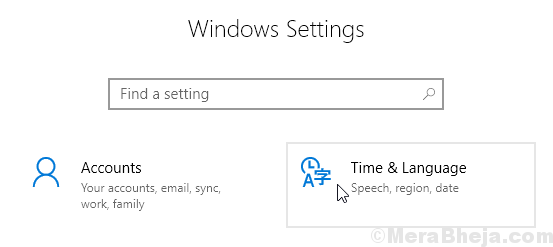
Select the Start button, then select Settings > Time & Language > Language.
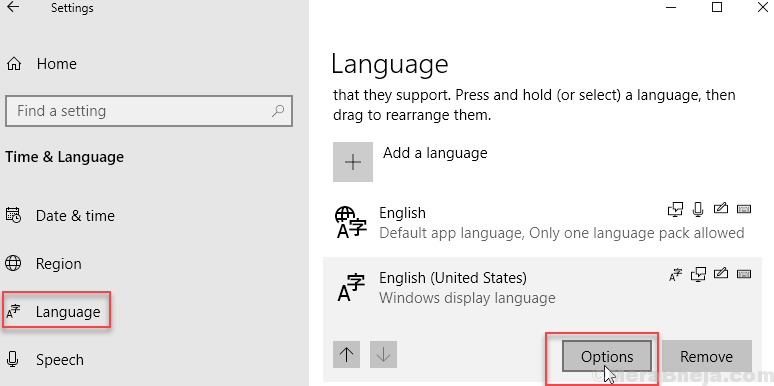
Under Preferred languages, select the language that contains the keyboard you want, and then select Options.
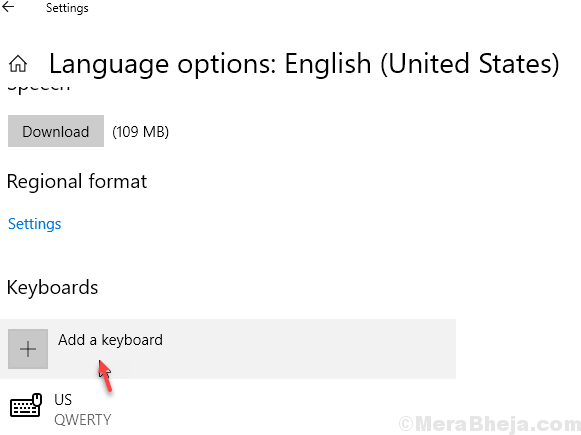
Select Add a keyboard and choose the keyboard you want to add. If you don’t see the keyboard you want, you may have to add a new language to get additional options. If this is the case, go on to step 4.
Return to the Language settings page, and select Add a language.
Choose the language you want to use from the list, and then select Next.
Review any language features you want to set up or install, and select Install.
The display language you select changes the default language used by Windows features like Settings and File Explorer.
Select the Start button, then select Settings > Time & Language > Language.
Choose a language from the Windows display language menu.
If a language is listed under Preferred languages but doesn’t appear on the Windows display language list, you’ll first need to install its language pack (if it’s available).
Select the Start button, then select Settings > Time & Language > Language.
Choose a language from the Add a language list under Preferred languages, and then select Options.
Select Download from the Download language pack option.
After the language pack is installed, select Back .
Choose a language from the Windows display language menu.
If you receive an «Only one language pack allowed» or «Your Windows license supports only one display language» message, you have a single language edition of Windows 10. Here’s how to check your Windows 10 language edition:
Select the Start button, select Settings > About, and then scroll down to the Windows specification section.
If you see Windows 10 Home Single Language next to Edition, you have a single language edition of Window 10, and you can’t add a new language unless you purchase an upgrade to either Windows 10 Home or Windows 10 Pro.
Select the Start button, then select Settings > Time & Language > Language.
Under Preferred languages, select the language you want to remove, and then click Remove.
To remove an individual keyboard, select the language in question (see step 2), select Options, scroll down to the Keyboards section, select the keyboard you want to remove, and click Remove.
How to add US International Keyboard in Windows 10
August 7, 2019 By Admin
If you want to add and use US international Keyboard on your Windows 10 PC, please follow the steps given in the article.
Step 1 – Click on the Start button and then gear shaped icon to Open settings.
Step 2 – Click on Time & Language.
Step 3 – Click on Language from the left menu.
Step 4 – Click on English (United states) to expand and then click on Options.
Step 5 – Scroll down and then click on + Sign beside Add a language.
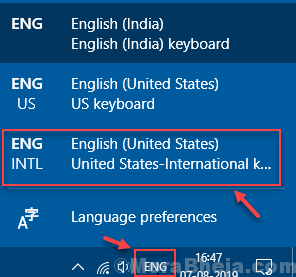
Step 6 – Select United states – International from the list.

Step 7 – Now, in the Taskbar , click on your language .
Step 8 – Now, select United states – International from the list.
This will install United states – International configuration on your Windows 10 Computer. Hope it helps.

Saurav is associated with IT industry and computers for more than a decade and is writing on The Geek Page on topics revolving on windows 10 and softwares.
Related Posts:
Reader Interactions
Comments
Mostafa Allam says
thanks for helping so much
YEEEESSSS! Thank you so much! ALT + *** is completely obsolete! (well, almost).
Jesus de la Rua says
Excellent post. It definitively helped me a lot.
Thank you, Thank you, Thank you!
Angela Silverman says
Great instructions … never would have found it without you. Thanks!
Camila Pará (now I can sign my name properly lol) says
I’ve been searching for that info for like a week and you were the only instruction that worked.
Thank you!
Thank you! First instruction set I found that was up to date.
Senteria W. says
thanks a lot this helped out so much!
thank you so much!
Perfect, marvellous, thank you.
Thank you for the breakdown with pictures. Other instructions did not get me to where I needed to be, your instructions were dummy proof, worked like a charm.
Alvaro Frederico Ramos Pompeia says
O my windows 10 english, in Step 6 – Select United states – International from the list
the list appears only 6 keyboard icons but no text so I don’t knou what to choice.
Extremely useful and very simple — Thanks very much for the detailed (and accurate) instructions
Sophie Repussard says
I rarely leave comments on such helpful pages but yours really is saving me from a lot of frustration. Thank you so much for making this article and making it so easy for us!
Oh you have no idea what a relief for me this was. I had always had to change the language to write á, é, etc… and then ()… This is just great, thank you so much!
Stephan Lubbe says
Thank you so much, The Greek Page!
I’d gotten used to the Eng US Int keyboard and after buying a new computer just couldn’t find the way to install it. Can’t believe it’s so tucked away in Microsoft’s workings. You solved a great problem in my typing life, and relieved me from a lot of frustration and even anger in my computer experience.
Thanks again!
God bless you.
Regards
Change your keyboard layout
Swipe in from the right edge of the screen, tap Settings, and then tap Change PC settings. (If you’re using a mouse, point to the lower-right corner of the screen, move the mouse pointer up, click Settings, and then click Change PC settings.)
Tap or click Time and language, and then tap or click Region and language, and then tap or click Add a language.
Browse for the language you want, and then tap or click it to add it to your language list.
Swipe in from the right edge of the screen, tap Settings, and then tap Change PC settings. (If you’re using a mouse, point to the lower-right corner of the screen, move the mouse pointer up, click Settings, and then click Change PC settings.)
Tap or click Time and language, and then tap or click Region and language.
If the language says Language pack available, tap or click Options.
Note: If you don’t see Language pack available, you might be able to download the language pack at the Download Center.
Tap or click Download. The download process might take a while, depending on your PC and the size of the language pack.
Swipe in from the right edge of the screen, tap Settings, and then tap Change PC settings. (If you’re using a mouse, point to the lower-right corner of the screen, move the mouse pointer up, click Settings, and then click Change PC settings.)
Tap or click Time and language, and then tap or click Region and language.
Tap or click the language that you want to see Windows in, and then tap or click Set as primary. The Will be display language after next sign-in message will appear under the language.
Tap or click Set as primary to move the language to the top of the list. If the language can become your Windows display language, you’ll see Will be display language after next sign-in appear under the language.
Sign out of Windows, and then sign back in.
Warning: When you change your primary language, your keyboard layout might also change. When signing back in to Windows, make sure you’re using the right keyboard layout for entering your password. Otherwise, you might not be able to sign in. You can change your keyboard layout on the sign-in screen by tapping or clicking the language abbreviation button in the lower-right corner.
Change the keyboard layout or other method you use to type
Whenever you add a language, a keyboard layout or input method is added so you can enter text in the language. If you want to use a different keyboard layout or input method, you can add a new one or switch between the ones you have.
Swipe in from the right edge of the screen, tap Settings, and then tap Change PC settings. (If you’re using a mouse, point to the lower-right corner of the screen, move the mouse pointer up, click Settings, and then click Change PC settings.)
Tap or click Time and language, and then tap or click Region and language.
Tap or click the language you want to add a keyboard to, and then tap or click Options.
Tap or click Add a keyboard, browse the input method list for the one you want to use, and then tap or click it.
You can enter text with different keyboard layouts or input methods by switching between them. There are a few different ways to switch between keyboard layouts or input methods:
On a hardware keyboard, press and hold the Windows logo key , and then press the Spacebar to cycle through your input methods.
If you have a touchscreen, you can switch your touch keyboard layout by tapping or clicking the keyboard icon, and then tapping or clicking the keyboard layout you want to switch to.
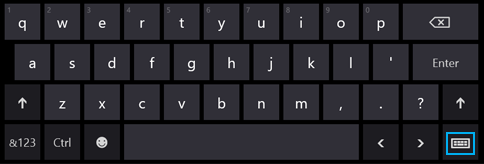
Language abbreviation button in the touch keyboard
On the desktop taskbar, tap or click the language abbreviation in the notification area at the far right of the taskbar, and then tap or click the keyboard layout or input method you want to switch to.
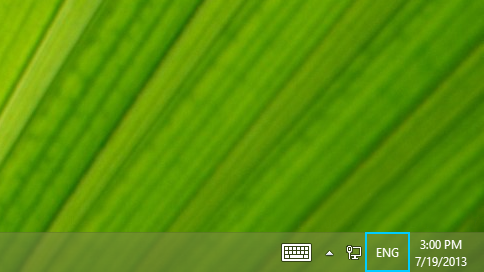
Language abbreviation button in the desktop taskbar
Your default keyboard layout or input method is the one that’s automatically used with the language you see Windows in (for example, the QWERTY keyboard for American English). If you want to keep your Windows language the same but use a different keyboard automatically, follow these steps:
Open Control Panel by swiping in from the right edge of the screen, tapping Search (or if you’re using a mouse, pointing to the upper-right corner of the screen, moving the mouse pointer down, and then clicking Search), entering Control Panel in the search box, and then tapping or clicking Control Panel.
Enter Add a language in the search box, and then tap or click Add a language.
Tap or click Advanced settings.
Under Override for default input method, choose the keyboard layout or input method you’d like to be your new default, and then tap or click Save.
Note: If you don’t see the keyboard layout or input method you want, then you haven’t added it to your input method list. For instructions, see the Add a keyboard layout or input method for a language section.
Install or change a display language
You can change the language Windows uses to display text in wizards, dialog boxes, menus, and other items in the user interface. Some display languages are installed by default, while others require you to install additional language files.
To install a Language Interface Pack (LIP), double-click the file to open the setup program. To install a language pack, follow these steps:
Open Region and Language by clicking the Start button , clicking Control Panel, clicking Clock, Language, and Region, and then clicking Region and Language.
Click the Keyboards and Languages tab.
Under Display language, click Install/uninstall languages, and then follow the steps.  If you’re prompted for an administrator password or confirmation, type the password or provide confirmation.
Note: The Display language section will be visible only if you have already installed a Language Interface Pack or if your edition of Windows supports a language pack. Language packs are available only in Windows 7 Ultimate and Windows 7 Enterprise.
When you change the display language, the text in menus and dialog boxes for some programs might not be in the language that you want. This happens because the program might not support Unicode.
Open Region and Language by clicking the Start button , clicking Control Panel, clicking Clock, Language, and Region, and then clicking Region and Language.
Click the Keyboards and Languages tab.
Under Display language, choose a language from the list, and then click OK.
Note: If you don’t see the list of display languages, you need to install additional language files.
Change your keyboard layout
On the Language bar, click the Input language button, and then select an input language.
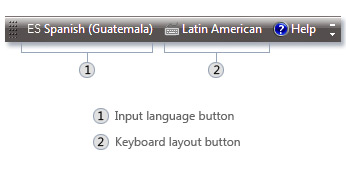
Click the Keyboard layout button, and then select a keyboard layout.
Note: If you don’t see the Language bar, right-click the taskbar, point to Toolbars, and then click Language bar.
On the Welcome screen, click the Keyboard layout button  , and then select a keyboard layout.
Note: If you don’t see the Keyboard layout button, you might not have more than one input language, or your regional and language settings might not be applied to reserved accounts.


