- How To Use SSH Keys on Windows Clients (with PuTTY)
- Step 1: Download and Install PuTTY, PuTTYgen and Pageant
- Step 2: Generate the OpenSSH-compatible Keys with PuTTYgen
- Step 3: Save The Public Key On The Server
- Step 4: Create a PuTTY Profile to Save Your Server’s Settings
- Step 5 (Optional): Disable the Password for Root Login via SSH
- Connect to Windows via SSH like in Linux
- How to Connect to SSH at Kinsta
- SSH Access Login Info
- How to Connect to SSH on Windows
- Step 1
- Step 2
- Step 3
- Step 4
- Step 5
- How to Connect to SSH on Mac/Linux
- Step 1
- Step 2
- How to Generate SSH Key Pair on Windows
- Step 1
- Step 2
- Step 3
- Step 4
- Step 5
- How to Generate SSH Key Pair on MAC/Linux
- Step 1
- Sign Up For the Newsletter
- We grew our traffic 1,187% with WordPress. We’ll show you how.
- Step 2
- Step 3
- Step 4
- How to Add SSH Keys in MyKinsta
- Step 1
- Step 2
- Step 3
- How to Connect to SSH on Windows With SSH Keys
- Step 1
- Step 2
- Step 3
- Step 4
- How to Connect to SSH on MAC/Linux With SSH Keys
- Step 1
- Step 2
- Step 3
- Step 4
- Additional Notes
- Hand-picked related articles
- Transactional Email – Can I Send Email From My WordPress Website?
- I Can’t Connect via SSH or SFTP – Delete SSH known_hosts
- How Do I Change My SFTP Password?
How To Use SSH Keys on Windows Clients (with PuTTY)
Using encrypted keys for authentication offers two main benefits. Firstly, it is convenient as you no longer need to enter a password (unless you encrypt your keys with password protection) if you use public/private keys. Secondly, once public/private key pair authentication has been set up on the server, you can disable password authentication completely meaning that without an authorized key you can’t gain access — so no more password cracking attempts.
It’s a relatively simple process to create a public/private key pair and install them for use on your ssh server.
Step 1: Download and Install PuTTY, PuTTYgen and Pageant
To get started, we’ll need to download and install both PuTTY (putty.exe), PuTTYgen (puttygen.exe) and Pageant (pageant.exe). You can find links to each of these at the project’s website. However, the easiest way to get both of the necessary programs is by downloading and installing the full .msi package, as pictured below:

Step 2: Generate the OpenSSH-compatible Keys with PuTTYgen
- Start the PuTTYgen utility, by double-clicking on its .exe file or pressing the Windows key and searching for PuTTYgen
- For Type of key to generate, select SSH-2 RSA
- In the Number of bits in a generated key field, specify either 2048 or 4096 (increasing the bits makes it harder to crack the key by brute-force methods)
- Click the Generate button
- Move your mouse pointer around in the blank area of the Key section, below the progress bar (to generate some randomness) until the progress bar is full
- A private/ public key pair has now been generated
- In the Key comment field, enter any comment you’d like, to help you identify this key pair, later (e.g. your e-mail address; home; office; etc.) — the key comment is particularly useful in the event you end up creating more than one key pair
- Optional: Type a passphrase in the Key passphrase field & re-type the same passphrase in the Confirm passphrase field (if you would like to use your keys for automated processes, however, you should notcreate a passphrase)
- Click the Save public key button & choose whatever filename you’d like (some users create a folder in their computer named my_keys)
- Click the Save private key button & choose whatever filename you’d like (you can save it in the same location as the public key, but it should be a location that only you can access and that you will NOT lose! If you lose your keys and have disabled username/password logins, you will no longer be able log in!)
- Right-click in the text field labeled Public key for pasting into OpenSSH authorized_keys file and choose Select All
- Right-click again in the same text field and choose Copy
NOTE: PuTTY and OpenSSH use different formats for public SSH keys. If the SSH Key you copied starts with «—- BEGIN SSH2 PUBLIC KEY . «, it is in the wrong format. Be sure to follow the instructions carefully. Your key should start with «ssh-rsa AAAA . «
Step 3: Save The Public Key On The Server
Now, you need log into your server via SSH as you normally would using PuTTY and paste the copied public key in the file
/.ssh/authorized_keys on your server.
If your SSH folder does not yet exist, create it manually:
Paste the SSH public key into your
/.ssh/authorized_keys file using the command-line text editor of your choice and save it.
Step 4: Create a PuTTY Profile to Save Your Server’s Settings
In PuTTY, you can create (and save) profiles for connections to your various SSH servers, so you don’t have to remember, and continually re-type, redundant information.
- Start PuTTY by double-clicking its executable file or pressing the Windows key and searching for PuTTY
- PuTTY’s initial window is the Session Category (navigate PuTTY’s various categories, along the left-hand side of the window)
- In the Host Name field, enter the IP address of your server
- Enter the port number in the Port field
- Select SSH under Protocol;
- Along the left-hand side of the window, select the Data sub-category, under Connection;
- Specify the username that you plan on using, when logging in to the SSH server, and whose profile you’re saving, in the Auto-login username field;
- Expand the SSH sub-category, under Connection;
- Highlight the Auth sub-category and click the Browse button, on the right-hand side of the PuTTY window;
- Browse your file system and select your previously-created private key;
- Return to the Session Category and enter a name for this profile in theSaved Sessions field, e.g. user@12.34.56.78 or user@hostname;
- Click the Save button for the Load, Save or Delete a stored session
Now you can log in to user@12.34.56.78 and you will not be prompted for a password. However, if you had set a passphrase on your public key, you will be asked to enter the passphrase at that time (and every time you log in, in the future).
Step 5 (Optional): Disable the Password for Root Login via SSH
Once you have copied your SSH keys unto your server and ensured that you can log in with the SSH keys alone, you can restrict the root login to only be permitted via SSH keys.
In order to do this, open up the /etc/ssh/sshd_config file:
Within that file, find the line that includes PermitRootLogin and modify it to ensure that users can only connect with their SSH key:
Alternatively, if you have configured sudo on your server and are configuring SSH keys for a sudo user, you can disable direct root access altogether:
Connect to Windows via SSH like in Linux
The most depressing thing for me is to connect to Windows hosts. I’m not an opponent or a fan of Microsoft and their’s products. Every product has its own purpose. But it is really painful for me to connect to Windows servers, because of 2 points: it is hard to configure (Hi WinRM with HTTPS), and it is really unstable (Hello RDP to VMs across the ocean).
Fortunately, I found the project Win32-OpenSSH. I realized that I want to share my experience with it. I believe it will help somebody and save a lot of nerves.

Installation ways:
- Manually
- Via Chocolatey package
- Via Ansible, let us say the role jborean93.win_openssh
I will explain the manual way because other ones are obvious.
I must note, this project is on beta stage and it isn’t recommended to use it in production.
Well, let’s download latest release. Currently it is 7.9.0.0p1-beta. It also has 32 and 64 bit versions.
Then unpack it to C:\Program Files\OpenSSH.
Important: It is necessary to grant write access to SYSTEM and Administers group only.
Futher, install services via shell script install-sshd.ps1 which is located in the OpenSSH directory
Let’s allow incoming connections on 22 port:
Note: applet New-NetFirewallRule is for Windows Server 2012 and above only. For older or desktop OS, you can use the following command:
Start the service:
This will automatically generate host keys under %programdata%\ssh if they don’t already exist.
You can set up the service auto-start by command:
Also, you can change default shell (it is cmd by default after install):
Note: you must define absolut path.
We can configure sshd_config, which is located in C:\ProgramData\ssh.
E.g.:
Then we create .ssh directory inside the user directory (C:\Users\ ) and authorized_keys file inside it. We can paste public keys into this file.
Important: the only user in which directory it is, must have write permissions for this file.
By the way, if you can’t fix it, you can disable permissions check via config:
Also, directory C:\Program Files\OpenSSH contains 2 scripts (FixHostFilePermissions.ps1, FixUserFilePermissions.ps1), which should but not obliged fix permissions, including authorized_keys permissions, but they don’t.
Don’t forget to restart sshd service to apply changes.
- Standart way to connect to any server (Windows/Linux)
When you have a few Windows host, it’s inconvenient:
So, here we go via ssh, but here via RDP,
and generally speaking, it is the best-practice with bastions, firstly ssh-tunnel, then RDP via the tunnel. Oh kill me baby one more time. - Easy to configure
I think it is obvious. - Connection speed to remote host
Without GUI we save up host resources, and size of transmitted data
Cons:
- It can’t replace RDP in some cases.
Not the all things you can do via PowerShell. I mean the cases when GUI is required.
Links:
How to Connect to SSH at Kinsta

SSH is a protocol for secure remote login and other secure network services over an insecure network. Kinsta provides SSH access on all of our hosting plans. SSH access allows you to log into a command prompt, perform common sysadmin tasks, and execute commands just as if you were sitting at the server itself. You can run additional tools such as Git, Composer, WP-CLI, etc.
If you’re on an Enterprise plan you can also use tools like npm.
Follow the directions below on how to connect to SSH on your WordPress site.
SSH Access Login Info
To connect to SSH you’ll need the following pieces of information:
- server address (IP address)
- username (SFTP Username, not your email address)
- password
- port (we take security seriously here at Kinsta, each site uses a different port)
Kinsta customers can find this information under the site’s Info tab within your MyKinsta dashboard (as seen below).
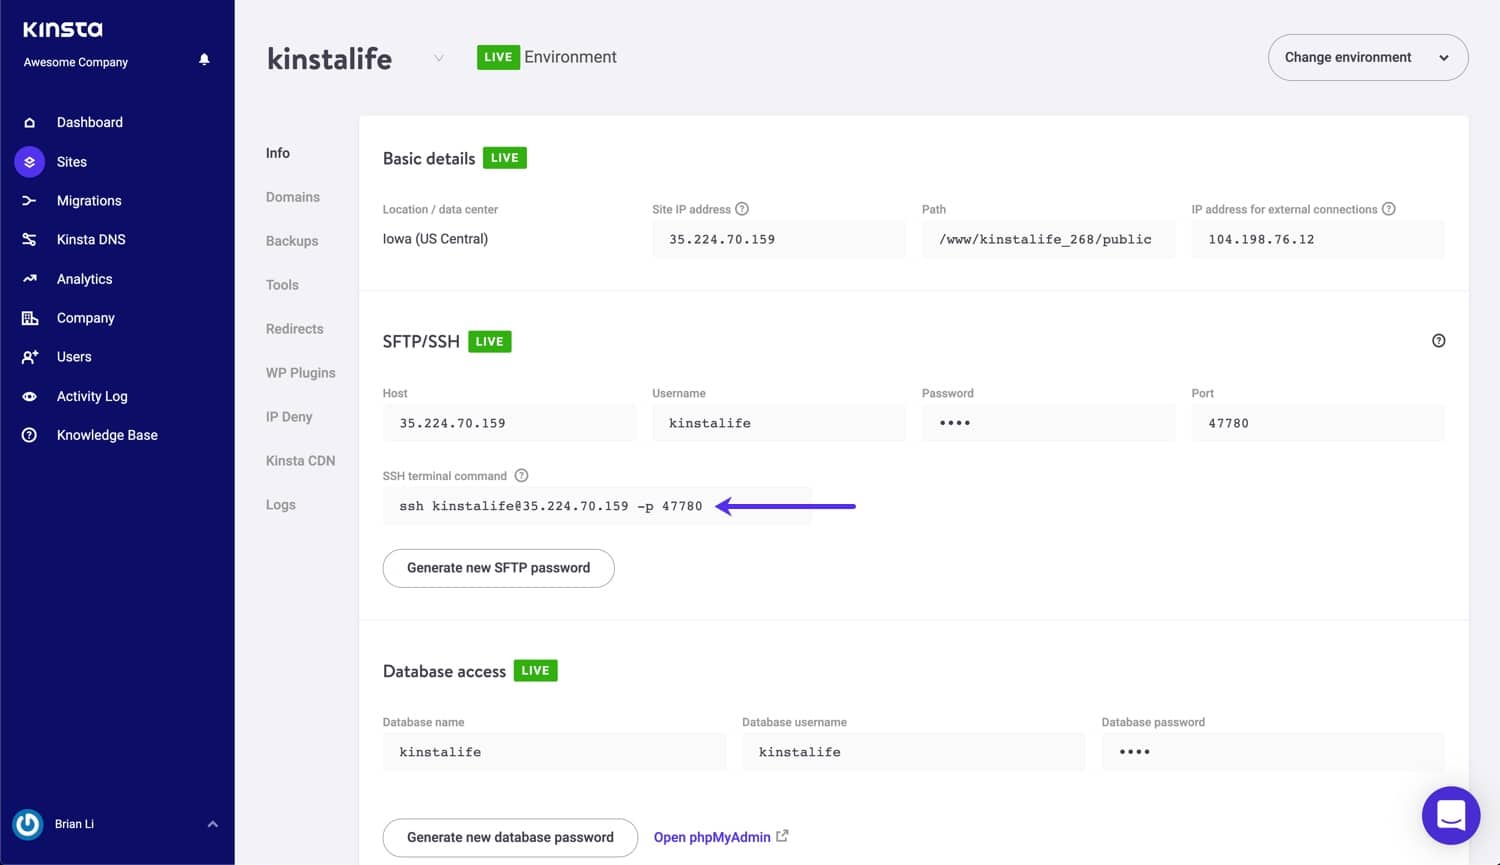
SSH terminal command in MyKinsta.
How to Connect to SSH on Windows
For those of you running Windows, you will need a terminal client to connect to SSH.
Step 1
We recommend downloading the free PuTTY client. Grab the .msi installer as this also includes PuTTYgen. If you want to use SSH keys later down the road, you will need this.
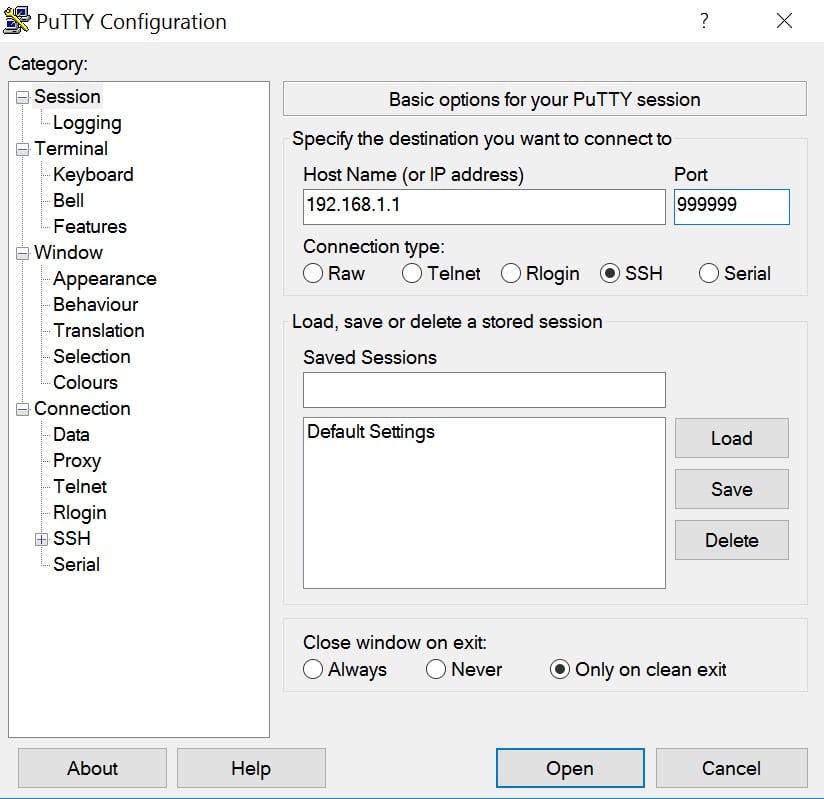
Step 2
Launch PuTTY and input your host name (Kinsta IP Address) and the unique port number. Then click “Open.”
Step 3
If this is your first time connecting you will most likely see a rsa2 key prompt. Go ahead and click “Yes” which will trust the host in the future.
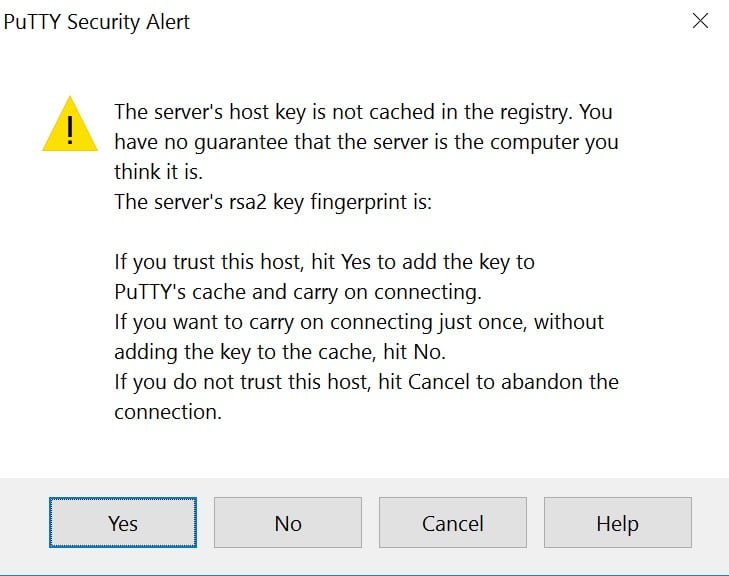
Putty Security Alert
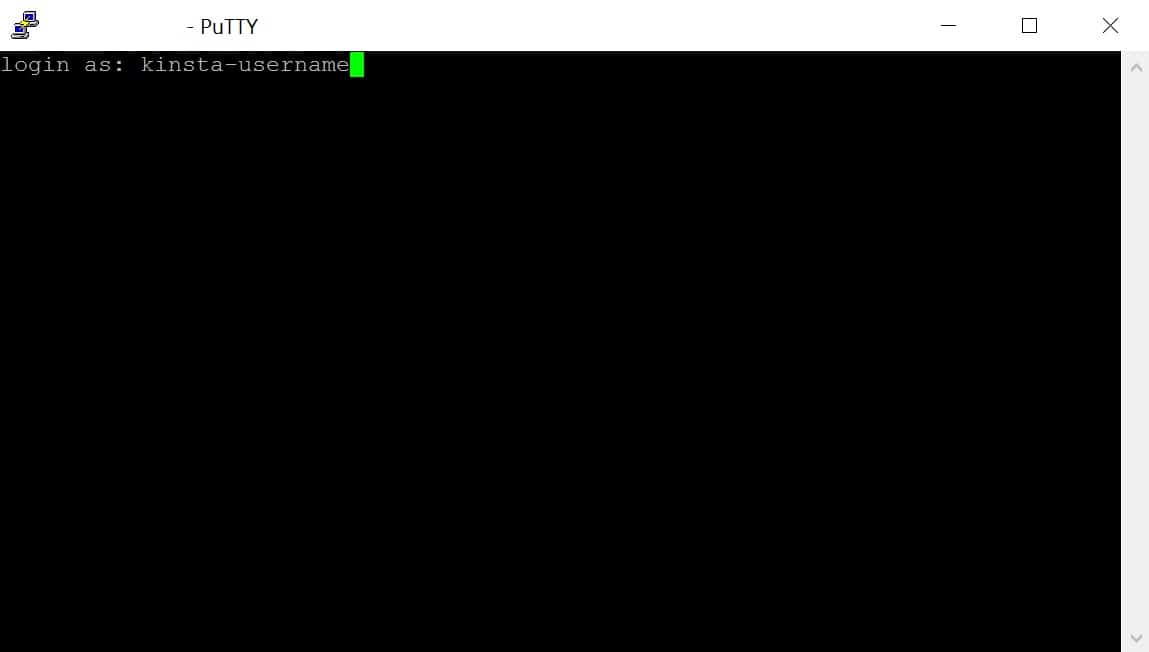
Step 4
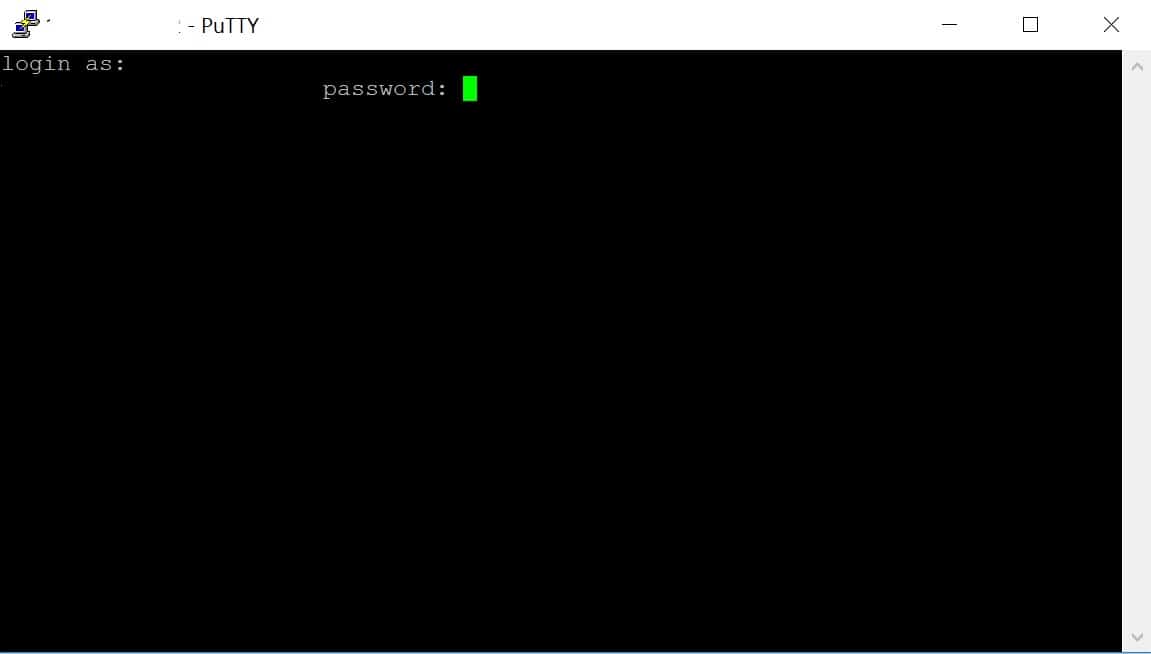
You will need to input your Kinsta username and press Enter.
Step 5
You will then be prompted to enter your password. Then press Enter.
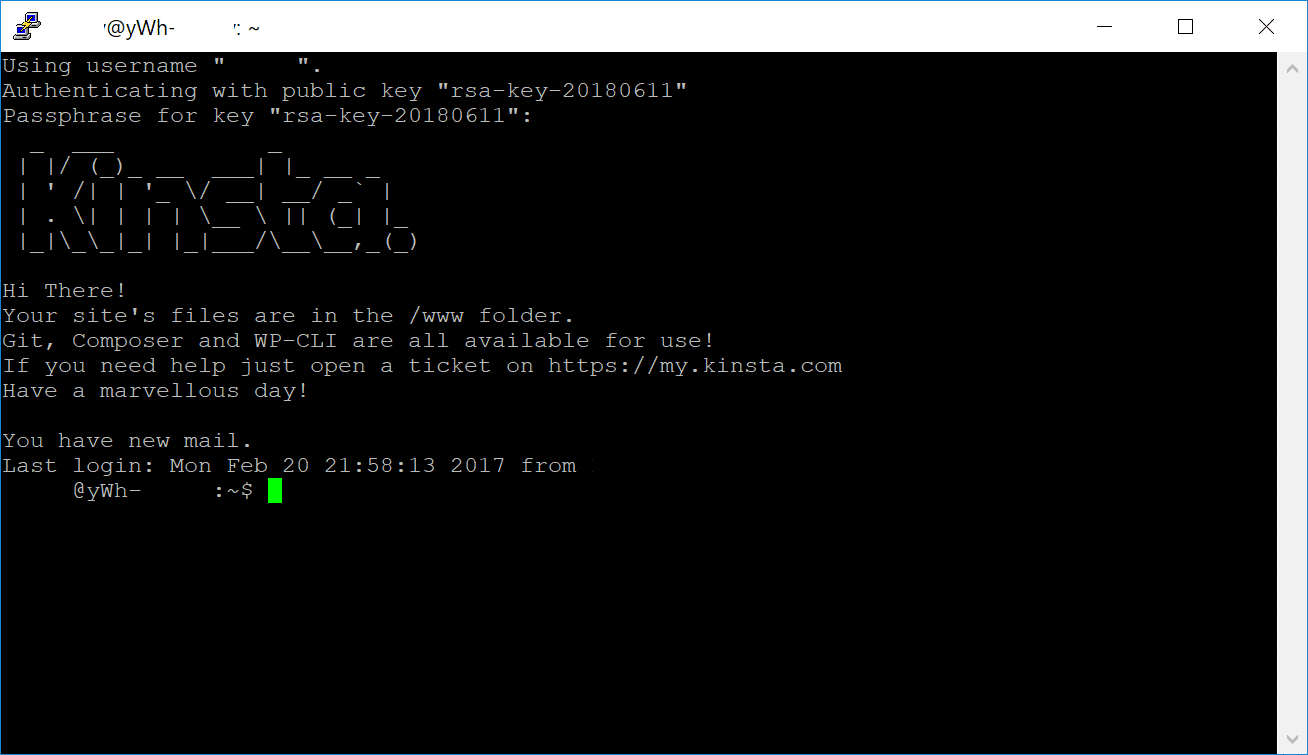
You are now connected via SSH to your WordPress site.
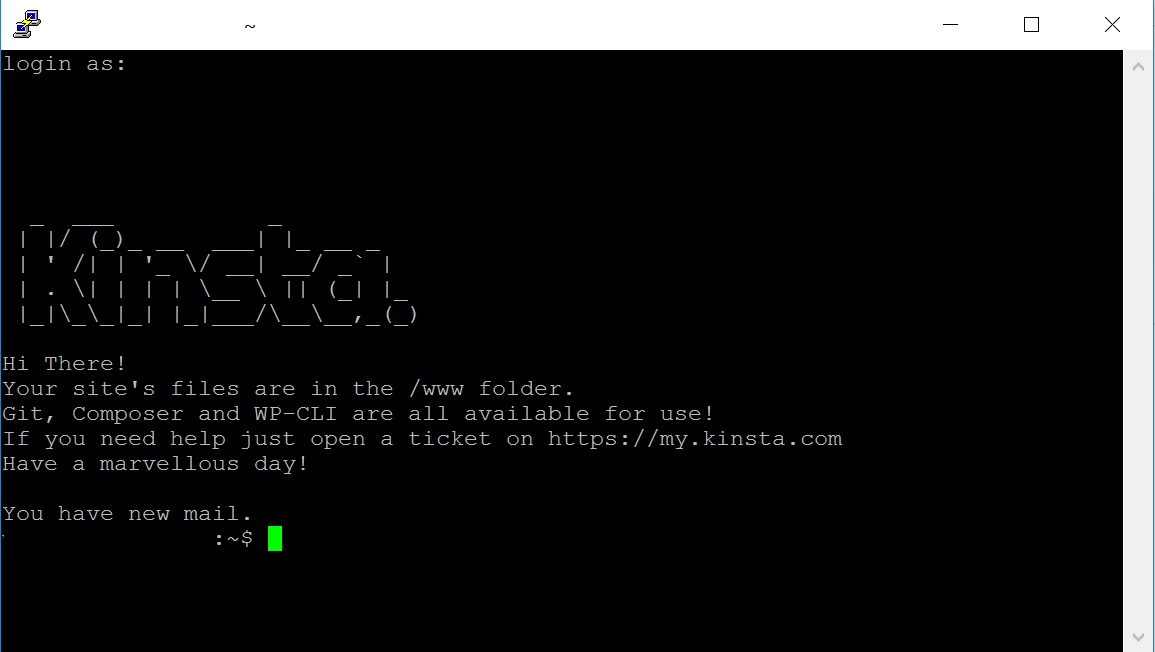
Putty Successful Login
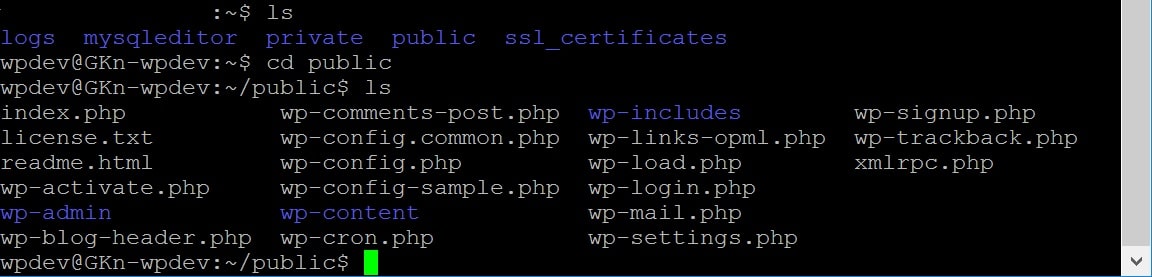
You can then run commands such as “ls” or “cd” to list items and navigate throughout your site’s directory. WP-CLI is also installed by default on all sites.
How to Connect to SSH on Mac/Linux
On Mac or Linux it is actually a lot easier to connect to SSH because the OS already has a terminal built into it.
Step 1
All you need to do is open the terminal. Navigate to Applications > Utilities and double-click on Terminal.
Step 2
Then enter the command in the following form (You can copy/paste this directly from your MyKinsta dashboard):
How to Generate SSH Key Pair on Windows
You can connect to SSH with your username and password, or you can generate an SSH key pair. SSH keys provide a more secure way of logging into a server and eliminate the need for a password. Although you can further protect your login by adding a passphrase.
Step 1
Launch PuTTYgen. If you haven’t download it yet you can grab it here.
Step 2
The default parameters should be fine in most configurations. Click on “Generate.”
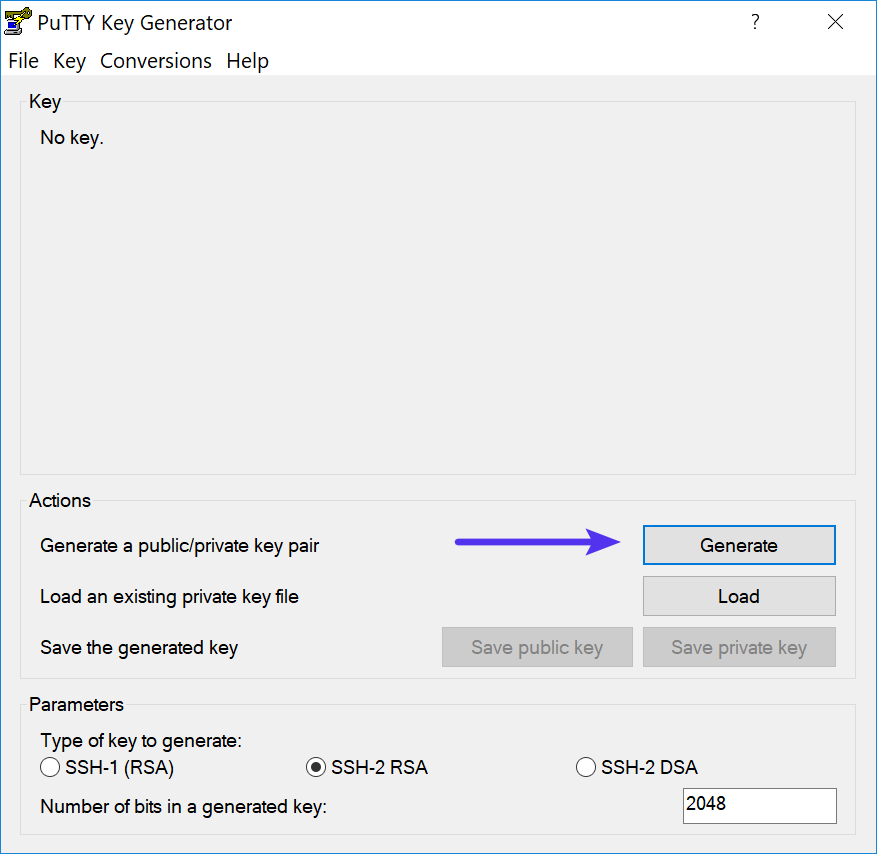
PuTTY Key Generator
Step 3
You will need to move your mouse around to generate some randomness.
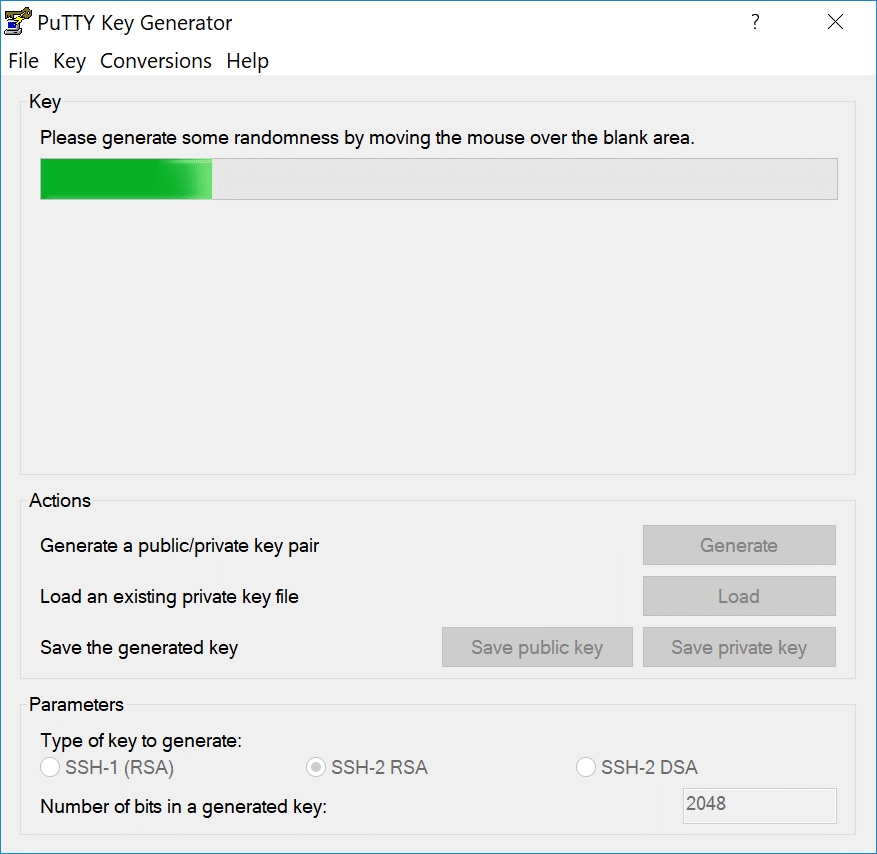
PuTTYgen move mouse around
Step 4
Save both your public (.txt) and private key (.ppk). Important: Keep your private key safe and don’t share it with anyone.
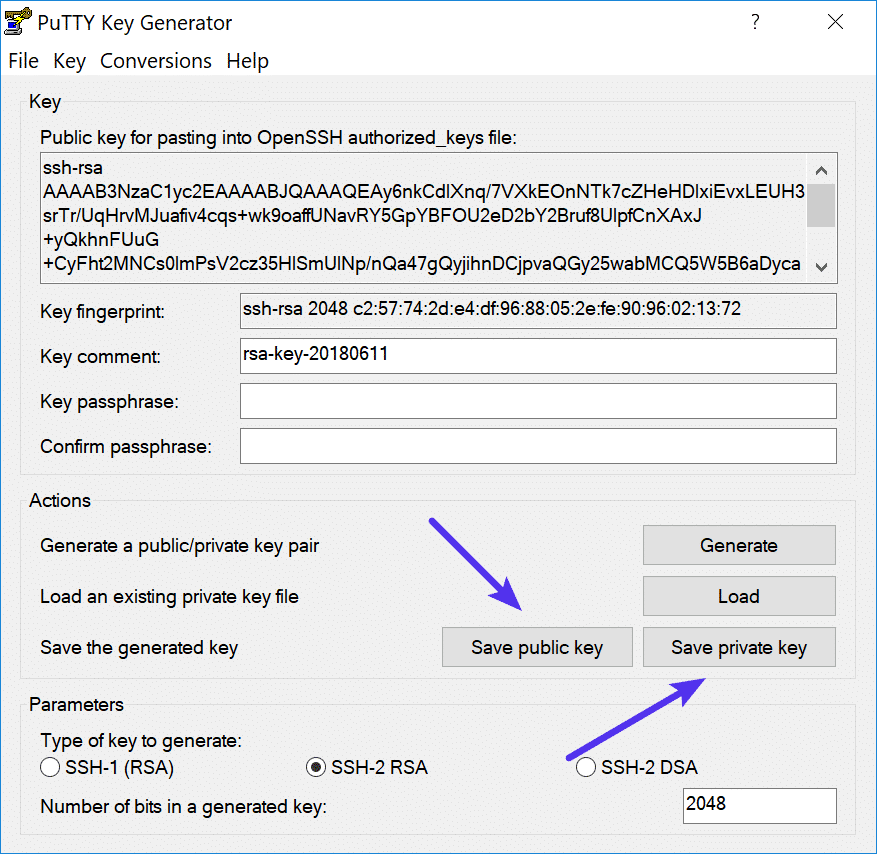
Save public and private keys
Step 5
Leave the PuTTY window open and skip down to where you add your public key to MyKinsta.
How to Generate SSH Key Pair on MAC/Linux
Step 1
Launch the Terminal from “Applications → Utilities → Terminal.”
Sign Up For the Newsletter
We grew our traffic 1,187% with WordPress. We’ll show you how.
Join 20,000+ others who get our weekly newsletter with insider WordPress tips!
Step 2
Use the following command to start the key generation.
Step 3
You will be prompted to choose a location to save your private key. If you simply leave it blank it will save it here:
The public key (.PUB) will get created in the same location.
Step 4
You will then be prompted to choose a passphrase. You can leave it empty if you don’t want to use a passphrase.
How to Add SSH Keys in MyKinsta
Now that you have your SSH keys, you can upload your public key in the MyKinsta dashboard.
Step 1
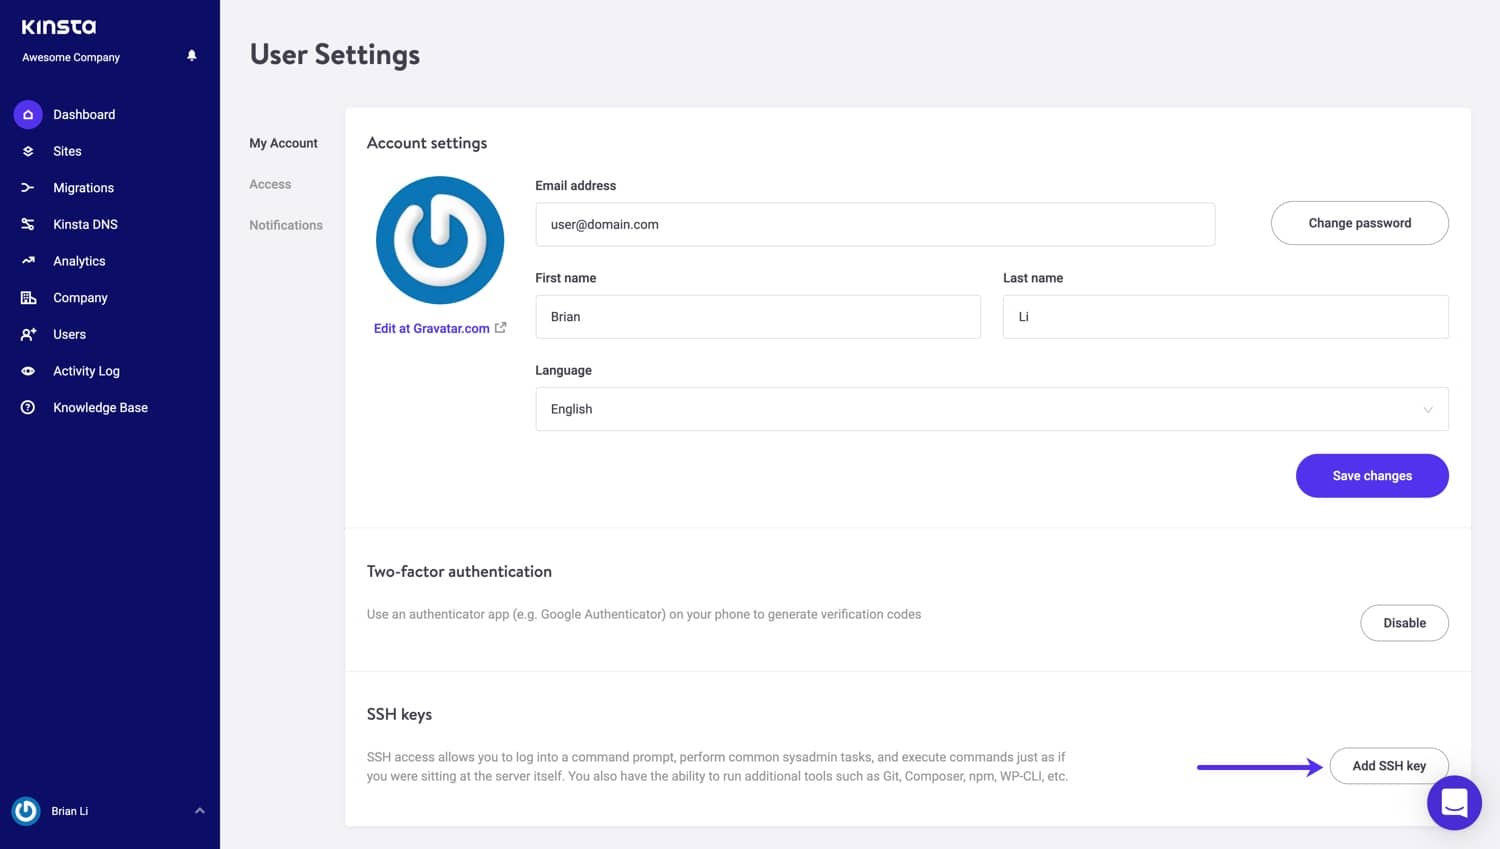
Click into your user profile on the bottom left-hand side, and click on “User Settings.”

MyKinsta user settings.
Step 2
Click on “Add SSH key.”
Add SSH key in MyKinsta.
Step 3
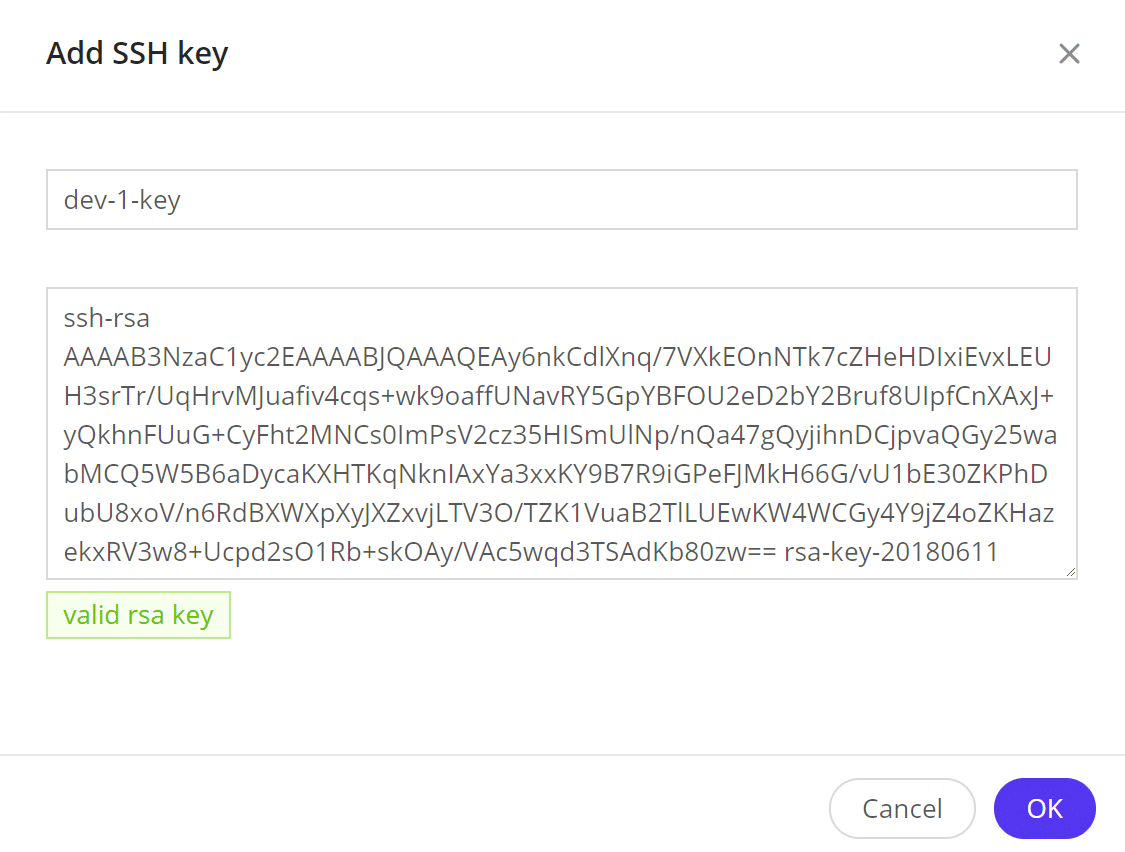
Choose a label and paste your public key.
- If you’re running on Windows copy and paste the public key directly from PuTTYgen.
- If you’re running on Mac/Linux you can copy your public key to your clipboard first by using the following command: pbcopy
After you paste your public key you should see a green confirmation that says “valid RSA key.” Then click “OK.”
How to Connect to SSH on Windows With SSH Keys
Step 1
Launch PuTTY and input your host name (Kinsta IP Address) and the unique port number.
Step 2
Under “Connection → Data” enter your Kinsta username in the “Auto-login username” field.
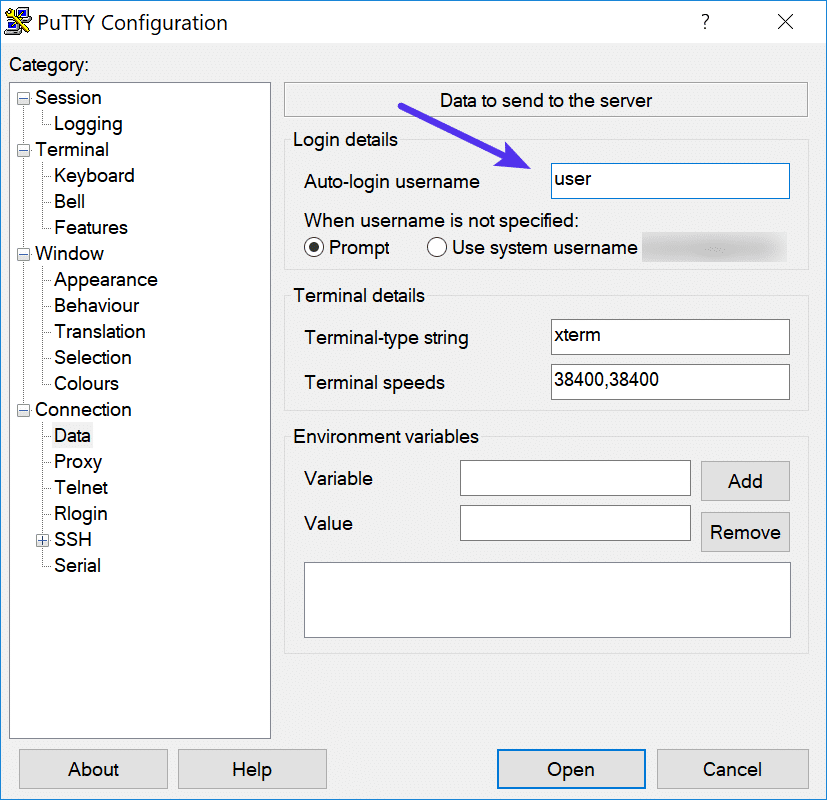
SSH auto-login username
Step 3
Under “Connection → SSH → Auth” select your private key file for authentication.
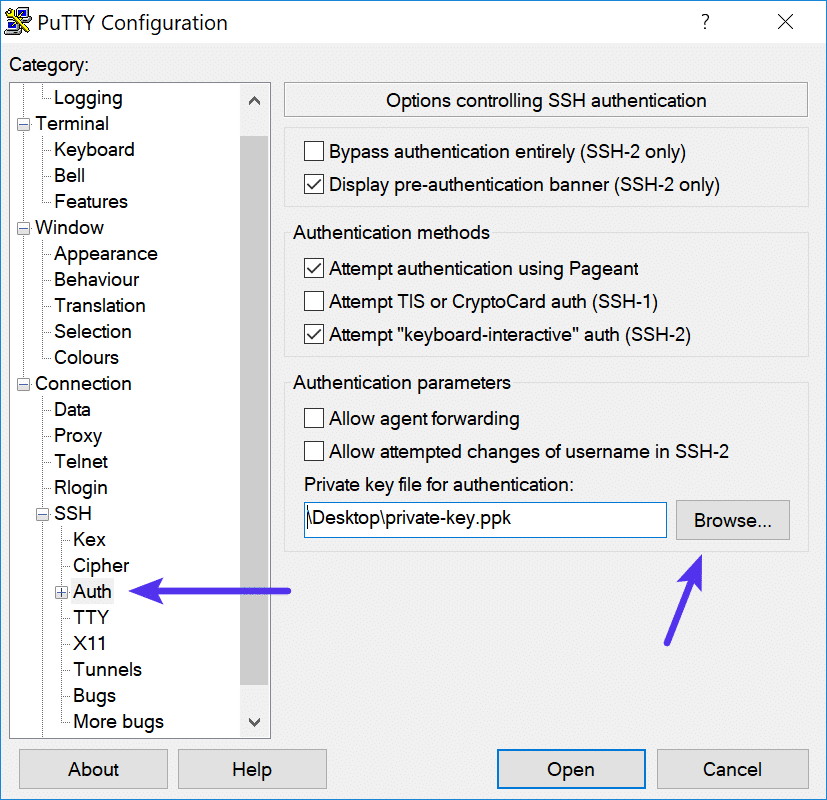
SSH private key
Step 4
Under “Session” choose a new “Saved Session” name and click on “Save.” Then click “Open.”
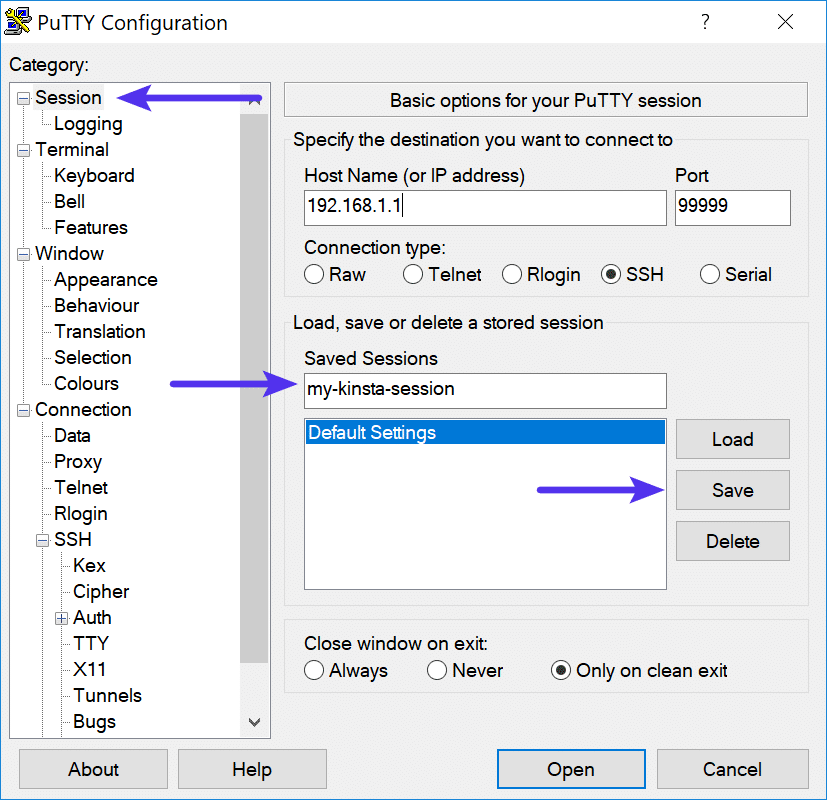
SSH save session
You will most likely see a security alert about a change in keys. Click on “Yes.”
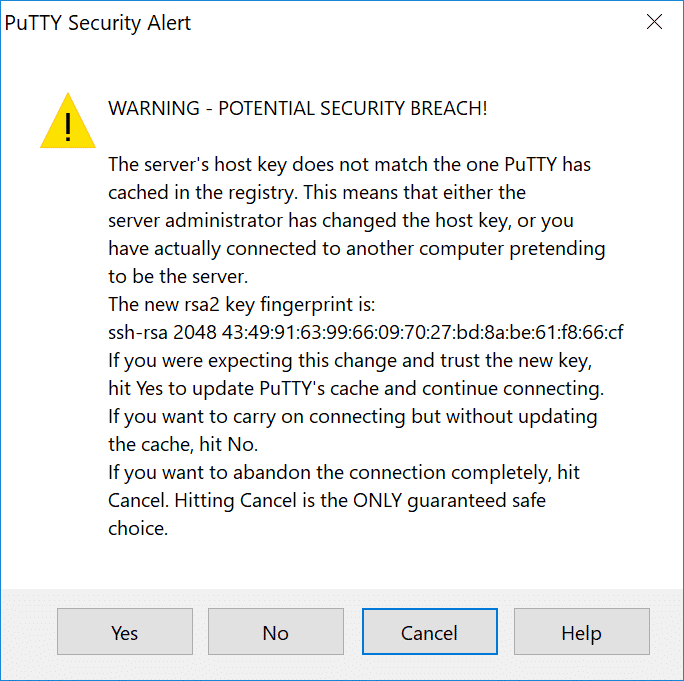
PuTTY security alert
If you set up a passphrase you will need to enter that.
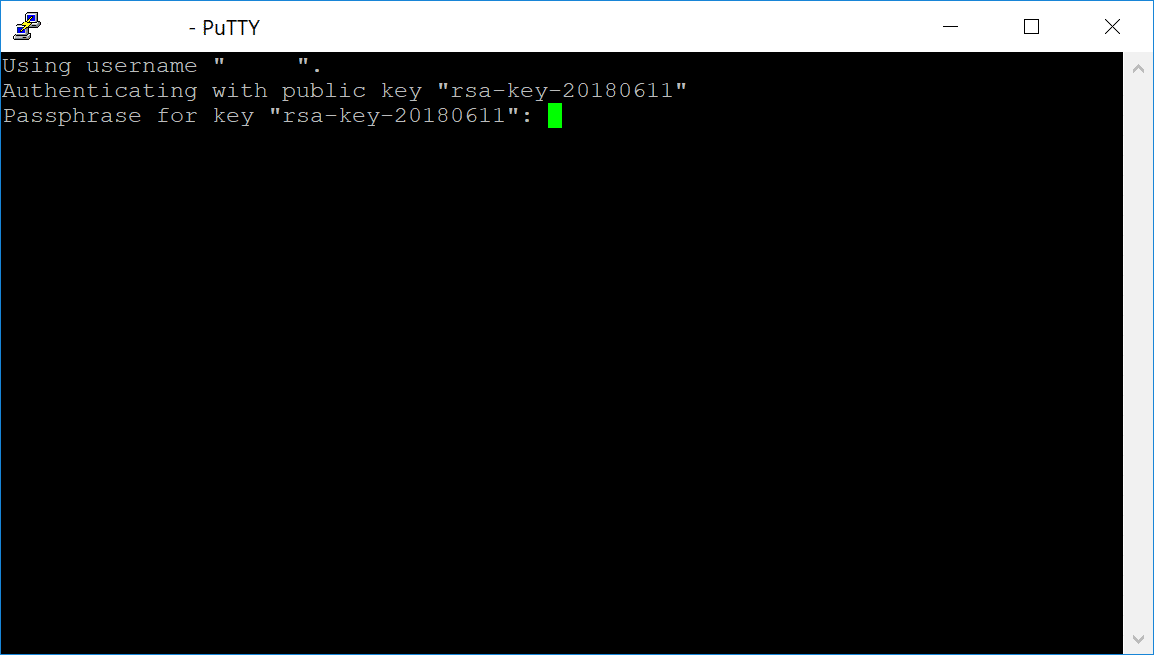
Otherwise, it will log you right in.
How to Connect to SSH on MAC/Linux With SSH Keys
Step 1
Launch the Terminal from “Applications → Utilities → Terminal.”
Step 2
You now need to load your saved private key from earlier into your SSH-agent. Use the following command:
Step 3
You will then be prompted to enter in the passphrase if you have one.
Step 4
Then enter the command in the following form (You can copy/paste this directly from your MyKinsta dashboard):
Additional Notes
If you have trouble connecting, you might need to reset your SSH password or delete entries from your known_hosts file.
If you enjoyed this tutorial, then you’ll love our support. All Kinsta’s hosting plans include 24/7 support from our veteran WordPress developers and engineers. Chat with the same team that backs our Fortune 500 clients. Check out our plans
Hand-picked related articles
Transactional Email – Can I Send Email From My WordPress Website?
I Can’t Connect via SSH or SFTP – Delete SSH known_hosts
How Do I Change My SFTP Password?
Is your WordPress site slow? Whether you’re just starting to use WordPress or are a seasoned developer you’ll find useful tips to speed up your site in this guide.


