- How to Create a System Image in Windows 10/8/7 Easily?
- AOMEI Backupper
- Key Features
- Create System Image
- Create Disk Image
- Backup Files
- Clone Hard Disk
- Automatic Backup
- AOMEI Freeware
- User Say
- What is a system image?
- When should I create a system image backup?
- How do I create a system image in Windows 10/8/7?
- How do I restore Windows from a system image?
- Wrapping things up
- How to Create a Windows 10 System Image Backup
- Create a System Image in Windows 10
- More on Windows 10 Backup and Recovery Tools
How to Create a System Image in Windows 10/8/7 Easily?

December 8, 2020
You will learn how to create a system image for Windows 10/8/7. A complete third-party backup software like AOMEI Backupper will be a better choice.
AOMEI Backupper

An easy-to-use and versatile tool offers data backup, files sync, disaster recovery, and disk clone solutions.
Key Features
Create System Image
Backup all contents in system drive to an image, including Windows and apps.
Create Disk Image
Backup entire disk to an image. Support HDD/SSD, MBR/GPT, removable drives.
Backup Files
Backup specified files to local disks, external drives or NAS/network share.
Clone Hard Disk
Clone a hard disk to another or an SSD with larger or smaller capacity.
Automatic Backup
Set & forget. Create a schedule to backup data automatically.
AOMEI Freeware
User Say
I wish to inform you that AOMEI Backupper is the best software I have used previously. Thank you so much for this free backup software.
I recently found your Windows system/data backup software-AOMEI Backupper- and I must say, this is by far the best I have tried in the last 6 months.
AOMEI Backupper is awesome. Its team solved ttough problem for me. I think it is a unique and personal software belonging to me.
What is a system image?
A Windows 10/8/7 system image is an exact copy of the system partition or entire hard drive(if the disk only has one partition with Windows installed on), including operating system(OS), System Reserved Partition/EFI System Partition (ESP), recovery partition, boot sectors, custom settings and all programs installed & files saved on those partitions.
Then, you can restore your computer easily and quickly when it faills to boot. And you don’t need to reinstall Windows and reinstalled programs. This is the greatest advantages of system image. Built-in system image backup software and 3rd party software are the same.
But sometimes you may feel frustrated with the weak compatibility of the built-in backup and restore software, it only allows you to backup and restore Windows 10/8/7 system image the same computer (for detailed steps, go to Create Windows 10 System Image Backup with 2 Free Ways) or at least computer with similar hardware and you cannot use it to restore image to a different computer with dissimilar hardware.
Therfore, if you want to create system image Windows 10/8/7 for another computer, you could consider using third-party Windows backup and restore software like AOMEI Backupper. In addition, it usually has more advanced features, such as, daily/weekly/monthly backup, wake the compuert to run scheduled task, full/incremental backup/differential backup, normal and high compression level, email notification, etc.
When should I create a system image backup?
A system image is very useful for OS development, hard drive upgrade, performance optimization, etc, so it is necessary to create a system image backup in Windows 10/8/7. Here are some situations:
▶ You just finished a clean install of Windows and most commonly used software on your computer. It’s probably the best time point to image system when everything is clean and runs smoothly. Once something bad happens later, you will be able to bring computer to its original state.
в–¶ You want to replace your slower mechanical hard drive with a speedy SSD. You can create a system image, swap hard drive out for SSD and restore system image to SSD. If hard drive and SSD can be connected to your computer simultaneously, you can migrate OS from HDD to SSD by system clone (in AOMEI Backupper Professional), saving much time and effort.
в–¶ When receiving some error warnings, such as «SMART failure predicted on hard disk», «Hard disk failure is imminent», and «Windows detected a hard disk problem», you need to create a system image or disk image at once. That’s because those messages indicate your hard disk is failing.
How do I create a system image in Windows 10/8/7?
As mentioned earlier, Windows has a built-in backup and restore software, it only works properly on the same computer or computer with similar hardware. And it still has some other limitations, for example, you cannot set up multiple schedules; the function “Create a system image” is not working for USB drive; the disk saving system image must be formatted as NTFS, etc. In addition, it’s not suitable for normal backup, which will include files you don’t need.
Therefore, It’s suggested to use a complete third-party Windows backup software to create a system image in Windows 10/8/7 or backup specific files and folders. Here you will use AOMEI Backupper Standard to make system image in simple steps. It breaks those limits in backup process and allows you to restore computer to different hardware with «Universal Restore» feature in AOMEI Backupper Professional. If needed, please upgrade the freeware at first.
In the first of place, download AOMEI Backupper Standard and install it on your computer. Then, prepare an external hard drive and be sure it can be detected by Windows, so you can use it to store Windows 10/8/7 system image.
Well then, follow the detailed steps below to create a system image backup with AOMEI Backupper Standard.
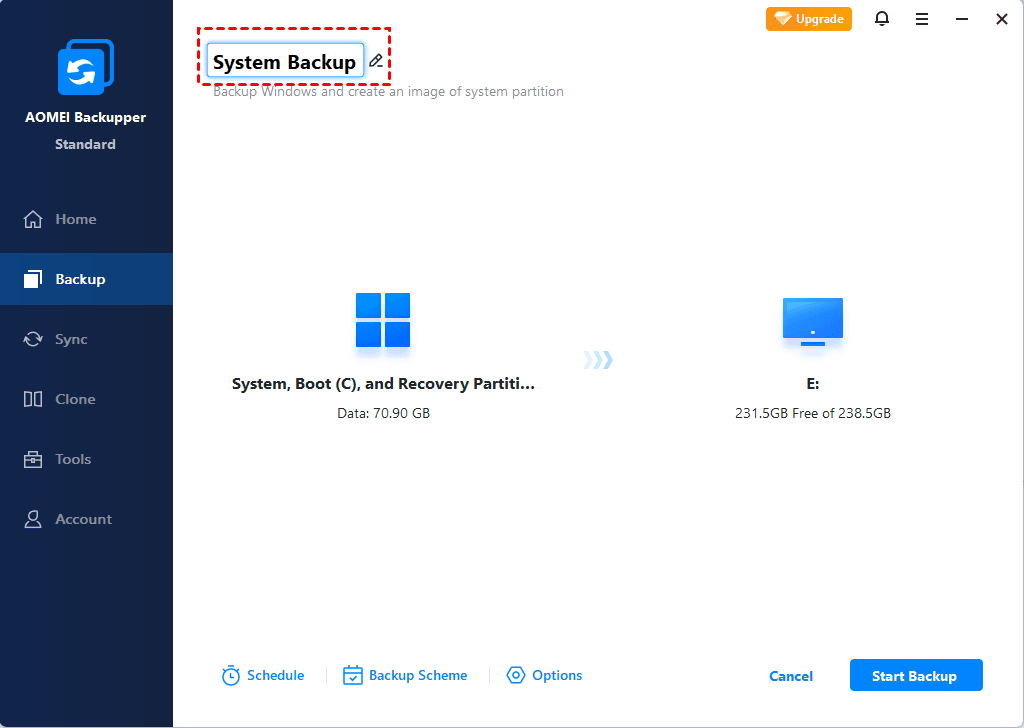
Step 1. Move your mouse pointer to «Backup» and click on it. Then, choose «System Backup» from the right list.

Step 2. You are able to edit the default «Task Name». You will find the program has automatically chosen the partitions required for a system image. Thus, you don’t need to worry about missing any boot-related partition(s), especially useful for green hands.
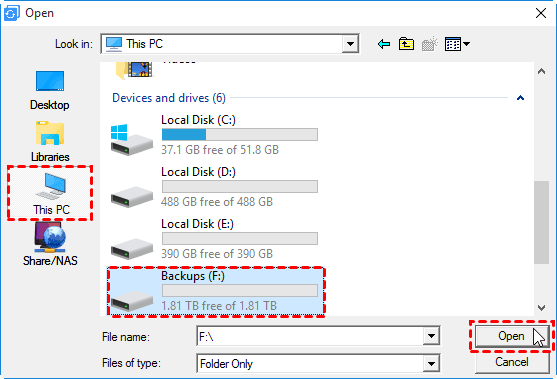
Step 3. Click the second column to choose a destination location.

In the pop-up window, you can choose from:
«This PC» (or «Computer«): to save a system image to a local disk, an external hard drive, a USB flash drive or CD/DVD. Among them, creating a system image for Windows 10/8/7 on USB is not possible with built-in tool.
«Share/NAS«: to save a system image to NAS devices or network share.
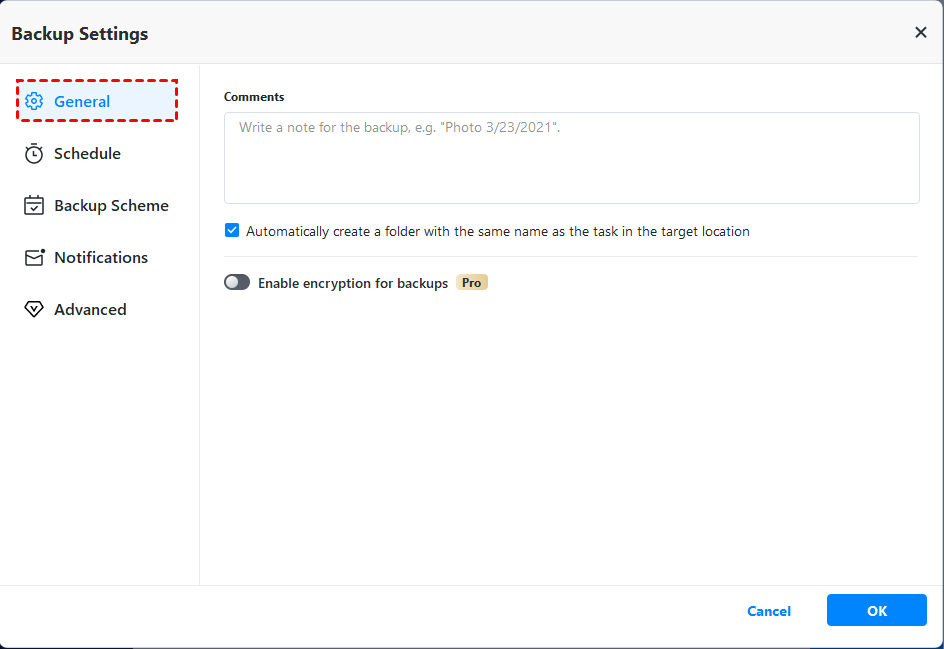
Step 4. (Optional) Choose daily/weekly/monthly backup plus full/incremental backup/differential backup in the «Schedule» option, so you can make sure the system image is up-to-date. Please note that the scheduled differential backup is available on AOMEI Backupper Professional or advanced version.

Besides, you can configure backup settings by clicking «Options» next to «Schedule». For example, write a comment, and compress the system image with normal or high compression level, etc.
Step 5. After finishing all your settings, just click «Start Backup» to begin creating Windows 10/8/7 system image. Please wait patiently until the backup task completes, the backup speed depends on how many data you have and the writting & reading speed of source disk and target disk.

How do I restore Windows from a system image?
AOMEI Backupper Standard still provides fast and flexible system image recovery solutions to help you get computer back in a very short time. Please check them in the following.
If your computer is still bootable, you can click «Restore» -> tap on «Select Task» -> select backup image you want to restore -> select «Restore this system backup» and «Restore system to other location«-> select the new hard drive or SSD and finally click «Start Backup«.
That’s it. If you cannot see any backup image using Select Task option, please go back and use «Select Image File» to manually choose the system backup image.

If your system crashes or disk fails, you can use “Create Bootable Media” to make a Windows PE bootable USB or CD to start up computer and then perform system image recovery.

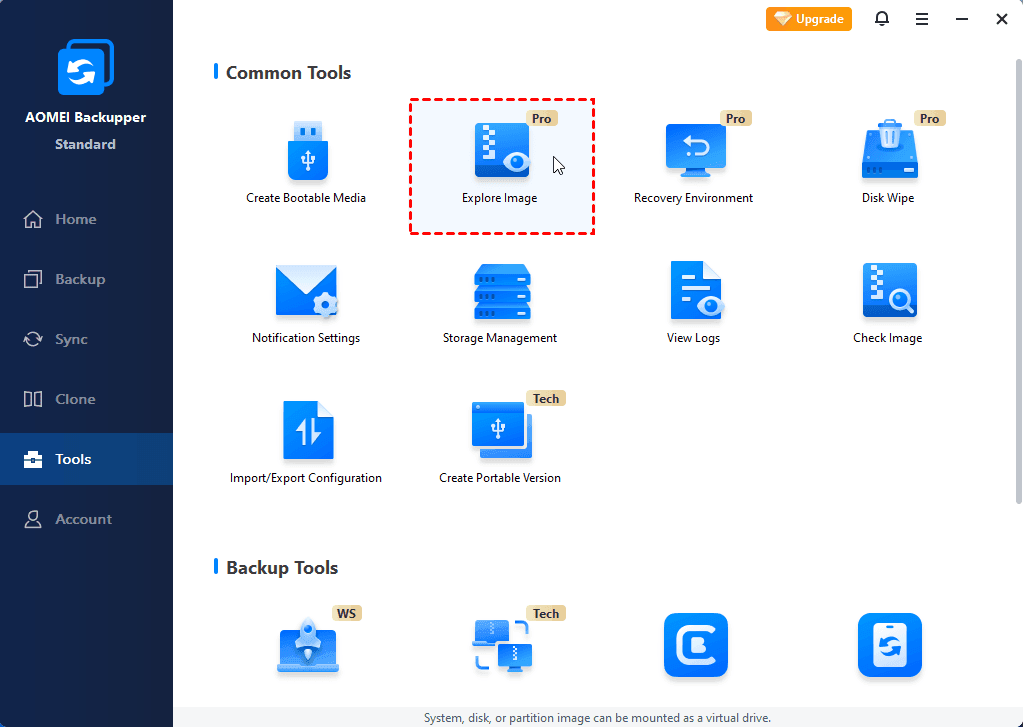
If you only want to restore individual files from the system image rather than the entire system, you can use “Explore Image” to mount system image as a virtual partition and copy data.
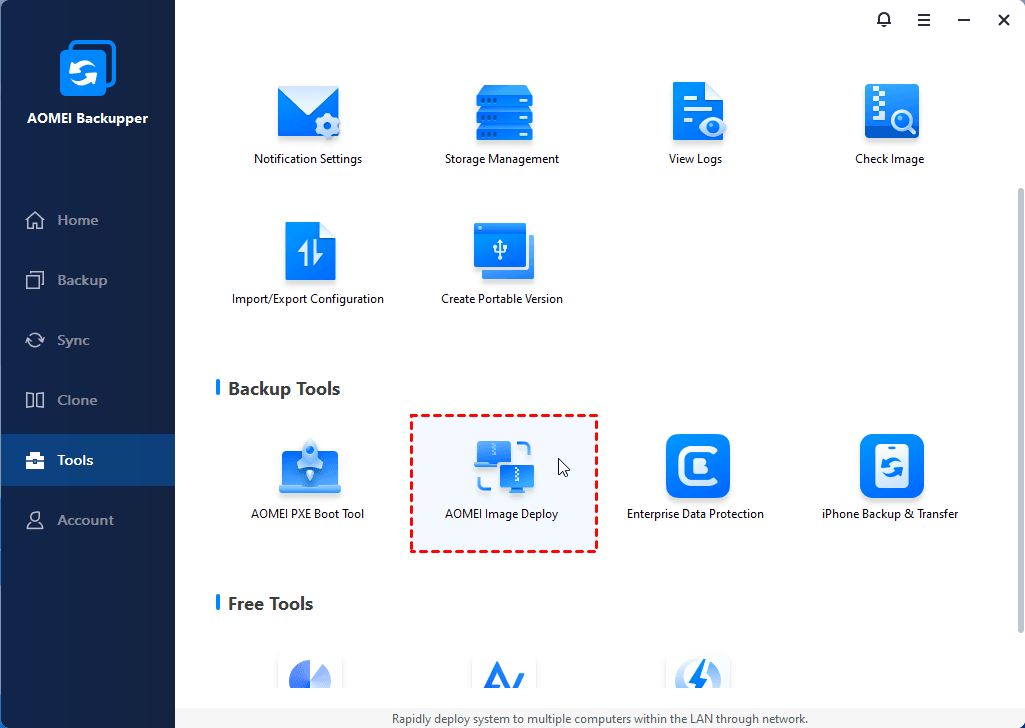
If you want to deploy a system image to multiple computers simultaneously instead of performing manual restoration one by one, you can use AOMEI Image Deploy(supported by AOMEI Backupper TechPlus) to perform system deployment.
Note: If the system image is used on another computer with dissimilar hardware, please check «Universal Restore» at the final confirmation page.
Wrapping things up
Creating a system image in Windows 10/8/7 is essential for computer users to protect system and data on it, which can greatly reduce the risk of data loss. More, its schedule backup settings make this task simple and efficient, including daily backup, weekly backup, monthly backup, incremental backup, differential backup, even triggers, etc.
Also, you can use this software to create disk image in Windows 10/8/7 with its «Disk Backup» feature, backup specific partition(s) you want with «Partition Backup», or directly backup files with «file backup». Its features are much more than these, and truste me, it’s one of the most powerful software to protect your computer. Please download it to explore yourself.
How to Create a Windows 10 System Image Backup


Windows 10 offers several ways to back up and recover your data. One toolset that you might be used to from Windows 7 is the ability to create a full system image backup. A system image can be used to recover files or restore your entire PC if you’re unable to boot into Windows.
It can also be used to access files in backups you might have made in Windows 7 or Windows 8.1.
Create a System Image in Windows 10
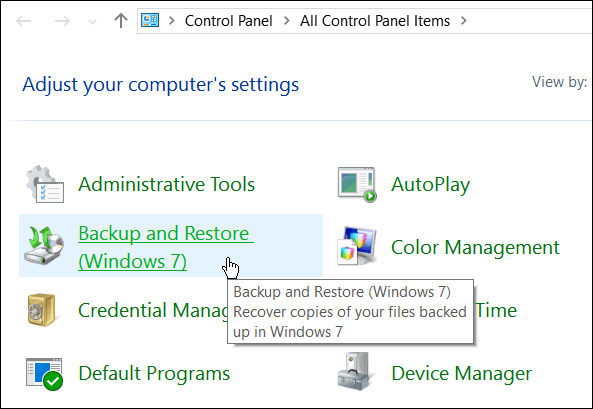
To get started hit the Windows key on your keyboard and type: control panel and choose the Control Panel app from the results. That will open the classic Control Panel that you’re used to from earlier versions of Windows.

Once you have Control Panel open, click Backup and Restore (Windows 7).
Then click the Create a system image link on the left side of the menu.

Windows will scan your computer for backup devices, and you have a few different ways to create your system image. You can use an extra internal or external drive, a network location, and you can still go “old school” and use DVDs.

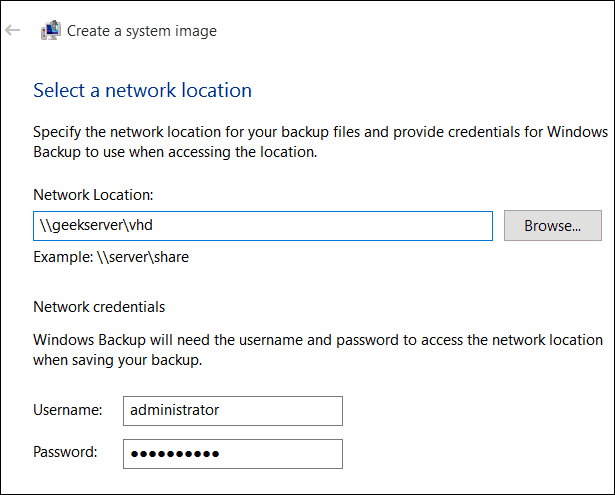
Note: Backing up to a network location like a NAS or Windows Home Server is for experienced users and takes a bit of work. Make sure that Windows is set to discover network locations, browse to the network share, and the first time you’ll need to enter your admin credentials. Unless you have a network share set up, you don’t need to worry about this option.
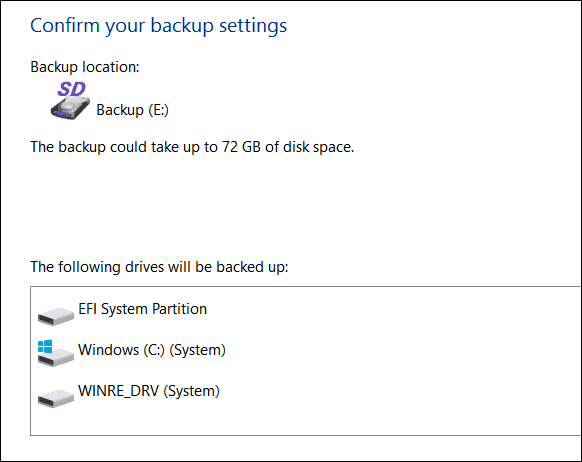
For this example I am going to use what most people would — an external drive plugged into my PC. After selecting your drive and everything looks right, select Start Backup and wait while the image is created.
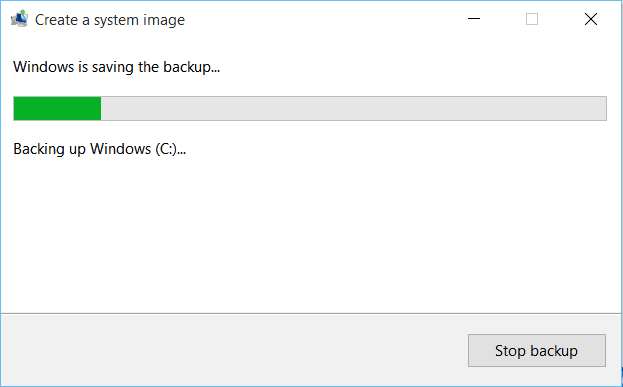
You’ll get a progress screen while the backup is being saved. The amount of time it takes will vary depending on the amount of data you have as well as your hardware.
When it completes, you will get the option to create a USB recovery drive. If you haven’t created one yet, definitely do it now so you’re prepared to recover your computer if needed.

If you’re wondering where the image is at, go into the drive or network location you used, and look for the folder called WindowsImageBackup.

More on Windows 10 Backup and Recovery Tools
Windows 10 has several new backup and recovery features that can come in quite handy if something goes awry.
There’s a PC Reset feature that allows you to restore Windows 10 while keeping your files, or even downgrade to your previous version of Windows (within the first 30 days of upgrading).
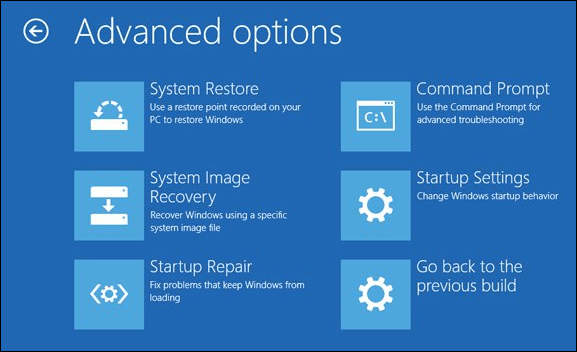
And the Advanced Recovery environment provides tools like System Restore, System Image Recovery, Startup Repair, Selective Startup, and a command prompt for advanced troubleshooting. You can access Advanced Options by holding down the Shift Key and clicking Restart.
In fact, we showed you that trick when we covered how to start Windows 10 in Safe Mode. You can also access the Advanced Options environment by creating a Windows 10 USB Recovery Drive.
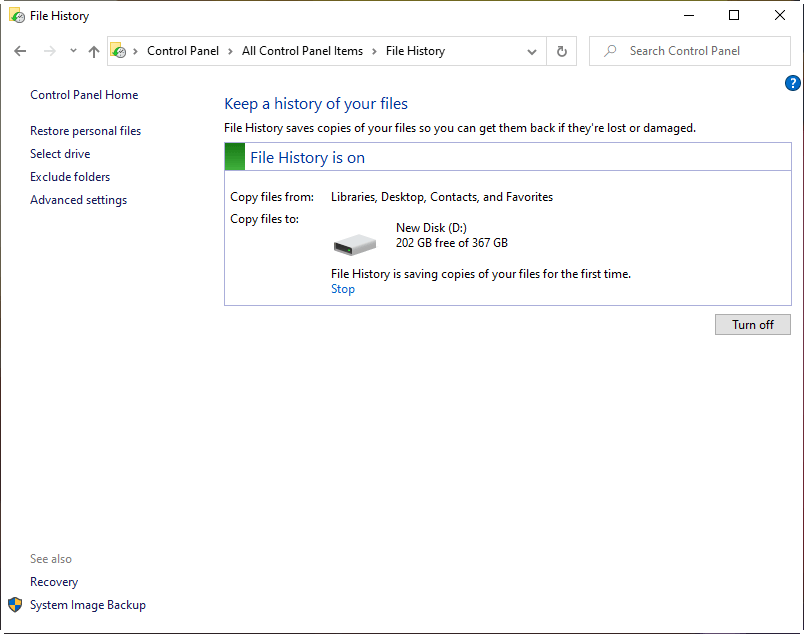
When it comes to file recovery and backup, in addition to making a System Image, there is File History that can be configured to automatically back up your most important files to a separate drive or network location. It’s a lot like Time Machine in Apple’s OS X, but for Windows.
Even with all of these options to backup and recover your data or PC, there might come a time when things are so bad (deeply embedded malware for example), or you just want a fresh start…and that’s where grabbing the Windows 10 ISO and doing a clean install comes into play.
If you haven’t upgraded your Windows PC to Windows 10 yet, make sure you back up your data first, and with that, you might want to create a system image. Check out the link that pertains to your system below for a step-by-step guide:


