- Uninstall or remove apps and programs in Windows 10
- How to remove Get Windows 10 App on Windows 7/8.1 PCs
- How to Prevent Windows 10 Upgrade on Windows 7/ 8.1
- How to Uninstall Windows 10
- Don’t like Windows 10? You can return to your previous operating system
- Take Appropriate Precautions
- How to Backup Your Data
- How to Revert to a Previous Operating System Within 10 Days of Installation
- If You Don’t See the Go Back Option
- How to Remove Windows 10 and Reinstall Another OS
- How to Uninstall the Default / Inbuilt Apps in Windows 10
- Remove Windows 10 Built in Apps using PowerShell
- Use the following commands to remove a specific app:
Uninstall or remove apps and programs in Windows 10
There are different ways to remove apps and programs, so if you can’t find the one you’re looking for, you can try another location. Note that some apps and programs are built into Windows and can’t be uninstalled. You can try to repair a program first, if it’s just not running correctly.
Uninstall from the Start menu
Select Start and look for the app or program in the list shown.
Press and hold (or right-click) on the app, then select Uninstall.
Uninstall from the Settings page
Select Start , then select Settings > Apps > Apps & features. Or just click the shortcut link at the bottom of this article.
Select the app you want to remove, and then select Uninstall.
Uninstall from the Control Panel (for programs)
In the search box on the taskbar, type Control Panel and select it from the results.
Select Programs > Programs and Features.
Press and hold (or right-click) on the program you want to remove and select Uninstall or Uninstall/ Change. Then follow the directions on the screen.
If you get an error message when you’re uninstalling, try the Program Install and Uninstall Troubleshooter.
If you’re trying to remove malware, see Stay protected with Windows Security to find out how to run a scan. Or if you use another antivirus software program, check their virus protection options.
How to remove Get Windows 10 App on Windows 7/8.1 PCs

Windows 10 has been here since July 2015, but some users still don’t want to upgrade their systems. They prefer to stick to the current (older) version of Windows they have. But it seems that Microsoft wants you really bad to upgrade to Windows 10, so it almost forces you to do so.
We already talked about the way to prevent Windows 10 upgrades, and remove the Get Windows 10 button. This method required installing a third-party software called GWX Control Panel. And users who weren’t satisfied by the fact that Microsoft is forcing them to upgrade to Windows 10 constantly complained about this decision. So, the company decided to ‘help’ them.
Microsoft engineers recently provided a tweak which will remove Get Windows 10 app and prevent all upgrade notifications on Windows 7 and Windows 8.1.
But you should keep in mind that this is not Microsoft’s official guide, as the company probably still wants you to switch to Windows 10, but it looks like some of its employees think different (hope they’ll keep their jobs).
How to Prevent Windows 10 Upgrade on Windows 7/ 8.1
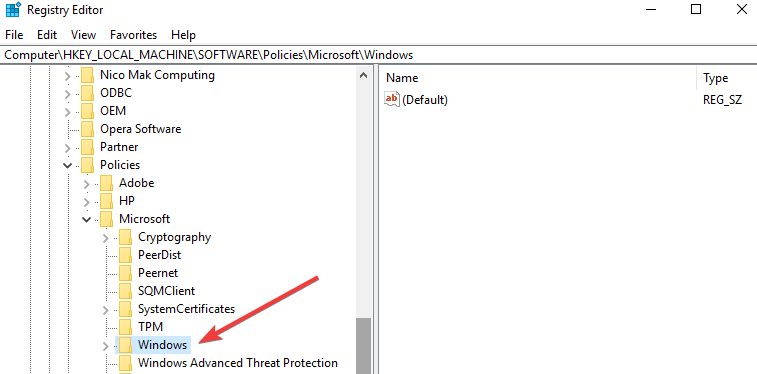
As one of Microsoft employees points out on Community forums, to prevent Windows 10 upgrade, you have to perform one registry tweak. Here’s exactly what you need to do:
- Go to Search, type regedit, and open Registry Editor
- Navigate to the following path:
- HKEY_LOCAL_MACHINESOFTWAREPoliciesMicrosoftWindowsGwx

- Create a new REG_DWORD called “DisableGwx,” and set its value to 1
- Reboot your computer
These instructions were suggested by users before, but Microsoft never used them to show people how to block Windows 10 upgrade prompts, for the very obvious reasons that you probably already know. Microsoft wants as many users of Windows 10 as possible.
But even if this action is effective, this can be only temporary, because some people are reporting that Microsoft reset their stings, and re-enabled Get Windows 10 button, with updates.
If you don’t want to bother with registry tweaks and creating DWORDs, you can simply download GWX Control Panel, because it basically does the same thing.
But we can’t tell you how long it will work because it looks like preventing Windows 10 upgrade becomes harder and harder with new system updates.
If you don’t want to use this Registry Tweak, you can try other methods, such as:
- Disable the Windows Update Service from Services
- Set your internet connection on a metered connection
Many Windows 10 users want to block system updates as well. So, it seems that this attitude is not valid only for Windows 7 or Windows 8.1 users. Even Windows 10 users prefer to use an older Windows 10 version rather than installing a new one.
If you upgraded to Windows 10 and you want to roll back to Windows 7 or Windows 8.1, check out this guide to learn what are the steps to follow.
How to Uninstall Windows 10
Don’t like Windows 10? You can return to your previous operating system
:max_bytes(150000):strip_icc()/JoliBallew-d00245b1a8a84e8592739e87c8546bd7.jpg)
If you upgraded your computer to Windows 10 and have since decided you don’t like it, you can return the PC to its previous operating system. How you remove Windows 10 depends on how much time has elapsed since you switched, though. If it’s within 10 days, a Go Back option makes it easy to revert to Windows 8.1 or even Windows 7. If it’s been longer than that, or if the installation was a clean one and not an upgrade, it’s a little more complicated.
As of January 2020, Microsoft is no longer supporting Windows 7. We recommend upgrading to Windows 10 to continue receiving security updates and technical support.
Take Appropriate Precautions
Before you downgrade to Windows 7 or revert back to Windows 8.1, you need to back up all the personal data you have on your Windows 10 machine. Remember, whether or not that data would or could be restored during the reversion process isn’t important. It’s always better to err on the side of caution when performing tasks like these.
How to Backup Your Data
There are many ways to back up data before you uninstall Windows 10. You can manually copy your files to OneDrive, to an external network drive, or a physical backup device like a USB drive. Once you’ve reinstalled your older OS, you can copy those files back to your computer. You can also use the Windows 10 backup tool if you like, although be wary about using this as the sole backup option. You might run into compatibility issues with an older OS while trying to restore.
In addition, you may want to back up program installation files for the applications you want to continue using. Third-party applications won’t be reinstalled during the reversion process. If you downloaded them from the internet, the executable files may be in your Downloads folder. You can always re-download the program files, though. You might have older programs on DVDs too, so look for those before continuing. If any of these programs require a product key, find that as well.
Finally, locate your Windows product key. This is the key for Windows 7 or 8.1, not Windows 10. This will be on the original packaging or in an email. It could be on a sticker on the back of your computer.
If you can’t find it, consider a free product key finder program.
How to Revert to a Previous Operating System Within 10 Days of Installation
Windows 10 keeps your old operating system on the hard drive for 10 days after installation, so you can revert to Windows 7 or downgrade to Windows 8.1. If you’re within that 10-day window, you can revert to that older OS from Settings.
To locate the Go Back to Windows option and use it:
Open Settings. (It’s the cog icon in the Start menu.)
:max_bytes(150000):strip_icc()/005-change-default-download-location-windows-10-4587317-ed009e660cfd4b54bc5c46e959e80d33.jpg)
Select Update & Security.
:max_bytes(150000):strip_icc()/001-turn-off-windows-defender-4165378-29d8ba33237246a18f625bd7b8e6e980.jpg)
Select Recovery.
:max_bytes(150000):strip_icc()/001-uninstall-windows-10-4153528-7fed3db52d684bbd96cc45bbacbb2aab.jpg)
Select either Go Back to Windows 7 or Go Back to Windows 8.1, as applicable.
Follow the prompts to complete the restoration process.
If You Don’t See the Go Back Option
If you don’t see the Go Back option, it may be because the upgrade took place more than 10 days ago, the older files were erased during a Disk Cleanup session, or you performed a clean installation instead of an upgrade. A clean installation erases all of the data on the hard drive, so there’s nothing to revert back to. If this is the case, follow the steps in the next section.
How to Remove Windows 10 and Reinstall Another OS
If the Go Back option isn’t available, you have to work a little harder to get your old operating system back. As noted earlier, you should first backup all of your files and personal folders. Be vigilant here; when you perform these steps, you’ll either be returning your computer to factory settings or installing a clean copy of your previous operating system. There won’t be any personal data (or third-party programs) on the machine after you finish. You’ll have to put that data back yourself.
With your data backed up, decide how you’re going to perform the installation of the previous operating system. If you know there’s a partition on your computer with a factory image, you can use that. Unfortunately, there might not be any way to know that until you follow the steps outlined here. Otherwise (or if you aren’t sure), you need to find your installation DVD or recovery DVD, or create a USB drive, that contains the installation files before you start.
To create your own installation media, download the disk image for Windows 7 or Windows 8.1 and save that to your Windows 10 computer. Then, use the Windows USB/DVD Download Tool to create the media. This is a wizard and guides you through the process.
With your data backed up and installation files at hand:
Open Settings.
Go to Update & Security.
Click Recovery.
Under the Advanced Startup section, select the Restart Now button. Your PC will reboot and start up from a disc or device (like a USB drive).
:max_bytes(150000):strip_icc()/002-uninstall-windows-10-4153528-14ff2b337345437391d0e342eff071af.jpg)
Select Use a Device.
Navigate to the factory partition, the USB drive, or the DVD drive as applicable.
Follow the on-screen prompts to complete the installation.
How to Uninstall the Default / Inbuilt Apps in Windows 10
Some apps can be easily uninstalled through the normal way using the windows control panel . Simply right click on the app and then uninstall them. On touch sensitive screens you need to long press on the app icon and the same menu will appear, where you need to tap uninstall. This trick helps to uninstall these apps – Get Started, Get Office, Get Skype, Money, Phone Companion, Solitaire, News, Sports, Bloatware apps that come with every device by the manufacturer.
But some inbuilt apps are not easy to uninstall. In this case method is useful to remove / uninstall / reinstall an inbuilt or default apps / software of Windows 10.
Remove Windows 10 Built in Apps using PowerShell
Windows PowerShell lets you uninstall many other apps with the exception of Microsoft Edge. Open the start menu, Search PowerShell and then run this program as an administrator. Just right click on the program and select the option.
You can also press Ctrl+shift+enter to run it as an administrator. PowerShell responds to specific commands for particular apps. You can utilize the Get-AppxPackage or Remove-AppxPackage commands to remove the built-in apps from Windows 10. If you want to delete an app, then in addition to these commands you will also need to provide info such as PackageFullName (the full package name of the relevant app).
Run the following command to get a list of all installed apps in Windows 10
This command will display all the installed apps with all their specific details and their full names which we require to uninstall them. We need the PackageFullName of the relevant apps so we run the following command to find out their names: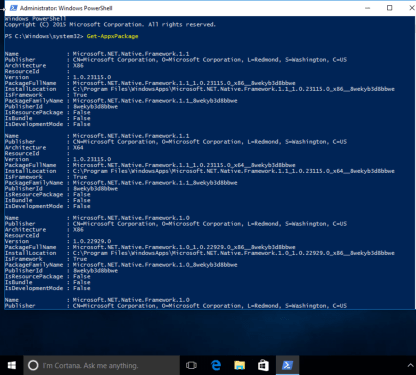
Get-AppxPackage | Select Name , PackageFullName
This command will show the name of the app and the PackageFullName and omit the undesired information.
To remove all inbuilt / default app from all user accounts in win 10
To remove all modern apps from system account
Use the following commands to remove a specific app:
Uninstall Skype app
Uninstall Sway
Uninstall Phone:
Uninstall Phone Companion:
Uninstall Phone and Phone Companion apps together:
Uninstall Calendar and Mail apps together:
Uninstall People:
Uninstall Groove Music:
Uninstall Movies & TV:
Uninstall Groove Music and Movies & TV apps together:
Uninstall Money:
Uninstall News:
Uninstall Sports:
Uninstall Weather:
Uninstall Money, News, Sports and Weather apps together:
Uninstall OneNote:
Uninstall Alarms & Clock:
Uninstall Calculator:
Uninstall Camera:
Uninstall Photos:
Uninstall Maps:
Uninstall Voice Recorder:
Uninstall Xbox:
Uninstall Microsoft Solitaire Collection:
Uninstall Get Office:
Uninstall Get Skype:
Uninstall Get Started:
Uninstall 3D Builder:
Uninstall Microsoft Store (Windows apps store):
Disable Microsoft Windows Defender
Enable Microsoft Windows Defender
This is an easy method for removing undesired apps from your Windows 10. However, there is no real use for uninstalling these, except to reduce the number of apps from your start menu. This is because the space freed from uninstalling these apps is not very significant.
FAQ:
Q: Why we need to uninstall the pre-installed / inbuilt apps / software in Windows 10?
A: Some times we require to uninstall default or inbuilt apps of Windows 10 to troubleshoot them. Removing and then reinstalling some times fixed the issue quickly. Windows 10 comes with a variety of apps that may be useless for some people and can irritate many users. These apps occupy little space, thus deleting them is just as useless as keeping them on the computer. It is best to ignore them if you don’t want to use them. However, if you want to delete these apps, then you need to follow some steps.
Q: How to remove apps using the control panel?
A: You can follow the tutorial here Uninstall apps / software from Windows 10. It will help you to uninstall apps from Windows 10 using the control panel.


