- How to delete $windows BT ?
- Replies (4)
- Turn off, disable, or uninstall OneDrive
- Unlink OneDrive
- Hide or uninstall OneDrive
- Need more help?
- Uninstall or remove apps and programs in Windows 10
- How to delete or uninstall Windows from your PC
- 1. How to delete Windows when it is the only operating system installed
- 2. How to delete one Windows when you have multiple Windows operating systems installed in a dual-boot or multi-boot configuration
- 3. How to delete Windows when you installed it alongside a Linux distribution such as Ubuntu, in a dual-boot or multi-boot configuration
- Why did you want to remove Windows?
How to delete $windows BT ?
Replies (4)
Using Disk Cleanup tool can delete the $windows BT file. Type cleanmgr or Dick Cleanup in the search field of the Windows Start Menu and launch the program.
We’d like to confirm which version of Windows 10 you’re trying to install? Is it Home, Pro or Enterprise?
11 people found this reply helpful
Was this reply helpful?
Sorry this didn’t help.
Great! Thanks for your feedback.
How satisfied are you with this reply?
Thanks for your feedback, it helps us improve the site.
How satisfied are you with this reply?
Thanks for your feedback.
Thanks Raymond. I eventually managed to delete this file. But I had tried to use Dick Cleanup (I was amused at the typo!) but I couldn’t work out how to ensure it deleted the file. I didn’t seem to be able to isolate a specific file.
I’m using Home edition.
4 people found this reply helpful
Was this reply helpful?
Sorry this didn’t help.
Great! Thanks for your feedback.
How satisfied are you with this reply?
Thanks for your feedback, it helps us improve the site.
How satisfied are you with this reply?
Thanks for your feedback.
When you want Disk Cleanup to delete Windows Installation files/folders like this, you muse let it do an initial scan, then click the ‘Cleanup System Files’, then let it scan again, select everything in the list and click OK . . .
This will cleanup Windows Installation Files, previous Windows Installations . . . etc.
Power to the Developer!
MSI GV72 — 17.3″, i7-8750H (Hex Core), 32GB DDR4, 4GB GeForce GTX 1050 Ti, 256GB NVMe M2, 2TB HDD
12 people found this reply helpful
Was this reply helpful?
Sorry this didn’t help.
Great! Thanks for your feedback.
How satisfied are you with this reply?
Thanks for your feedback, it helps us improve the site.
How satisfied are you with this reply?
Thanks for your feedback.
Launch Disk Cleanup, the quickest way is this:
Press Windows key + R then type: cleanmgr.exe
Windows 7/Vista/XP > Start > All Programs > Accessories > System Tools > Disk Cleanup
Windows 8/8.1/10 > Windows key + S > type disk cleanup > hit Enter on your keyboard
Windows 10 > Start > All Apps > Windows Accessories > System Tools > Disk Cleanup
Once Disk cleanup opens, select the drive where Windows is installed if its not already.
Windows will scan your hard disk for files it can clean up.
Note some of these files too can include older installations of Windows. For example, if you upgraded from Windows 7 to Windows 10 a copy will be kept at the root of the hard disk in a folder called Windows.old. Please becareful though, this folder can actually be useful if you need to go back to your previous version of Windows for whatever reason. So be mindful before deleting it. Removing it though can significantly free up disk space.
After Disk Cleanup is finished scanning, you will see the Disk Cleanup window. This window provides a list of areas of the system you can clean up safely. Before we start cleaning up the system, you will notice appears on the window called Clean up system files. Clean it and the Disk Cleanup will run a thorough check of the system again to include every file that can be removed.
Once you have determined what to remove, click OK then click the Delete Files button to begin.
Click Yes if you are ok with the action that will be taken.
Turn off, disable, or uninstall OneDrive
If you want to stop syncing for a short time, learn How to pause and resume sync in OneDrive.
If you want to stop syncing a file, read How to stop or cancel sync in OneDrive.
If you want to remove a OneDrive folder from your computer, follow the steps in Choose which OneDrive folders to sync to your computer.
If you want to cancel your OneDrive subscription, see How to cancel your Microsoft subscription.
If you want to sign out of OneDrive on the web, select your profile photo, then select Sign out.
If you just don’t want to use OneDrive, the easiest solution is to unlink it.
Unlink OneDrive
You won’t lose files or data by unlinking OneDrive from your computer. You can always access your files by signing in to OneDrive.com.
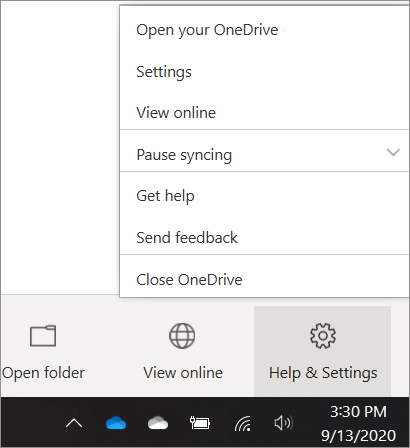
Select the white or blue OneDrive cloud icon in the taskbar or menu bar.

Note: You might need to click the Show hidden icons arrow  next to the notification area to see the OneDrive icon. If the icon doesn’t appear in the notification area, OneDrive might not be running. Select Start, type OneDrive in the search box, and then select OneDrive in the search results.
Select  Help & Settings > Settings.
On the Account tab, click Unlink this PC and then Unlink account.
Hide or uninstall OneDrive
On some versions of Windows, you can also hide or uninstall OneDrive. You can also uninstall the OneDrive mobile app from Android and iOS devices.
OneDrive is built in to some versions of Windows and can’t be uninstalled. But you can hide it and stop the sync process, so it stays hidden. To do this, turn off all the OneDrive settings and remove the OneDrive folder from File Explorer.
Select the white or blue OneDrive cloud icon in the notification area, at the far right of the taskbar.
Note: You might need to click the Show hidden icons arrow next to the notification area to see the OneDrive icon. If the icon doesn’t appear in the notification area, OneDrive might not be running. Select Start, type OneDrive in the search box, and then select OneDrive in the search results.
Select Help & Settings > Settings.
On the Settings tab, uncheck all the boxes under General.
On the Auto Save tab, set the Documents and Pictures lists to This PC only, and uncheck the other boxes.
On the Account tab, click Choose folders.
In the Sync your OneDrive files to this PC box, check and uncheck the box at Sync all files and folders in my OneDrive. (The first check selects all the boxes, then the uncheck clears them all.) Click OK to close the box and return to settings.
This step removes all OneDrive files from your computer, but leaves them on OneDrive.com.
Click OK to save your changes in the Settings box.
Open the Settings again. On the Account tab, click Unlink OneDrive. Close the Welcome to OneDrive box that appears.
Open File Explorer, right-click OneDrive, and then click Properties.
On the General tab, next to Attributes, check the Hidden box. This hides OneDrive from File Explorer.
One more time, select Help & Settings and select Quit OneDrive. This removes the OneDrive icon from the Notifications area.
In your computer’s Start menu, press and hold or right-click the OneDrive tile, and then select Unpin from Start.
Go to PC Settings, using the PC Settings tile in the Start menu, or swipe in from the right edge of the screen, select Settings, and then select Change PC settings.
Under PC settings, select OneDrive.
On the File Storage tab, turn off the switch at Save documents to OneDrive by default.
On the Camera roll tab, select Don’t upload photos and turn off the switch at Automatically upload videos to OneDrive.
On the Sync settings tab, under Sync settings with OneDrive, turn off the switch at Sync your settings on this PC.
On the Metered connections tab, turn off all the switches.
To hide OneDrive from File Explorer, open File Explorer and in the folder list on the left, right-click OneDrive and then click Properties.
On the General tab, at Attributes, check the Hidden box.
You won’t lose files or data by uninstalling OneDrive from your computer. You can always access your files by signing in to OneDrive.com.
Select the Start button, type Programs in the search box, and then select Add or remove programs in the list of results.
Under Apps & features, find and select Microsoft OneDrive, and then select Uninstall. If you’re prompted for an administrator password or confirmation, type the password or provide confirmation.
The OneDrive app comes with Windows 8.1 and Windows RT 8.1 and cannot be uninstalled.
Windows 7 or Windows Vista
Click the Start button, then in the search box, type Add Programs , and then, in the list of results, click Programs and Features.
Click Microsoft OneDrive, and then click Uninstall. If you’re prompted for an administrator password or confirmation, type the password or provide confirmation.
Go to Settings and select Storage/Memory.
Select OneDrive and tap Uninstall.
Go to the Home Screen, tap and hold on the OneDrive app icon
Tap X that appears in the upper left corner of the app icon.
Just drag the OneDrive app to the Trash.
Need more help?

Get online help
See more support pages for OneDrive and OneDrive for work or school.
For the OneDrive mobile app, see Troubleshoot OneDrive mobile app problems.

Contact Support
If you still need help, contact support through your browser or shake your mobile device while you’re in the OneDrive app.

Tips
Letting us know your location may help us resolve your issue more quickly.
All fixed? If you contacted us and OneDrive starts working again, please let us know by replying to the email we sent you.
Uninstall or remove apps and programs in Windows 10
There are different ways to remove apps and programs, so if you can’t find the one you’re looking for, you can try another location. Note that some apps and programs are built into Windows and can’t be uninstalled. You can try to repair a program first, if it’s just not running correctly.
Uninstall from the Start menu
Select Start and look for the app or program in the list shown.
Press and hold (or right-click) on the app, then select Uninstall.
Uninstall from the Settings page
Select Start , then select Settings > Apps > Apps & features. Or just click the shortcut link at the bottom of this article.
Select the app you want to remove, and then select Uninstall.
Uninstall from the Control Panel (for programs)
In the search box on the taskbar, type Control Panel and select it from the results.
Select Programs > Programs and Features.
Press and hold (or right-click) on the program you want to remove and select Uninstall or Uninstall/ Change. Then follow the directions on the screen.
If you get an error message when you’re uninstalling, try the Program Install and Uninstall Troubleshooter.
If you’re trying to remove malware, see Stay protected with Windows Security to find out how to run a scan. Or if you use another antivirus software program, check their virus protection options.
How to delete or uninstall Windows from your PC
Some of our readers have asked us how they can remove Windows from their computers. Some of them want to remove Windows and empty their drives, some have dual-boot configurations and want to keep only one Windows version, and other have Windows and Linux running alongside, and prefer to get rid of Windows altogether. We wanted to help, so here are all the steps you need to take in these situations:
IMPORTANT: Make sure that you back up the data you have on the drive where Windows is installed. If you do not back it up while Windows is installed and works well, you risk losing your data if something goes wrong along the way.
1. How to delete Windows when it is the only operating system installed
If you installed just one Windows operating system, then the uninstallation is simple. Create a USB recovery drive or an installation CD/DVD or USB memory stick with the operating system that you want to use next, and boot from it.
Then, on the recovery screen or during the installation of the new operating system, select the existing Windows partition(s) and format or delete it (them).
Alternatively, you can boot from the recovery disk, load Command Prompt, and then use the diskpart and format commands to remove or format the Windows partition(s) you no longer need. If you need help with these commands or with opening Command Prompt from the recovery environment, you find instructions in these tutorials:
2. How to delete one Windows when you have multiple Windows operating systems installed in a dual-boot or multi-boot configuration
What if you have two or more Windows operating systems installed on the same computer, and you want to uninstall one of them? For example, let’s assume that you have installed Windows 10 to dual-boot alongside Windows 7. You may want to remove the older Windows 7 and use the space occupied by Windows 7 to create a new partition or to resize your existing Windows 10 partition. How do you do that?
First of all, remove the boot entry for the Windows version that you want to uninstall. In our example, that’s Windows 7. Perform this action from the version of Windows that you want to keep. In our case, that is Windows 10.
Start the Windows operating system that you want to keep and open the System Configuration tool. A quick way to launch it is to use the Run window. Simultaneously press the Windows + R keys on your keyboard and, in the Run window, enter type msconfig. Press Enter or click/tap OK, and the System Configuration tool opens.
We use the System Configuration tool because it is available in all Windows versions. If you prefer, you can also use other boot managers, but make sure that the one you choose is compatible with all the operating systems that you have installed.
In System Configuration, go to the Boot tab, and check whether the Windows that you want to keep is set as default. To do that, select it and then press “Set as default.”
Next, select the Windows that you want to uninstall, click Delete, and then Apply or OK.
To test if everything is OK with the Windows that you want to keep, restart your computer and see if you can boot without problems. You should be able to.
If something terribly wrong happens and you cannot boot correctly, you can repair the boot entries using the Windows installation media. Read Fix problems that keep Windows from loading, with Startup Repair and How to use the Command Prompt to fix issues with your PC’s boot records, for help.
Now that the boot entry is gone, it is time to erase or format the partition used by the Windows that you want removed. Format it if you plan to reuse that partition to install another operating system, or eliminate the entire volume if you would instead use that space to extend other partitions.
For both actions, you can use the Disk Management tool. Open it with a click/tap on its shortcut from the WinX menu (press Win + X on your keyboard), or use one of the methods we described here.
In the Disk Management window, right-click or tap and hold on the partition that you want to be removed (the one with the operating system that you uninstall), and select “Delete Volume” to erase it. Then, you can add the available space to other partitions.
If you want to reuse the same partition for another operating system, you should format the partition instead of deleting it. For example, if you want to remove Windows 7 so that you can install another operating system, select the partition, right-click or tap and hold on it, and then click/tap on Format in the contextual menu.
Windows warns you that you are about to erase all the data stored on that partition, and you might also get a warning that the selected partition is in use. To continue the formatting, press Yes. Once you do that, you can see that the Windows that you wanted to uninstall has been removed.
3. How to delete Windows when you installed it alongside a Linux distribution such as Ubuntu, in a dual-boot or multi-boot configuration
If you have a multi-boot setup that includes non-Microsoft operating systems, like Ubuntu Linux, the steps are similar to the ones in the previous section, but you have to perform them from Linux. Let’s assume that you have a dual-boot setup with Ubuntu and Windows 10 running alongside on the same computer. How do you get rid of Windows 10 and keep Ubuntu?
First of all, remove the Windows 10 system partition(s). To do so, you need an app that can manage drives and partitions. The one found by default in Ubuntu is called Disks. Start by opening the Applications menu with a click/tap on its button from the bottom-left corner of the screen.
On the Applications screen, type disks in the search field from the top. In the list of search results, click or tap Disks.
In the Disks app, select the Windows partition that you want to remove. It should be easy to spot because it’s usually formatted using NTFS. After you select it, click/tap the – (minus) button beneath the list of Volumes.
Ubuntu asks if you “are sure you want to delete the partition.” Click Delete.
Confirm the action by entering the administrator password, and then click/tap Authenticate.
Now, the Windows partition should be no more. However, there may be other Windows partitions found on your computer, such as System Reserved or Recovery partitions. If there are, you might want to delete those also, using the same procedure.
After you have deleted all the Windows partitions that you no longer need, reboot your computer.
When your computer starts, the GRUB loader should still show Windows 10 as an available operating system to boot from. However, it does not work, because you deleted its partition(s). To completely forget that a Windows operating system was ever found on your computer, you need to delete its entry from the GRUB boot menu. Fortunately, that’s easy: start Ubuntu again and login with your user account.
Open a Terminal window by simultaneously pressing the Ctrl + Alt + T keys on your keyboard. In the Terminal, type the command sudo update-grub and press Enter. Type the password of your administrator account and press Enter once more.
After a moment or two, Ubuntu updates the GRUB boot menu and removes the Windows 10 entry from it. From now on, you can enjoy a Windows-free Linux experience. 🙂
Why did you want to remove Windows?
As you have seen, uninstalling Windows is not as hard as it may seem. Anyone can do it with a bit of attention to the steps detailed above. If you are looking for guides on installing different versions of Windows, do not hesitate to read the recommendations below and, if you have something to add to our guide, write us a comment.


