- How to Delete Backup Files in Windows 10
- Deleting Windows File History
- Removing Windows System Restore Points
- Deleting the Windows.old Folder After Windows 10 Updates
- Clearing Disk Space with Windows 10
- How to Delete Backup Files in Windows 10 When Backup Disk Full?
- Why should you care if backup disk is full?
- How to free up space on backup disk?
- How to Delete Windows image backup in Windows 10?
- How do I delete system restore points?
- How to cleanup File History?
- How to delete backup files in Windows 10 with backup software?
How to Delete Backup Files in Windows 10
Get rid of older ones hogging space
There are plenty of good reasons why you might want to set up Windows 10 backups. When something goes wrong, a backup can help you restore your files and system with little to no data loss. Unfortunately, the downside is a loss of space—these files can fill up your hard drive, especially on smaller-sized drives.
While we’d always recommend that you maintain automatic system backups, Windows will fill up your drive with unnecessary backup files that you can delete from time to time, including older Windows update files. If you want to know how to delete backup files in Windows 10, here’s what you need to do.
Deleting Windows File History
Windows 10 offers a far better system for regular file backups than older Windows versions, thanks to a built-in file backup system. Using Windows File History, copies of files in certain critical folders are saved on a regular basis, from every 10 minutes to once daily, with copies saved indefinitely.
Over time, that can mean a vast increase in the storage space being used. If you want to know how to delete backup files in Windows 10, deleting your Windows File History backups should be the first task on your list.
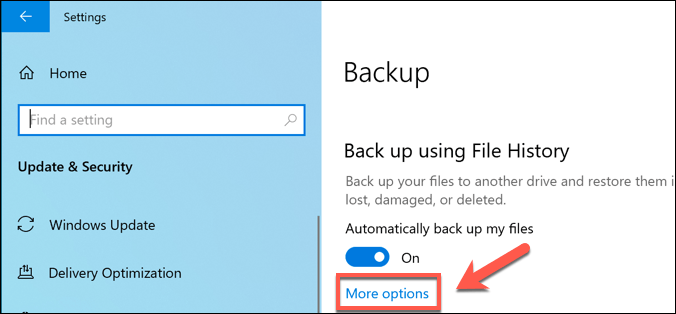
- To start, you’ll need to open the Windows Settings menu—right-click the Windows Start menu and press Settings. From here, press Update & Security > Backup. If you’re using Windows File History already, press the More options button.
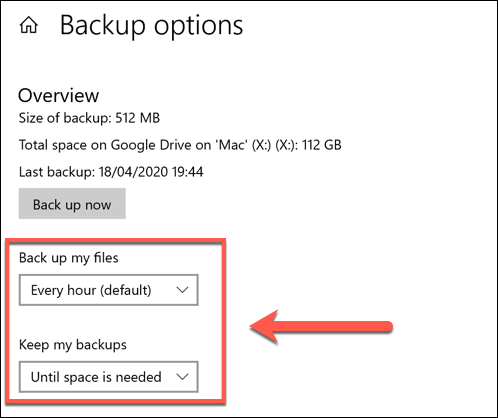
- In the Backup options menu, you can change how often file backups are made and how often they’re saved before being deleted. Change these under the Back up my files and Keep my backups drop-down menus.
By default, the Keep my backups option is set to Forever—changing this to delete backups every month, or when space is needed, will increase your available disk space.
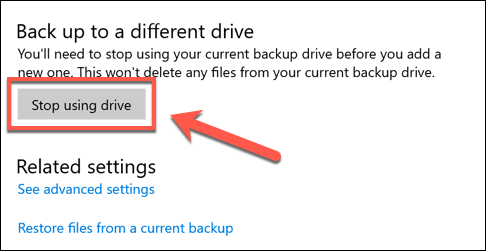
- You can also disable Windows File History entirely by pressing the Stop using this drive option in the Backup options menu. This will remove your current Windows file backup drive, therefore disabling the feature entirely.
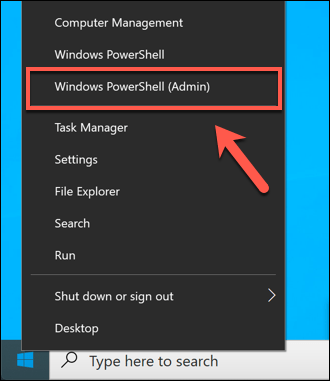
- If you want to immediately remove any saved backup files kept by File History, you’ll need to right-click the Windows Start menu and press the Windows PowerShell (Admin) option.
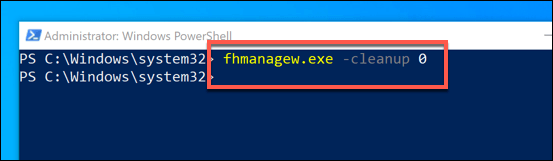
- In the PowerShell window that appears, type fhmanagew.exe -cleanup 0 to remove all but the most recent file backups, then hit enter to run the command. You can replace 0 with another set of days to leave a longer period of backups saved. If the command is successful, a pop-up window will appear to confirm.
Removing Windows System Restore Points
Backing up files in older Windows versions was an all or nothing affair—at least where built-in features were concerned. One of the earliest backup features was the System Restore feature, which stored a snapshot of your current Windows installation and files.
This feature still exists in Windows 10 and is used to create restore points for major system updates. If it’s enabled and too many restore points are made, it can take up valuable disk space. Removing some of these restore points can be a good way to clear some space for other files.
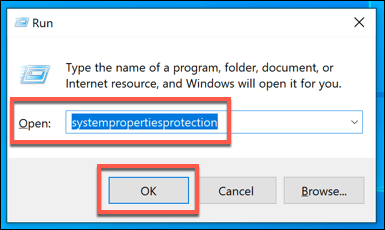
- To remove System Restore points, press the Windows + R keys on your keyboard to open the Run window, type systempropertiesprotection and hit enter.
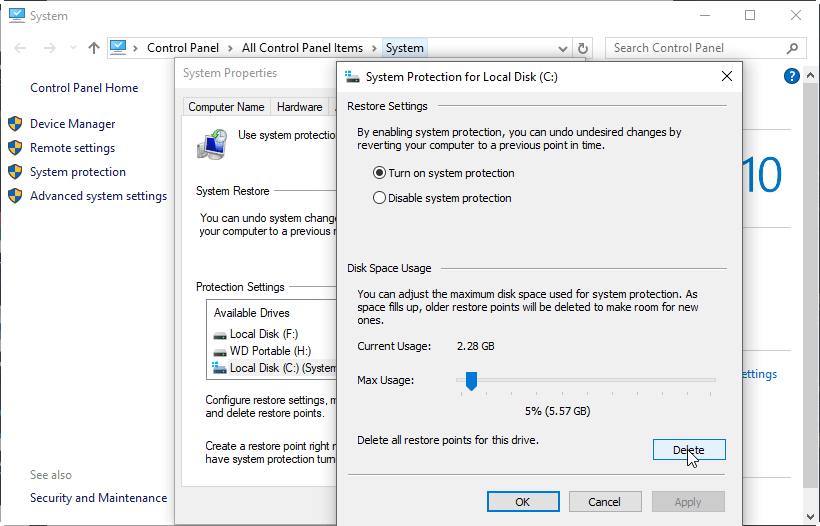
- This will open the System Properties window. In the System Protection tab, press the Configure button.
- In the System Protection window, press the Delete button. This will remove any saved System Restore points. You can also change how much disk space this feature uses by moving the Max Usage slider.
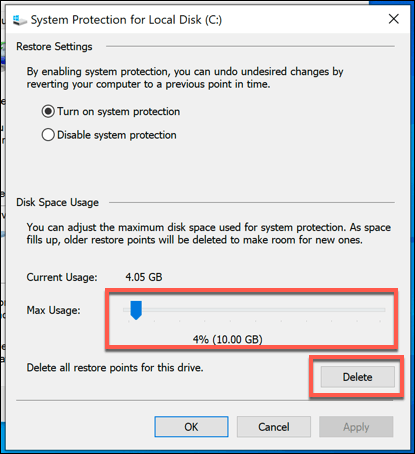
- While it isn’t recommended, you can also disable this feature and restore all of the System Protection reserved space for general usage by pressing the Disable system protection radio button. Press OK to save your settings once you’re done.
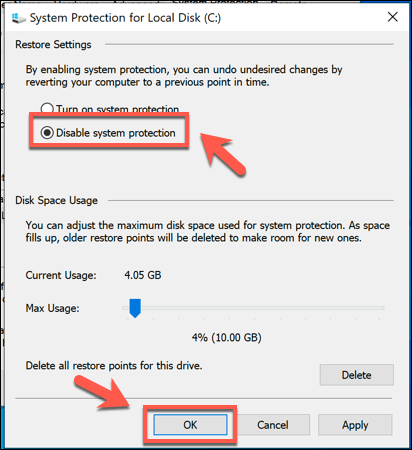
Once disabled, any space previously reserved for System Restore points will be released for you to use elsewhere.
Deleting the Windows.old Folder After Windows 10 Updates
If you want to clear space after a major Windows 10 update, you should start by deleting the Windows.old folder. This folder is automatically created as a backup of your older Windows installation when a major Windows update takes place.
You don’t have to worry about deleting this folder in most cases—Windows will automatically remove it a month after an upgrade takes place. If you want to remove it sooner to regain the space faster, however, you can.
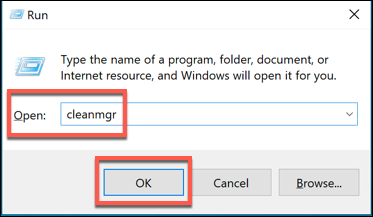
- To delete the Windows.old folder, you’ll need to run the Disk Cleanup tool. Press the Windows + R key and type cleanmgr, then click OK to launch it.
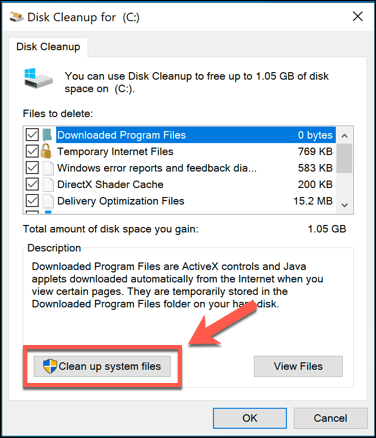
- In the Disk Cleanup window, press the Clean up system files option to view options to clear system files.
- In the Files to delete list, make sure that the Previous windows installation(s) checkbox is enabled. To save additional space, you can also enable other settings or folders to be wiped at this point. Once you’re ready, press OK to begin the deletion process.
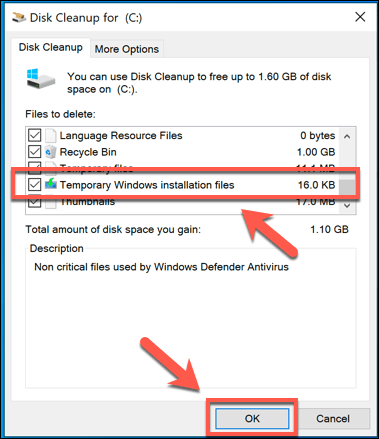
This will remove the Windows.old folder, restoring several gigabytes of space in the process. You won’t be able to restore the older Windows installation once you do this, however, so make sure that any updates or new installations are working correctly before you proceed.
Clearing Disk Space with Windows 10
While you should be able to delete any unnecessary backup files in Windows itself, there are other and better ways to create more space in Windows 10. You could, for instance, look for larger files and remove them to free up space for other apps and files.
If that doesn’t work, you may need to look at uninstalling Windows 10 software to make room for other essential files—including your important Windows 10 backup files.
Ben Stockton is a freelance technology writer based in the United Kingdom. In a past life, Ben was a college lecturer in the UK, training teens and adults. Since leaving the classroom, Ben has taken his teaching experience and applied it to writing tech how-to guides and tutorials, specialising in Linux, Windows, and Android. He has a degree in History and a postgraduate qualification in Computing. Read Ben’s Full Bio
How to Delete Backup Files in Windows 10 When Backup Disk Full?
Windows 10 backup disk may get full after saving multiple versions of backups. Learn to manually or automatically delete all kinds of backup files.

By AOMEI  / Last Updated December 30, 2020
Why should you care if backup disk is full?
Windows 10 includes features that allow you to backup system image backup and save previous versions of your files regularly. Those features are very useful because your files and system are protected with backups.
If backup disk is full, then no backups can be created, leaving your files and system at risk. Therefore, it is important to well manage backups in Windows 10.
How to free up space on backup disk?
As mentioned, Windows 10 has many backup features to protect your system and files. You may have enabled system protection to create system restore points, set up automatic image backup task with Backup and Restore (Windows 7), or backup your files using File History.
If you want a better way to delete backup files in Windows 10, please use the professional backup software.
How to Delete Windows image backup in Windows 10?
To delete Windows image backup, use the following steps:
1. Click Start and then select Settings > Update & Security > Backup > Go to Backup and Restore (Windows 7) to open the old image backup tool.
2. Click on Manage Space.
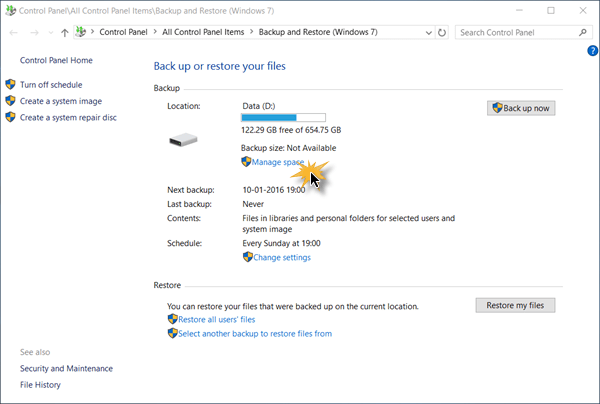
3. In the next screen, click View backups to select any of the image backup files to delete.
After deleting some of the previous image backups, you can also change how Windows manage the previous image backups. Click on Change Settings, and then you have two choices:
Let Windows manage the space used for backup history
Keep only the latest system image and minimize space used by backup.
The first 1 is the default option. If your backup disk always gets full, you can change to the second option to only save one system backup in Windows 10.
How do I delete system restore points?
Windows 10 System Restore Points allow you to undo unwanted system changes and restore protected files to the previous version. If you think this is taking too much space. You can delete all or some of the system restore points.
To delete all restore points:
1. Search “system protection” and select the result “Create a restore point”.
2. Click Configure…
3. Click Delete and confirm the option to delete all of the restore points on this drive.
To delete all but the most recent restore point (Recommended):
1. Right click on C: drive and select Properties and Disk Cleanup. If you want to delete restore points on other drives, just right click on another drive and do the same.
2. Click Clean up system files and wait for the calculating.
3. Click More Options tab, and click Clean up… under System Restore and Shadow Copies.
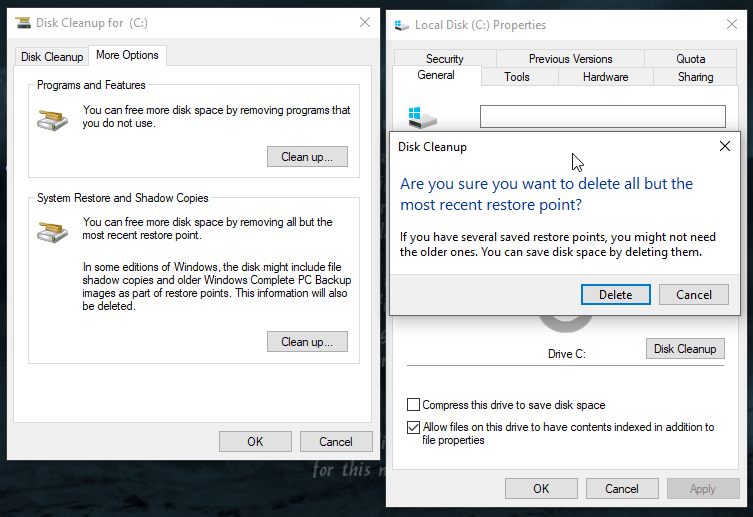
4. In a pop-up confirmation window, click Delete to delete all but the most recent restore point.
How to cleanup File History?
By default, Windows 10 File History will save all versions forever, so eventually, your Windows 10 backup disk will full. You can easily change that setting to automatically delete old versions. Before you trying to delete File History backup versions, you need to make sure the backup drive is connected and File History turned on. Otherwise, you are not allowed to delete File History backups.
To cleanup file history, use the steps below:
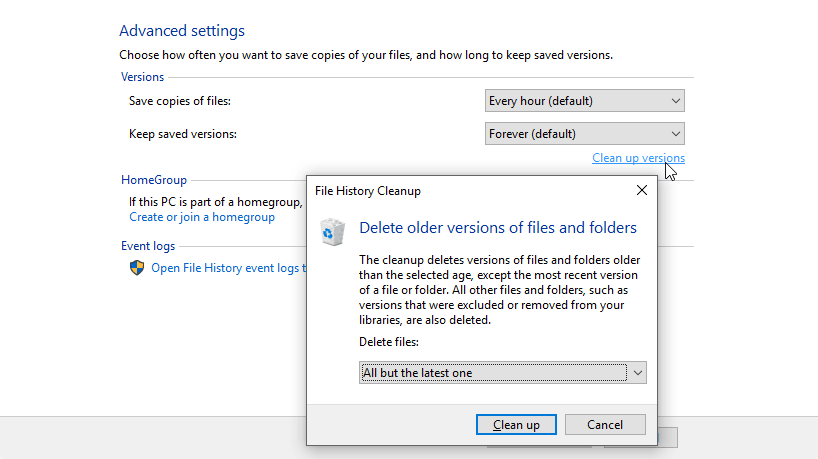
1. Open File History from Control panel. Then click on the Advanced settings.
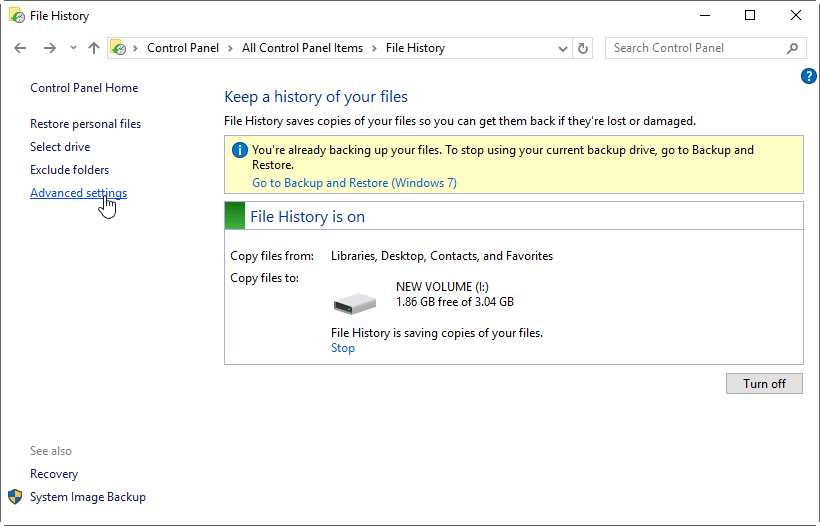
2. In the next screen, you will have the option to change how long the saved versions are stored. You can change Keep saved versions for 3 months or so. You can click the link Clean up versions to delete versions right now.
All those three Windows backup features are supposed to free up disk space when needed. By theory, you should never run out of disk space on backup disk. However, you still may end up backup disk full in Windows 10. In that case, you may want to choose another backup program with a more flexible way of managing backup disk space.
How to delete backup files in Windows 10 with backup software?
If you are looking for Windows Backup and Restore software, then AOMEI Backupper Professional edition is recommended. It provides scheduled incremental and differential backup and 5 different backups schemes to automatically delete previous backups files, so your backup disk will never run out of space.
To delete backup files in Windows 10, you can choose a backup type at first, then select a schdule backup and backup scheme, click Start Backup at last. After that, when the backup amount reaches the number you set, it will delete backup files automatically.
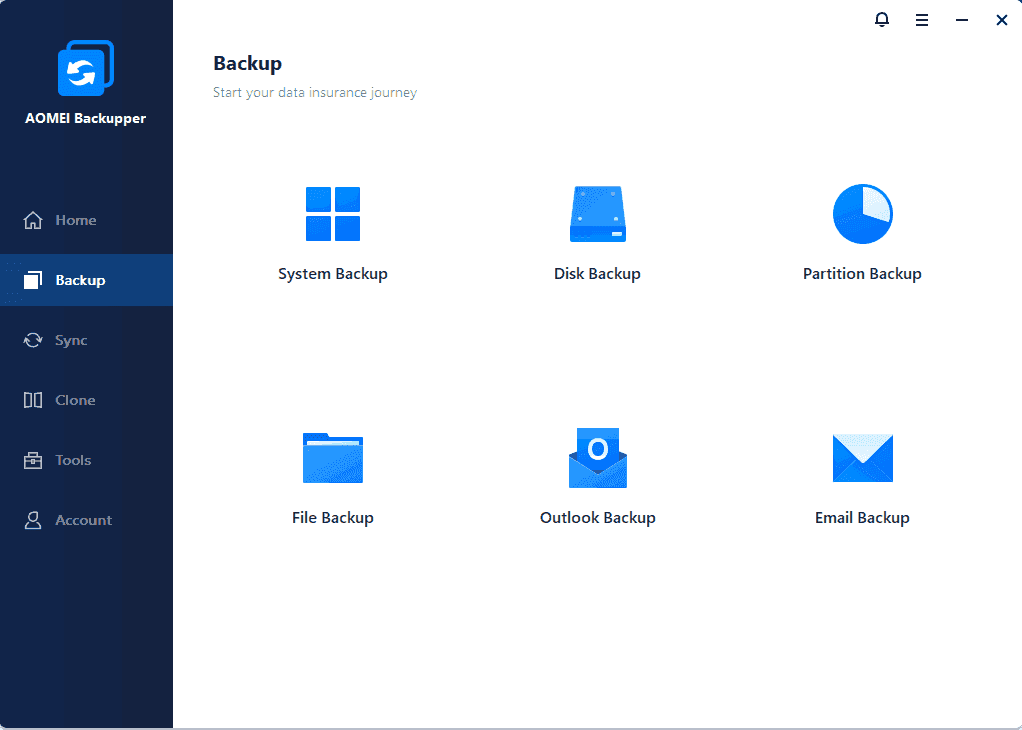
Backup types:
Based on what you want to include in the backup, you can perform system backup, disk backup, partition backup, files and folders backup. And all of the backup types support schedule backup and backup scheme.
Backup Schedule:
When choosing schedule triggers, you can have the backup to run at a specific time daily/weekly/monthly or upon an event. If you want the backup to run when no user is logged on, you need to choose the option runing scheduled backup using Task Scheduler under the Advanced tab.

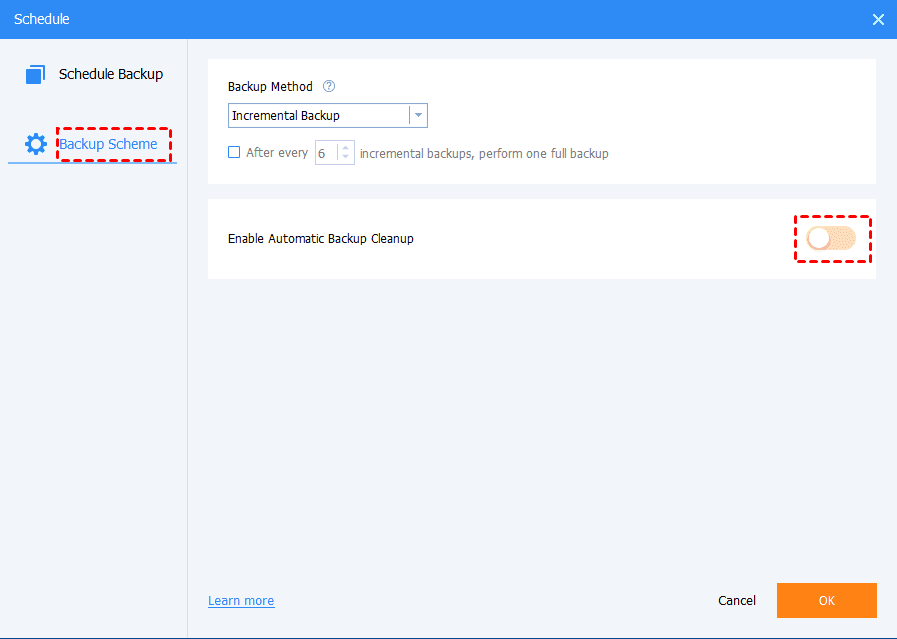
Backup Scheme:
After configuring a scheduled backup, you can enable Disk Space Management to automatically free up backup disk space while keeping remaining backup images recoverable. Based on how you set up the scheduled backup, choose the suitable backup scheme to free up disk space.
Unlike file-level backup, AOMEI Backupper is able to backup files that are currently in use.
It is recommended to use the listed backup schemes to automatically delete obsolete backups. If you intend to delete backups manually, you can do it with File Explorer.
As you may know, incremental backup is based on the previous backup. If you delete an incremental backup, the incremental backups after the one deleted are useless. Therefore, you should create a full backup before deleting incremental backups. Unlike incremental backup, differential backup is based on the last full backup. You can delete any differential backup. as long as the full backup is intact, your differential backups are valid.
If you get confused, just use the built-in backup schemes and it will take care of your backups and disk space, so you will not worry about Windows 10 backup disk full. Besides these features, AOMEI Backupper also provides File Sync and Disk Clone feature to protect your data.
If you want to protect unlimited computers within your company, you can pick AOMEI Backupper Technician. With the inbuilt AOMEI Image Deploy tool, you are also allowed to deploy/restore system image file on server-side computer to multiple client-side computers over network.


