- How to disable DCOM support in Windows
- Summary
- Edit the Registry
- Use DCOMCNFG.EXE
- More Information
- how to disable windows help and support pop up window?
- Windows Services you can safely disable [Complete Guide]
- What Windows 10 services can I disable? Complete list
- How can I disable Windows Services?
- Disable Windows 10 services to improve performance: Pros & Cons
- How to Disable The Help and Support Window..
- How to disable or remove hotkey F1 for Help and support?
- Replies (43)
How to disable DCOM support in Windows
Summary
The Distributed Component Object Model (DCOM) is a protocol that enables software components to communicate directly over a network. Previously named «Network OLE,» DCOM is designed for use across multiple network transports, including Internet protocols such as HTTP. More information about DCOM, visit the following Microsoft Web site: http://technet.microsoft.com/en-us/library/cc958799.aspx
DCOM is supported natively in Windows NT 4.0, Windows 2000, Windows XP, and Windows Server 2003.
Warning If you disable DCOM, may you may lose operating system functionality. After you disable support for DCOM, the following may result:
Any COM objects that can be started remotely may not function correctly.
The local COM+ snap-in will not be able to connect to remote servers to enumerate their COM+ catalog.
Certificate auto-enrollment may not function correctly.
Windows Management Instrumentation (WMI) queries against remote servers may not function correctly.
There are potentially many built-in components and 3rd party applications that will be affected if you disable DCOM. Microsoft does not recommend that you disable DCOM in your environment until you have tested to discover what applications are affected. Disabling DCOM may not be workable in all environments.
Support for DCOM on all Windows NT-based operating systems can be disabled. To disable this support, follow these steps.
Note To disable DCOM on a Windows 2000-based computer, you must be running Windows 2000 Service Pack 3 (SP3) or later.
Edit the Registry
Important This section, method, or task contains steps that tell you how to modify the registry. However, serious problems might occur if you modify the registry incorrectly. Therefore, make sure that you follow these steps carefully. For added protection, back up the registry before you modify it. Then, you can restore the registry if a problem occurs. For more information about how to back up and restore the registry, click the following article number to view the article in the Microsoft Knowledge Base:
322756 How to back up and restore the registry in Windows
Start Registry Editor.
Locate the following path:
Change the EnableDCOM string value to N.
Restart the operating system for the changes to take effect.
Use DCOMCNFG.EXE
If you are running Windows XP or Windows Server 2003, perform these additional steps:
Click the Component Services node under Console Root.
Open the Computers folder.
For the local computer, right-click My Computer, and then click Properties.
For a remote computer, right-click Computers folder, point to New, and then click Computer.
Type the computer name.
Right-click the computer name, and then click Properties.
Click the Default Properties tab.
Click to select (or click to clear) the Enable Distributed COM on this Computer check box.
If you want to set more properties for the computer, click Apply to enable (or disable) DCOM. Otherwise, click OK to apply the changes and quit Dcomcnfg.exe.
Restart the operating system for the changes to take effect.
More Information
The following registry string value is used to enable or disable DCOM on all operating systems:
HKEY_LOCAL_MACHINE\Software\Microsoft\OLE\EnableDCOM If you change this value to N, you disable DCOM after you restart the operating system. For more information, click the following article number to view the article in the Microsoft Knowledge Base:
256986 Description of the Microsoft Windows registry
how to disable windows help and support pop up window?
I was experiencing the same problem on WIndows 8 when I installed an earlier version of CorelDraw.
I did not see anyone post this possible solution but it worked out for me.
http://support.microsoft.com/kb/917607. Scroll a couple pages down.
It lists downloads for a couple versions of windows.
Hope this is helpful to you.
127 people found this reply helpful
Was this reply helpful?
Sorry this didn’t help.
Great! Thanks for your feedback.
How satisfied are you with this reply?
Thanks for your feedback, it helps us improve the site.
How satisfied are you with this reply?
Thanks for your feedback.
This issue might have happened due to the program installed on Vista. Since it is not possible to disable help and support option, you may try the following steps to resolve the issue:
First you may try to perform a clean boot to verify if any of the services or startup items is causing this issue. To perform a clean boot we will have to run System Configuration Utility.
To perform clean boot, follow the steps:
1. Click Start , type msconfig in the Start Search box, and then press ENTER . If you are prompted for an administrator password or for a confirmation, type the password, or click Continue.
2. On the General tab , click Selective Startup .
3. Under Selective Startup , click to clear the Load Startup Items check box.
4. Click the Services tab , click to select the Hide All Microsoft Services check box, and then click Disable All .
5. Click Apply and OK .
6. When you are prompted, click Restart .
7. After the computer starts verify whether you are able to resolve the issue.
If your issue is resolved after performing Clean Boot, then follow the steps mentioned in the following KB article to narrow down the exact source:
Also, see the section on how to return your computer to a Normal startup mode by following the steps under “Reset the computer to start as usual”.
Step 2: You may also try Uninstalling and Re-installing the Acid program and check what happens.
For more information, you may refer the following link to uninstall a Program:
Hope this information is helpful.
Microsoft Answers Support Engineer
Visit our Microsoft Answers Feedback Forum and let us know what you think.
Windows Services you can safely disable [Complete Guide]

- If you want to tweak and boost your PC ‘s performance , you don’t always have to download specialized software to do so.
- Simply disabling a few unessential services can have your Windows 10 PC working like never before.
- For more tweaks and tricks, check out our Windows 10 Hub.
- If you want to expand your tech and software knowledge, visit our How-To Section.

- Download Restoro PC Repair Tool that comes with Patented Technologies (patent available here).
- Click Start Scan to find Windows issues that could be causing PC problems.
- Click Repair All to fix issues affecting your computer’s security and performance
- Restoro has been downloaded by 0 readers this month.
Did you know that you can safely disable Windows services to boost your computer’s performance?
However, the problem comes in determining which services are safe to disable and which ones are not. To save you from a bit of trial and error, we’ve devised the following guide.
In it, we have listed all the Windows services you can disable to boost your computer’s performance for gaming or just general use.
In addition to this, we have also included a short section that shows you how to disable said services in Windows 10.
So you may find it beneficial to read this guide until the end. Without further ado…
What Windows 10 services can I disable? Complete list
| Application Layer Gateway Service | Phone Service |
| Alljoyn Router Service | Program Compatibility Assistant Service |
| AVCTP Service | Print Spooler |
| Bitlocker | Parental Control |
| Bluetooth Support Service | Remote Registry |
| Connected User Experience and Telemetry | Retail Demo Service |
| Certificate Propagation | Secondary Logon |
| Diagnostic Policy Service | Smartcard |
| Diagnostic Service Host | TCP/IP NetBIOS Helper |
| Diagnostic System Host | Touch Keyboard and Handwriting Panel Service |
| Distributed Link Tracking Client | Windows Error Reporting Service |
| Download Maps Manager | Windows Insider Service |
| Enterprise App Management Service | Windows Image Acquisition |
| Fax | Windows Biometric Service |
| File History Service | Windows Camera Frame Server |
| GameDVR and Broadcast | Windows Connect Now |
| Geolocation Service | Windows Insider Service |
| IP Helper | Windows Media Player Network Sharing Service |
| Internet Connection Sharing | Windows Mobile Hotspot Service |
| Netlogon | Windows Search |
| Offline Files | Windows Update |
| Parental Control | Xbox Accessory Live Auth Manager |
| Payments and NFC/SE Manager | Xbox Live Auth Manager |
| Xbox Live Networking Services | Xbox Live Game Save |
How can I disable Windows Services?
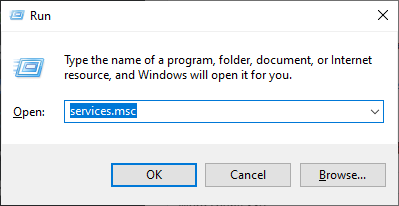
- Open a Windows Run Dialog (Win + R).
- Type in services.msc.

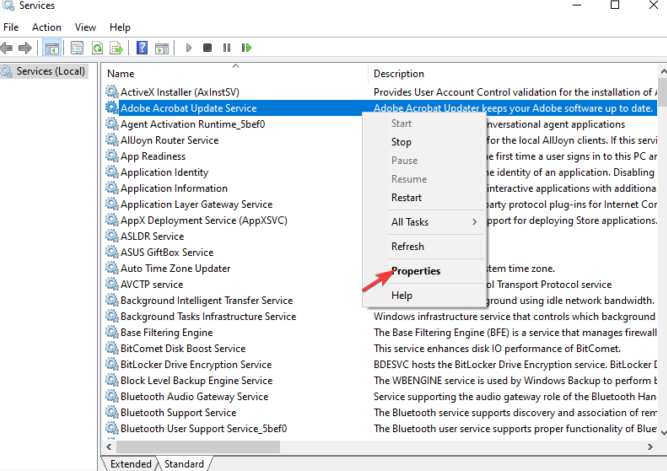
- Right-click on the service and select Properties.
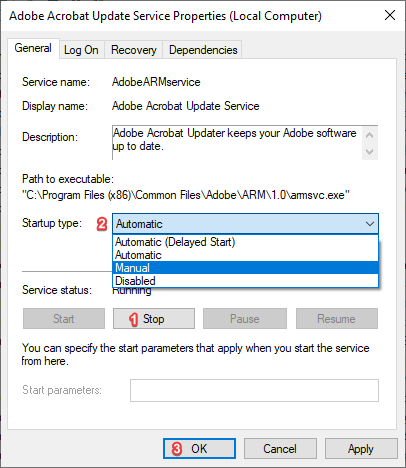
- Click on the Stop button (if the service is running).
- Change the Startup type to Disabled.
- Click on OK.
Disable Windows 10 services to improve performance: Pros & Cons

- Frees up memory and boosts Windows Performance.
- Can assist you in troubleshooting a problem.
- Will stop certain Windows quality-of-life features from working.
You can safely disable all 48 Windows 10 services listed in this guide. However, it’s important to note that you may still need some of these services, depending on how you use your computer.
For instance, if you are a gamer, it would be inadvisable to stop the Xbox-related services. Thus, you should apply the tips in this guide with a bit of discernment.
Some of the functions of these services can be replaced with third-party applications. For example, you can replace the Windows Search service with a third-party file finding program.
Disabling these Windows 10 services isn’t permanent. Make a note of each service you disable. You may be required to re-enable them in the future.
Either way, we hope you’ve found this guide to be helpful. If you have your own list of inessential services, please share it down below. As always, thank you for reading.
How to Disable The Help and Support Window..
Greetings To all of you.
Please Help Me How to Disable The Help and Support Window In Windows 7 Ultimate
If am start my system press the mouse in desktop or start button the help and support window automatically pop up.
I could not close that window and i cannot access my system also. i tried all the solution like hide the Microsoft service and Turn of the windows firewall also but i can’t rectify that please help me.
Moved from Vista Performance and Maintenance Forum.
![]()
Thank you for posting your query in Microsoft Community Forum.
Was it working fine before? If YES, did you make any significant hardware or software changes to the computer prior to this issue?
I understand that you get a Help and Support pop-up when you click on your desktop screen after system startup. So, I would suggest you to try the following steps and check if the issue persists.
Method 1:
Refer to the following steps and check if they are helpful.
- Click on Start button and click on Help and Support from the list.
- On the Windows Help and Support window, click on Options.
- Click on Settings and uncheck the ‘Improve my search results by using online help’.
- Click OK and close the window.
If the issue still exists, try Method 2.
Method 2:
I would suggest you to start the computer in a selective startup mode with only necessary Microsoft services and programs in operation, to check if the issue is due to any third party software.
How to perform a clean boot in Windows
http://support.microsoft.com/kb/929135
Note: Refer «How to reset the computer to start normally after clean boot troubleshooting» to reset the computer to start as normal after troubleshooting.
Hope this information is helpful. If the issue still persists, please post back for further assistance, we’ll be glad to assist you.
How to disable or remove hotkey F1 for Help and support?
Replies (43)
* Please try a lower page number.
* Please enter only numbers.
* Please try a lower page number.
* Please enter only numbers.
Its a universal feature available within win and most third party programs, and as such I dont believe it can be disabled.
Perhaps you would care to explain why you wish to do so.
39 people found this reply helpful
Was this reply helpful?
Sorry this didn’t help.
Great! Thanks for your feedback.
How satisfied are you with this reply?
Thanks for your feedback, it helps us improve the site.
How satisfied are you with this reply?
Thanks for your feedback.
![]()
Its a universal feature available within win and most third party programs, and as such I dont believe it can be disabled.
Perhaps you would care to explain why you wish to do so.
5 people found this reply helpful
Was this reply helpful?
Sorry this didn’t help.
Great! Thanks for your feedback.
How satisfied are you with this reply?
Thanks for your feedback, it helps us improve the site.
How satisfied are you with this reply?
Thanks for your feedback.
Thats the standard win7 help & Support window.
Still not sure why you would wish to disable it
If your sys contains say Word, if you start Word then press F1 you would then get an Office Help Window
Or if you start WordPad then press F1 you would get a specific WordPad help window
5 people found this reply helpful
Was this reply helpful?
Sorry this didn’t help.
Great! Thanks for your feedback.
How satisfied are you with this reply?
Thanks for your feedback, it helps us improve the site.
How satisfied are you with this reply?
Thanks for your feedback.
![]()
946 people found this reply helpful
Was this reply helpful?
Sorry this didn’t help.
Great! Thanks for your feedback.
How satisfied are you with this reply?
Thanks for your feedback, it helps us improve the site.
How satisfied are you with this reply?
Thanks for your feedback.
![]()
65 people found this reply helpful
Was this reply helpful?
Sorry this didn’t help.
Great! Thanks for your feedback.
How satisfied are you with this reply?
Thanks for your feedback, it helps us improve the site.
How satisfied are you with this reply?
Thanks for your feedback.
149 people found this reply helpful
Was this reply helpful?
Sorry this didn’t help.
Great! Thanks for your feedback.
How satisfied are you with this reply?
Thanks for your feedback, it helps us improve the site.
How satisfied are you with this reply?
Thanks for your feedback.
Sorry for the delay in responding, I would suggest you try the steps mentioned by » C-10Kid » from the link.
Reply if you need further assistance, we will be happy to assist.
6 people found this reply helpful
Was this reply helpful?
Sorry this didn’t help.
Great! Thanks for your feedback.
How satisfied are you with this reply?
Thanks for your feedback, it helps us improve the site.
How satisfied are you with this reply?
Thanks for your feedback.
If you are running a desktop keyboard, toggle the ‘lock’ key. This releases the F keys from the original hard wired configuration that go back to the earliest days of computing and allow Windows programs to reuse for other functions.
Even so, many Windows programs still set the F1 key for ‘help’. It is the way things are and ALWAYS have been..
7 people found this reply helpful
Was this reply helpful?
Sorry this didn’t help.
Great! Thanks for your feedback.
How satisfied are you with this reply?
Thanks for your feedback, it helps us improve the site.
How satisfied are you with this reply?
Thanks for your feedback.
2 people found this reply helpful
Was this reply helpful?
Sorry this didn’t help.
Great! Thanks for your feedback.
How satisfied are you with this reply?
Thanks for your feedback, it helps us improve the site.
How satisfied are you with this reply?
Thanks for your feedback.
For future users coming in off Google, don’t listen to these non-helpful responses above. This is how you do it: for Windows 10 (you can do any one of the three, you do not have to do all of them):
1) Navigate to C:\Windows, find helppane.exe, right click, Properties, Security tab, Advanced. On the top where it says «Owner:», hit change. Type in your username and hit Check Names, click OK. Apply. Hit okay back to the Security tab. Next to «to change permissions, click edit» hit Edit. Hit Add, type in your username and click Check Names. Hit okay and then on the permissions give yourself Full Control with all boxes checked. Click Apply, yes, then OK. Ok again to close the box. Then right click, rename it, hit enter and click Continue to provide administrator permission. to rename it. Or simply click the file and press Delete on your keyboard to get rid of it. Now you can press F1 without having to be bothered by the help pane popup!
2) Open up command prompt, File, run new task, type in regedit and hit enter. Click yes if there is a popup.
Please backup your registry before making any changes by clicking File > Export (make sure All is selected under Export Range). Make sure to scroll up and select the uppermost level before searching, for me it is «Computer». Then Edit > Find. Under Find What: helppane.exe and make sure only Data is selected and nothing else. This should lead you to the keys that point towards the executable which you can then rename or remove at your own risk.
3) Use a program like Sharpkeys (search it online) to disable the F1 button (not recommended as it will disable the button entirely).


