- How to enable Virtualization (VT) on Windows 8 and 8.1 for BlueStacks 4
- How will this help?
- Table of Contents
- 1. Check if Virtualization is enabled/disabled on your PC.
- 2. Check if Virtualization is supported on your CPU.
- 3. Enter BIOS to enable Virtualization.
- 4. Enable Virtualization in your BIOS.
- How to Enable Virtualization in Windows 10
- How to Enable Virtualization in Windows 10 from Control Panel
- How to Enable Virtualization in Windows 10 with Command Prompt
- How to Enable Virtualization in Windows 10 with PowerShell
How to enable Virtualization (VT) on Windows 8 and 8.1 for BlueStacks 4

How will this help?
This article will guide you through the process of enabling Virtualization on your computer for Windows 8 and 8.1.
Table of Contents
1. Check if Virtualization is enabled/disabled on your PC.
Before enabling Virtualization, you can check whether it is enabled or disabled through the Task Manager. The steps below will teach you how to do this.
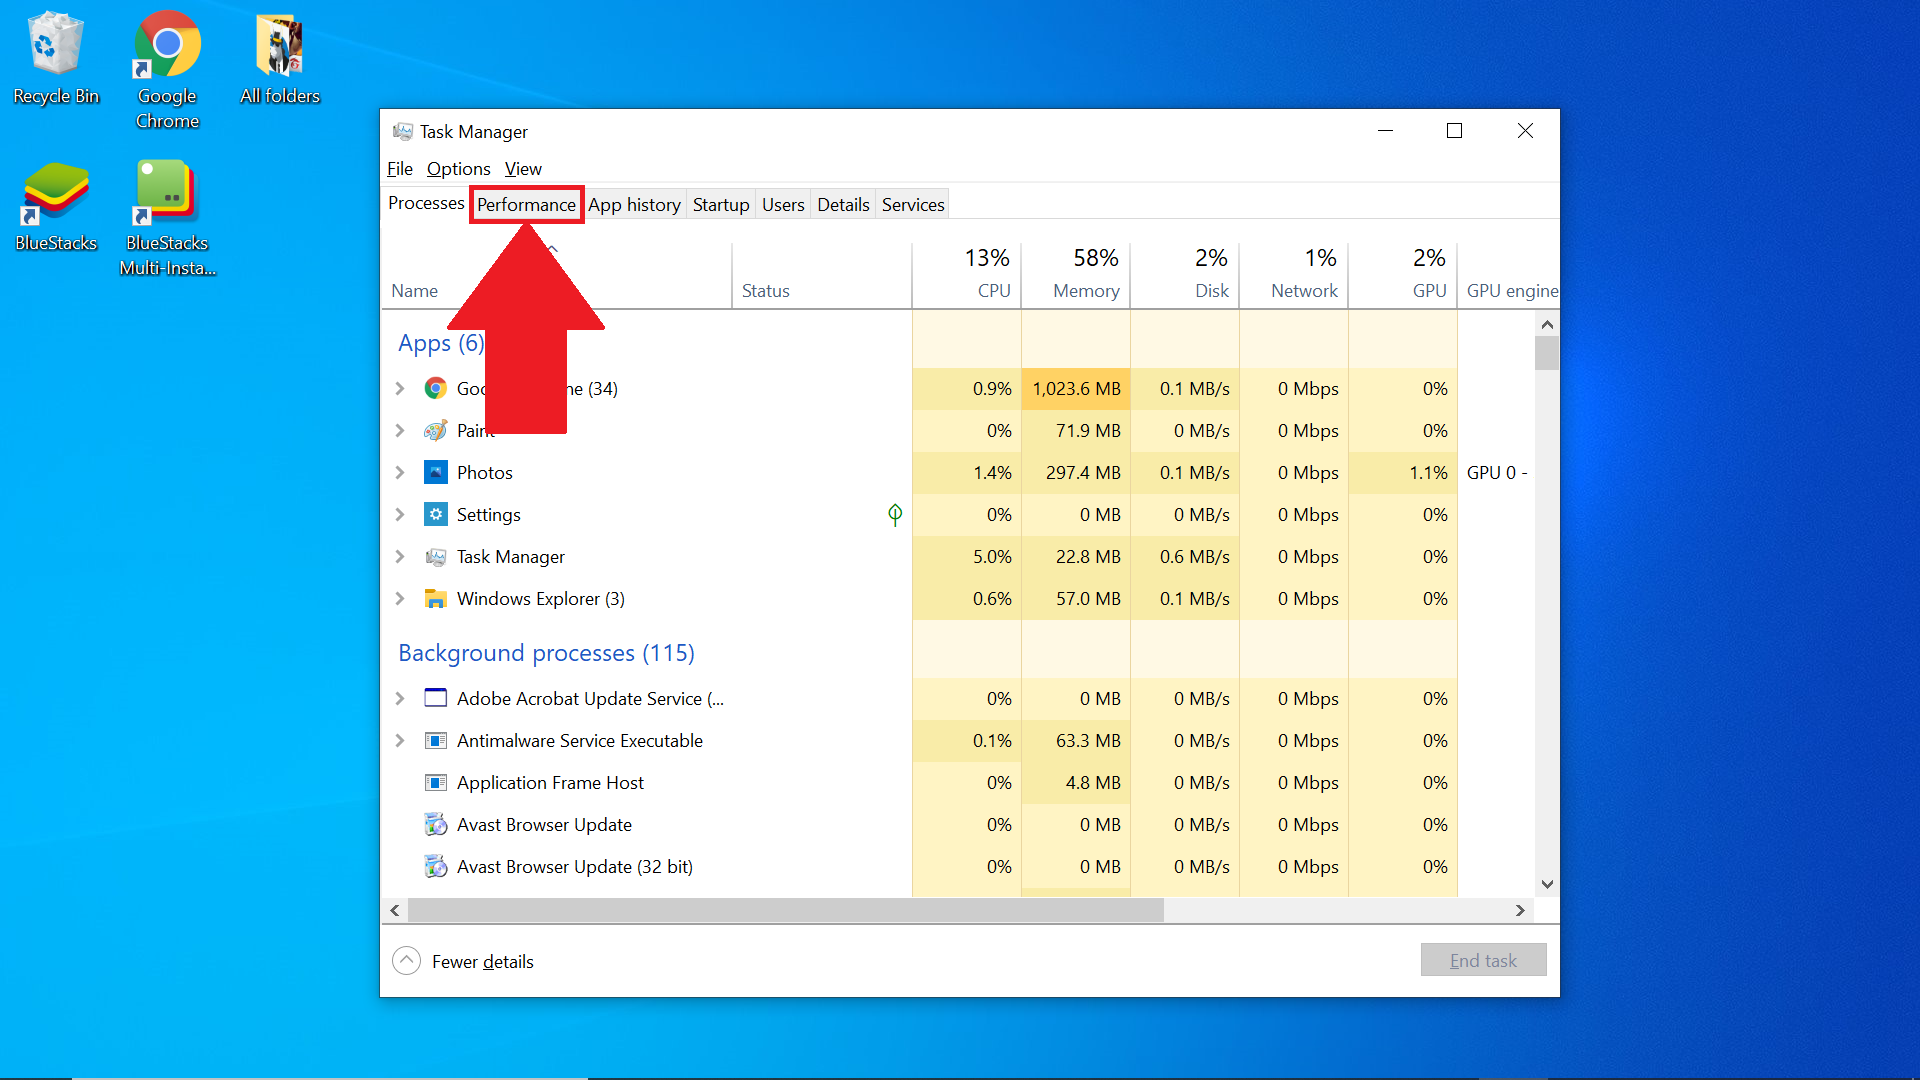
1. O pen up the Task Manager by pressing the Ctrl + Shift + Esc keys. Next, go to the Performance tab.
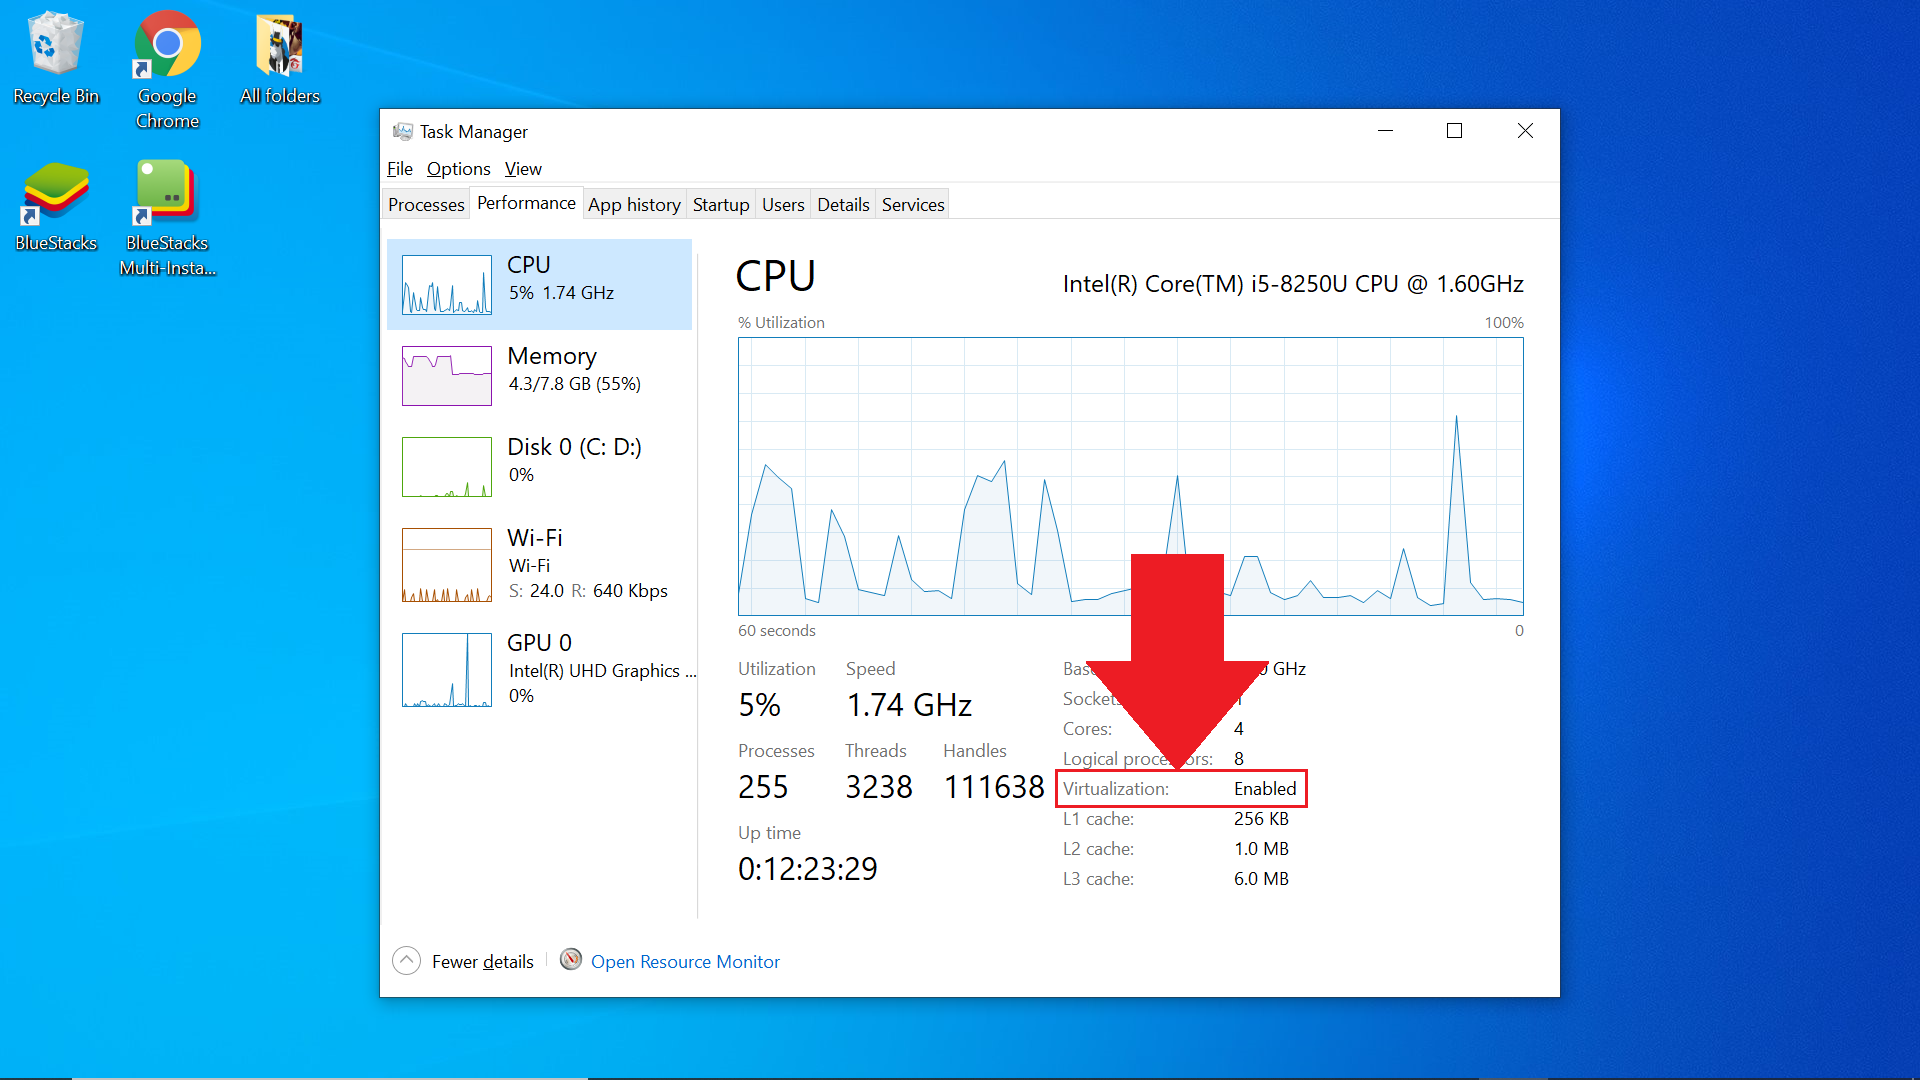
2. Here, you will find information about Virtualization on your PC. If it says Enabled, then Virtualization is turned on. However, if it says Disabled, then Virtualization is turned off.
2. Check if Virtualization is supported on your CPU.
If the CPU inside of your PC has Hardware-Assisted Virtualization, then your PC will support Virtualization. In order to learn if your PC supports virtualization, click on one of the links below, based on your CPU.
Virtualization support on Intel CPU.
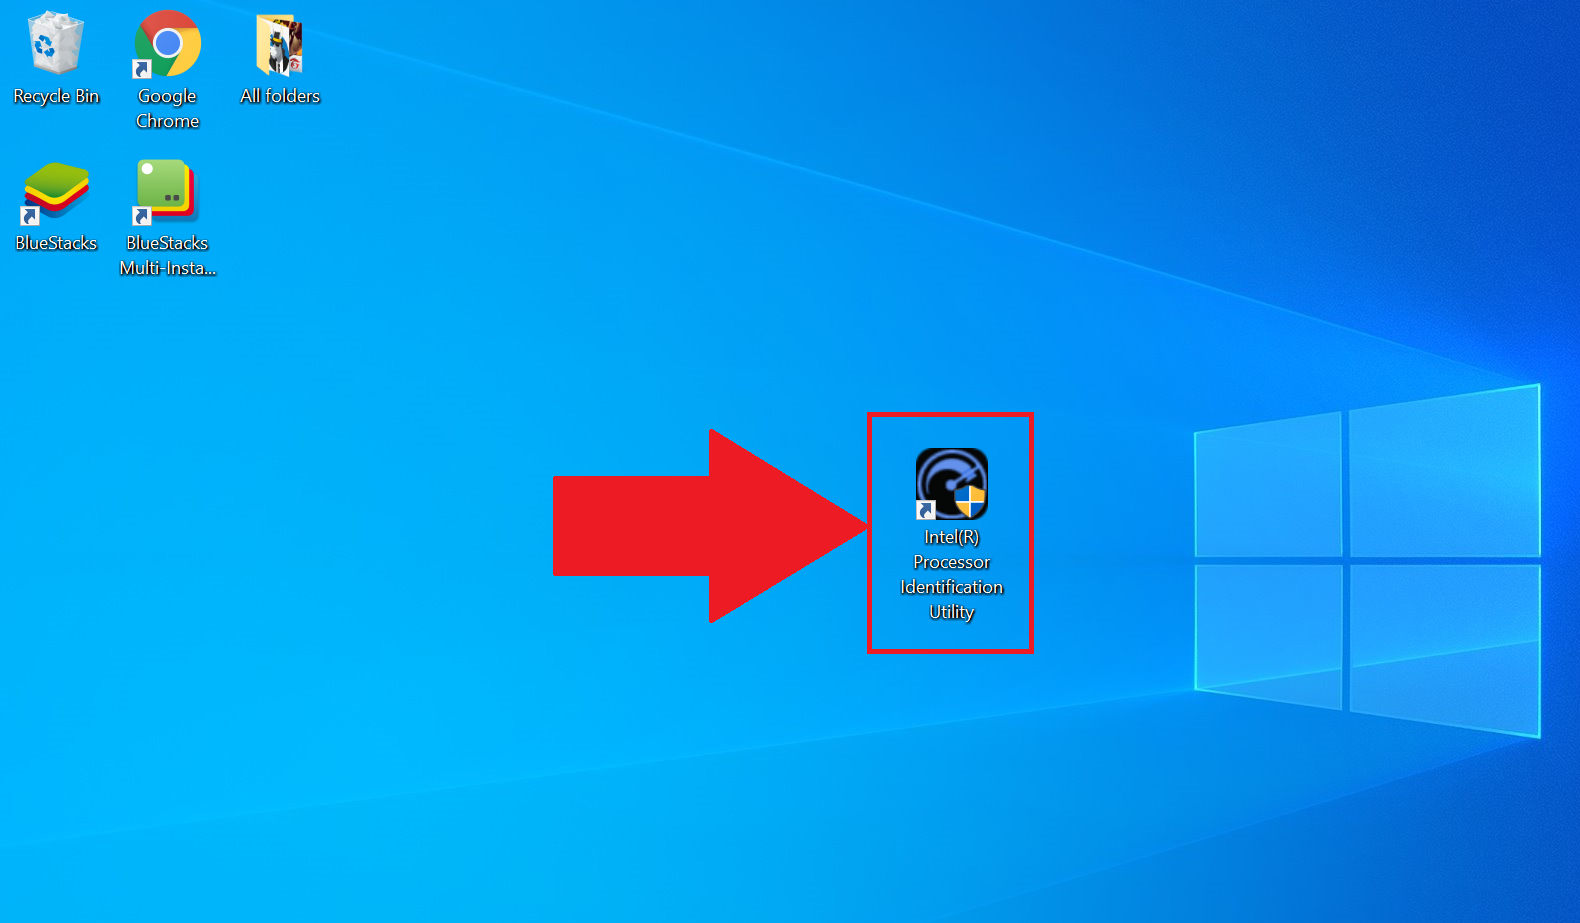
1. Download and install the Intel Processor Identification utility from their official website.
2. Once it is installed, launch it on your PC.
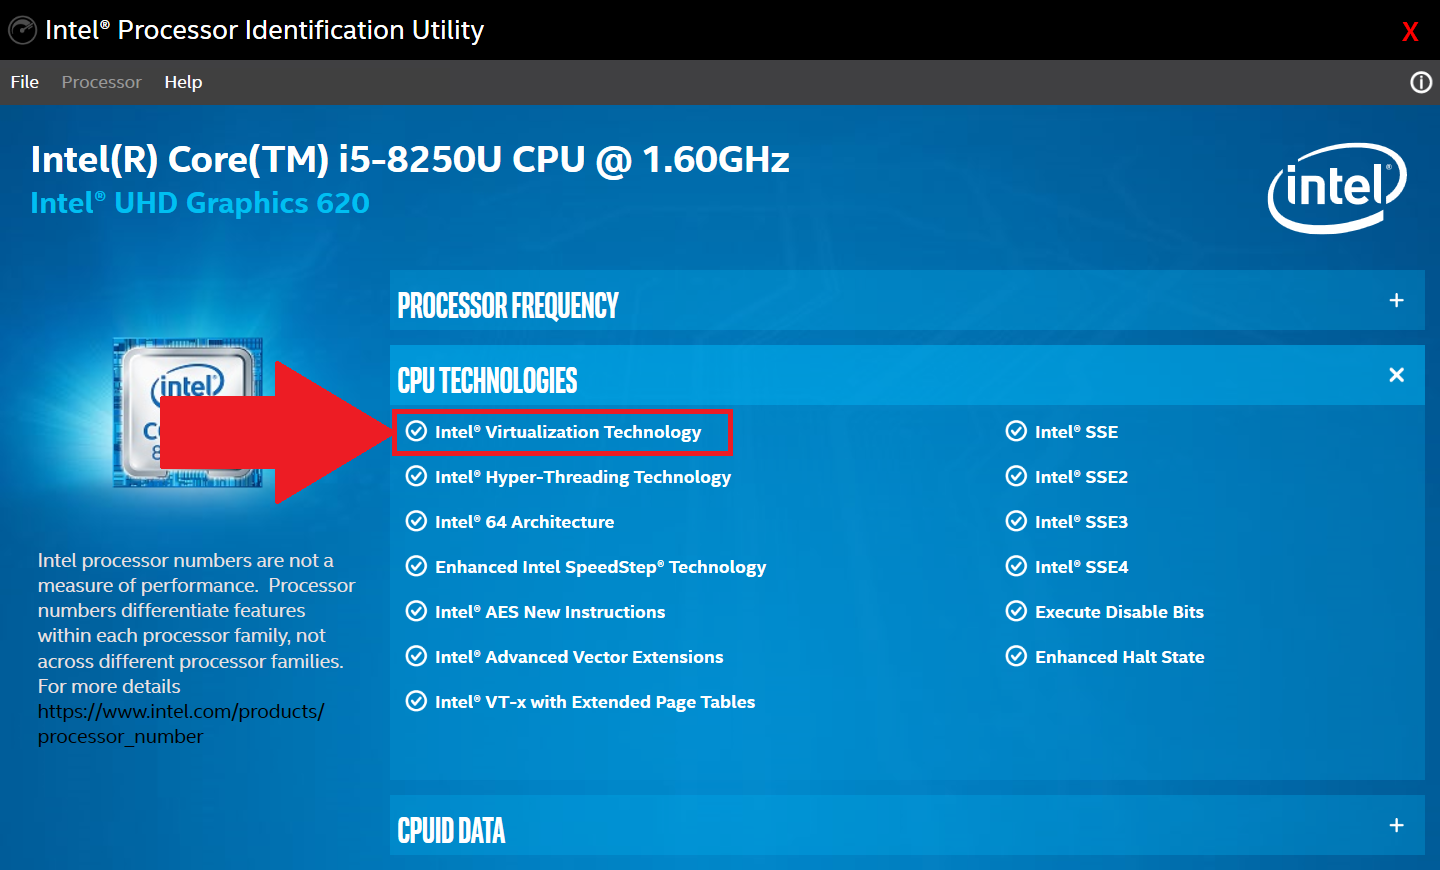
3. Now, click on the CPU Technologies tab, as shown below.
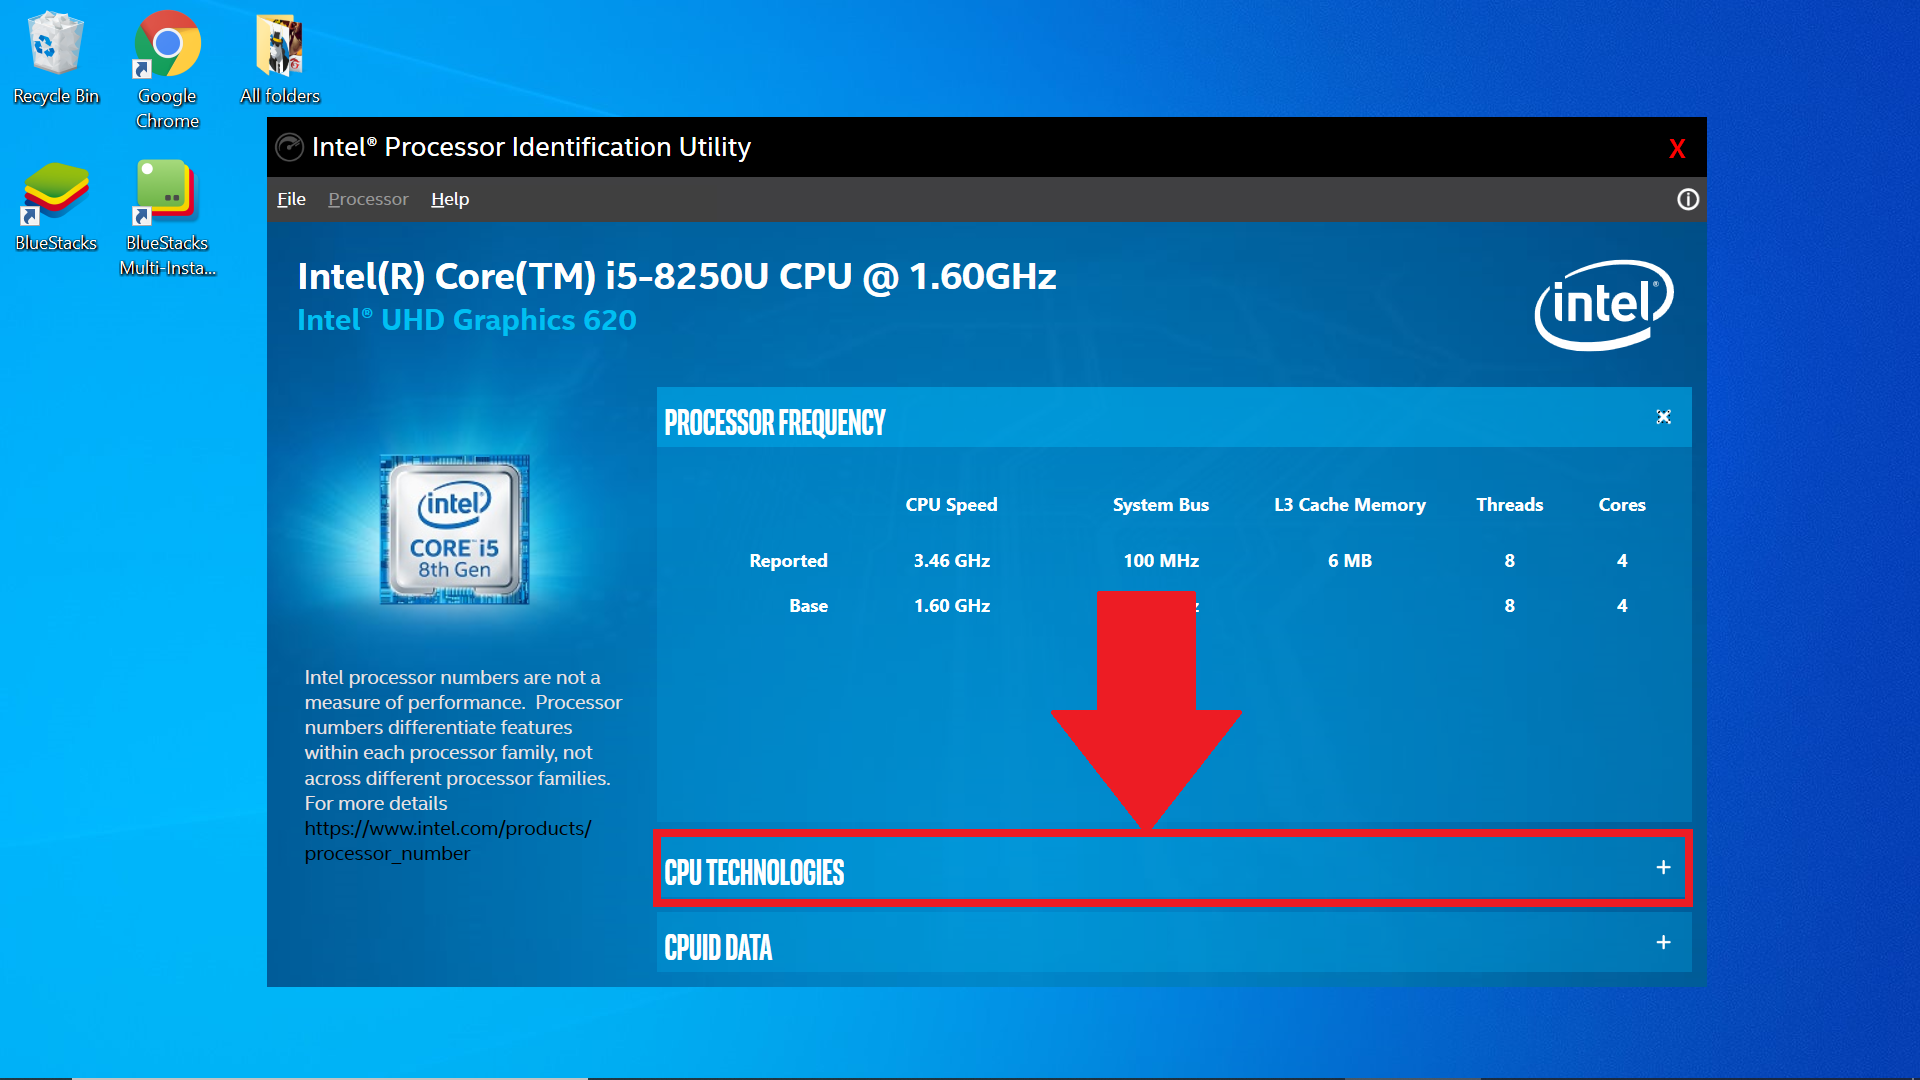
4. A drop-down menu will appear. If there is a tick-mark before «Intel® Virtualization Technology», then Virtualization is supported on your PC.
To learn the next steps for the process of enabling Virtualization, click here.
Virtualization support on AMD CPU.
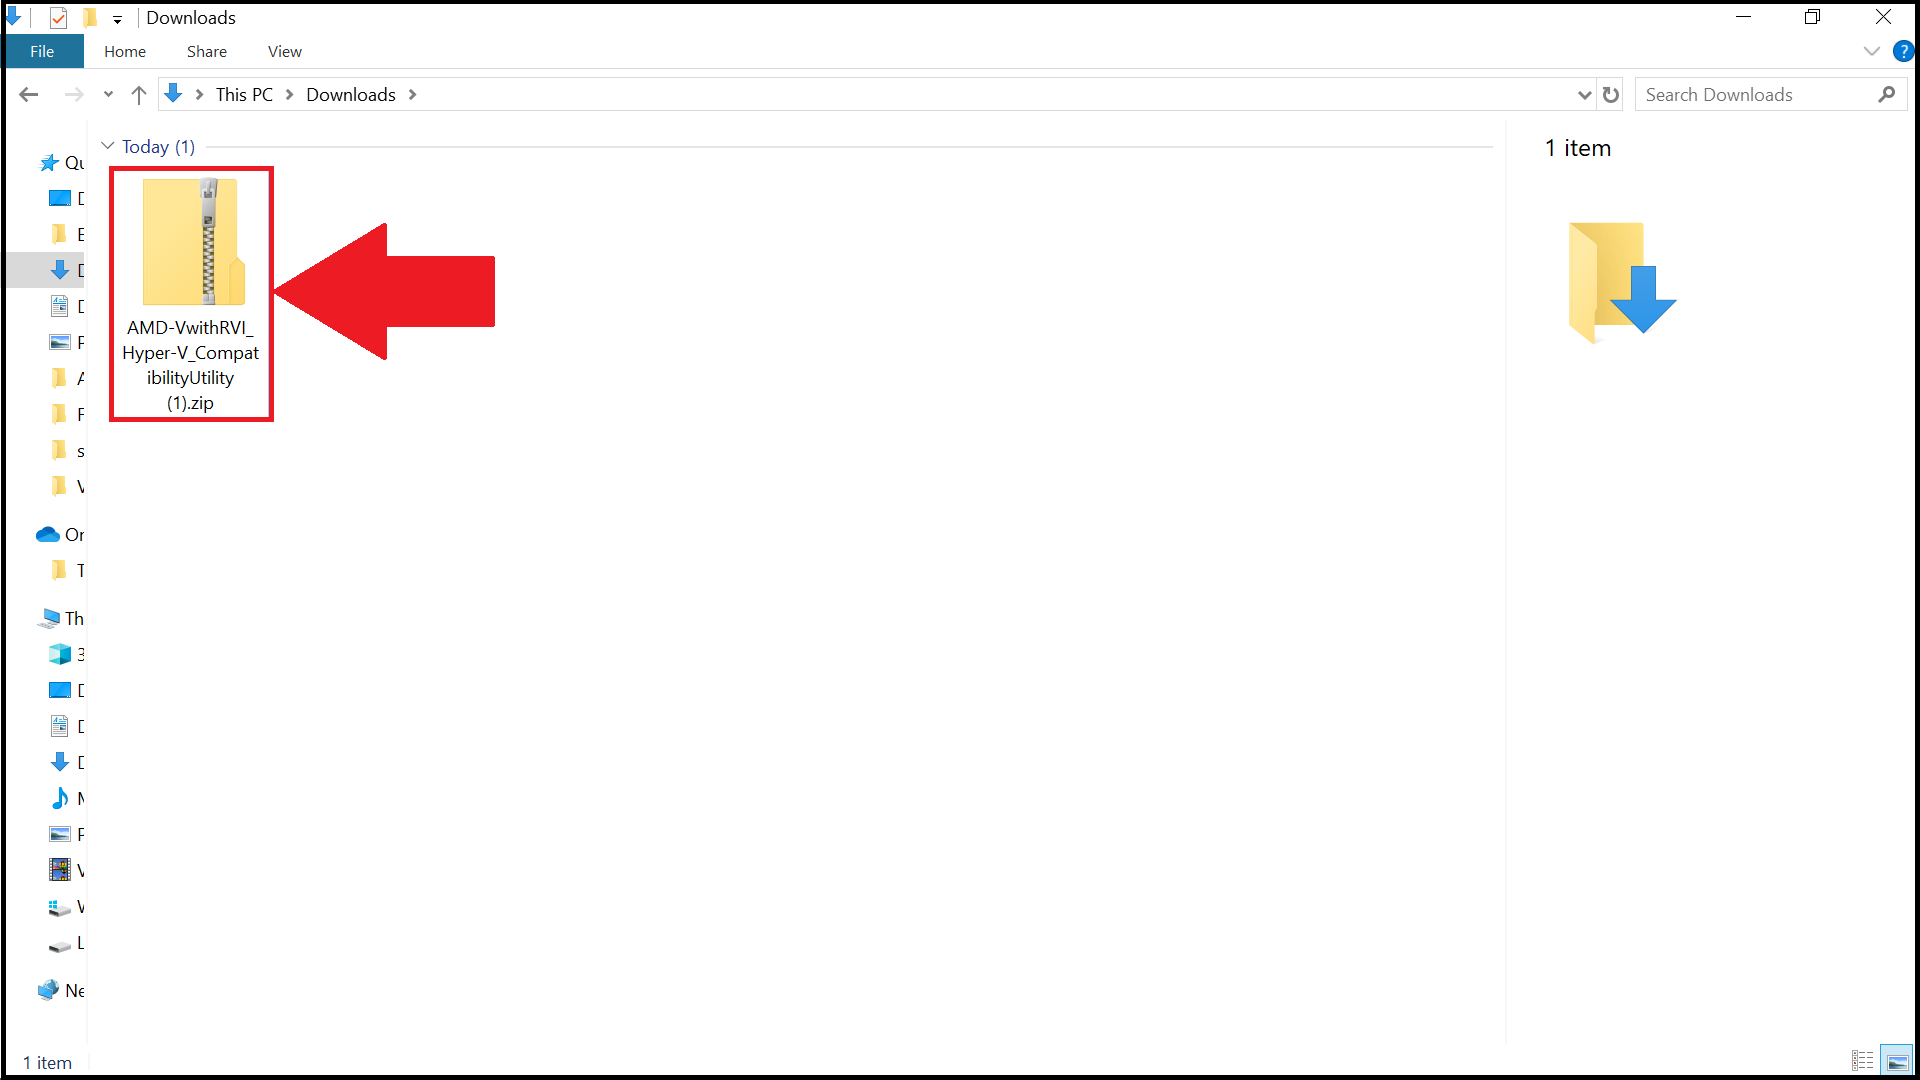
1. Download the AMD-V Detection Utility by clicking here.
2. Now, right-click on the ZIP file for the utility and select Extract All.
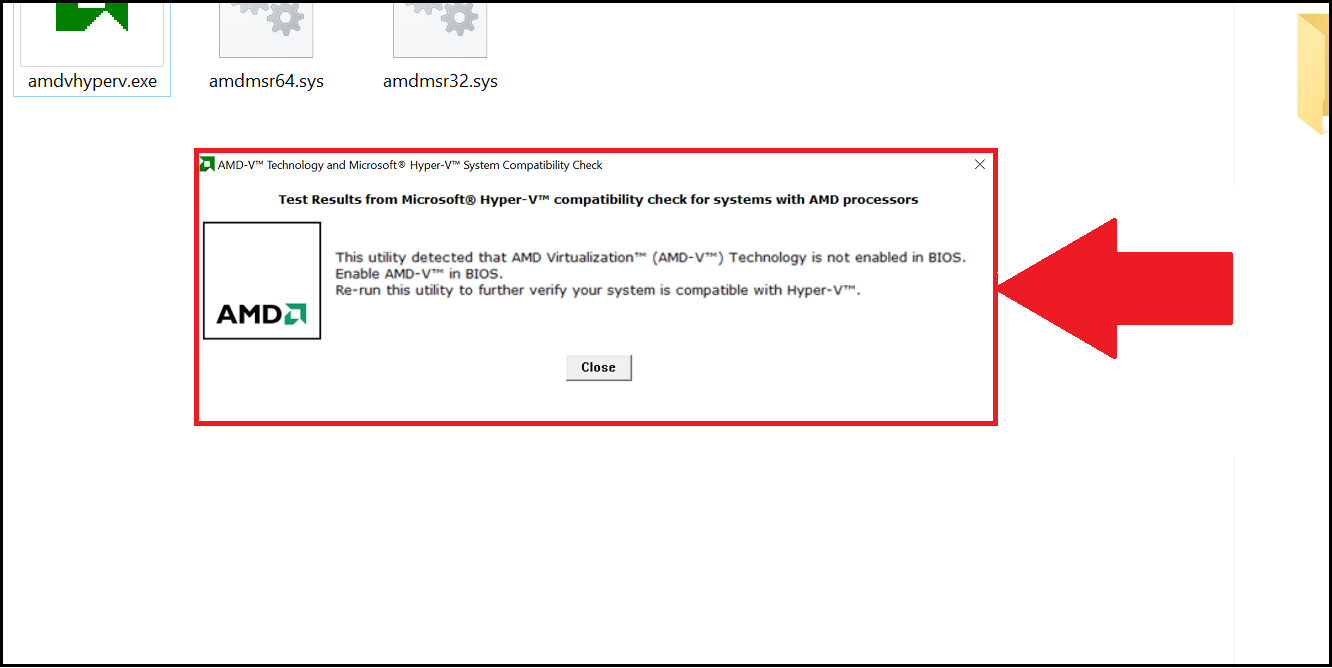
3. Once it’s extracted, right-click on the .exe file for the AMD-V Detection Utility and select Run as administrator.

4. You will now be notified about the status of Virtualization on your PC. For example, the image below shows that the PC supports Virtualization, but it is not yet enabled.
3. Enter BIOS to enable Virtualization.
BIOS (Basic Input Output System) is used for performing hardware initialization and also lets you control various attributes and functions in your PC.
By entering your PC’s BIOS settings, you can control the Virtualization process and enable or disable it. Click on the links below to learn how to:
How to enter BIOS in Windows 8.
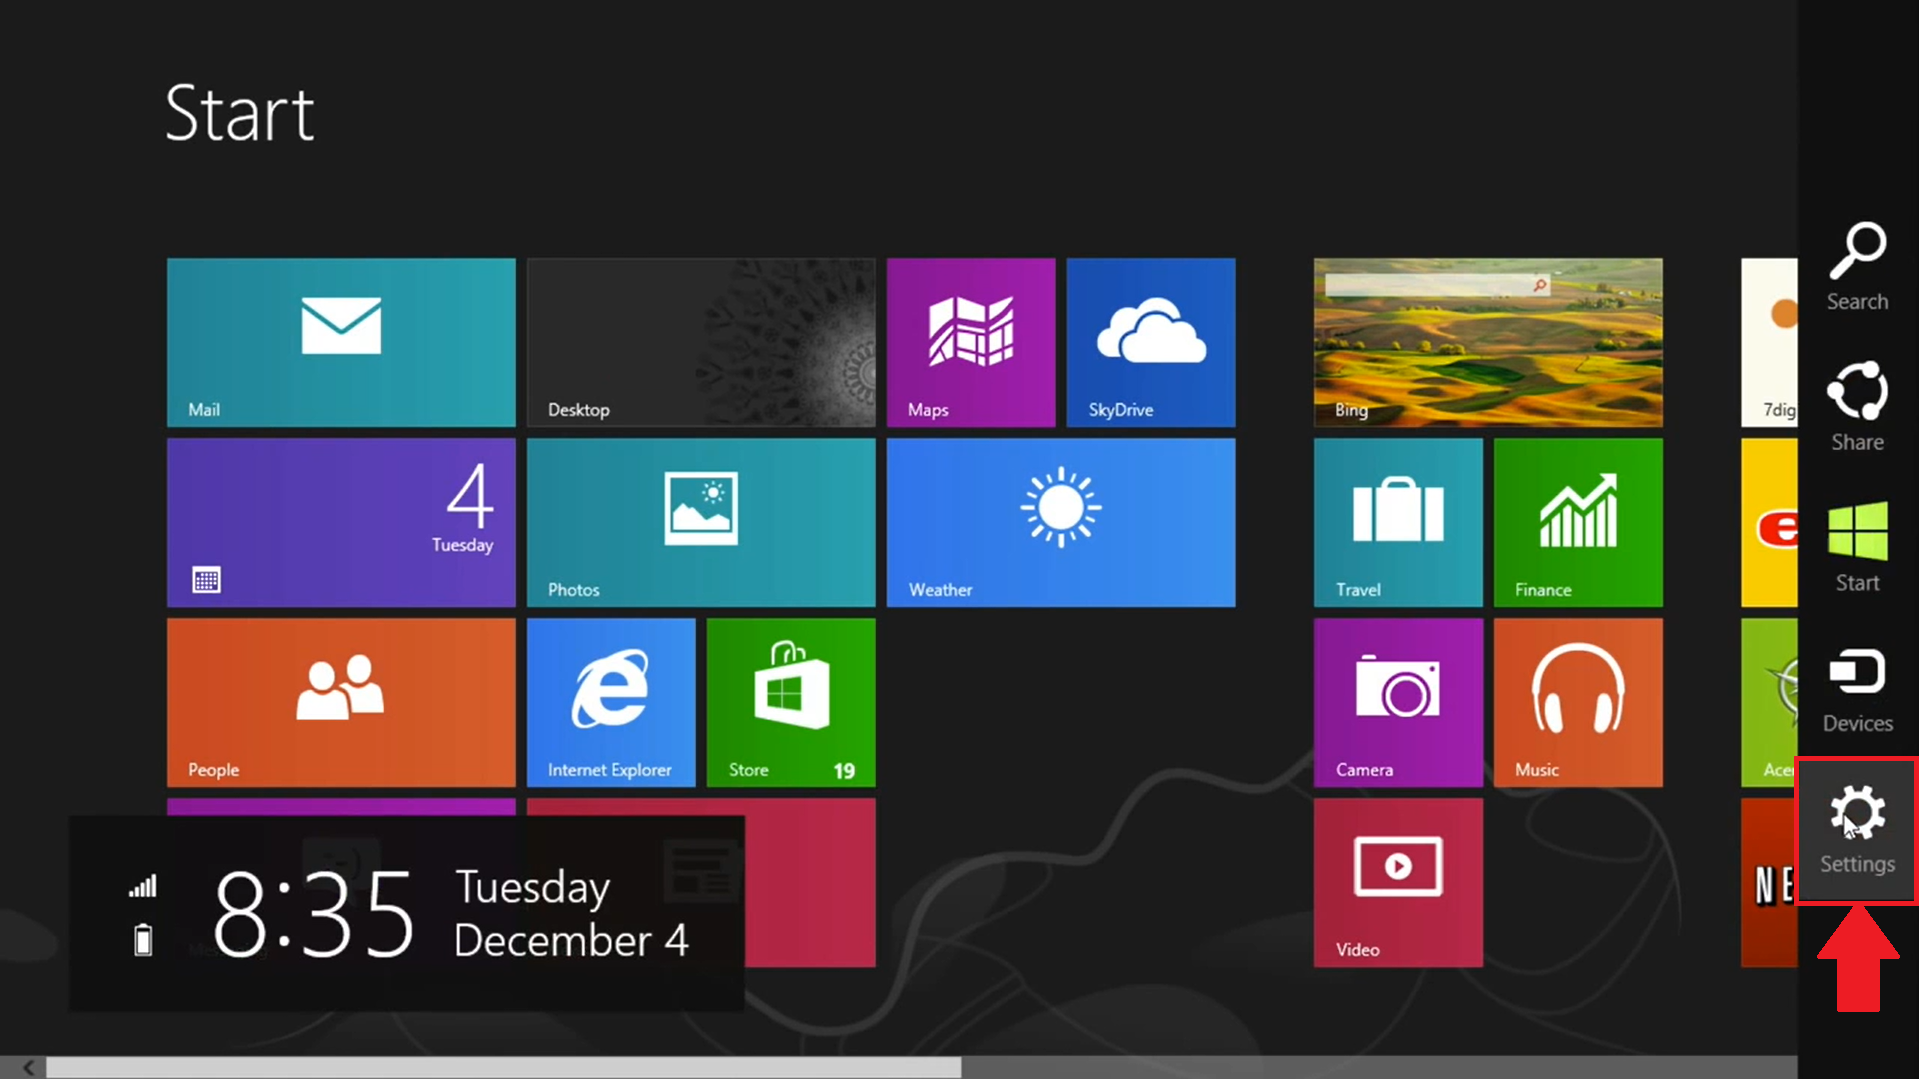
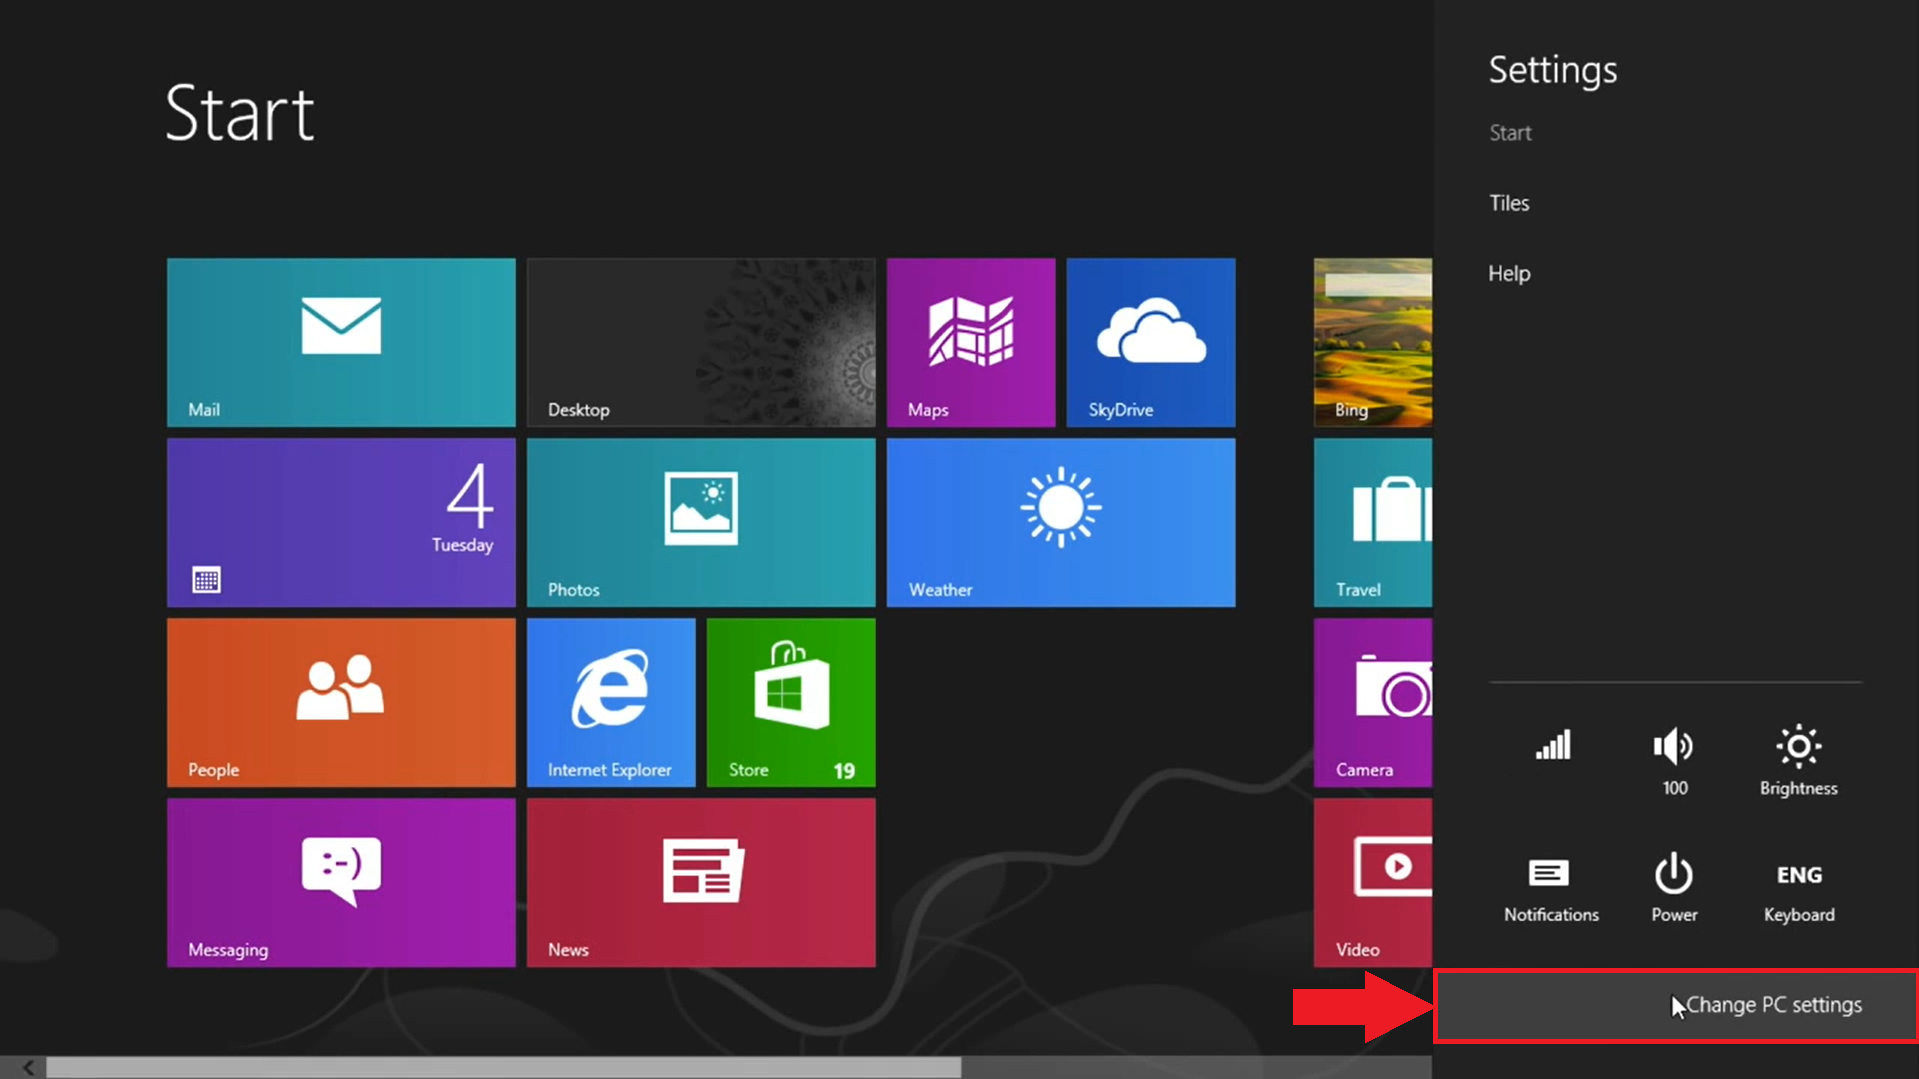
1. Drag your mouse to the bottom-right of the screen, until the sidebar appears. Here, click on Settings.
2. Now, select Change PC settings.
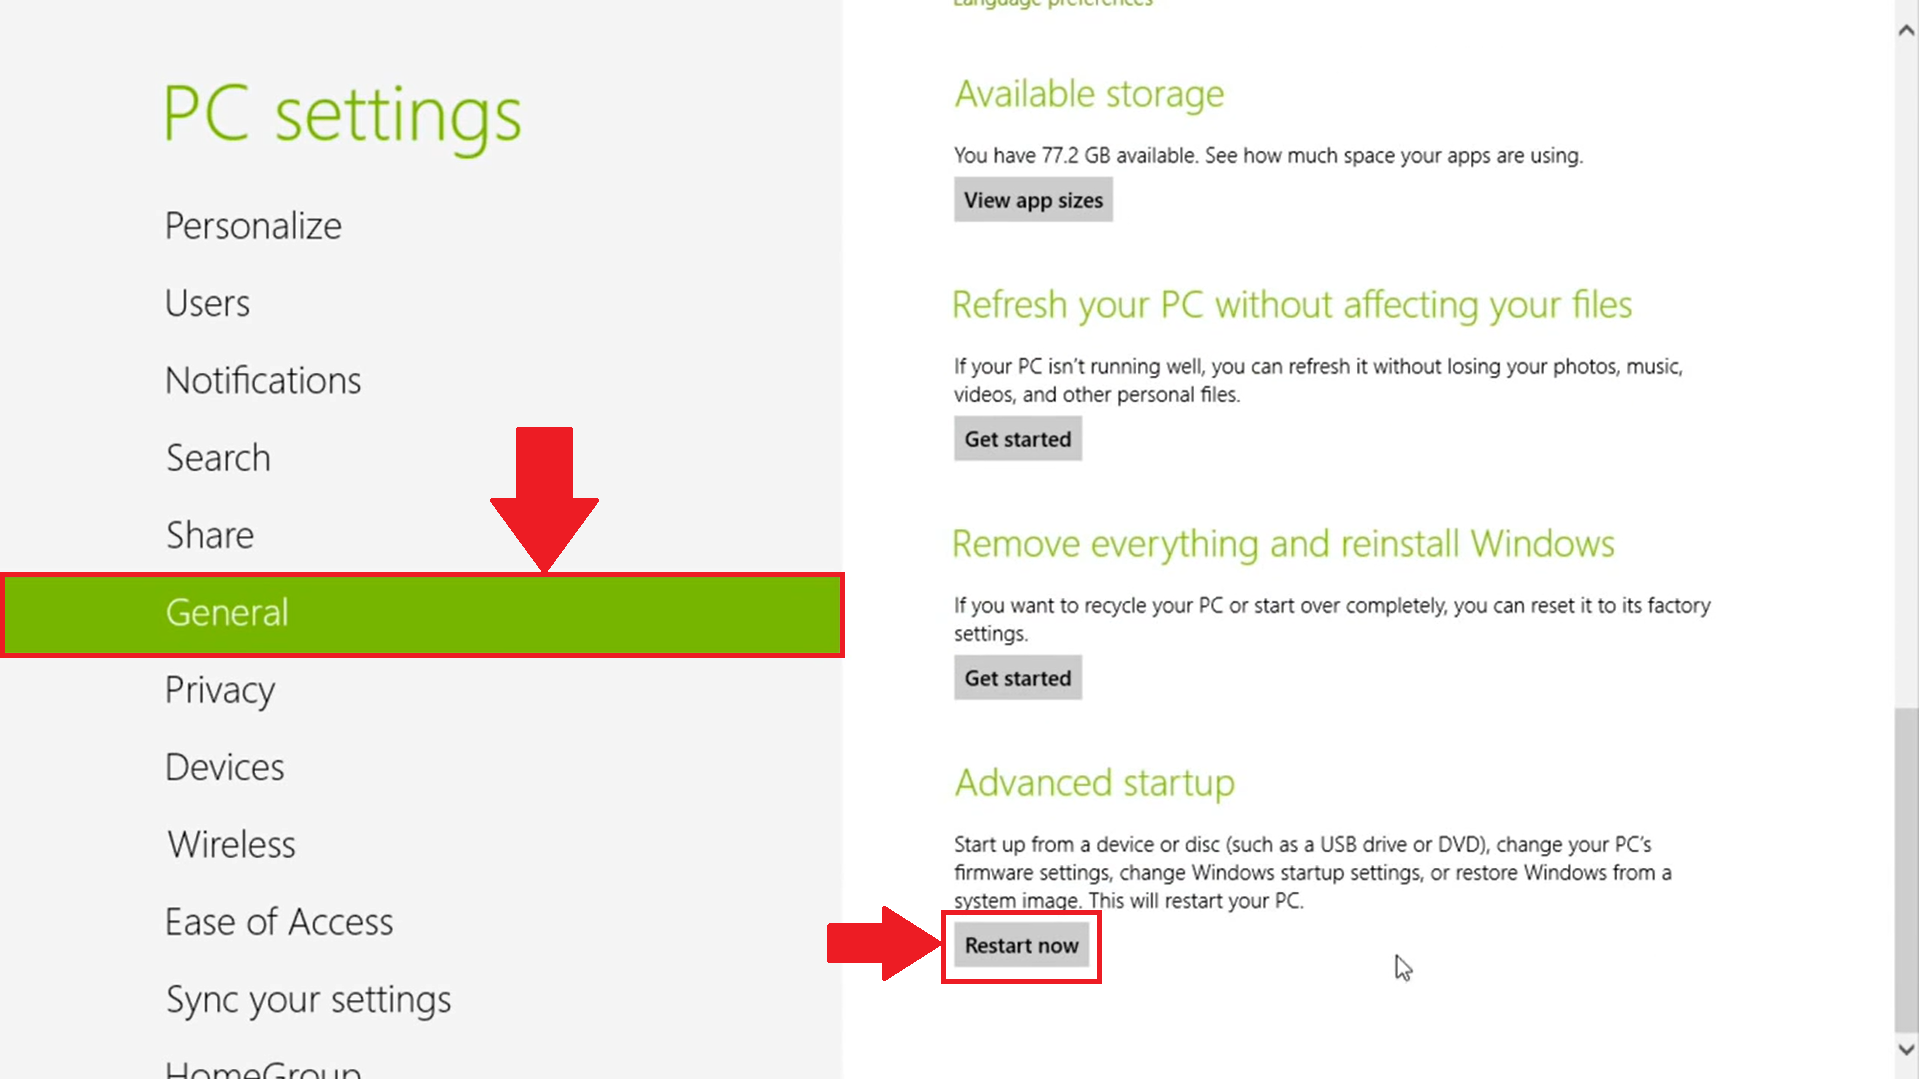
3. The PC settings menu will open up. Here, go to the General tab and click on Restart now at the very bottom.
4. You will now be presented with 4 options to choose from. Click on Troubleshoot.

5. Next, click on Advanced Options.

6. Within the Advanced options , select UEFI Firmware Settings, as shown below.

NOTE: If you don’t see UEFI Firmware Settings then disable Fast Startup or refer to this alternate method for accessing your BIOS.
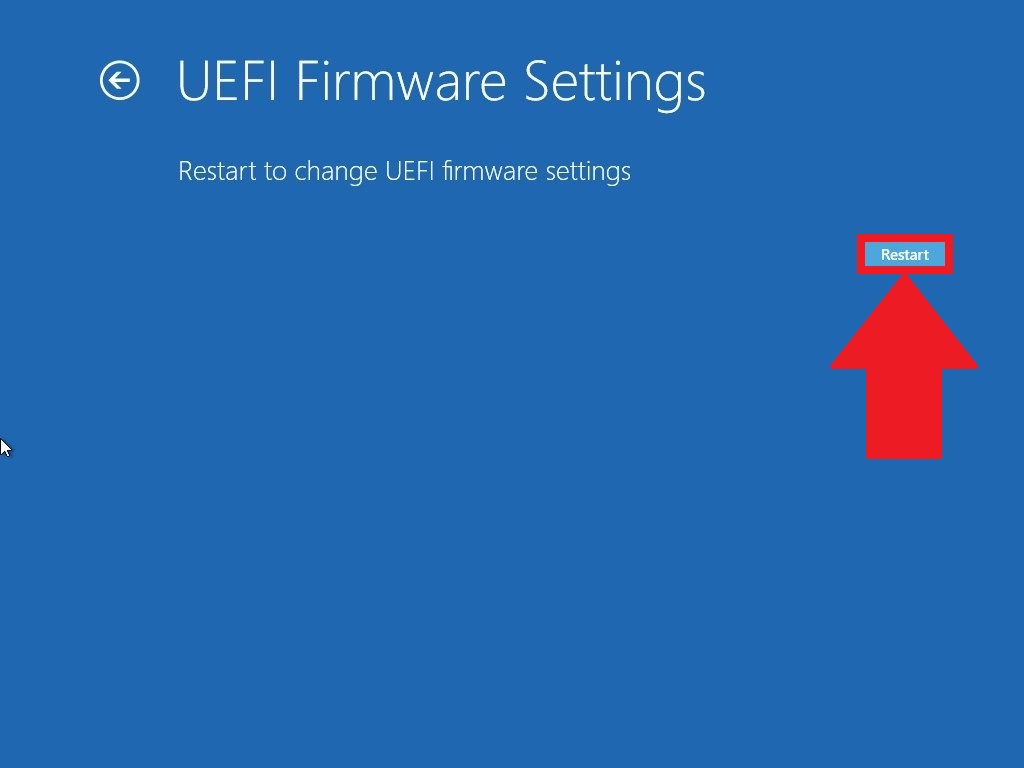
7. You will now be prompted to restart your machine. Click on Restart Now.

After this step, you will enter the BIOS settings on your PC. To learn how to enable Virtualization, click here.
How to enter BIOS in Windows 8.1.
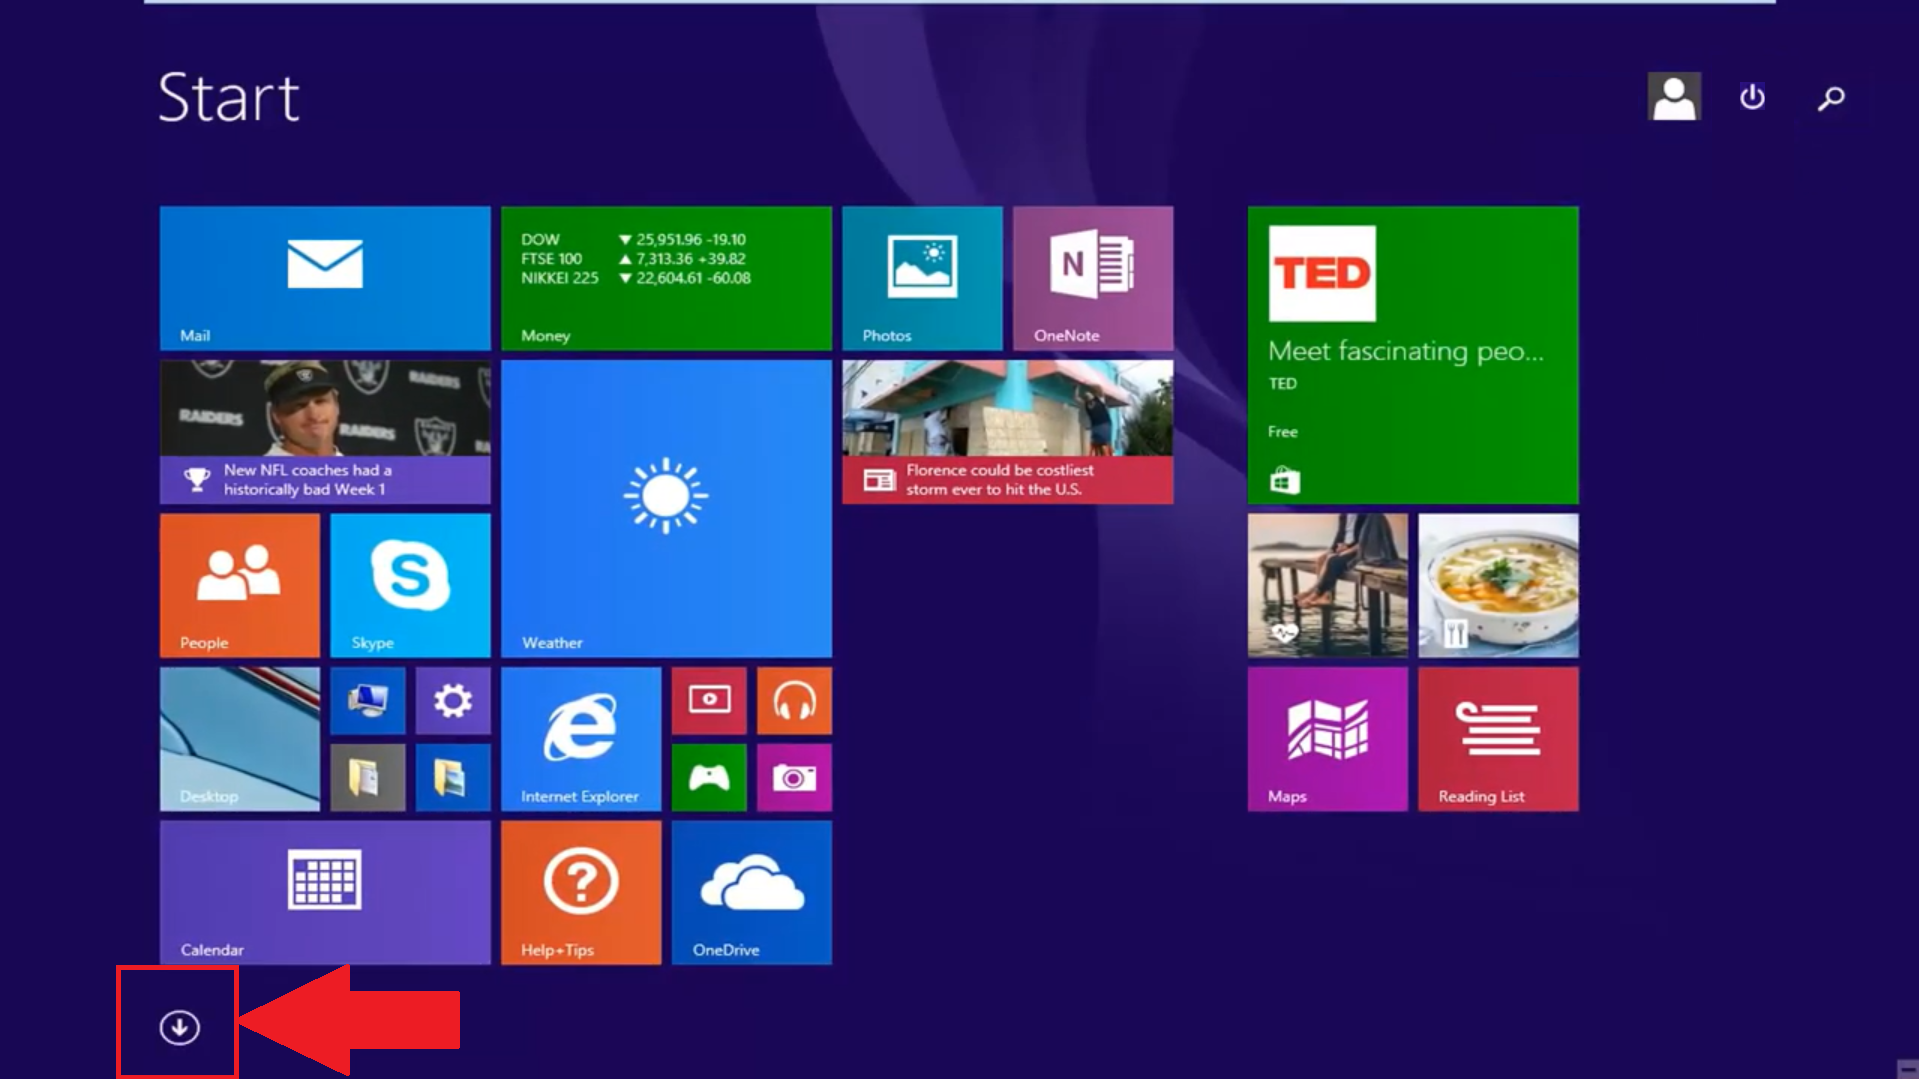
1. Click on the Arrow button at the bottom-left of the Start menu, as shown below.
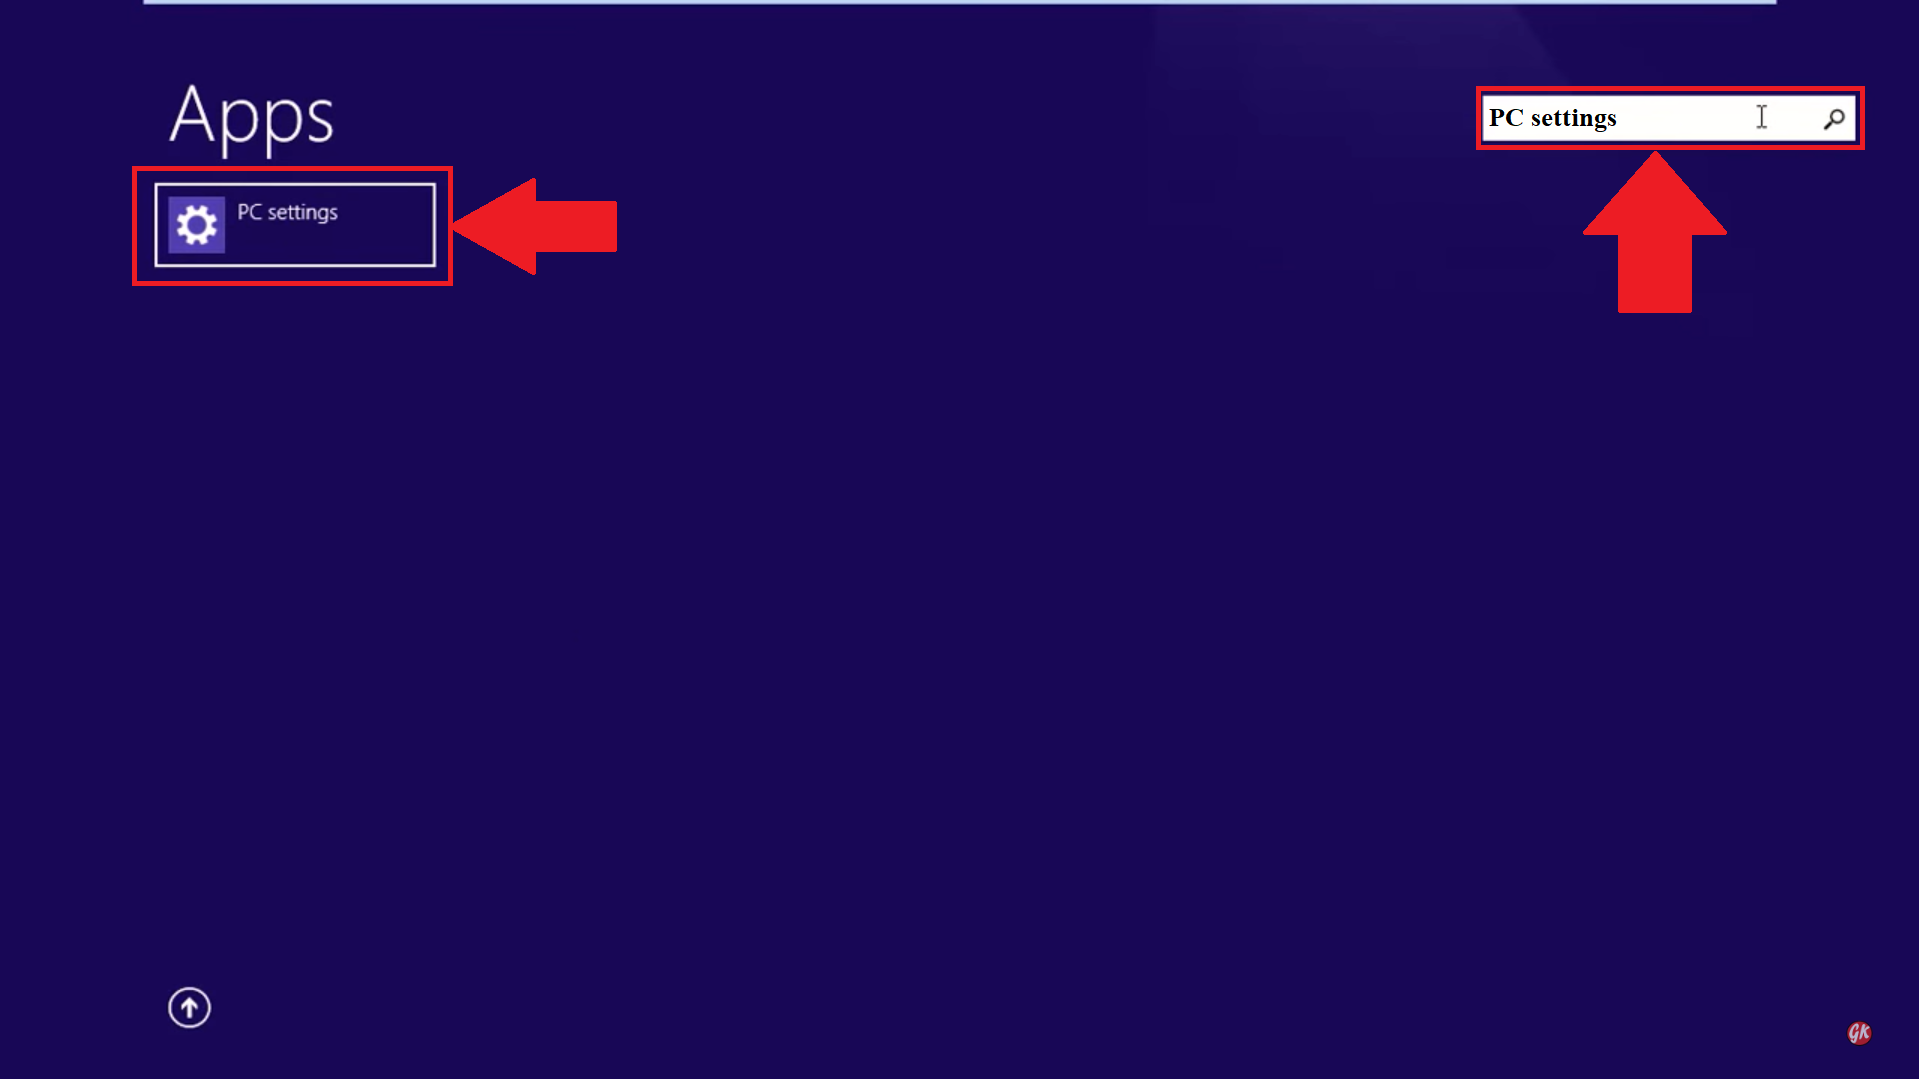
2. Now, type «PC settings» in the search bar and open it, once you find it.
3. Within the PC settings, go to the Update and recovery tab.
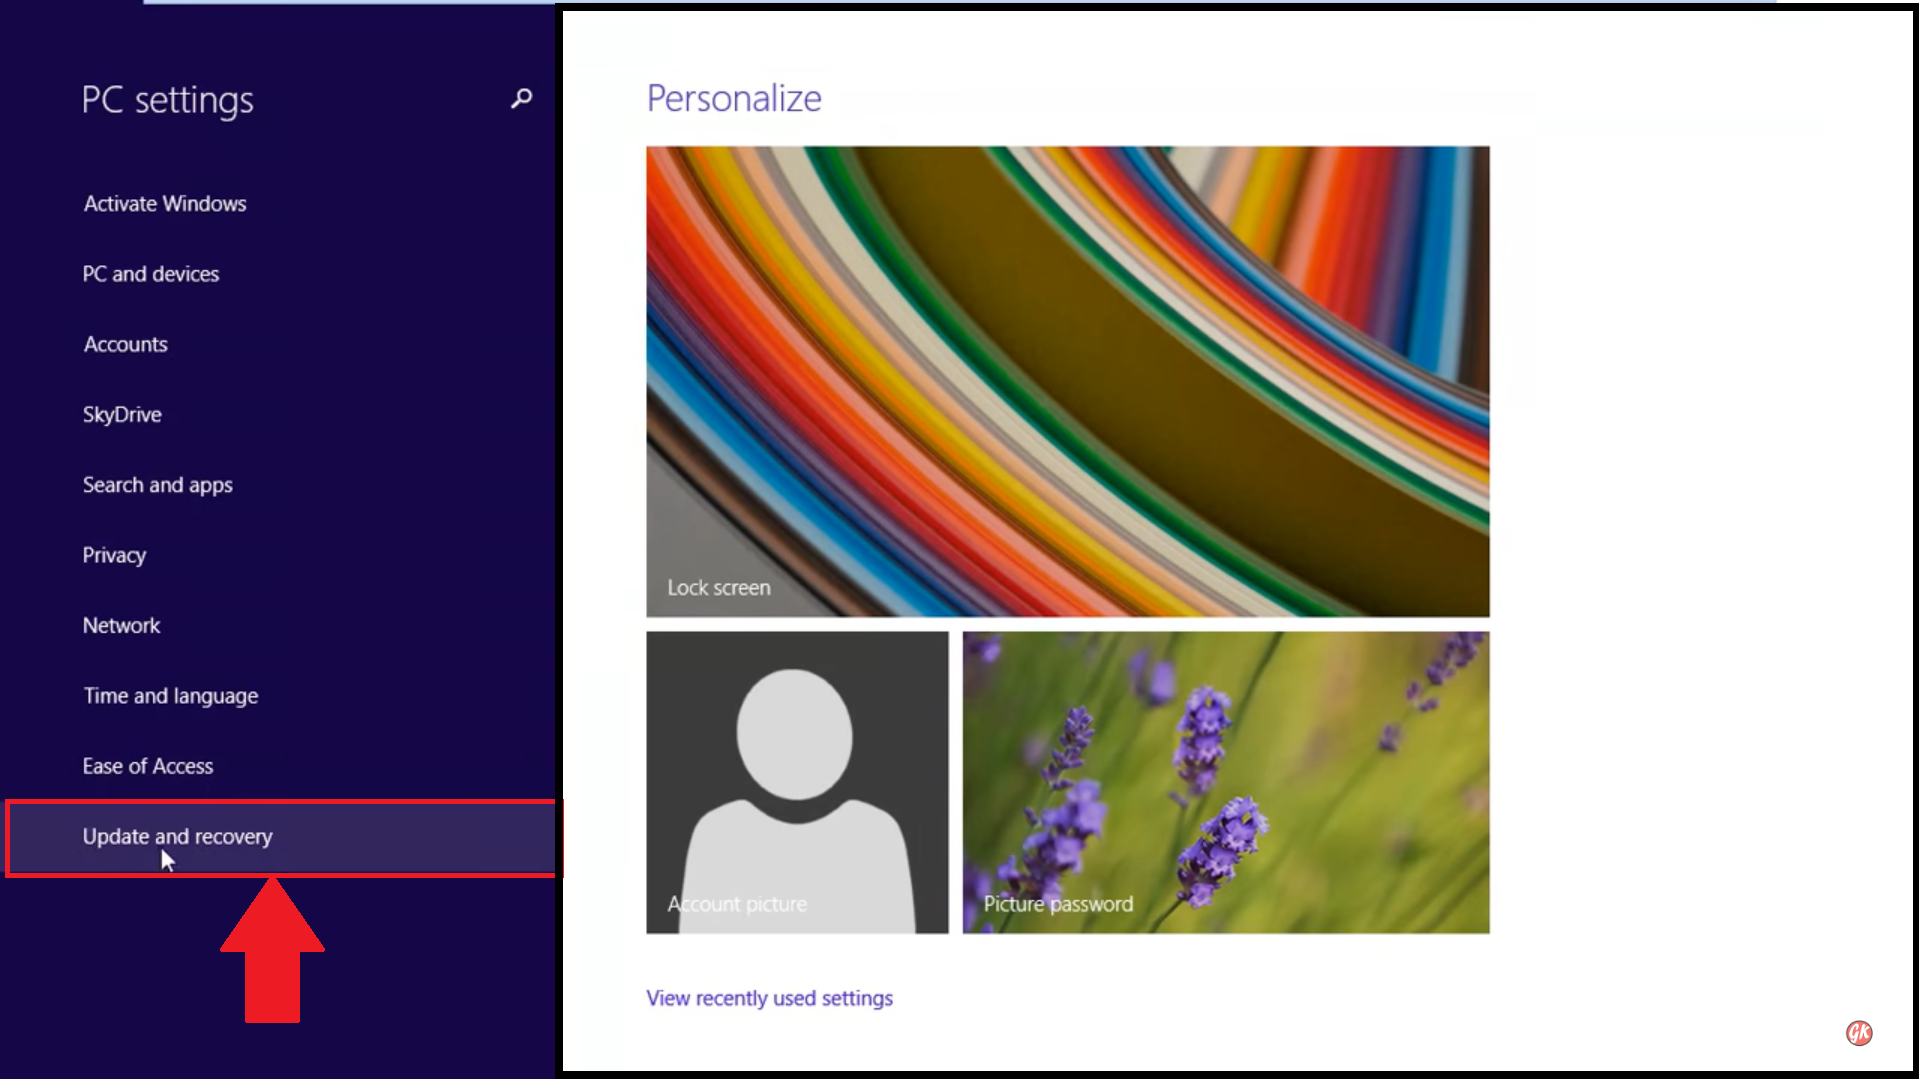
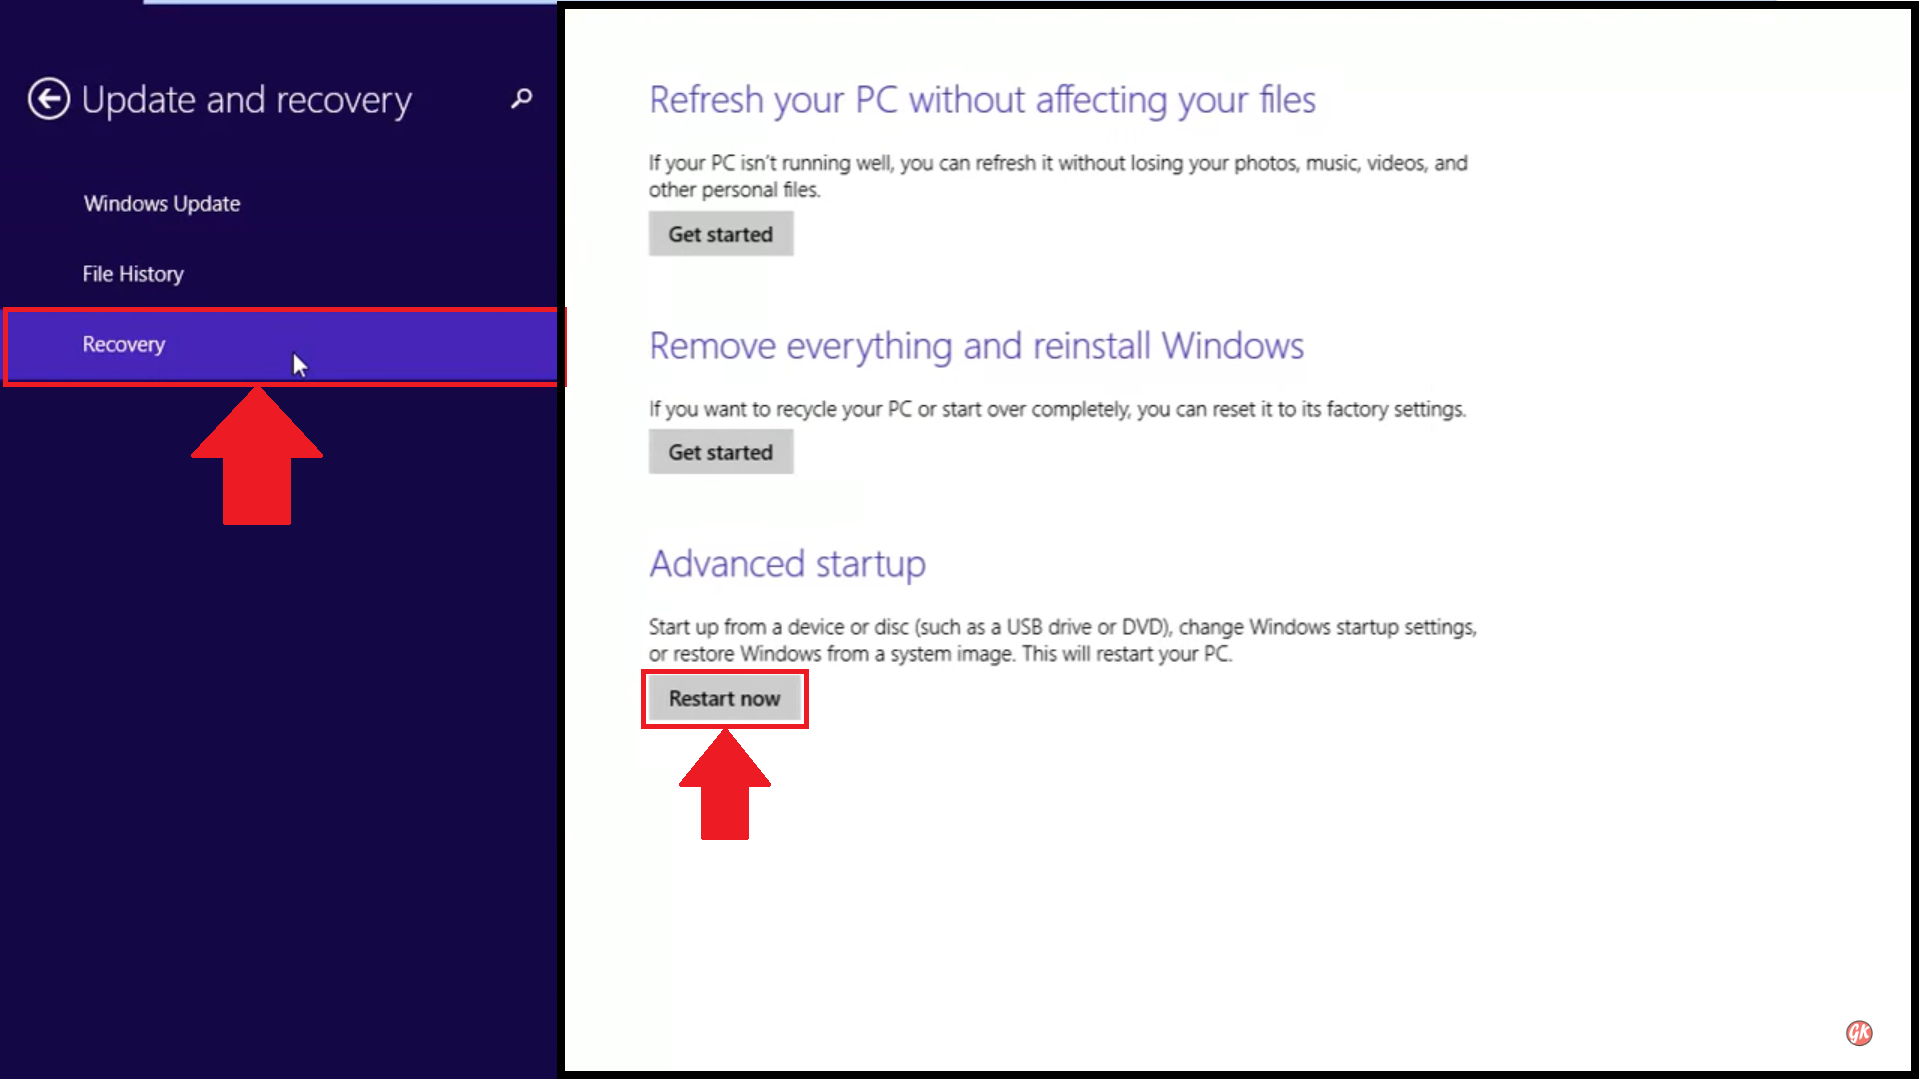
4. Here, click on Recovery and then select the Restart now option under Advanced Startup.
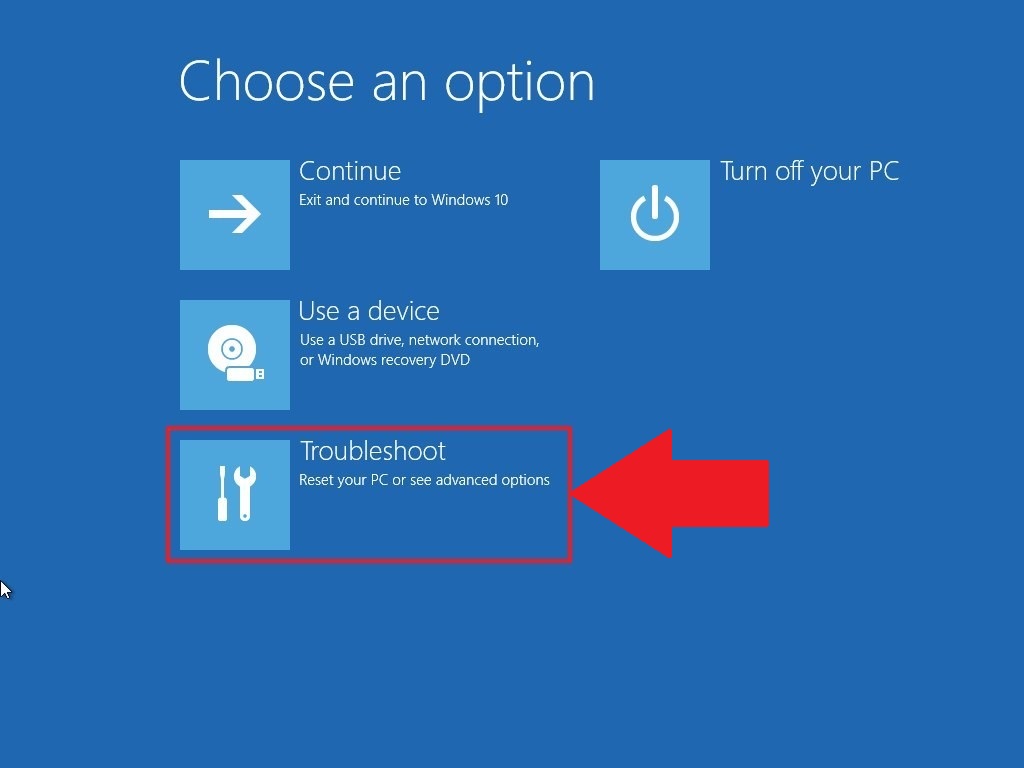
5. You will now be presented with 4 options to choose from. Click on Troubleshoot.
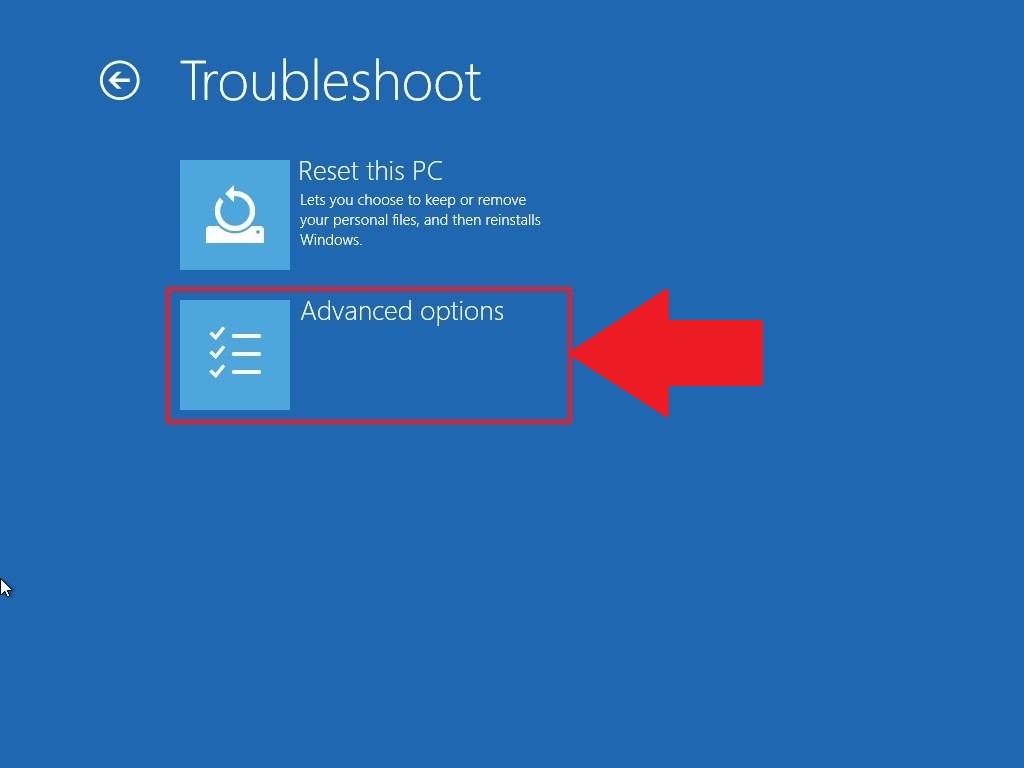
6. Next, click on Advanced Options.
7. Within the Advanced options , select UEFI Firmware Settings, as shown below.
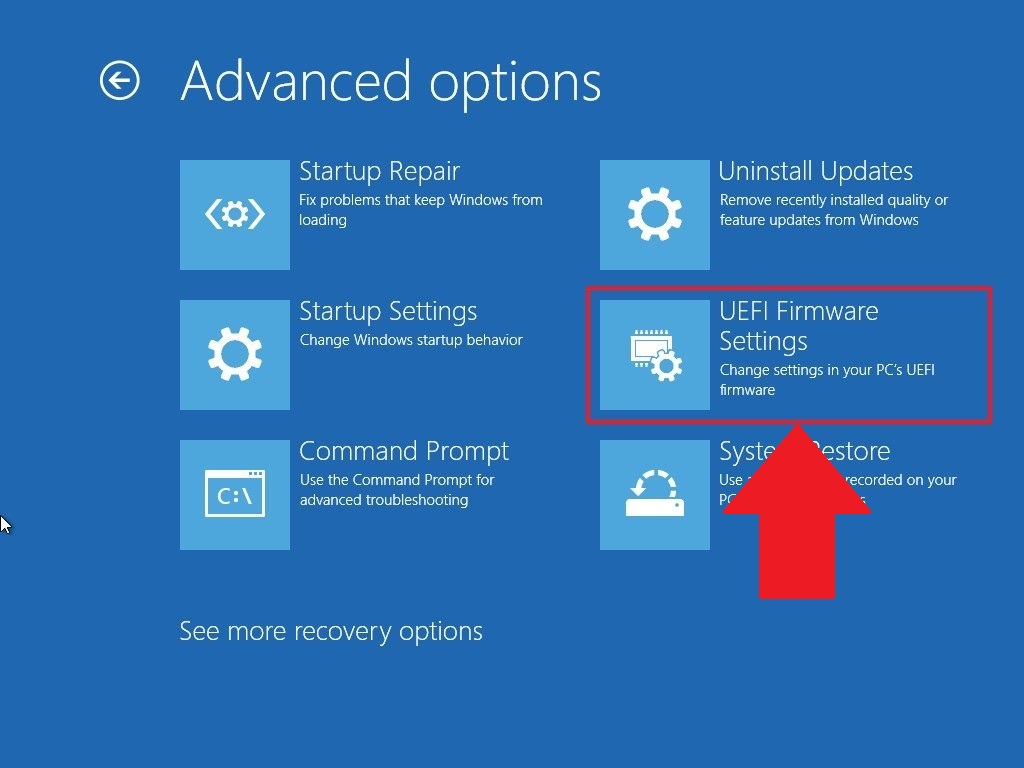
NOTE: If you don’t see UEFI Firmware Settings then disable Fast Startup or refer to this alternate method for accessing your BIOS.
8. You will now be prompted to restart your machine. Click on Restart Now.
After this step, you will enter the BIOS settings on your PC. To learn how to enable Virtualization, refer to the section below.
4. Enable Virtualization in your BIOS.
Virtualization allows a single processor to run different operating systems simultaneously and it is a requisite for running BlueStacks efficiently.
Once you have entered the BIOS settings in your PC, the steps for enabling virtualization will vary according to the CPU you have. Based on the CPU you have in your PC, click on one of the links below.
Enabling Virtualization in BIOS for Intel CPU.
NOTE: The layout of BIOS Settings can also vary on various other factors such as your motherboard, chipset, computer model and OEM.
1. After entering the BIOS settings, press the F7 key or click on the Advanced Mode button, as shown below.
2. Now, open the Advanced tab, as shown below.
3. Here, you will be presented with various options. Select CPU Configuration.
4. To enable Virtualization, click on Disabled next to «Intel Virtualization Technology» and change it to Enabled.
5. Lastly, click on Exit and select «Save changes & reset».
NOTE: The nomenclature may vary depending on your PC model, but in all cases make sure to save before exiting.
Enabling Virtualization in BIOS for AMD CPU.
NOTE: The layout of BIOS Settings can also vary on various other factors such as your motherboard, chipset, computer model and OEM.
1. Within the BIOS settings, press the F7 key or click on the Advanced Mode option, as shown below.
2. Now, navigate to the Advanced tab.
3. Find and select CPU configuration.
4. To enable Virtualization, open the drop-down menu next to «SVM Mode» and choose Enabled.
5. Next, click on Exit.
6. You will now be asked to save your changes. Click on OK to apply the changes you have made to BIOS settings.
How to Enable Virtualization in Windows 10
This Itechguide teaches you how to enable virtualization in Windows 10. The guide covers steps for 3 methods to enable virtualization in Windows 10.
The Windows 10 virtualization technology is called Hyper-V. To enable virtualization in Windows 10, enable the Hyper-V optional feature.
To enable Hyper-V, your Windows 10 edition must be Enterprise, Pro or Education. Windows Home, Mobile or Mobile Enterprise do not support Hyper-V feature.
The PC must also meet the following hardware requirements:
- 64-bit Processor with Second Level Address Translation (SLAT)
- CPU MUST support for VM Monitor Mode Extension (VT-c on Intel CPU’s)
- Minimum of 4 GB memory. It should be higher, depending on the number of Virtual Machines you intend to run concurrently.
Finally, you need to enable Virtualization technology on the computer BIOS.
For a full list of all the requirements visit this link – Windows 10 Hyper-V System Requirements.
Here are the high-level methods to enable Hyper-V in Windows 10:
- Turn Windows Feature on or Off
- DISM /Enable-Feature Command
- PowerShell Enable-WindowsOptionalFeature Cmdlet
Browse Post Topics
How to Enable Virtualization in Windows 10 from Control Panel
To use this method, here are the steps below:
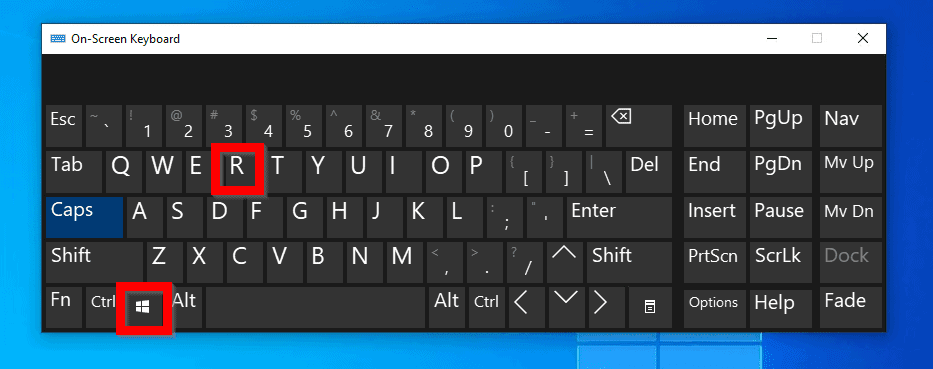
- Press Windows logo + R key to open Run command.
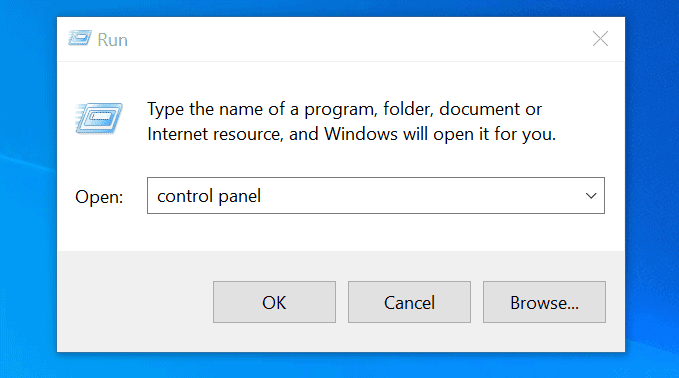
- At Run command, type control panel. Then press OK.
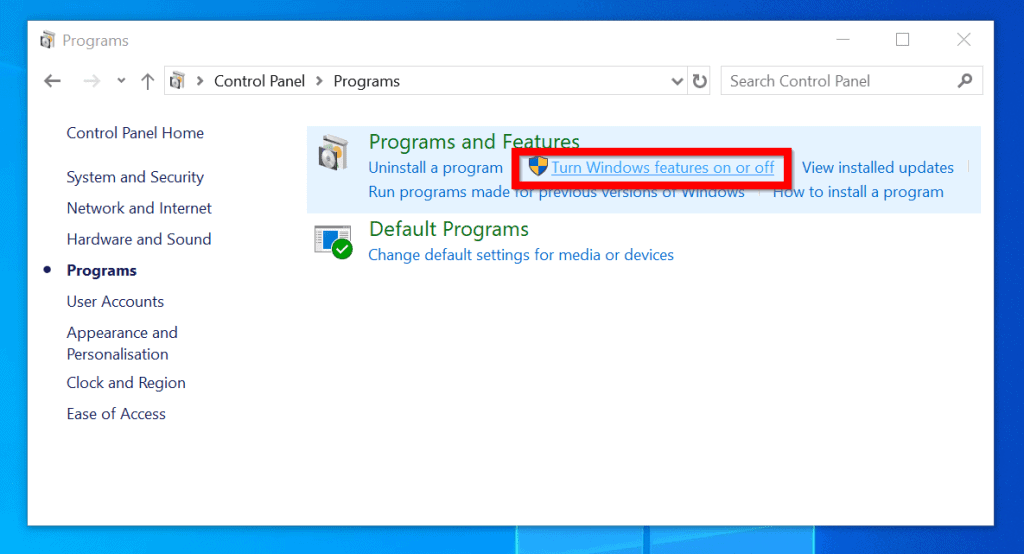
- When Control Panel opens, click Programs.

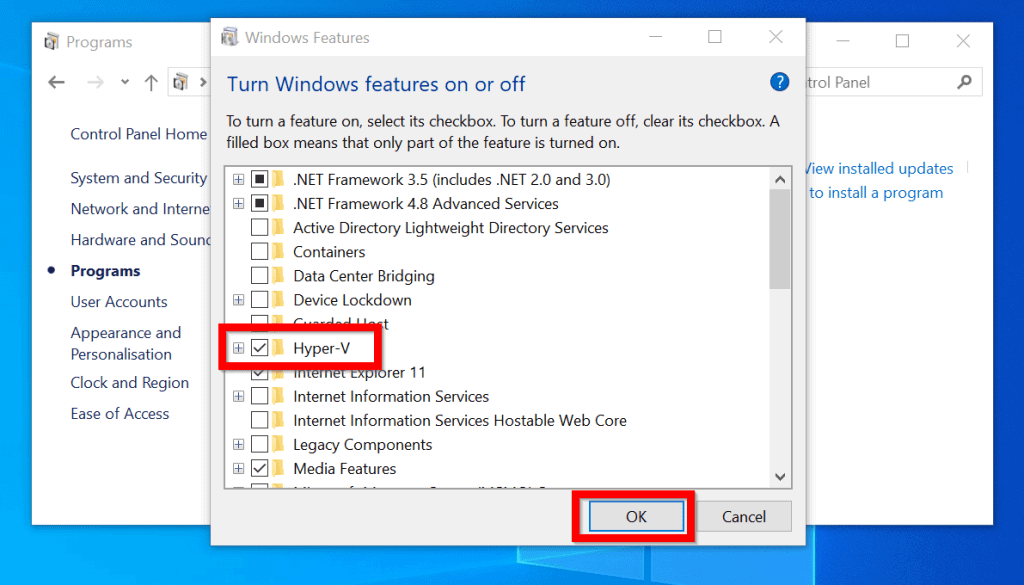
- Then click Turn Windows Feature on or Off.
- Finally, to enable Hyper-V in Turn Windows feature on or off, check the box beside Hyper-V. Then click OK.
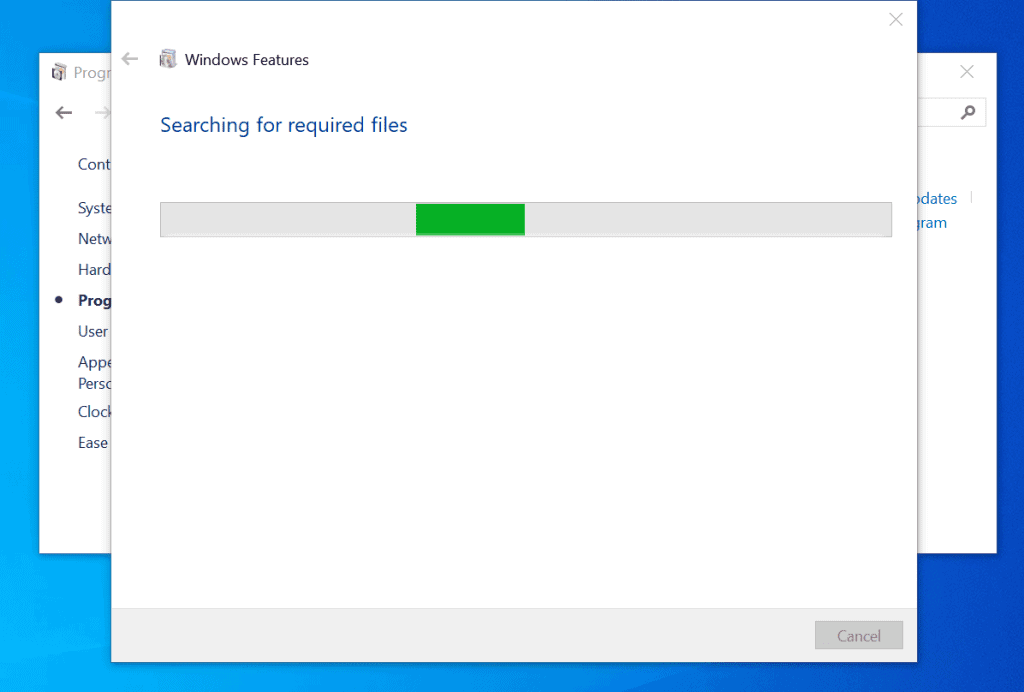
- The feature will begin install…
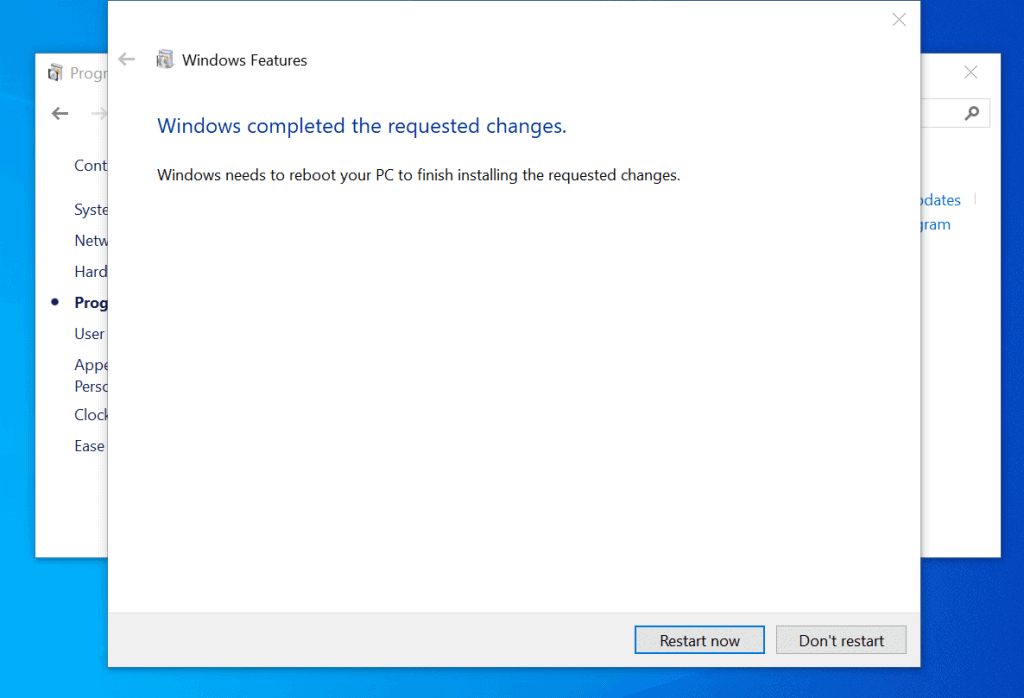
- Then you will be required to restart your PC to complete the installation. Click Restart now.


How to Enable Virtualization in Windows 10 with Command Prompt
You can also enable Hyper-V (virtualization) on Windows 10 with DISM. Here are the detailed steps:
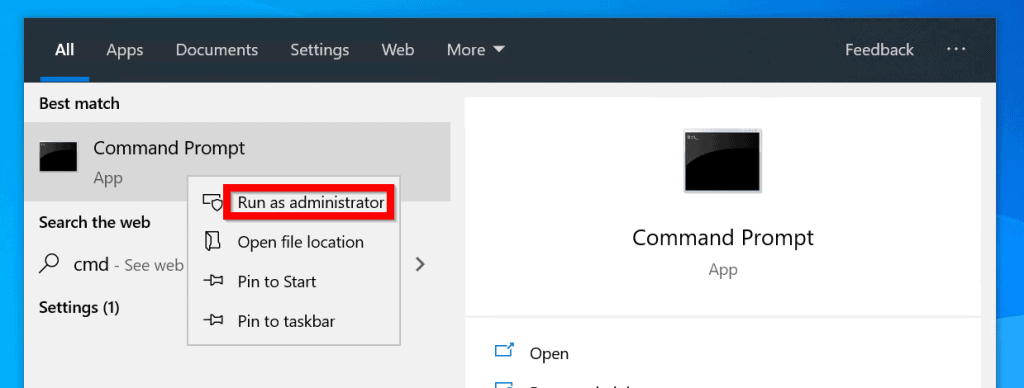
- Type cmd in the search bar. Then right-click Command Prompt and select Run as administrator.
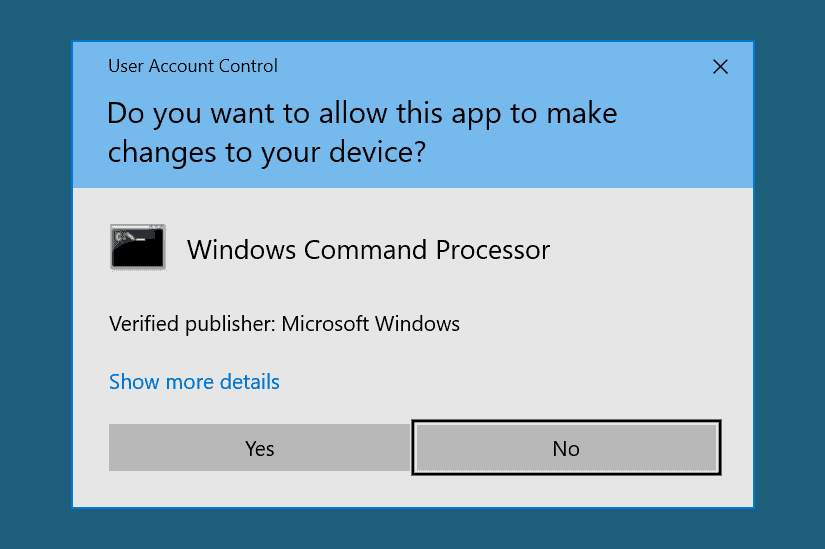
- If you receive User Account Control prompt, click Yes.
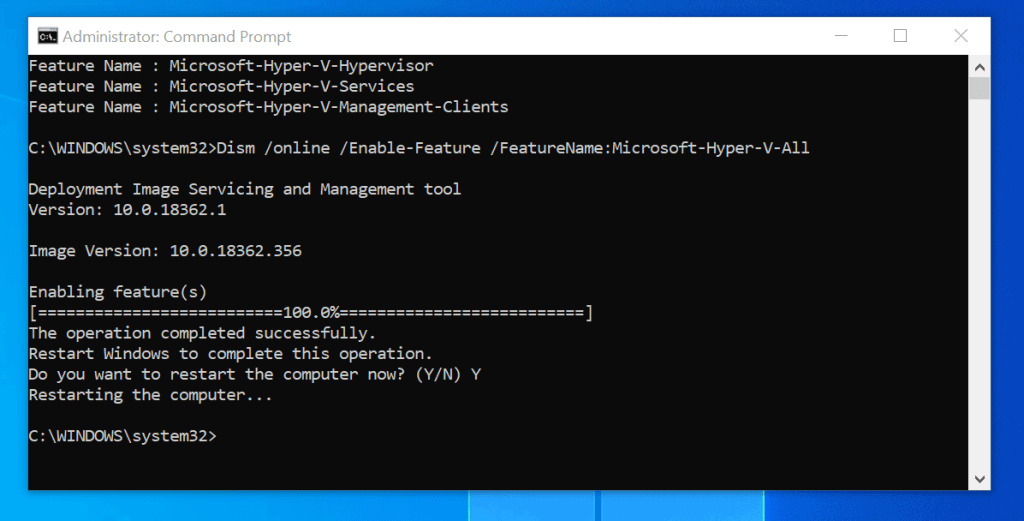
- On the command prompt, type this command. Then press enter.
The command lists all available Hyper-V features…

- To install all Hyper-V in Windows 10 (all features), type the command below. Then press enter.
- The feature will initiate the install. Then prompt for a restart. Type Y and press enter.
How to Enable Virtualization in Windows 10 with PowerShell
Here are the steps for this method:
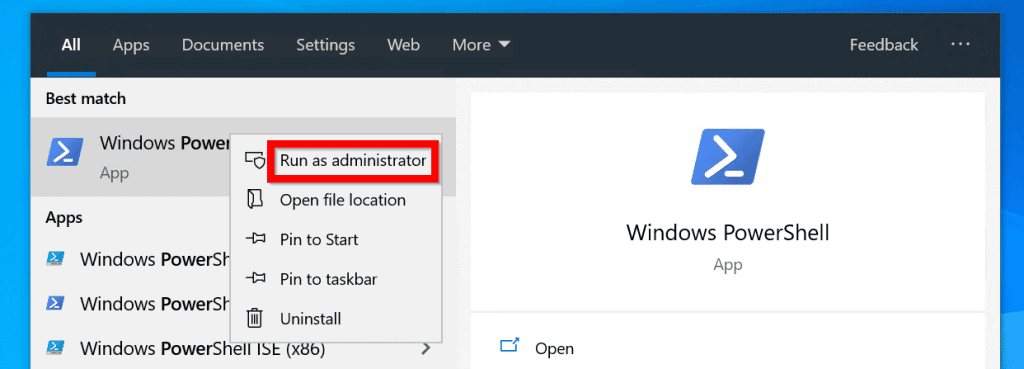
- Search PowerShell. Then right-click Windows PowerShell and select Run as Administrator.
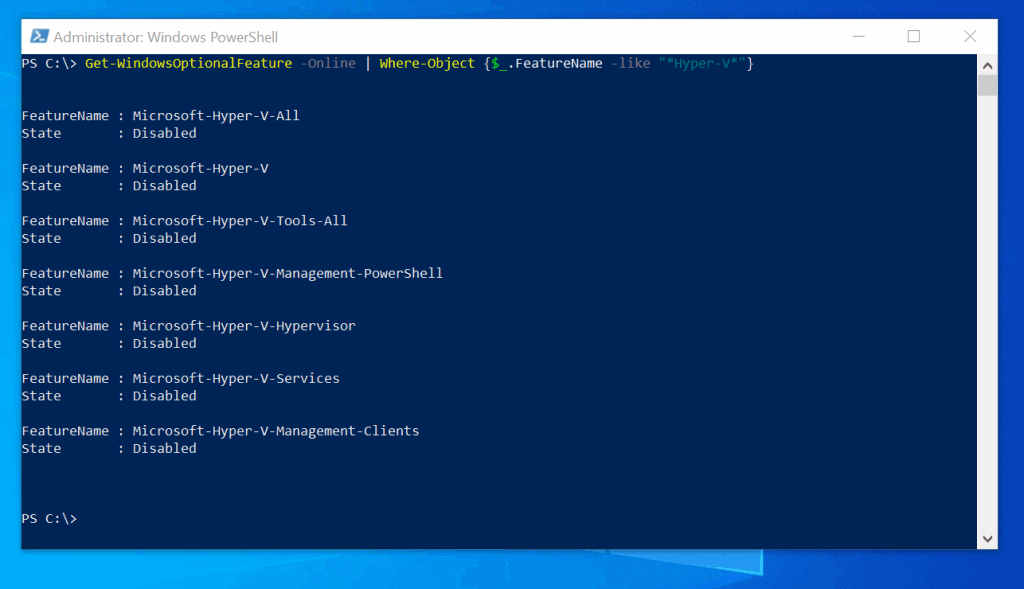
- At the PowerShell command prompt, to list available Hyper-V features, type the command below. Then press enter.
The command lists all available Hyper-V features…
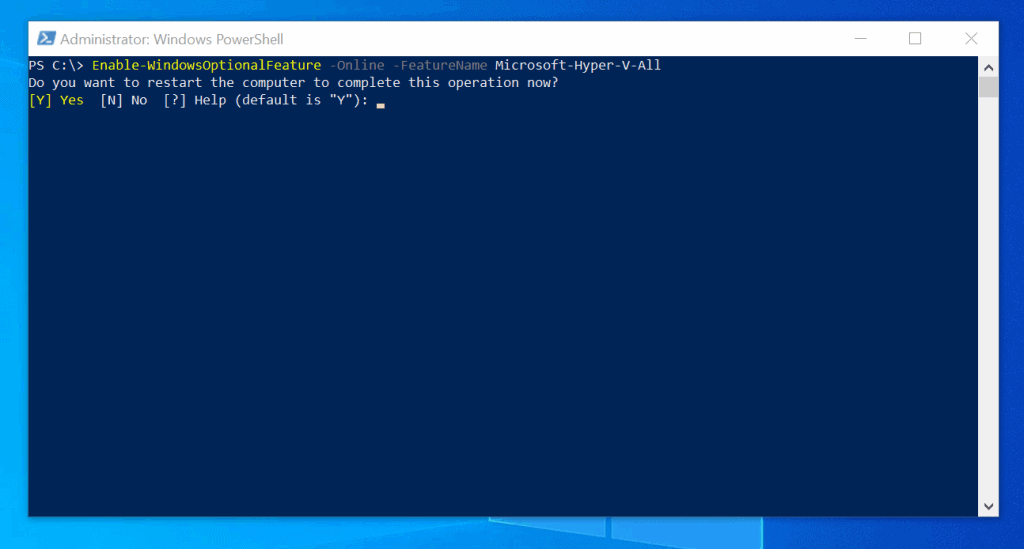
- To enable all Hyper-V features, type this command. Then press enter.
- The command will install the features. Then prompt for a restart. Type Y. Then press enter.


